Working with Unity has been quite a challenge especially for someone who hasn’t had much experience in making games.
I enjoyed focusing on the visual aspects and the more I worked with C# the easier it became to remember certain mechanics to implement (for example movement, shooting and Player Death).
The main mechanics I want to implement to future updates to these prototypes are sounds and animation, this makes the aesthetics for each game stand out more as well as adding functionality to them. These important fundamentals will also make these prototypes stand out as ‘games’ as it adds a level of detail which players will appreciate when playing these games.
Other updates for these prototypes include:
Project 01: Cookie Clicker
Another counter mechanic where it makes unlocking different automatic clicking (Recipes) upgrades much harder to obtain. (e.g a counter for supplies. A certain amount of supplies are made by different sources of these supplies)
More automatic upgrades to gain more money.
new set of automatic upgrades for the new counter (mentioned above)
Project 02: Space Invaders
Respawn for the player (this also includes a health bar)
Invisible walls for the player to collide into so they don’t leave the map
More variety of enemies when they respawn and potentially have them attack the player
Score system to keep on track how many times the player has killed the enemy
A game over state when the player loses all their health.
Project 03: Top Down Shooter
Score system to keep track how many times the player has killed the enemy
Bullet Upgrades spawning randomly to make the gameplay experience more fun
More variety in terms of enemies
A timer for the player to beat
A health bar and a game over state so it adds stakes to gameplay.
Project 04: Platformer
Update the jumping function so it didn’t rely on ground checks
add a UI system to tell the player how many jumps they had left
add enemies that patrol on certain platforms
randomised levels
dangerous obstacles that hurt the player (e.g Spikes)
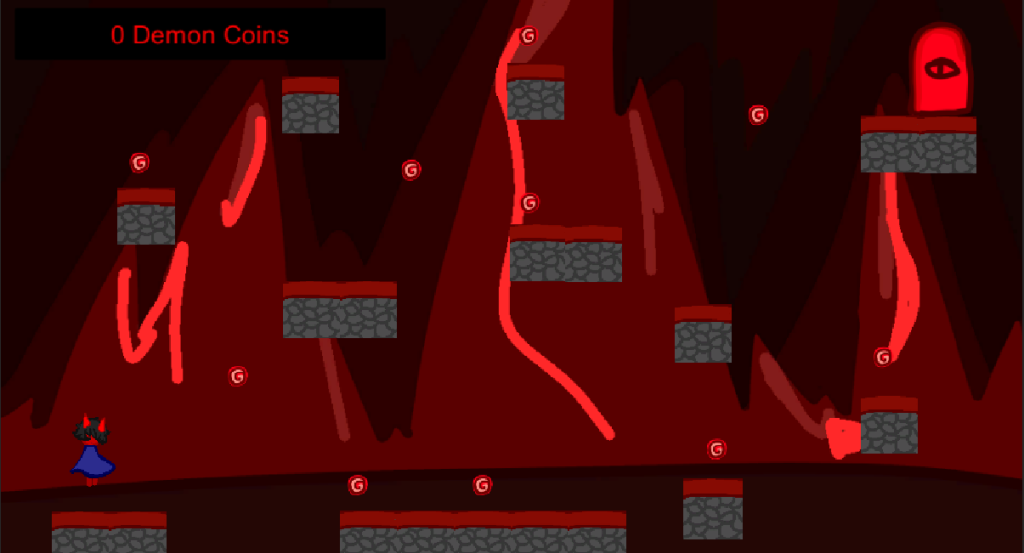
For this project, I wanted to create something different. This platformer somewhat tied back to overall aesthetics of the cookie clicker clone. This was one of the hardest projects I’ve worked on, a lot of additional functions I wanted to include didn’t work well with the code for the player movement such as the respawn function and even the death function. So I decided to just focus on the basic mechanics for the game.
Scripting: Player Movement
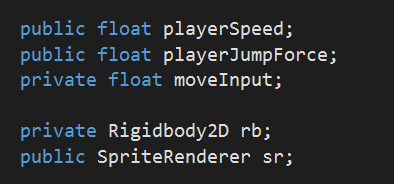
To start off with, I added some variables for Unity to call back to when different movement inputs are used. I want to be able to control the player’s speed, jump force as well as edit the sprite’s movement with moveInput. The Private Rigidbody 2D and Sprite renderer help link back to the player sprite.
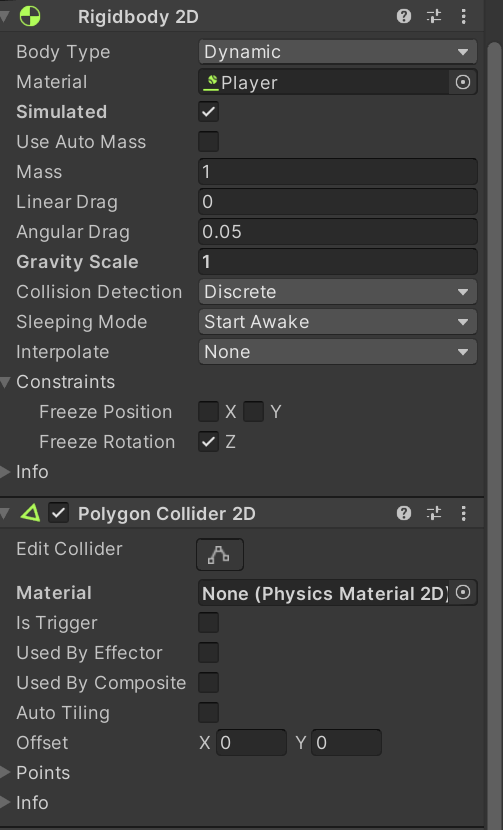
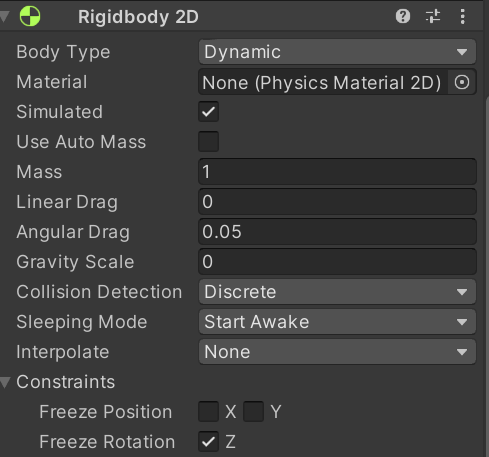
I also added collision and a RigidBody2D component to my sprite as well as a collsion component to my platform tiles so my sprite didn’t fall through the platform.
In addition to this, I added a physics material to the RigidBody so the player doesn’t get stuck between the platforms whilst they were colliding with the objects.
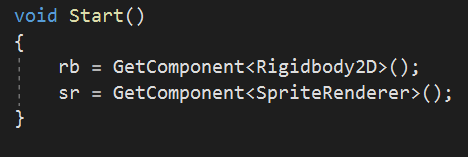
I started by adding Get Components in the Void Start function in order for the script to access the GameObjects needed for the code. In this instance, it’s for the character sprite.
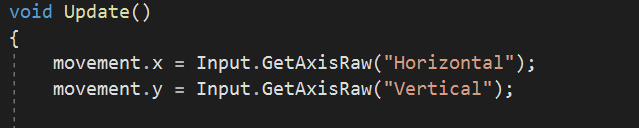
For the move input, I wanted the character to only move horizontally so the moveinput would only register the left and right inputs.
The use of ‘GetAxisRaw’ command means that the game will automatically and immediately reflect on the change of the axis value, only returning to 0, 1 or -1.
Since, I made the Rigidbody as a variable, I was able to add a velocity function which allowed the movement input to work alongside the player’s speed, however since I didn’t want the velocity to affect the players left or right movement, I made sure the velocity code only used the object’s current y value.
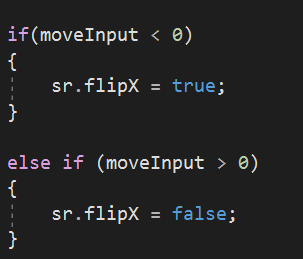
Since my sprite was going to move horizontally, I wanted the gameobject to flip every time the player switches between a left and right input. So if the move input on the axis was less than 0 then the sprite would flip it’s axis.
The next mechanic I had to focus on was the jumping mechanic, I needed the character to also react with the ground however, this would be the most difficult function to implement into this game as it interfered with other mechanics later on.
Scriping: Player Movement Part 2: Ground Check and Jump
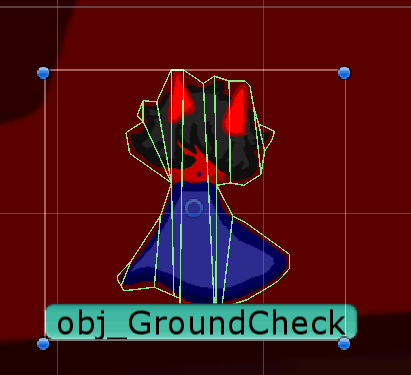
The purpose for Ground Check is for the sprite to only jump when it’s made contact with the ground, meaning that the sprite wont collide with the ground. So I created a emptychild object called obj_GroundCheck and placed it near the sprite’s feet.
Heading back to the Player movement code, I added more variables in regards to the ground check, adding comments to remind myself what they meant. These variables will make sure that the groundcheck object and the player can detect what the ground is based on collision.
These variables are then used to set a new booelan string to ‘true’. If the radius of the circle overlaps with an object set as its ground layer.
For the jumping mechanic: I added a public integer variable called Jumps
this was originally to limit how many times the player can use the double jump – however, later on I found out that there were some issues regarding that.
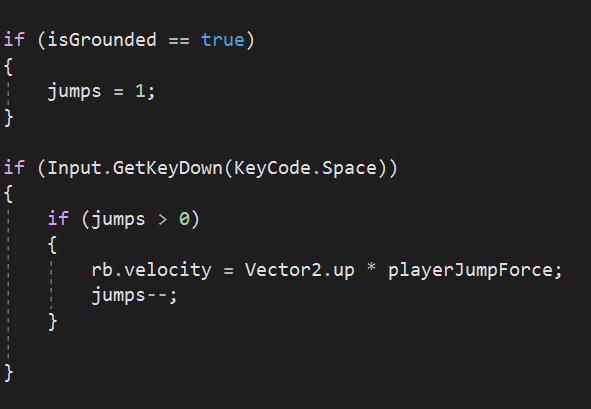
So I added an “if” statement where if the player was on the ground then they’ll be allowed to jump, originally I had set the jumps to 2 to enable double jump.
then I, put an key input for the jump mechanic to be space and if the number of double jumps were greater than 0, the player would be able to jump but it took 1 double jump from the amount given.
However, this didn’t work as I later found out when testing the game.
This is the part where I started experiencing issues:
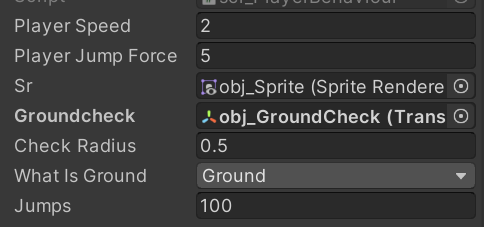
Whenever I started the game, the sprite would only be able to jump a certain amount of times from the jumps variable. This essentially meant that my double jump didn’t work. I tried rectifying this by adding the ground layer to all my platform tiles but it didn’t work. So my workaround was to limit the amount of jumps the player has to 100.
I wanted the jump force to be low so it forced the player to be generous with how many jumps they were inputting at once. This is potentially an interesting mechanic for future updates as it adds strategy in the gameplay. For the player to know how many jumps they have left, I could implement a jumps counter and a mechanic where the score is based off of collecting all the coins in a levels as well as how many jumps the player uses.
Scripting: Currency
For the currency and the respawn functions, I got the code from the same source. I was only successful in adding the currency mechanic unfortunately as the respawn function didn’t work (more explained in the next section).
I started by adding a level manager script, this was to create a space where external mechanics would be implemented.
To start off with, I wanted
These two functions allow for the level manager script to be called within other scripts in Unity. This was incredibly helpful as it prevented clutter in different scripts.
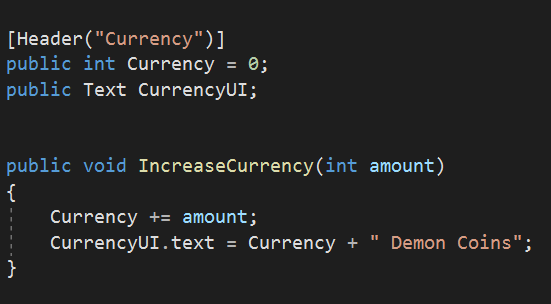
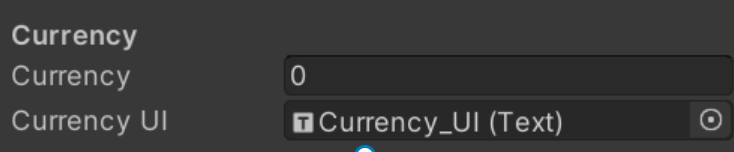
I added two public variables, the currency and the public text. From my work with the cookie clicker project, I knew that I needed to use UI elements in order for the text to update every time the player collects currency within the game.
In the public void function, I also added another integer which was the amount, the amount would serve as a way to increase the currency count as well as update the text to show how much the player has collected through the UI text, much like the counter mechanic in the cookie clicker game.
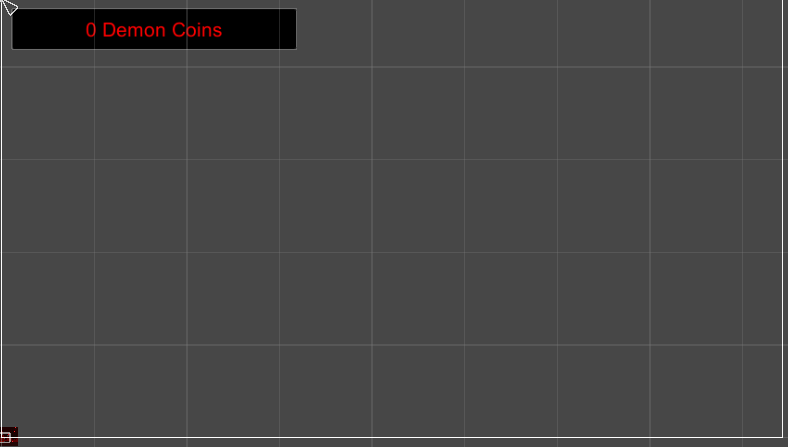
For the UI, I created a UI panel. I adjusted the canvas so the panel would appear at the side of the screen and I made sure that it adjusted to the screen size.
The UI text was also adjusted so it linked with the panel
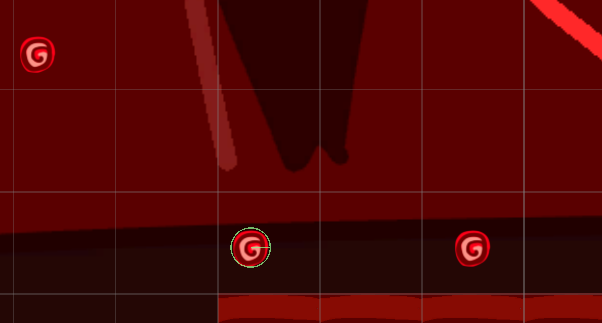
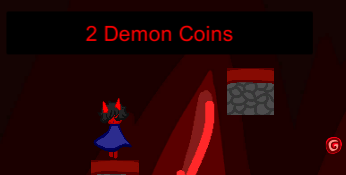
Next, I wanted to focus on implementing the currency into the scene, so I created my own ‘demon coin’ sprite and added a circle collider to them so they would collide with the player, making them into a trigger. Then I made them as a prefab, so I could implement multiple copies of them throughout the level.
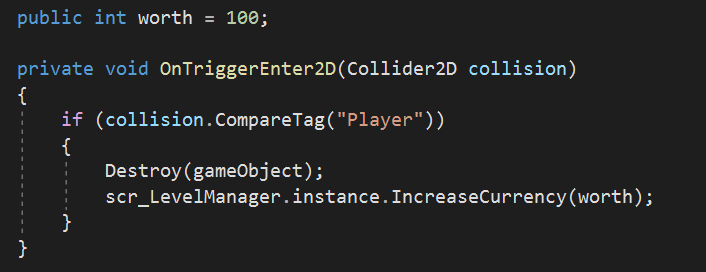
I created a seperate script called ‘scr_CurrencyPickup’ so I could add code that would basically make the coins disappear when the player collides with them as well as add to the amount in the currency UI. I also referenced the Level manager script so these two scripts are connected and player the increase currency function.
Finally, I linked the UI components to the variables in the Level Manager and so when my game starts playing, the text updates everytime the player collects a coin.
Attempted Scripting: Respawn
Unfortuantely, I deleted most of the script for the respawn function because it was interfering with the way my game worked.
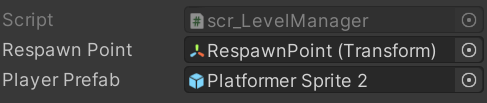
The code I used was similar to the enemy respawn function in my top down shooter game since I used the instantiate function and the collision. I added variables to the Level Manager in order for the character to respawn at a particular point.
However, whenever I attempted to have my character respawn, they would fall off the map, I tried using the platformer sprite prefab instead and it didn’t solve anything.
So I wanted to add another transform variable for the instantiate function to respawn: the groundcheck object to see if it worked but Unity couldn’t instantiate the object. It was a learning curve but I want to be able to add a respawn mechanic or a game over screen in future updates to the prototype.
Summary
In summary, this project was incredibly hard to work on, I wanted to add more features to the prototype but they either didn’t fit or they made the game unplayable. The currency function was the only one to actually work for the game which I was incredibly proud of since I used code from cookie clicker to have the UI work for the game.
I learnt a lot when it comes to creating a platformer game, however for future updates, I want to see if I could use something other than groundcheck for my jumps to work as it seems to be the cause of why my respawn mechanic didn’t work.
I also want to create a larger level for the game with more enemies but since I struggled with the jumping and groundcheck mechanics, I was wary about adding more mechanics into this prototype.
Using what I’ve learnt from the Space Invaders project in terms of the fundamentals in the shooting, movement and respawn mechanics, The Top Down Shooter project would use similar functions but with more character movement and objects colliding with the player ( used as cover for the player ) as well as more movement for the enemies.
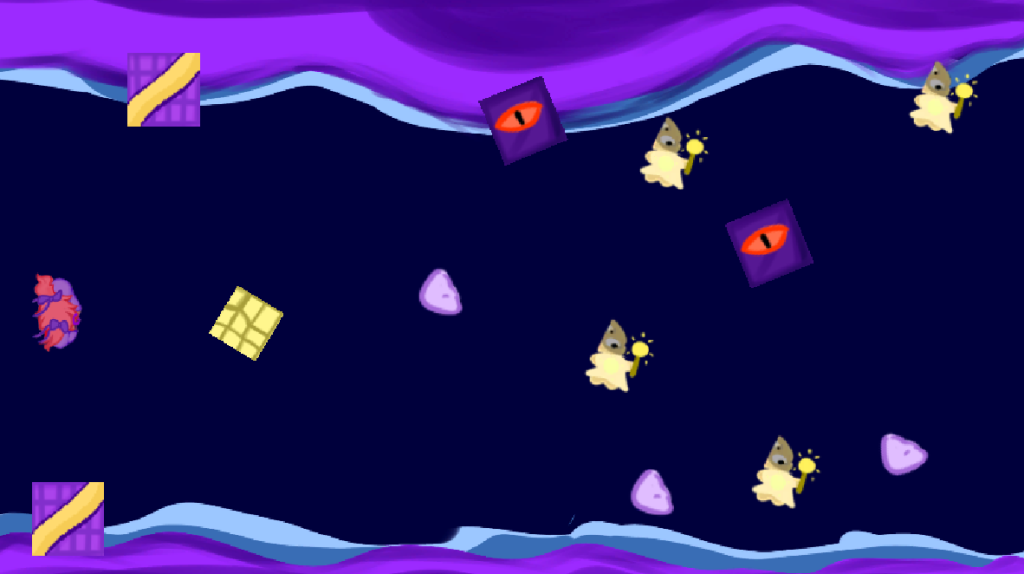
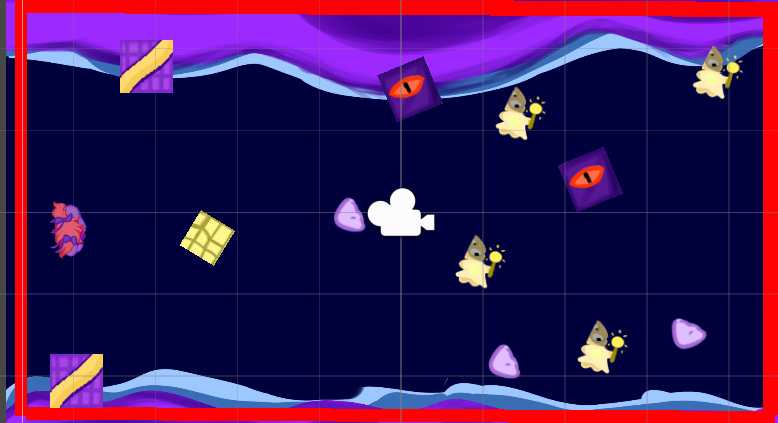
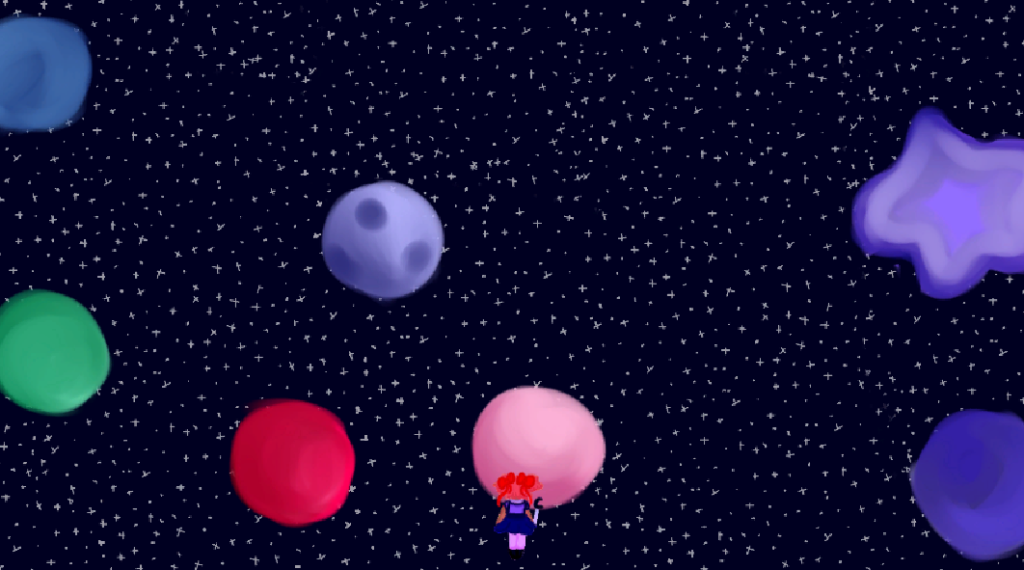
For the Top Down Shooter, I wanted the game to be a continuation / sequel to the Space Invaders Prototype so I added the same character and overall aesthetics, just different enemies.
The idea was for the game to be set where the character was floating in space with debris surrounding the level as well as enemies respawning in different locations.
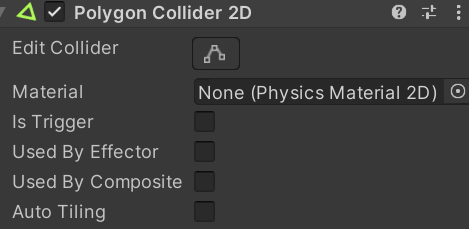
To start off with, I added a Rigidbody 2D component and a Polygon Collider to the player sprite so it can react to different objects on the map and so it allows the sprite to stimulate physics.
Scripting: Player Movement
Unlike the Space Invaders Prototype ( which only focused on horizontal movement ) , the player for the Top Down Shooter can move within the horizontal and vertical axis. This allows the player to roam around the level and interact with the cover more frequently, adding strategy to the game.
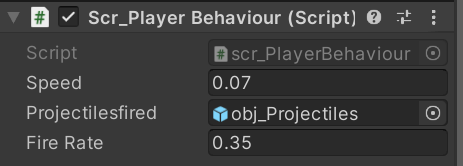
I also added a speed variable to adjust the player’s speed, much like in my Space Invaders Prototype.
A new feature I’ve added to the game, however, was the ability for the player’s sprite to follow the mouse pointer position, making the controls for the bullets much easier to use during combat.
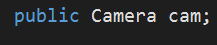
So to begin with, I added a Camera and Mouse position variable so the position is referenced from the scene view and the camera can be referenced for this:
This function converts the mouse’s position into ingame x,y coordinates so now it can be referenced within the sprite’s rotation.
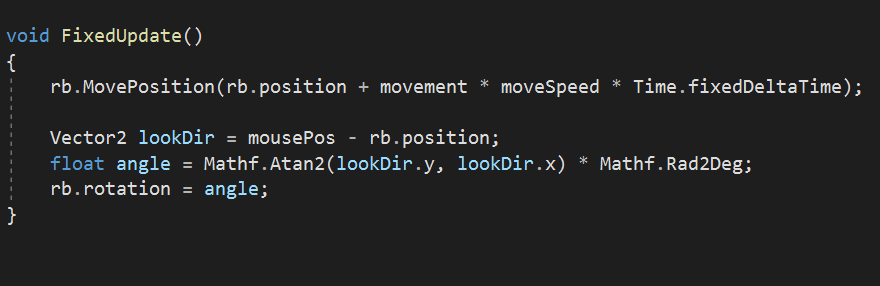
Then I created a FixedUpdate function so the angle and position of the mouse would update every frame in tune with the RigidBody’s position.
Scripting: Bullet Behaviour
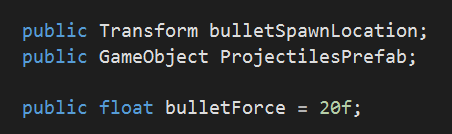
For my Bullet Behaviour script, I mainly used what I learnt from the Space Invaders Project and transferred similar code into this project. Same as before, I created a Projectile Prefab so Unity can reuse this object multiple times.
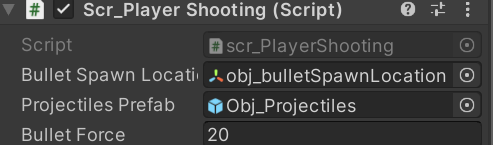
These Variables will help identify where the bullet’s will spawn and what prefab will be used.
the public float: Bullet Force adjusts the speed of the bullets when they’re fired. This can be used to potentially add a level of difficulty to gameplay since if the bullets are slower in speed, the player would have to time their shots when dealing with enemies.
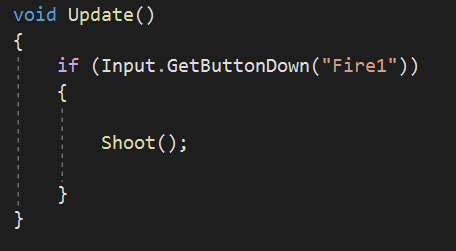
The input for the shooting mechanic shown here is the left mouse button since “Fire1” is mapped to that control in Unity.
So when this “if” statement is activated, it goes over to the “shoot” function where it spawns in the projectiles as well as adding the bullet force to them as well as adjusting the angle depending on the angle of the bulletspawn location. The Bullet Spawn Location object is an empty one but it’s attached to the player sprite.
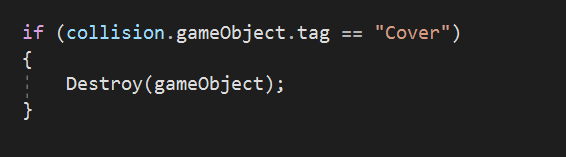
For Collision script, I wanted to make sure that when the bullets collide on cover objects or the invisible barriers, they would despawn, this was a work-around to make sure that stray bullets wouldn’t affect gameplay (for example, despawning enemies randomly and making open spots harder to see.).
This essentially meant that if objects tagged as cover were to interact with the bullets, they would despawn automatically, this included invisible walls too which were close to the edges of the game view.
The invisible walls with Sprite Renderer on
For all the cover objects, I added box / polygon colliders so enemies would have to work around to catch the player but the player can use them to hide around them.
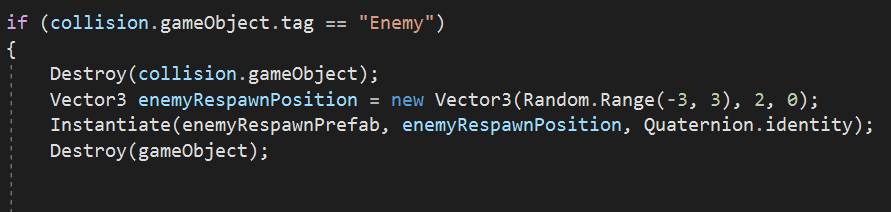
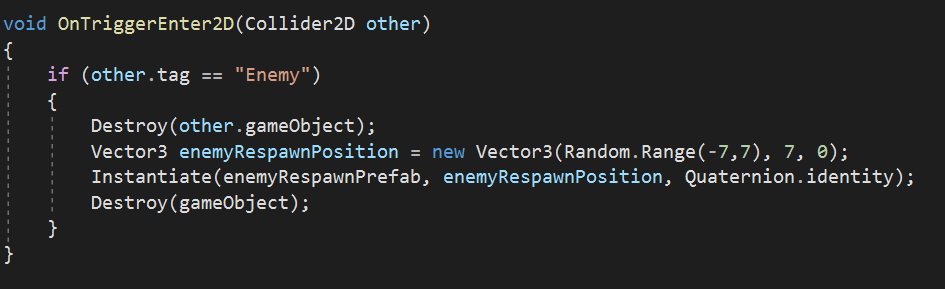
For the enemies, I used similar code except I wanted them to respawn so using my knowledge from the space invaders project.
In summary: when the bullet collides with the enemy, both the enemy and the bullet will despawn. However, with the instantiate function, the enemy will repsawn with a different position depending on the range in the Vector3 function.
Scripting: Enemy Behaviour
To start off with creating enemies, I wanted to make the sprite into a prefab since there will be multiple enemies on one level which will respawn multiple times.
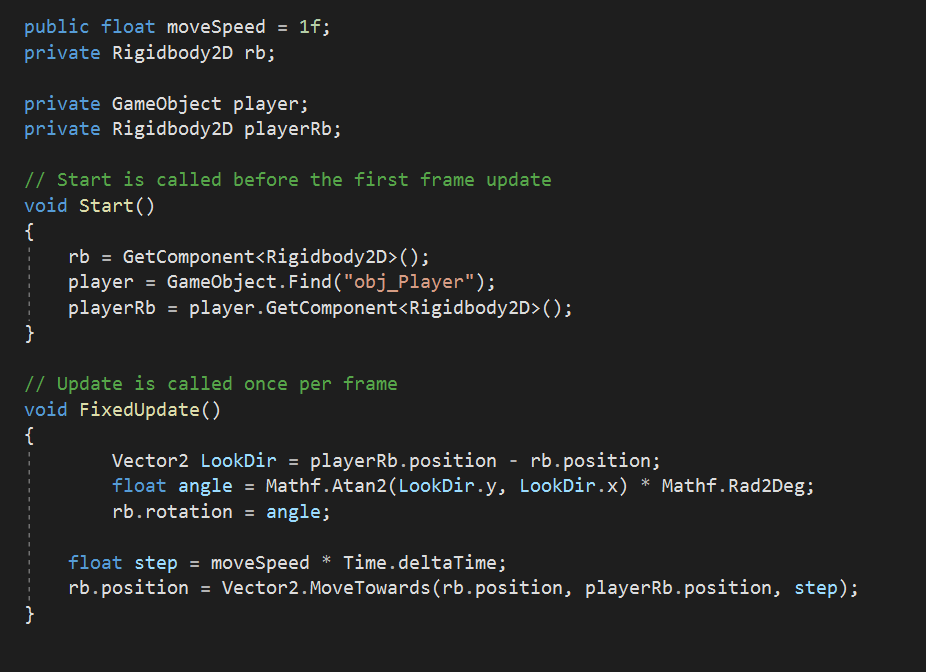
I wanted the enemies to follow the player which means replicating their movements to suit the player. I added a rigidbody to the enemy prefab and started working on it’s movements.
Since I wanted the enemy to follow the player, I needed to reference them in the a private float. Once the player’s rigidbody (the Main Character Sprite) is referenced, then the I added GameObject.Find which referenced the character sprite and meant that the enemies focus was towards them.
In the FixedUpdate Function, I used similar script to the player movement, in order for the enemy’s movement to replicate theirs, adding a level of challenge to the gameplay experience.
The enemy’s function is to get closer to the player so everytime the player moves around, the enemy will follow those coordinates so they move towards them in real time.
Summary
The challenge with this project was replicating some of the features from the Space Invaders project such as the randomisation for the respawn coordinates, since I could only have the enemies repsawn within the scene because of the invisible walls I’ve implemented. However, I reminded myself on how the axis works using the transform tool in Unity.
This project helped refine and improve the mechanics learnt from the space invaders project with free roaming movement and adding functions that’ll allow better combat when fighting enemies but also making enemies more of a threat towards the player. Although, I’m not a huge fan of the Top down Shooter genre, this project has certainty cemented the idea of implementing a more strategic build for future games.
I called my Space Invaders Project called Moonflower Axis, I wanted to create a Space Invaders that didn’t rely on the standard Sci-Fi conventions. So instead of space ships and aliens as the main visual assets, I decided to use a Magic Girl and corrupted enemies, inspired by anime.
This project is where I started focusing a lot on the visual aspects of the game as well as the basic fundamentals on the games mechanics. The assets such as the sprites and the background were created through Paint tool SAI, however these sprites were not created through pixel art which could’ve been a better choice when designing a game with little focus on the character (since the size of the sprites are so small).
This project was the starting point on how I managed to add backgrounds, utilising sorting layers.
The mechanics of the game focus on player movement, bullets, and the enemy respawn.
Scripting: Player Movement
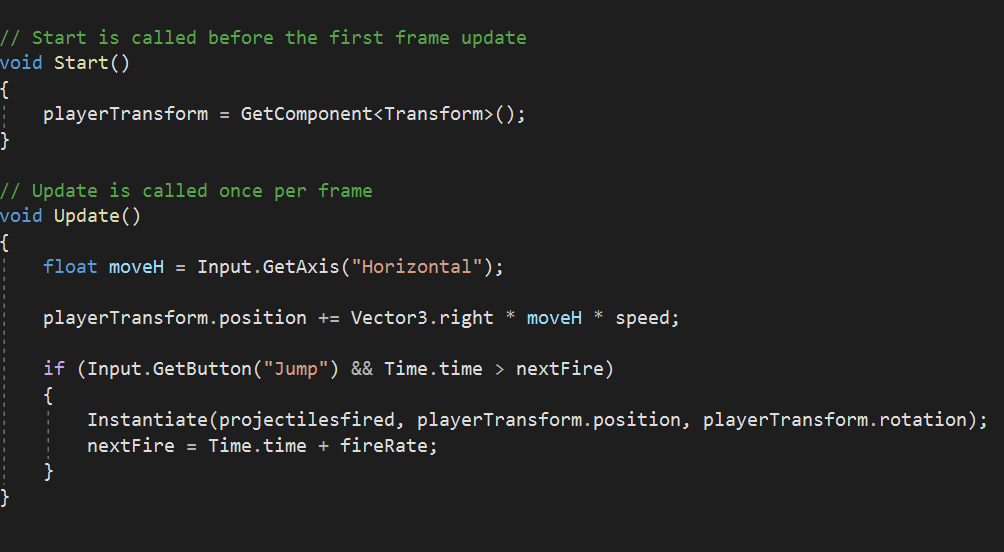
The script for the player movement works injunction to the bullet. The Input.GetAxis command outputs a value between 1 and -1 within the horizontal axis. So by putting this command (along with Vector3.right) in the update function, the value will be determined through the arrow key input. By multiplying the speed with the values from the Vector, it will allows us to adjust the movement speed variable.
The GetComponent script allows Unity to call back to a specific sprite thats linked to that specific code.
Unity recognizes these commands with the corresponding inputs so essentially it allows the player to move left and right.
the “If” statement focuses on the input for the bullet. In summary, everytime the player input the space command, bullets will be fired from the player’s position. The Time.time + fireRate command makes sure that the bullets only fire every fame rather than in large stacks.
Scripting: Bullet Behaviour
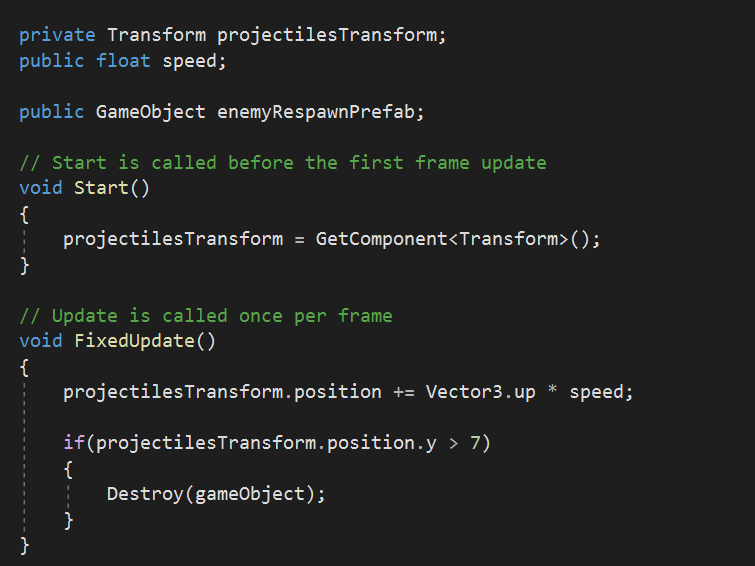
The Bullet Behaviour script controls the bullet’s speed as well as it’s despawn mechanics. I used a bullet prefab to allow it to be reused multiple times and can be transferred to different scenes.
Similarly to how I input the player’s movement, I wanted the projectiles to move upwards when fired, so I added Vector3.up multiplying it with the speed so later on, the speed can be adjusted injunction to the bullets movement.
To have the bullets despawn however, I added an if statement so when the projectiles position was greater than 7 on the Y axis, they would despawn, this is so the game doesn’t have to render large amounts of bullets after they leave the camera view.
Now the main focus is for the bullets to collide with enemies and destroy them when they’re hit. The bullets should also despawn when this happens. So I started by adding colliders to the enemy sprites and the bullet prefab.
Then I focused on scripting the collision event, I added an if statement so when the bullet does collide with the enemy it destroys the two objects.
However, I also added a respawn function for the enemies, allowing a range between (-7, 7) on the axis so there’s an element of replayability to the game. Giving a large range for the enemies respawn locations also allows a level of difficulty to the game as it adds a level of unpredictability to the gameplay.
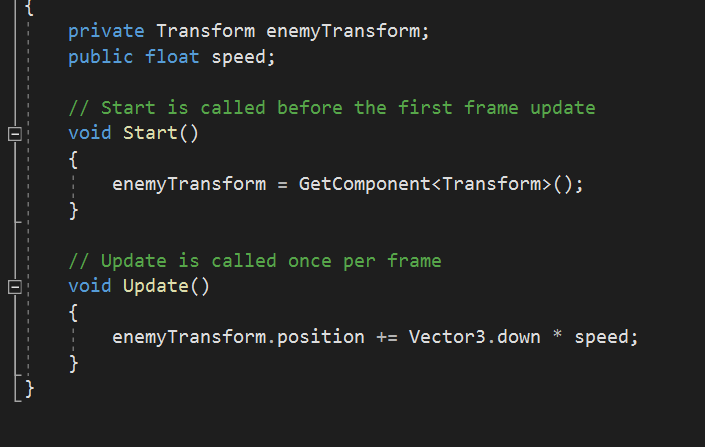
Scripting: Enemy Behaviour
For enemy behaviour, I used similar code from the player movement script. Since their only function is to move down, I just needed to add the enemyTransform.position function so the I could add a vector and a speed variable.
Summary
As it currently stands, I’ve managed to add in an enemy respawn, basic player controls and attack mechanics. This project allowed me to develop an understanding on how vectors work and how to code collision functions. It also allowed me to gain a better understanding on how the Unity interface works in terms of the importance of positioning sprites within the game as I was experimenting where I would want enemies to spawn.
As mentioned previously, I haven’t had much experience in coding with C# especially in Unity, so the main challenge for me was picking up new commands and features especially in regards to vectors and the instantiate command. However the project taught me code that I could use as mechanics for other future, developed projects.
The Cookie Clicker is the starting point for developing prototypes and an introduction to coding. I’ve had little experience when coding so The Cookie Clicker taught me the basics of Unity and C# Scripting, using components that will later be useful in other Prototypes.
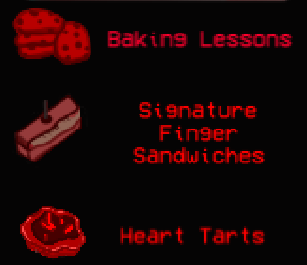
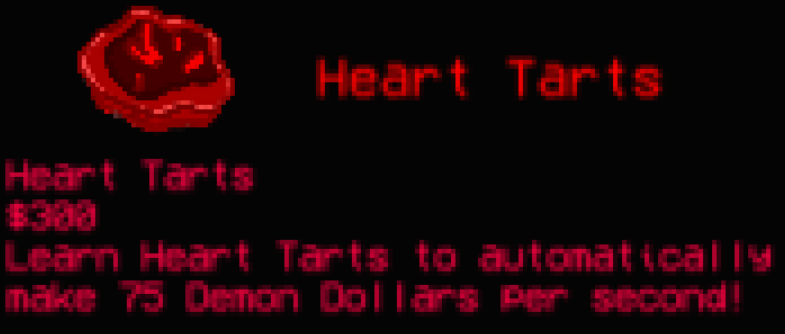
I thought of an idea of creating a Bakery Simulator, taking the mechanics of cookie clicker and adding a horror spin to it. The main functions I focused on within this prototype are the Counter, the Clicker and basic Upgrade Mechanics which were created as UI elements such as the text and the buttons.
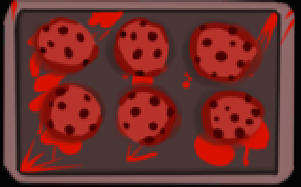
To start off with however, I worked on the clicker aspect itself. To do this, I created a button, replacing the default image with a more visually appealing look. This a similar thing I did when I created the upgrades.
Other UI elements I added was the counter and the Upgrade info which were both Text UI. These show the player how much currency is being produced through clicks and auto-upgrades.
UI Elements: Counter and Click Button
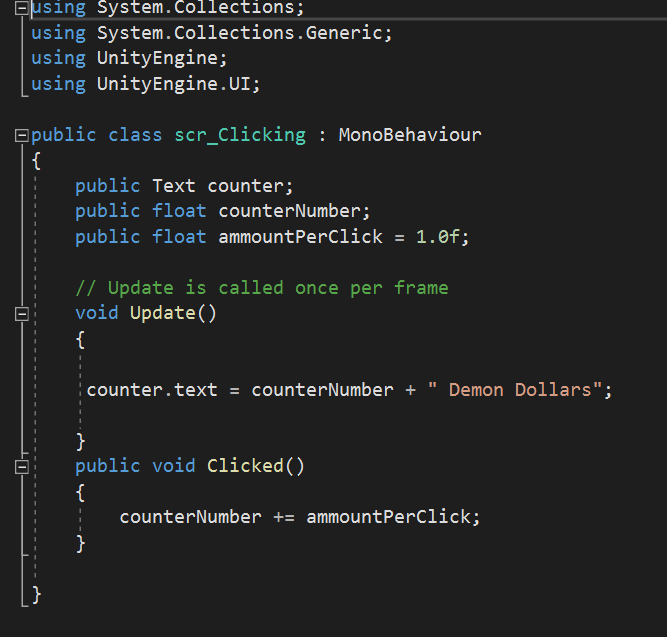
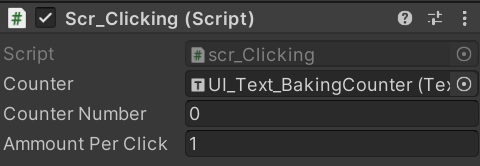
Script for the counter: This allows the counter to display the amount of clicks from the button. At the beginning of the game, the text for the counter will change into Demon Dollars.
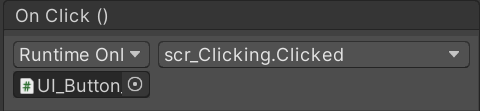
This script was linked to the click button (the baking tray of cookies) and when clicked it adds one ‘Demon Dollar’ to the counter (without the Upgrades). When the Game starts, the counter number will always start at 0.
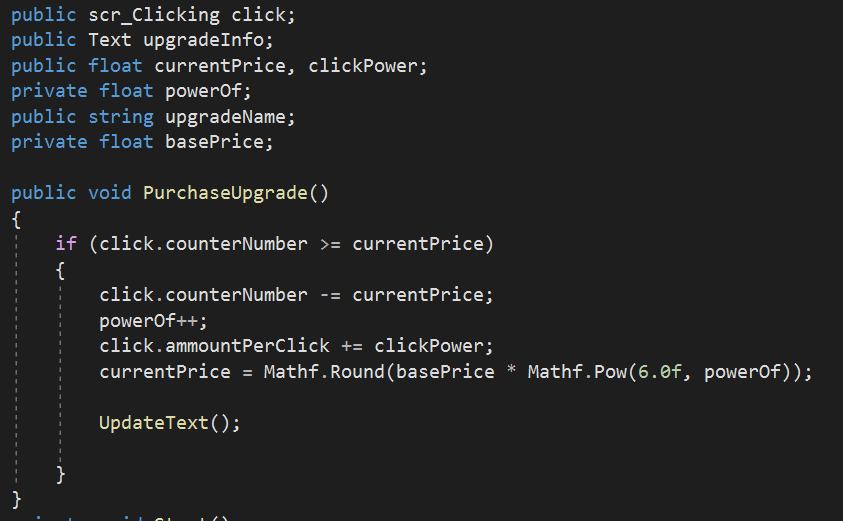
UI Scripting: Upgrades
Essentially with this piece of the UpgradePerClick Code, it gives the upgrade a set Price which will increase to the power of 6 each time the upgrade has been purchased.
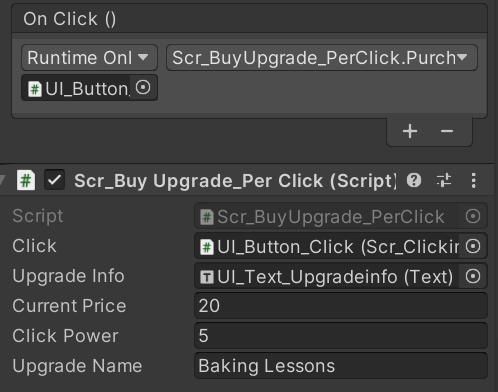
The public floats presented in the script are shown here: They link up to the click button and the UI Text: Upgrade Info. The click power adds 5 Demon Dollars to every click.
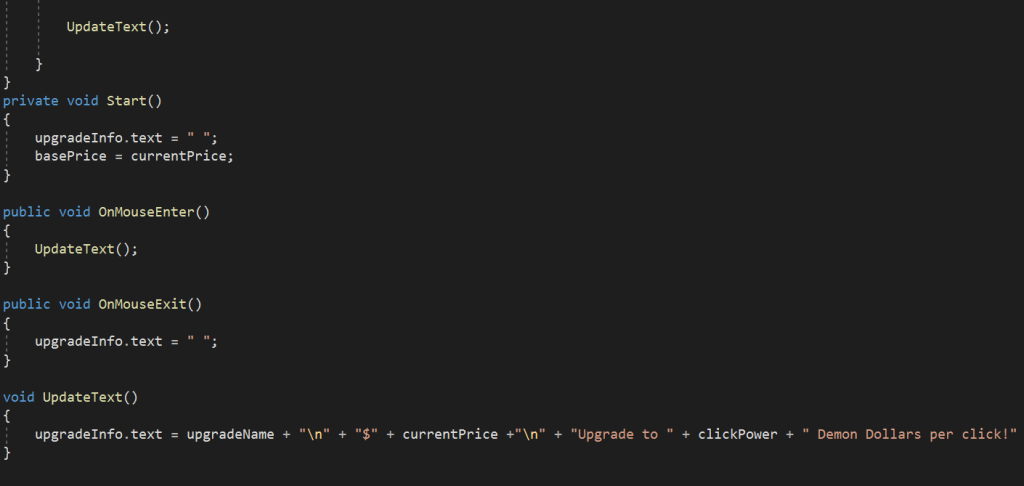
This is the code for the Upgrade Info, all the Upgrades have this piece of code which basically updates every time the player buys an upgrade. The currentPrice which increased every time the player purchased an upgrade, also updates the text on the Upgrade Info. The text in the speech marks will show when the mouse is hovered over the button. The OnMouseEnter and OnMouseExit allows the UI Upgrade Buttons and Upgrade Text to be linked together as well as turning them into Hover Buttons.
The main issue I came across when programming the upgrades was the balance between the steady increase in the upgrade price and the actual click power / multiplier. I didn’t want to make the game too easy nor too hard since the game is supposed to be an incremental game. From my perspective, however, the auto upgrades make the game a lot easier therefore they cost more in comparison the the upgrades per click so I decided that the auto upgrades must have a higher cost in comparison to the upgrades per click.
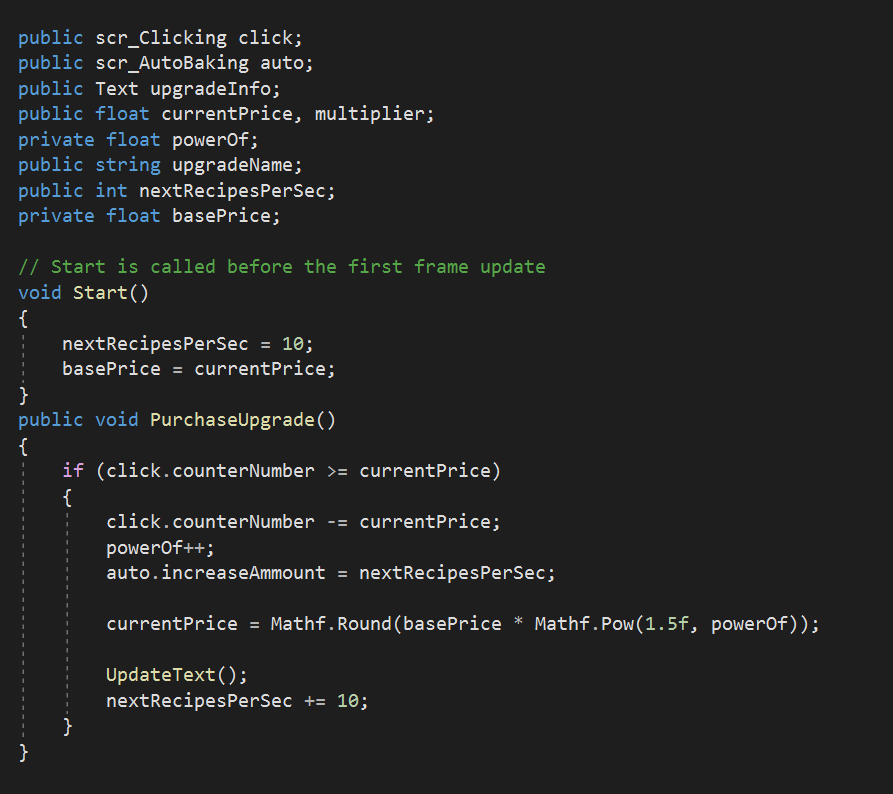
UI Scripting: Auto Upgrades
As mentioned previously, I have used similar coding to the UpgradesPerClick script, however, since its an upgrade that produces currency automatically we needed to add script that will automatically increase the amount of the counter. The current price also increases a much more and within each purchase, the currency being produced increase by ten.
Summary
The Cookie Clicker Game, as basic as it is, starts out as a clear introduction to the fundamentals of coding. The game is based on numerical values and UI elements but it serves as a way to focus on the functionality of the game rather than the visual aesthetics.
This also meant seeing common mistakes in coding which I faced a lot during the programming stages such as missing strings or spelling errors. However, this helped me get used to the requirements in coding as well as making it easier to spot mistakes.