In terms of collaboration for the project, it was an chaotic experience as in the second half of the project. There were issues with having a consistent deadline as the team members were in different stages of development as well as everyone having personal circumstances that further caused issues with keeping to the same deadline.
Originally the idea was to have a small area outside the blacksmiths which was the area assigned to me during the project’s first stages. The work in the group was split between different areas rather than with different tasks, that way we would be able to learn unreal engine’s variety of tools and also cover more ground with world building and modelling.
When deciding on the sub-theme, we all put down different ideas for what we wanted to work on and we also arranged a meeting to discuss this with members that weren’t able to contribute at the time.
After being given our main theme (Blacksmiths) however, we all decided it’d be interesting to work with feudal japan. As historically, we were curious about the difference between the western and eastern interpretations on blacksmiths as well as the story that we could build up from the themes.
The plan was to only make an outside forge, but due to the lack of space we were sharing between me and another team member; so instead I’d work with the outer area of the forge. This decision also allowed me to have more creative control with the large space I was given.
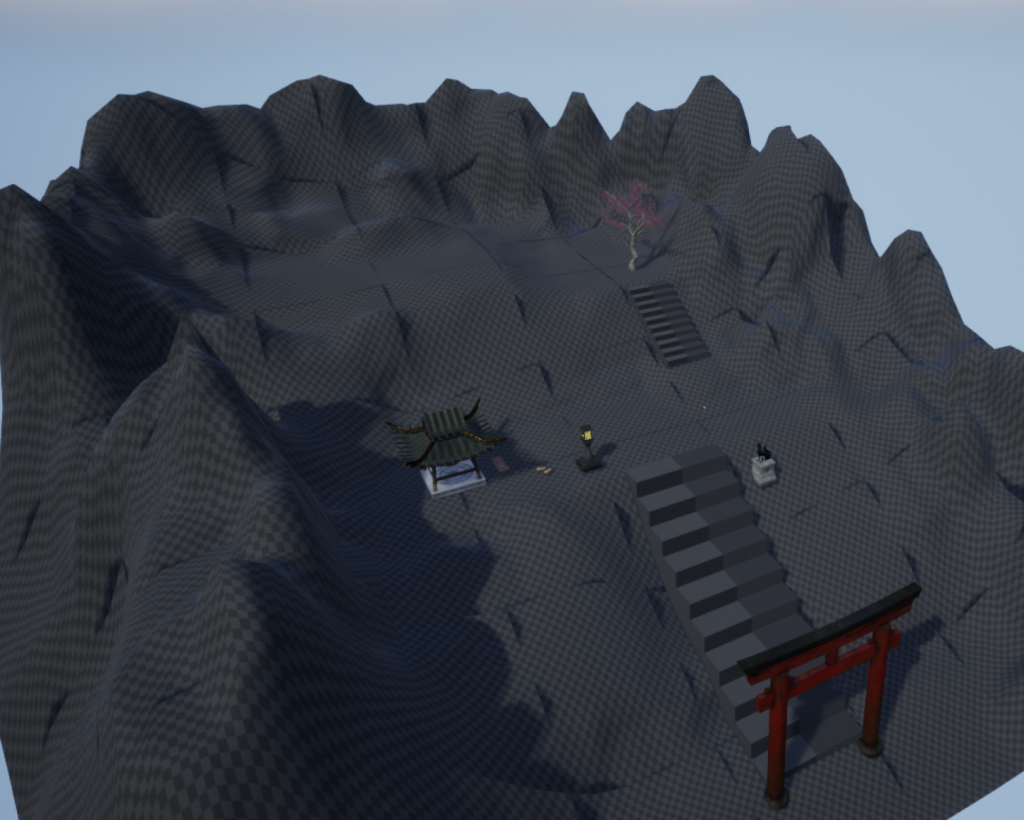
In order for our area tasks we’d have to work around the blockout. These blockouts were created by Damien to give a better understanding on how our project would be laid out:
However, due to the difference in deadlines I had decided to finish the outside area so the other team members would also be able to work with a completed set of the area whilst still giving them a large enough space to work with. I told this new plan in a meeting which allowed everyone else to focus on their 3D asset work.
Once I finished my piece of the project, I sent off the file to the team members for them to work on their own spaces. This way they’d be able to work around the area that was given to them whilst still keeping in track of my personal deadline.
Damien has created the building itself for the project and so now two other team members are planning on working from the inside and parts of the outside whilst Damien works on the outside forgery surrounding the building. Here are some examples of the inside area of the blacksmiths which was created by one of the team members: Brannon who created the particle and lighting effects, as well as adding their 3D asset into their scene.
Reflection
In terms of working as a group, it was the main difficulty we faced during the project especially with the setbacks. We managed to solve them through working with different deadlines and on my end, giving them a space to work with.
Our group’s main strength was our creativity, we were able to brainstorm many story and visual ideas together online and in-person. We had many different inspirations that could work into our landscape together and we’d try to bring up as many ideas as possible.
We also had a strong plan on interweaving our 3D asset projects to the environment as well as a visual objective to work towards when creating our world.
If we were to choose any other theme, it’d either be corruption or infection. There weren’t many discussions on choosing another theme than Feudal Japan but if we were to choose either other themes we would work with a makeshift blacksmith that was created by a survivor only for it to be destroyed by the infected, a similar story to our project.
To further improve in my part of the project, I would set the project in a much more darker environment rather than in the morning as the lighting for the landscape would drastically change the tone of the story we were telling.
For the landscape, I would’ve also added more blacksmith weapons and armory around the environment to create a more chaotic area. I’d also add more destruction in the area such as adding fire particles and destroyed items such as walls or objects. I could’ve also added more blacksmith items in the empty space but this would’ve limited the creative space the other team members would’ve had and potentially make the area feel more cluttered.
For the environment as a whole, the landscape would’ve been placed better in a larger mountain / forest area, surrounding the landscape I worked with. This way, the environment would’ve been more claustrophobic and set in a more realistic area. In the future, I want to be able to have the grass and foliage be fully rendered across the landscape. This was more an issue for the video as certain areas would only be fully rendered if I was close enough with the viewport camera.
In conclusion, this group project taught me that communication is vital when it comes to working with the same environment. Our group is able to creatively come up with ideas but executing it as well as time management and planning is an area that we struggled on to work with as a team. Despite the setbacks we faced, we managed to push through the project by setting different deadlines and giving each other different places to work with, giving us an idea on how we’d tackle group projects and communication in the future.
At the beginning of the project, I started to set up the outside area using Unreal Engine’s environment and foliage plug ins. The template I originally used is the empty map so I was able to have a blank slate and experiment with the environment block-out much more easily.
Here, I was experimenting with the different tools that the landscape mode provided, messing with the brush radius for the sculpting, smoothing and noise mechanics. These tools were used to create the mountains surrounding the area as well as the hill structures.
This was one of the more difficult areas to work with as the lack of shaders and lighting made it difficult to understand the heights of the different areas in the map.
However, when I added the objects into the blockout, I was able to understand how to edit the layout even more as I was able to build around some of the assets I also placed these items into the blockout to get a better understanding on the areas and how much space I could work with.
The large area near the Sakura tree area is where the blacksmith building would be placed. The blacksmith building will be created by one of the team members in the group.
I used this tutorial ( https://docs.unrealengine.com/4.27/en-US/BuildingWorlds/OpenWorldTools/Grass/QuickStart/ ) to help set up the grass material tool which would help allow me to edit the grass density and randomise the grass’s size, location and rotation in the environment, adding more variety in it’s implementation. The layer also included a grass texture which the grass helped from preventing any noticeable repeating patterns.
Afterwards, I added another layer known as the dirt path. This made navigating through the environment narratively more noticeable as the initial intention was to provide a linear story to the area.
In this screenshot, you’re able to see the difficulties that I intially faced as the grass layer was overlapping the dirt. To rectify this, I left some areas of the grass untouched but took away most of the noticeable parts using the smoothing and erase tool.
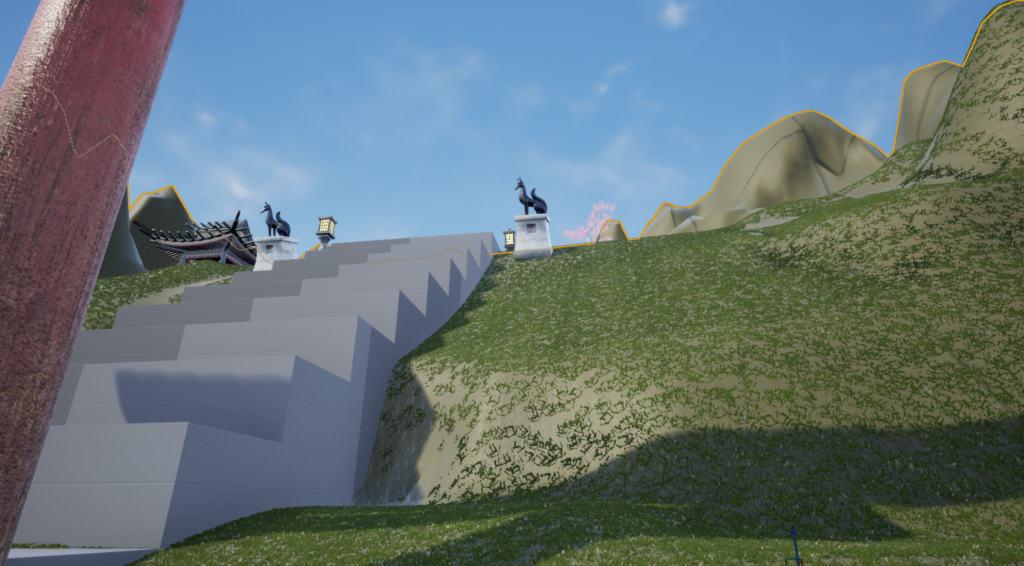
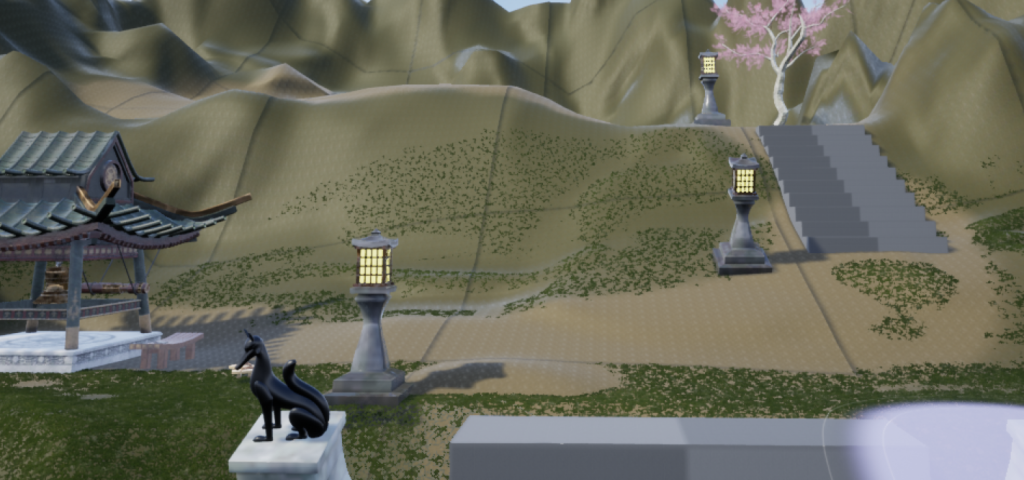
At this time, I started adding more objects around the environment such as the stone lanterns, a way to understand the scale of the landscape. The main difficulty I had with this process was finding a suitable size for the stone lanterns and the fox statues as I didn’t want them to set an unrealistic proportion so I tried to make them slightly bigger than the statues, this way the lanterns would feel physically intimidating despite emitting a warm glow.
Part 2: Populating the landscape – Composition work
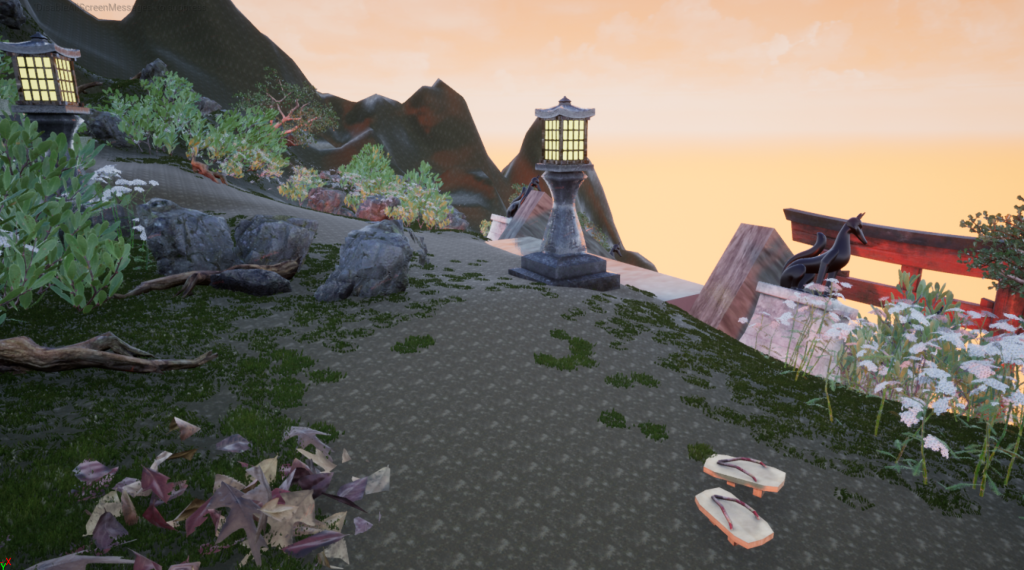
After adding in the textures for the ground, I started adding in foliage such as rocks, dead leaves, flowers and bushes around the landscape. The main idea for this composition was to visually show the chaos and the flora taking over an isolated but beautiful landscape.
Originally, I scattered lots of different debris across the map, especially in the first area but it became too cluttered and disorientating. So instead I just added trees around the landscape and reduced the amount of debris. This also allowed more subtlety to the destruction of the land narrative-wise.
screenshot of the environment once I started adding trees as well as using experimenting with the foliage tool.Experimenting with different camera angles for screenshots, this also helped me clean up some of the clipping issues with the stone lanterns, statues or the stairs.One of my first high quality screenshots: I was experimenting with the lighting around this time and figured out how to change the lighting into the evening.
In the environment, I added lots of flowers to the area because I was having difficulty with grass length and so the ground still felt flat. However, the flowers helped with this issue by adding some more volume and variety to the grass layers. The shrubs and bushes help elevate that.
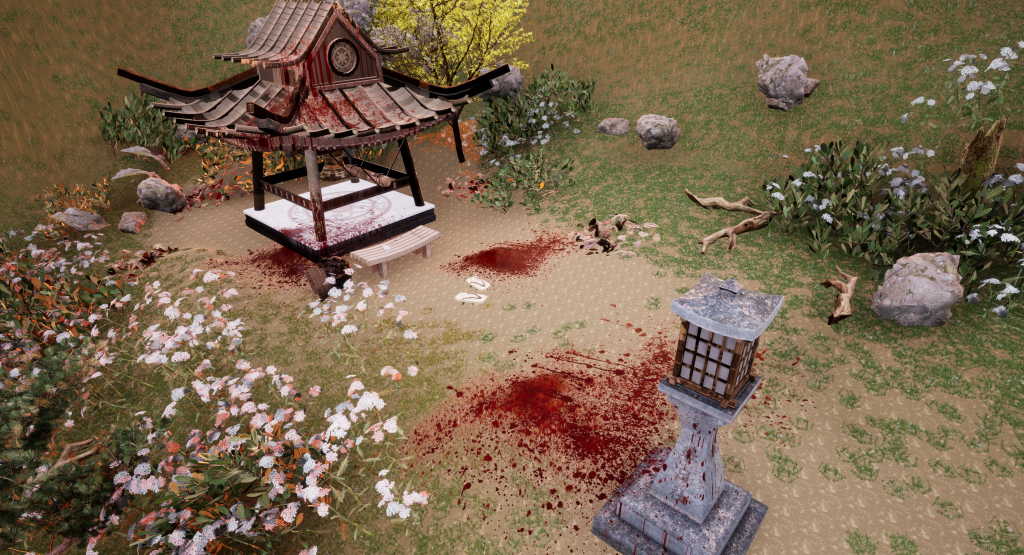
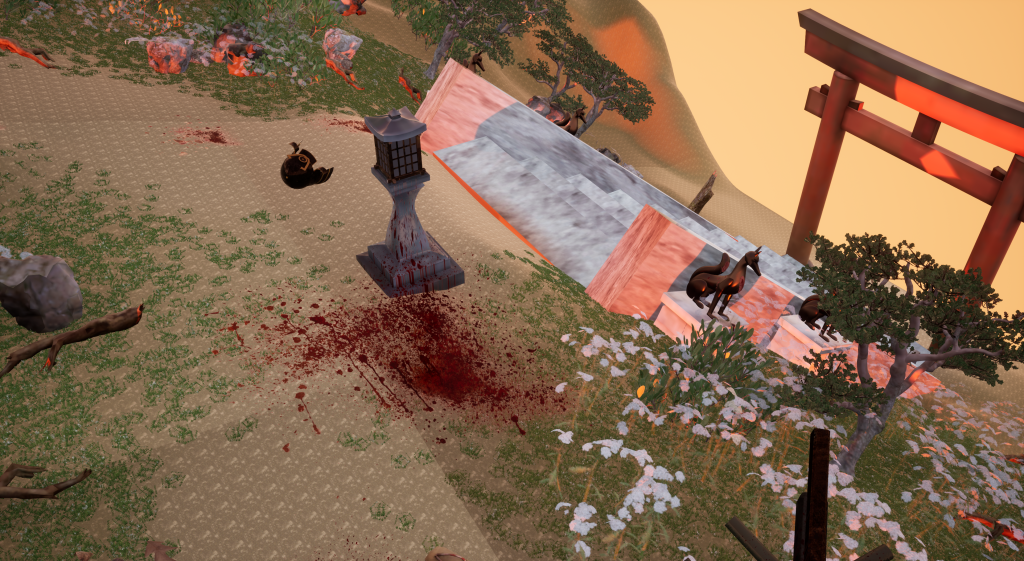
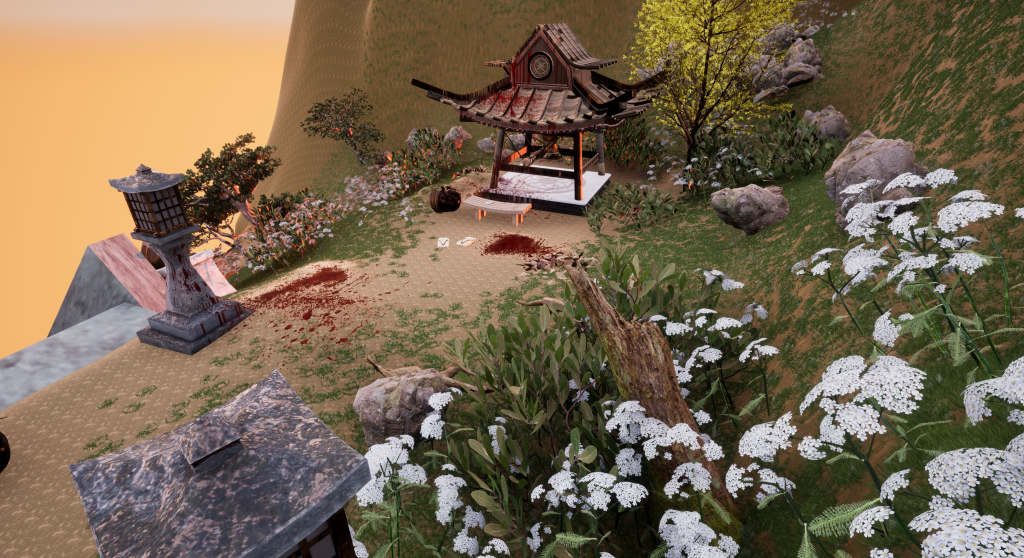
Afterwards, I added some blood splatter decals to the ground and some of the objects and structures. This was the finally add the horror element to the environment as well as to emphasis the chaos and juxtaposition between the beauty of the flora and the horror behind the oni’s attack.
For this, I used different decals and overlapped them on certain spots and objects to create a more vibrant effect. However, much like the debris, I tried to limit the amount of blood in order to not lose it’s visual effect.
Afterwards, I added some extra props to the scene because I wanted to shift the focus of the project back to the blacksmith theme.
Assets such as the helmets, statues and tower bell are part of the main theme due to their importance in their narrative. That narrative being the generational destruction of the blacksmith’s livelihood and family as well as the decay surrounding the blacksmith’s work.
Once I adjusted the extra props, I added them into the environment, the helmets being in different parts of the map.
Here are a couple examples of beauty shots of the finished arrangement.
Part 3: Feedback and Improvements
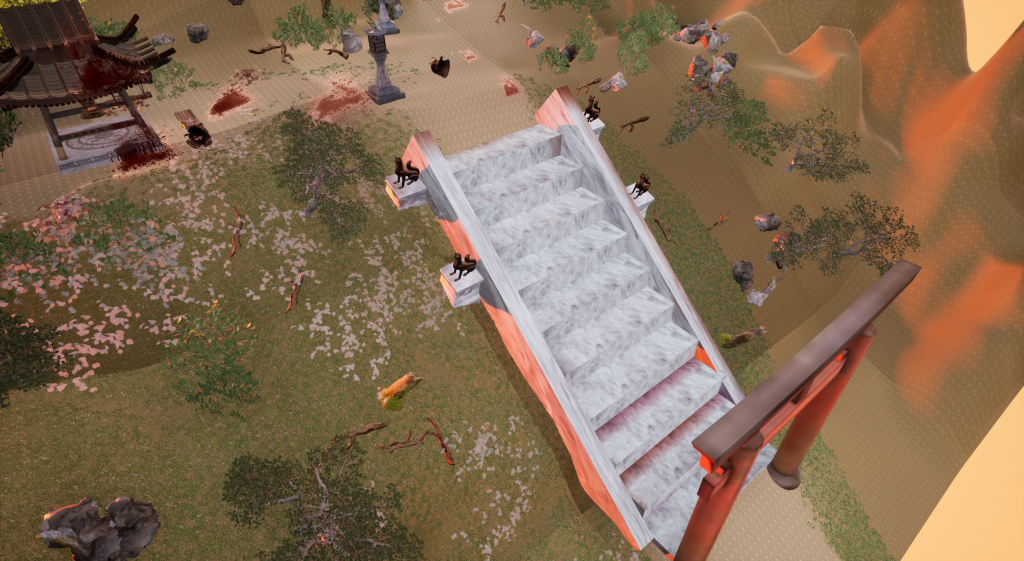
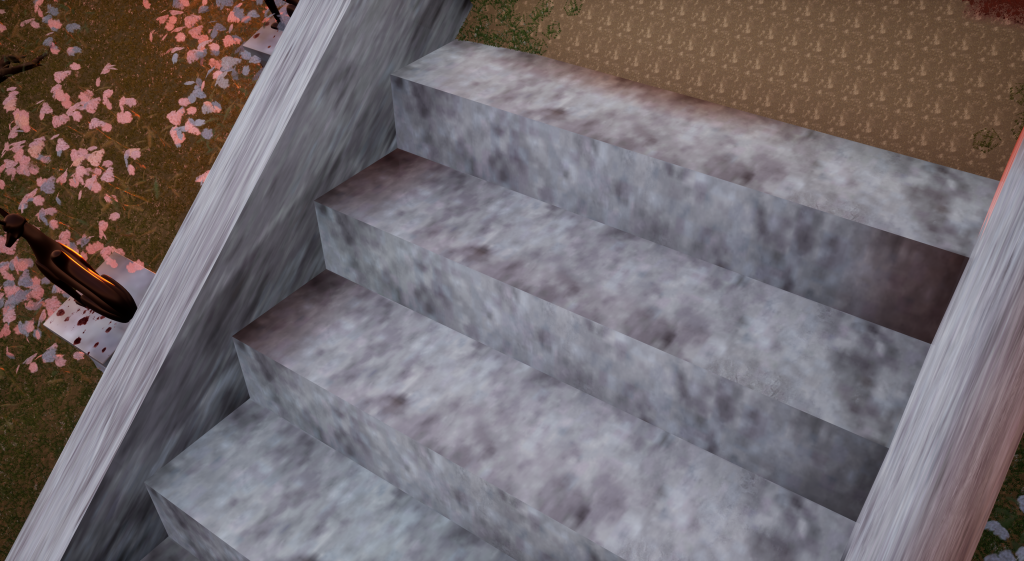
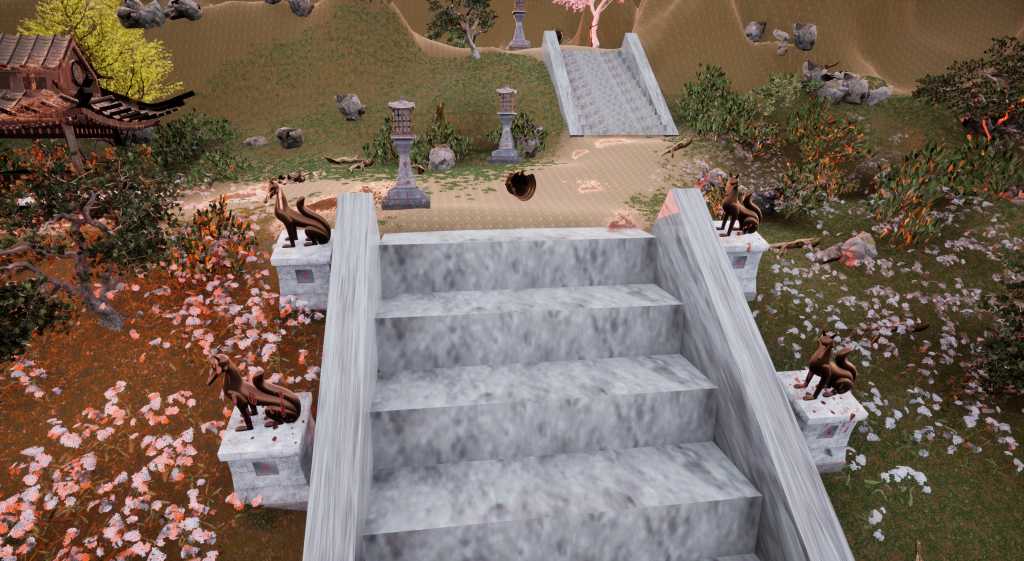
When I got some verbal feedback for the environment, the main concern were the steps from the first area as the scale for the stairs were seen as too large in comparison to the second set of stairs in the next area.
This is the first screenshot of the steps before they were sized down.
So as a simple fix, I was able to reduce the size of the stairs as well as the railings. This, however, also meant I had to create a steep area near the top of the stairs. This was due to the clipping issues I faced when creating a gradual slope.
There were also some lighting issues I faced with my assets, before rebuilding the lighting the first time. My peers had pointed out the error message as well as the ‘preview’ text affecting the lighting. So I had to rebuild the lighting every time I wanted to add any new objects or if I edited them and restart Unreal Engine to get the full effect.
Ontop of this, once I built in the lighting, I ran into the issue of the stone lanterns not being lit up anymore, however I left this in as contextually this area is set in the early morning. Perhaps they were snuffed out during the attack?
Steps without the built in shaders or lighting.An example beauty shot of the Medium Lighting quality built into the project.
Part 4: Implementing the 3D asset into the environment.
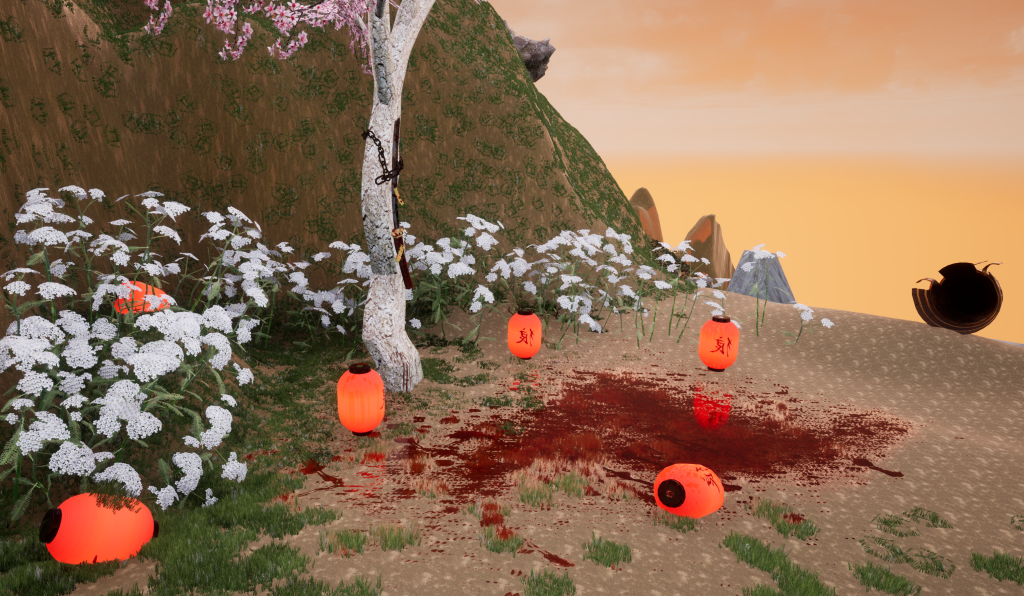
I added lanterns and a large pool of blood along with a helmet near the stairs and the mask in front of the tree to indicate the powerful supernatural horror that surrounds the katana.
Unreal Engine had some trouble importing the katana’s textures. After troubleshooting, we’ve discovered that the gradient for the blood (in the base colour texture map) potentially wasn’t recognised by unreal properly so the textures looked choppy.
The chains on the tree were individually placed around the trunk as I couldn’t find an chain asset that would perfectly wrap around the tree trunk. So instead I made a custom chain link using a chain asset I found. The custom chains were one of the hardest parts to assemble as the chain’s would either clip through the trunk or become too lose to hold the katana together, however after experimenting with the chain linking, I was able to build around the katana.
For the lighting, I added a small red spotlight to the tree mainly for dramatic effect as the lanterns weren’t emitting enough light to make the katana stand out.
Part 5: Beauty Shots
These screenshots were created using Unreal Engine’s High Res Screenshot function. These shots show off the final product of the landscape I worked on. ( Some of these screenshots may have been included earlier as examples in the post )
Part 6: Video
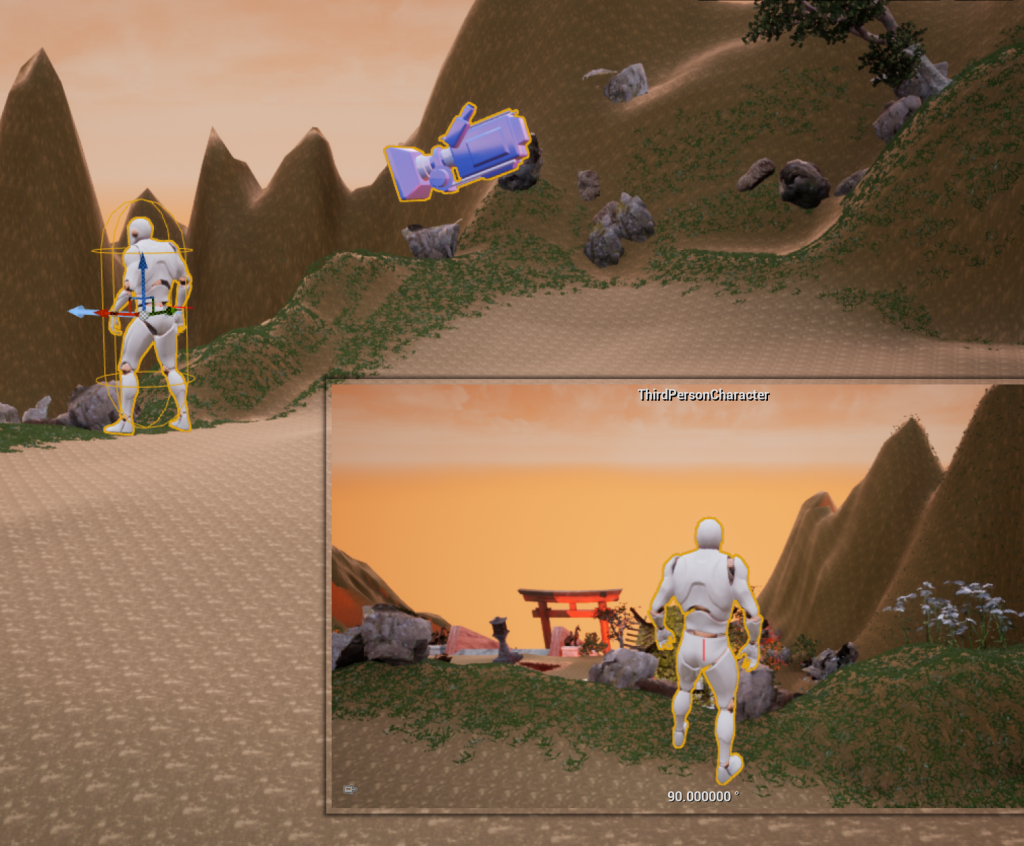
Originally the plan was to have a character exploring the world as the main outlet for the video. However, there were some technical difficulties setting it up, its main issue being scaling. So instead I provided a 2 minute video with the camera and immersive view showcasing the entire world and the different areas. This includes a better look of the empty space for the blacksmith’s building.
The character is standing in the empty plot for the blacksmiths at the top of the mountain.
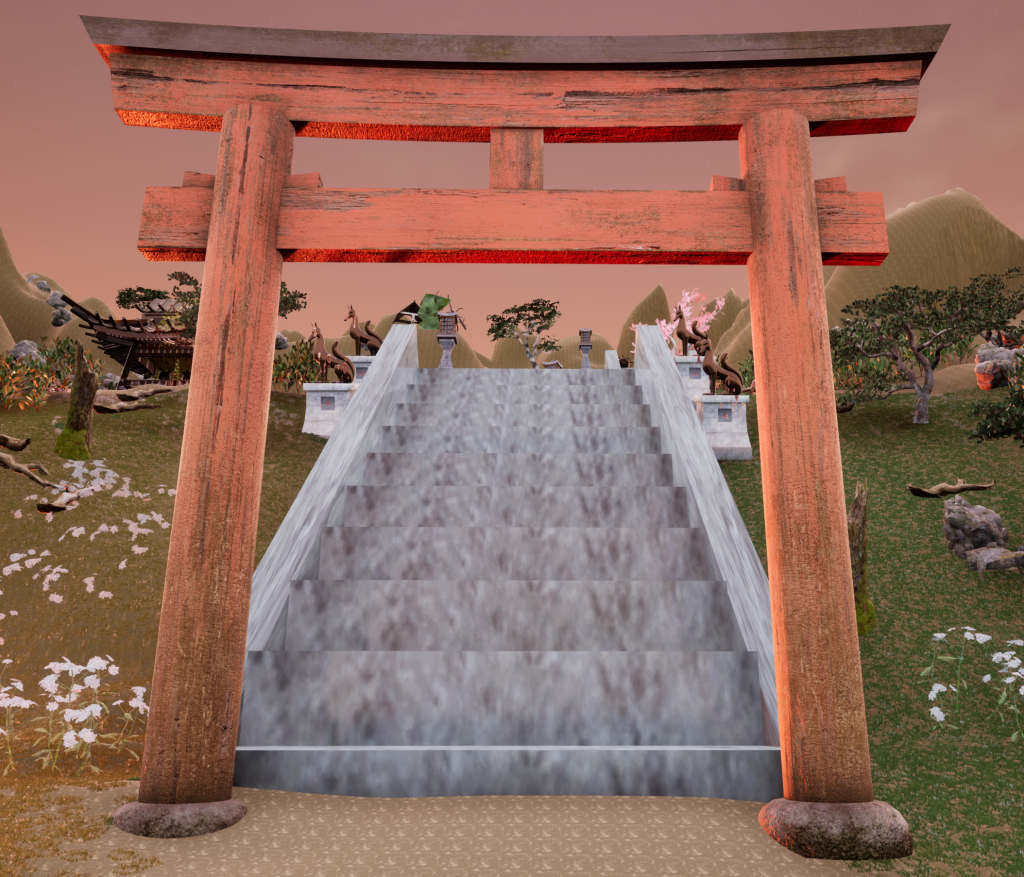
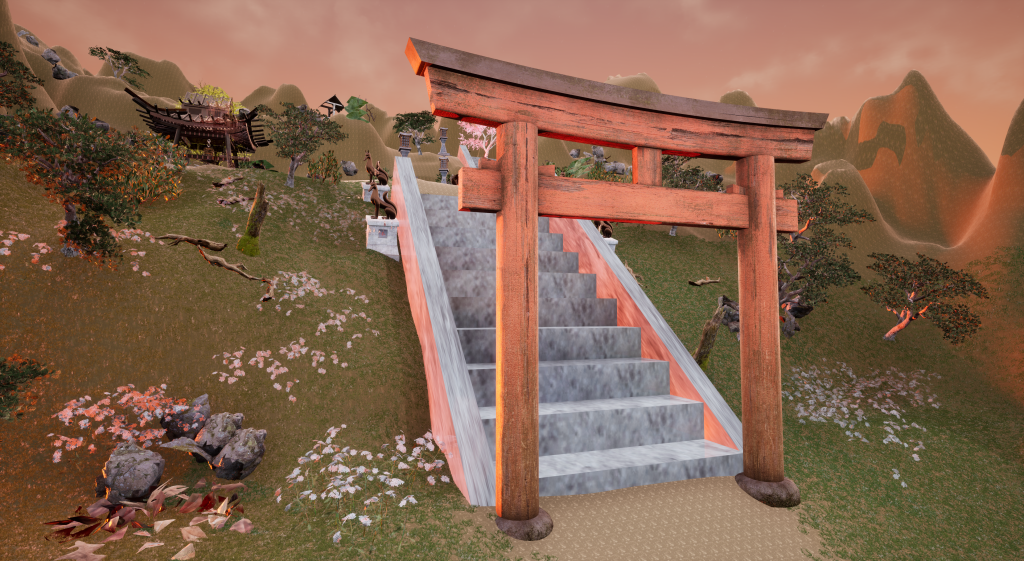
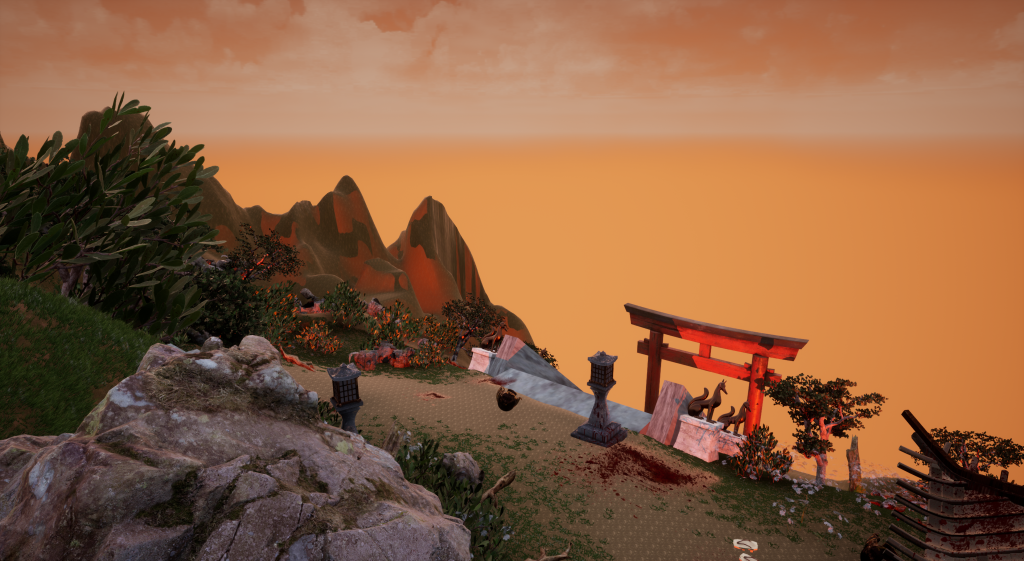
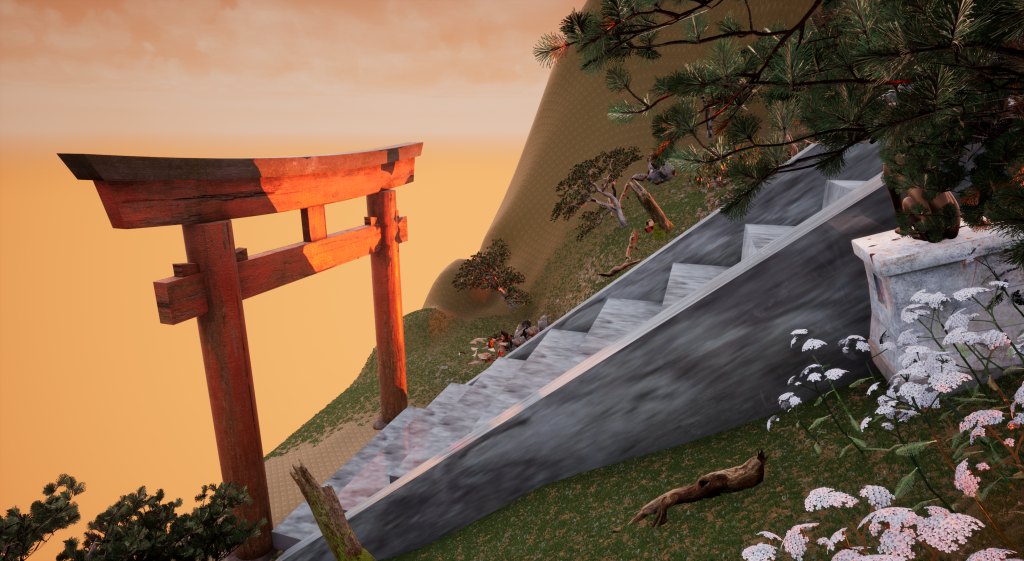
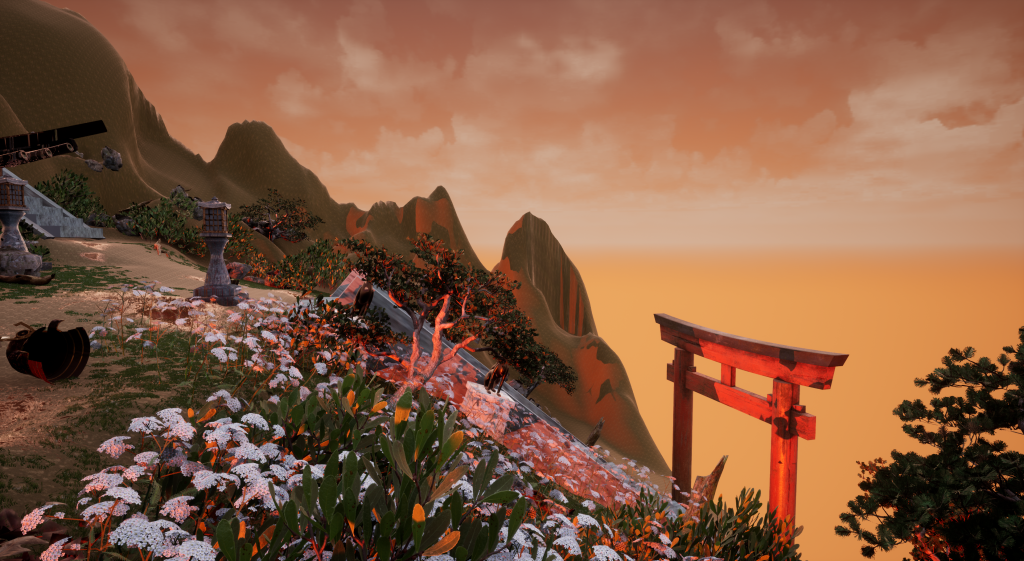
In the video, I show off the three separate areas of the landscape I’ve built. The first area introducing the world with a tori gate, inviting the viewer into a different ‘world’ spiritually. However, the debris surrounding the stairs and the gate suggests the tranquility of this place has already been broken.
The fox statues are made of metal, they stand proudly as they were made by the blacksmith, their positioning resembles a symmetrical format as they are meant to impose a dominating stance over the player. It’s perfect appearance, however, is tainted by blood, much like the white marble stairs. The dark red on the statues showing clearly on the marble replicates the main story’s theme: destruction as the colour theory behind the contrast implies a more darker force took away the peace.
It’s also clear that the blacksmith’s home was built from the ground up from rich materials as they take great pride in their work.
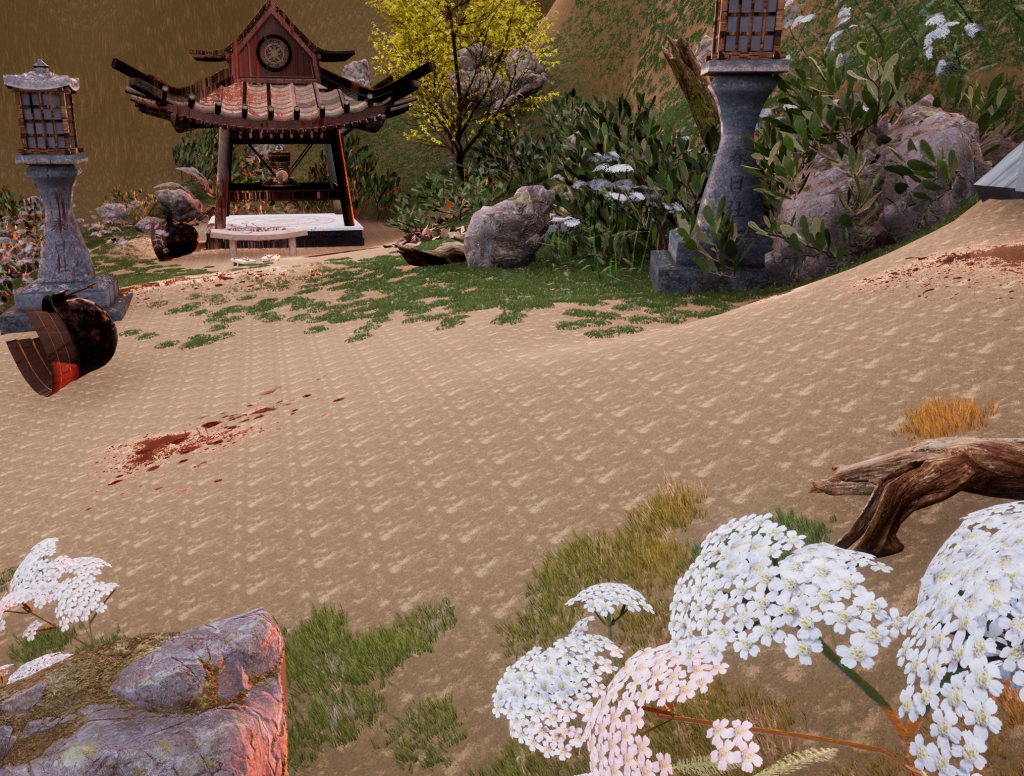
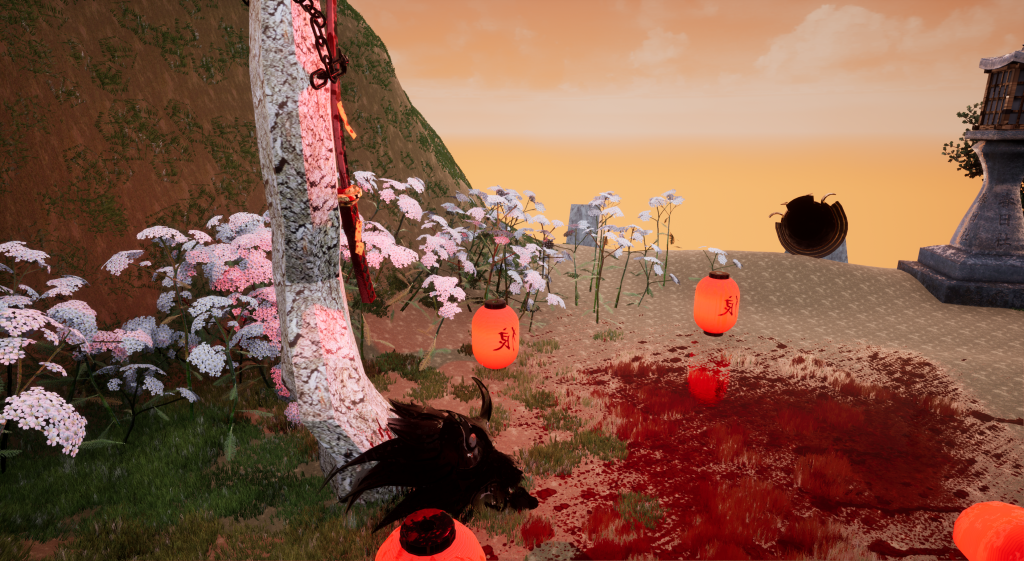
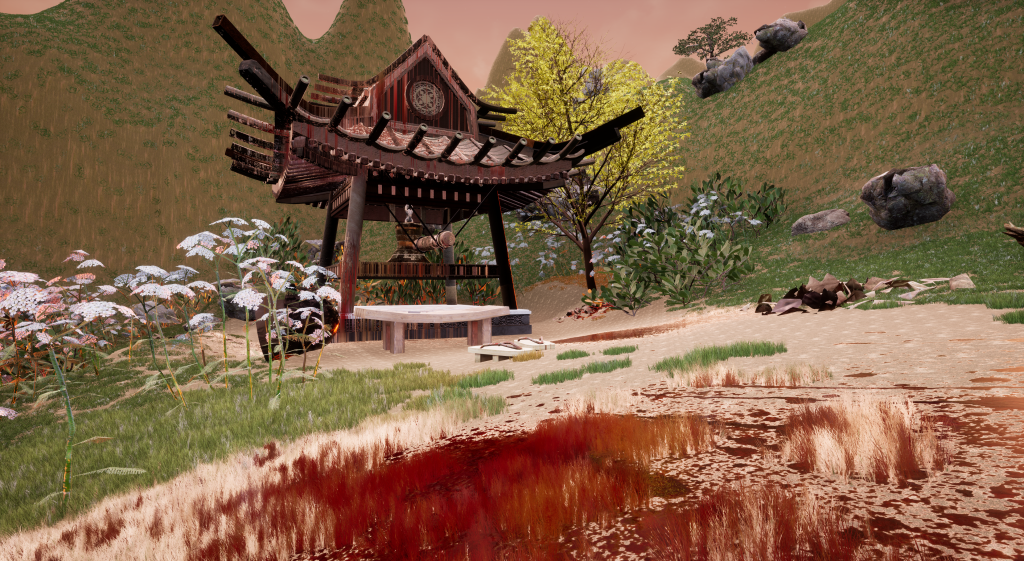
In the second area, the true horror starts to appear, the blood and violence become more apparent with more debris and blood splatters surrounding the areas. I had some empty spaces such as near the bell tower and some flora around to give the player some breathing space. However, the aftermath becomes more apparent with the helmets lying near the pools of blood.
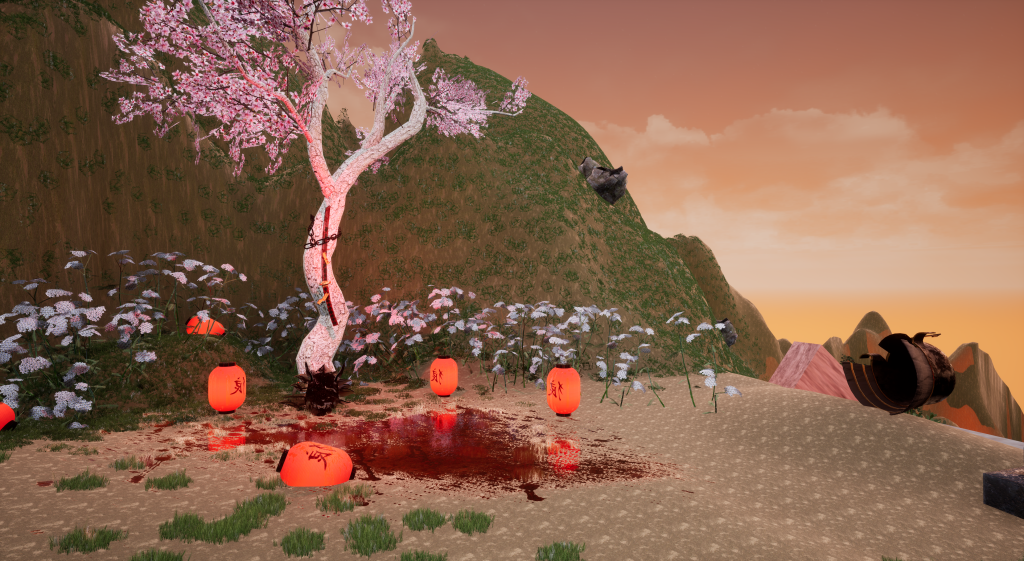
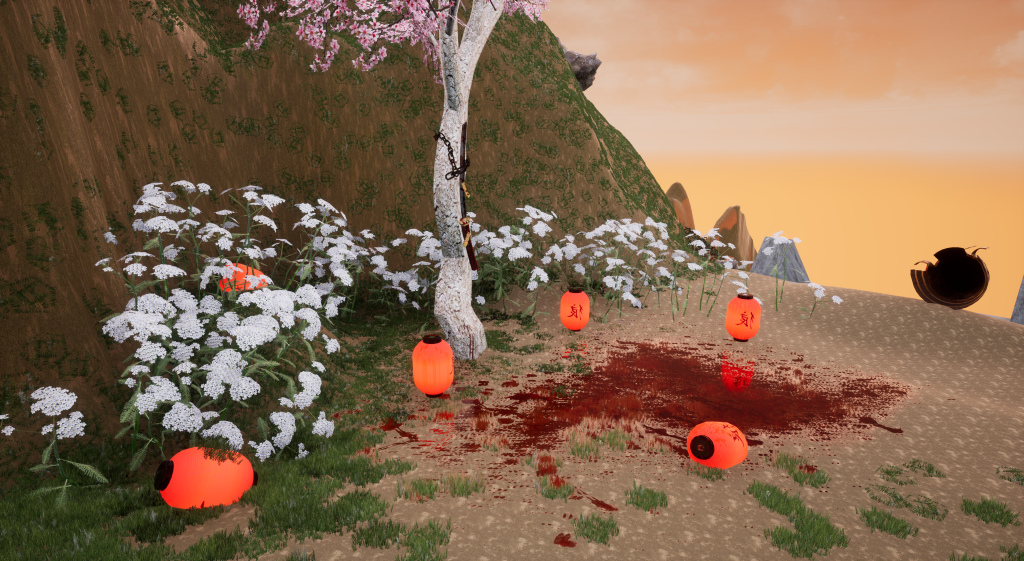
In the third area, nearby the blacksmiths, the katana is chained tightly against a sakura tree. Underneath is an Oni mask and surrounding the tree are different lanterns that have fallen down into the pools of blood, emitting a red glow. The small area is meant to give the player a claustrophobic feel whilst the harsh lighting is meant to intimidate them. The placement of these assets are also meant to suggest a ritual in sealing one of the demons, therefore the seals attatched to the katana and the chains.
The final area is the empty space for the blacksmith’s building. I gave the team a large area to work and experiment, adding another a well asset as a contribution to their work.
Before showing my final renders of my models, I need to talk about the process I went through in order to create these render shots.
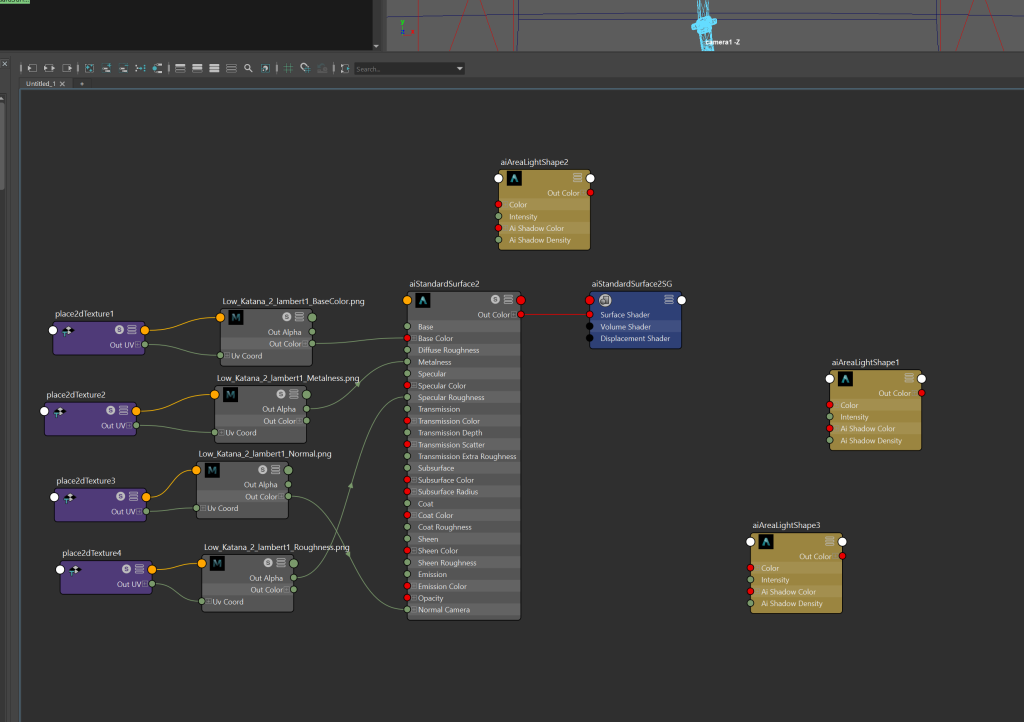
To start off with, I imported the model from substance painter as a .fbx file into Maya. Then I exported the textures with the optimized settings for the Arnold render, keeping them in a seperate folder.
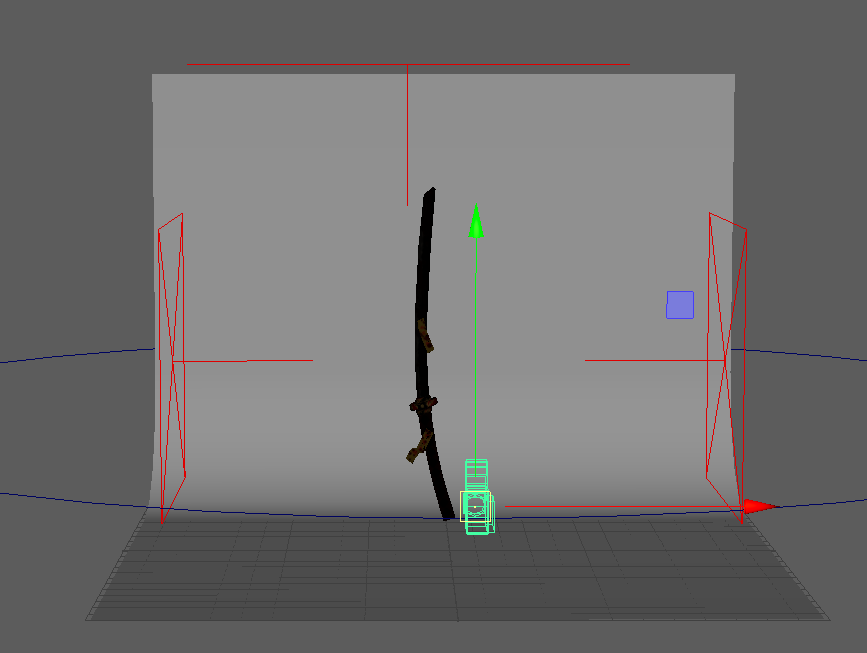
After, placing the model in Maya, I set up the rendering window and started adding in 3 stage lights and increased the intensity of the lights. This way, the reflection of the metal can be seen more clearly during the rendering. Before, there were issues regarding the lighting, since I used dark colours for my textures, the lighting needed to be more intense in order for the textures to be properly registered on the model.
Next I added in the textures for the model, this was done through Arnold’s hypershade editor.
I added a camera in to the scene as well as a NURB sphere, this was to set up the rotational angle for the video, merging them together and then using the keyframe technique, I went up to 480 frames per second and started the render using viper.
Setting up the model for arnold was the most difficult area to work on, I was mainly quite anxious about ecountering errors from rendering but luckily with the help of my peers, I managed to understand how to do basic rendering for Maya.
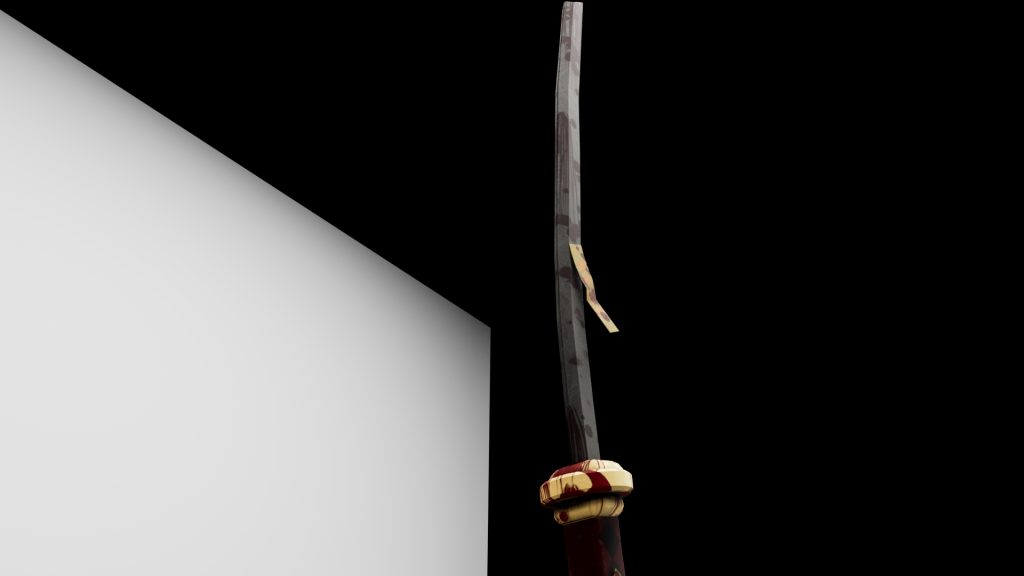
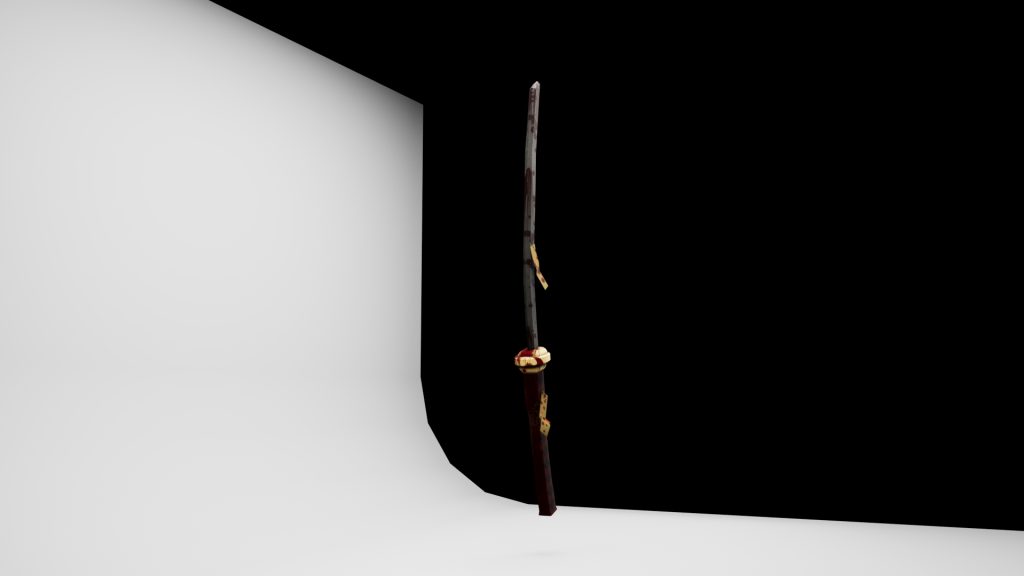
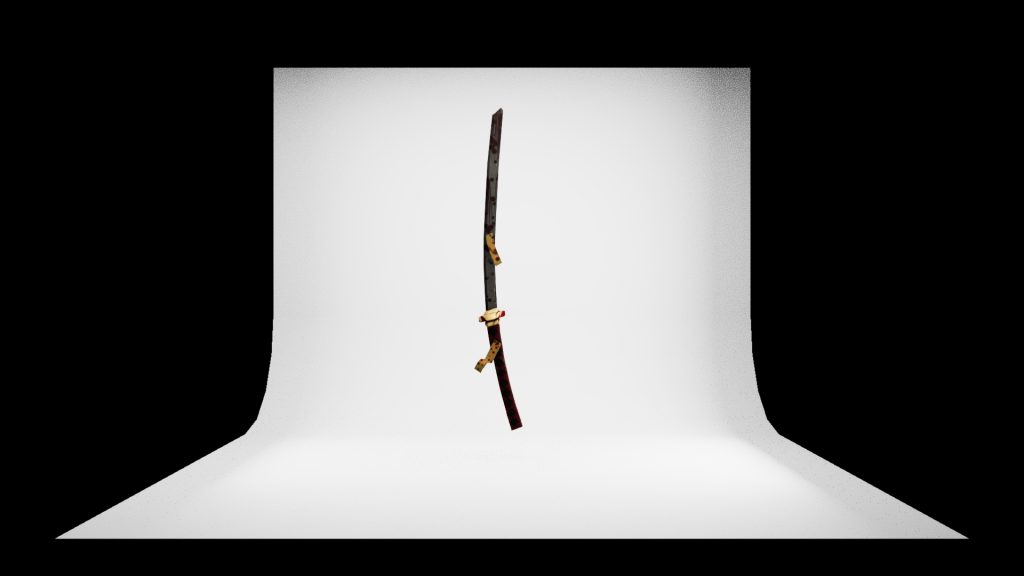
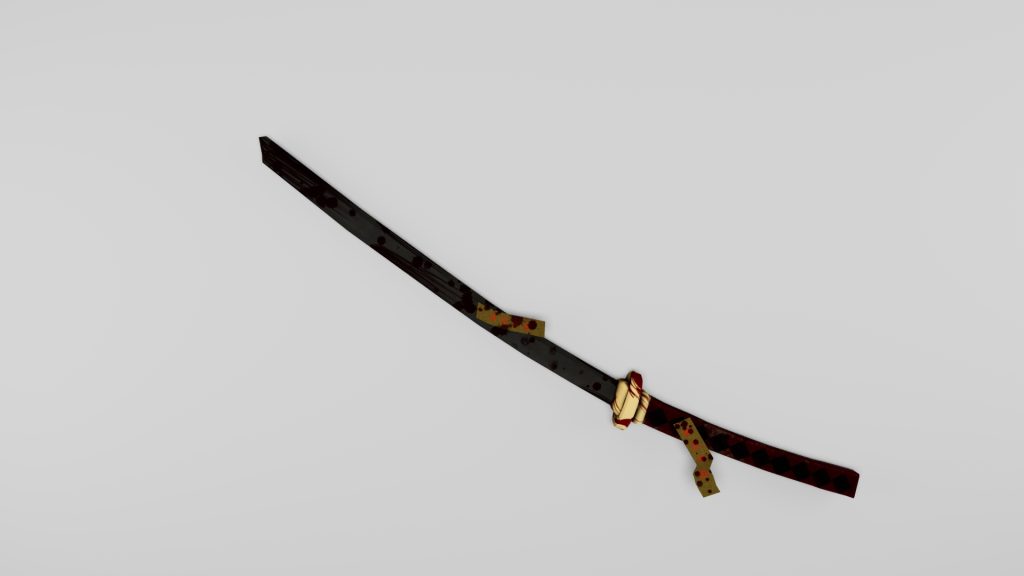
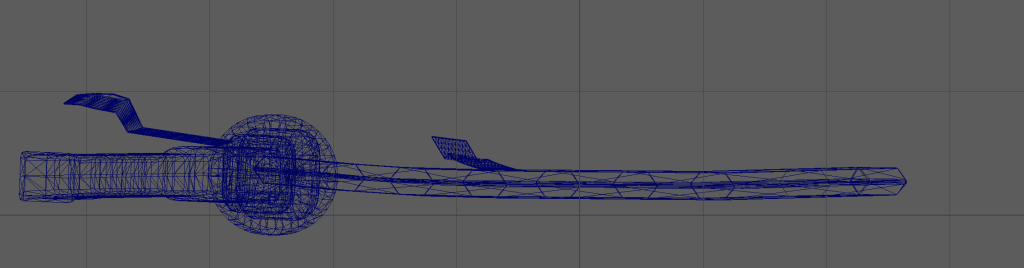
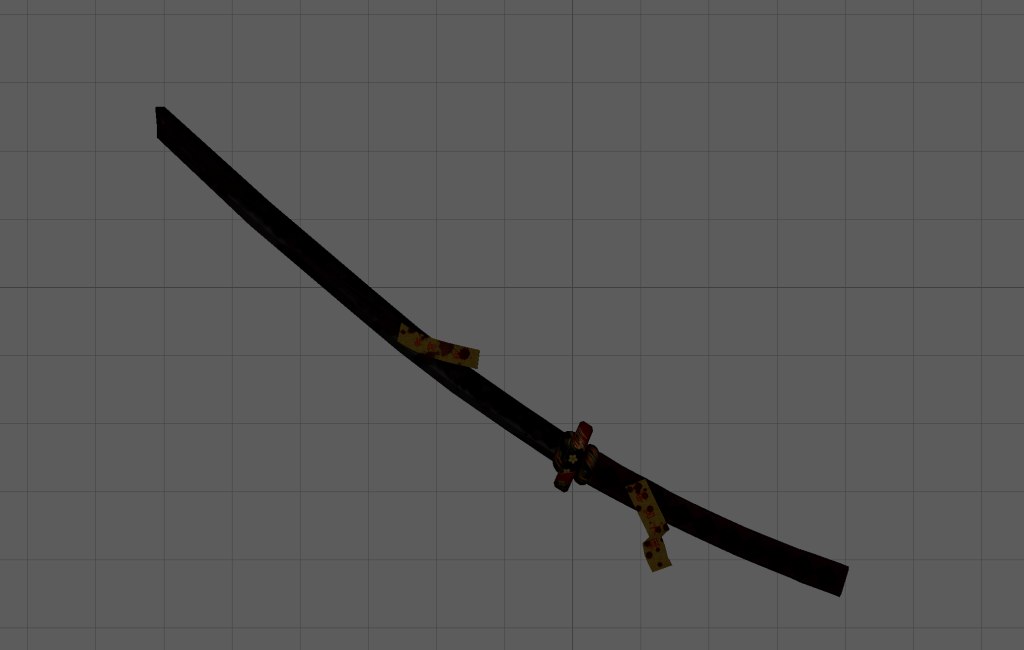
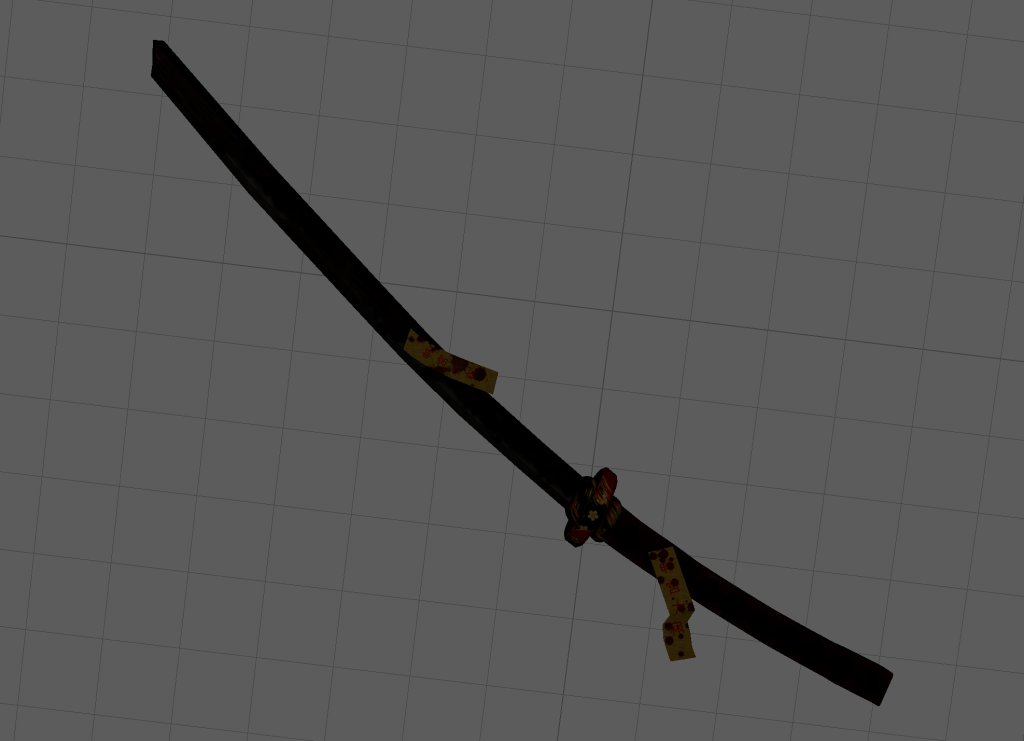
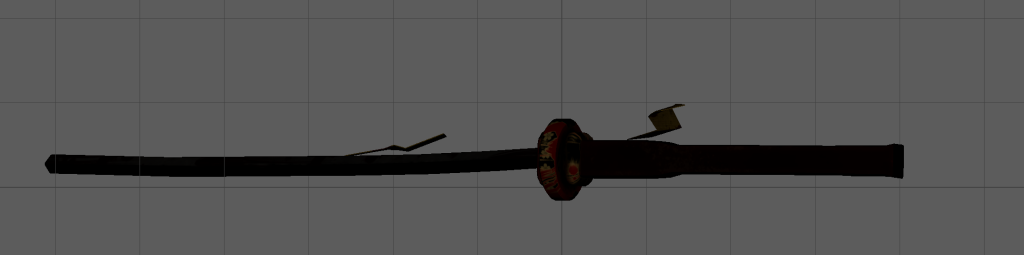
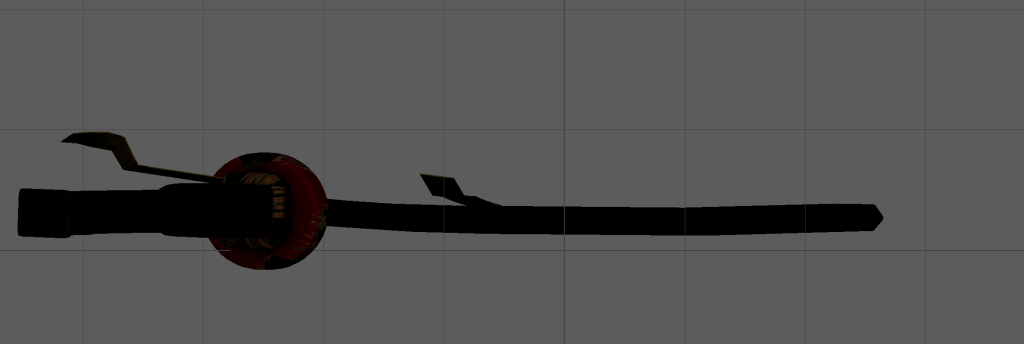
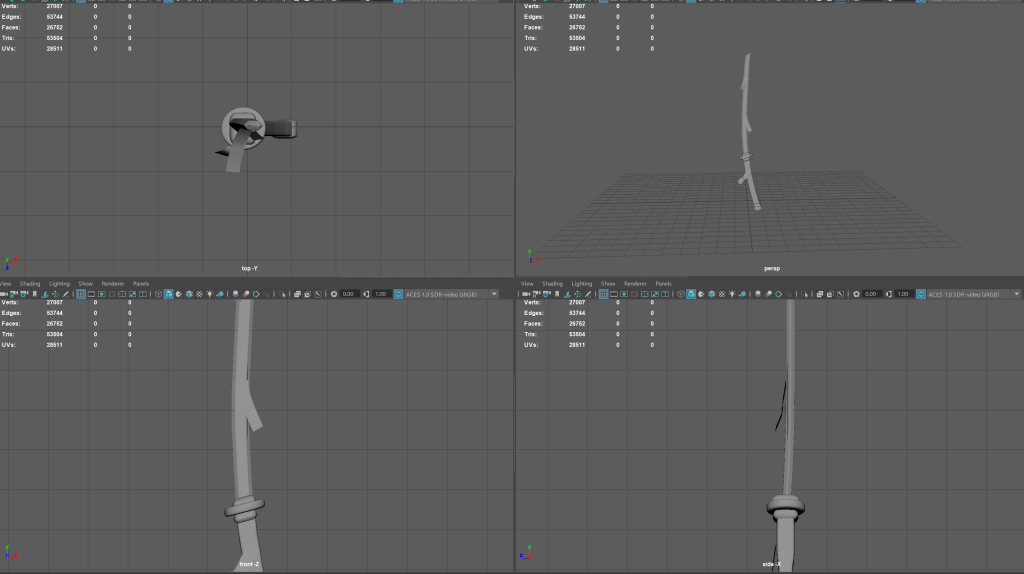
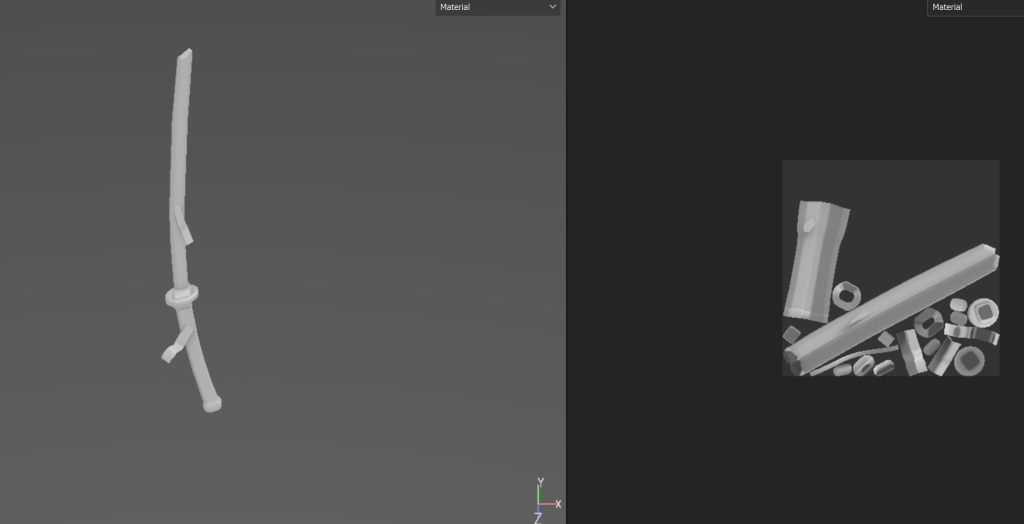
This was my original 360 render of the model as a whole:
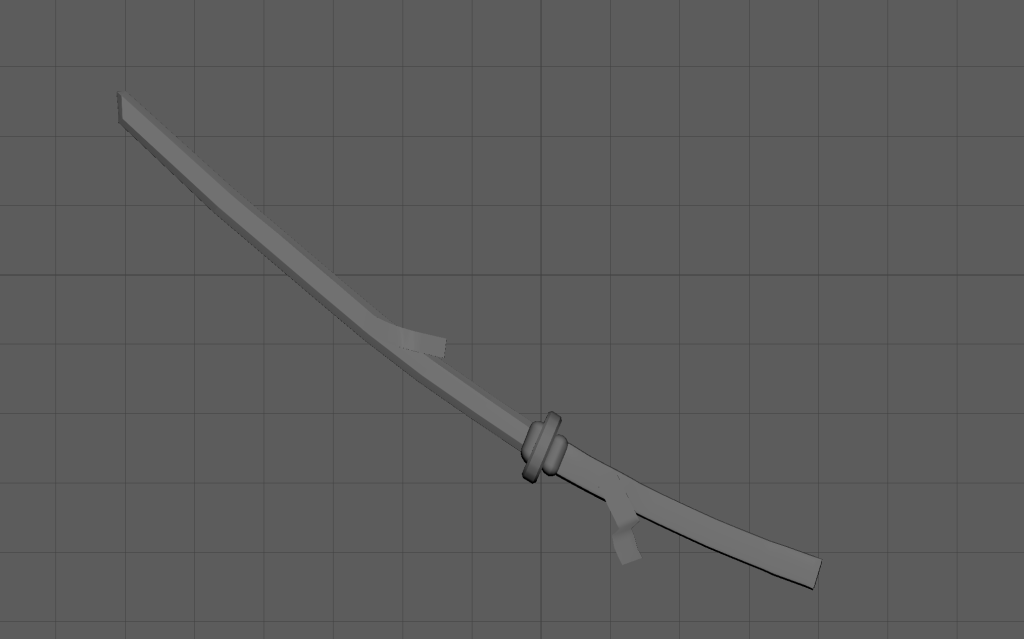
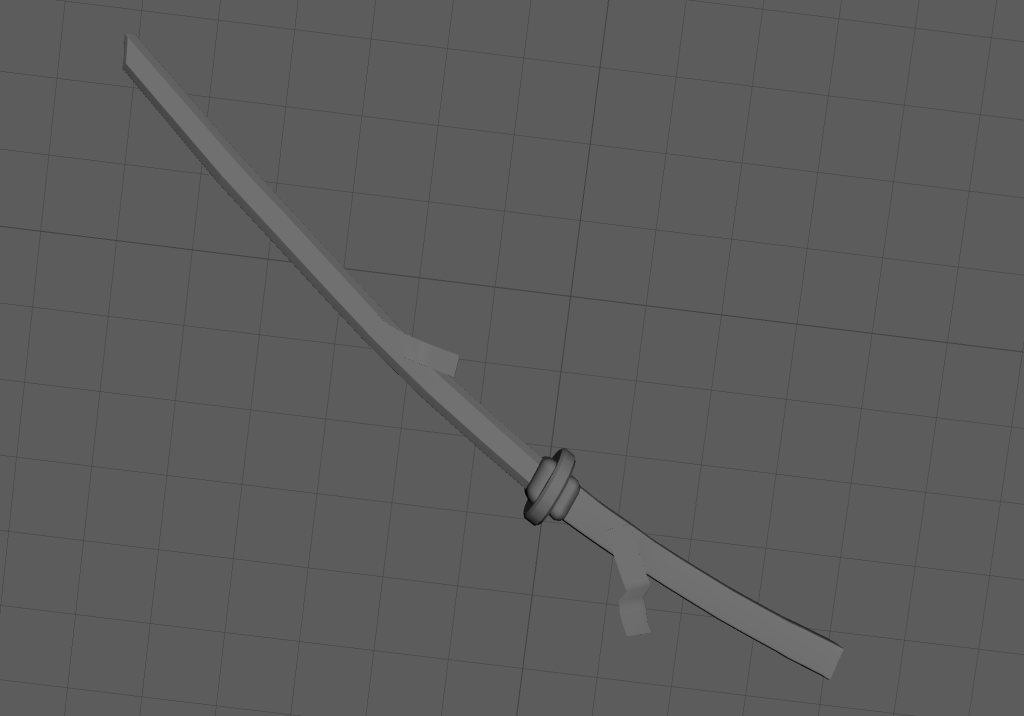
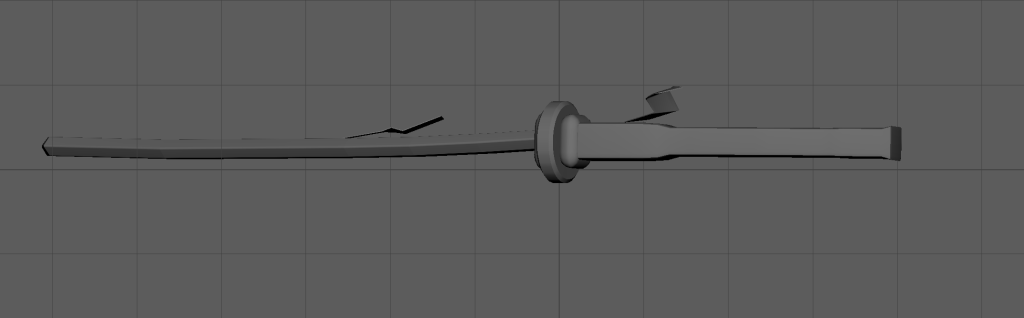
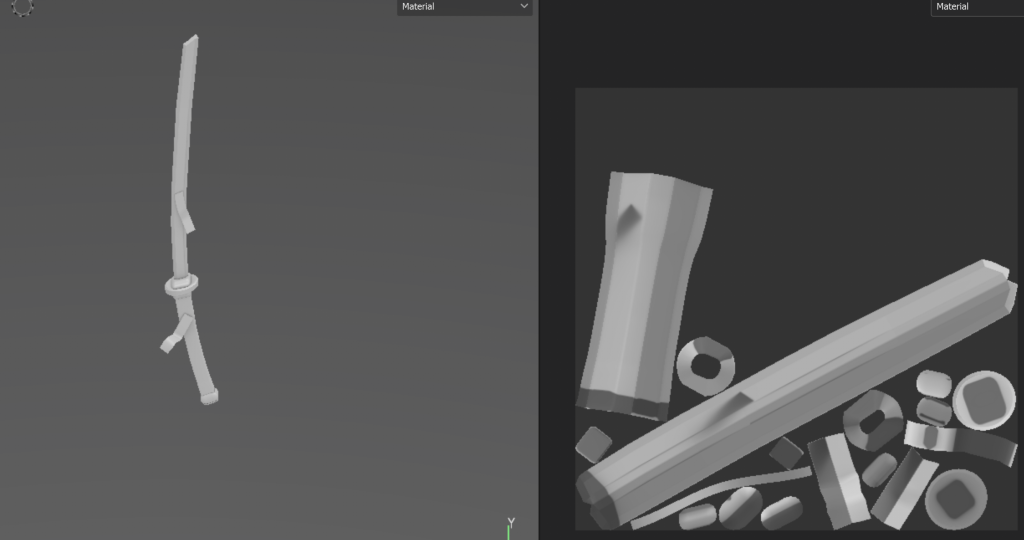
and these are screenshots of the model:
In this screenshot, I was messing around with the lighting colours but it doesn’t show much in terms of details.
Unlit Screenshots:
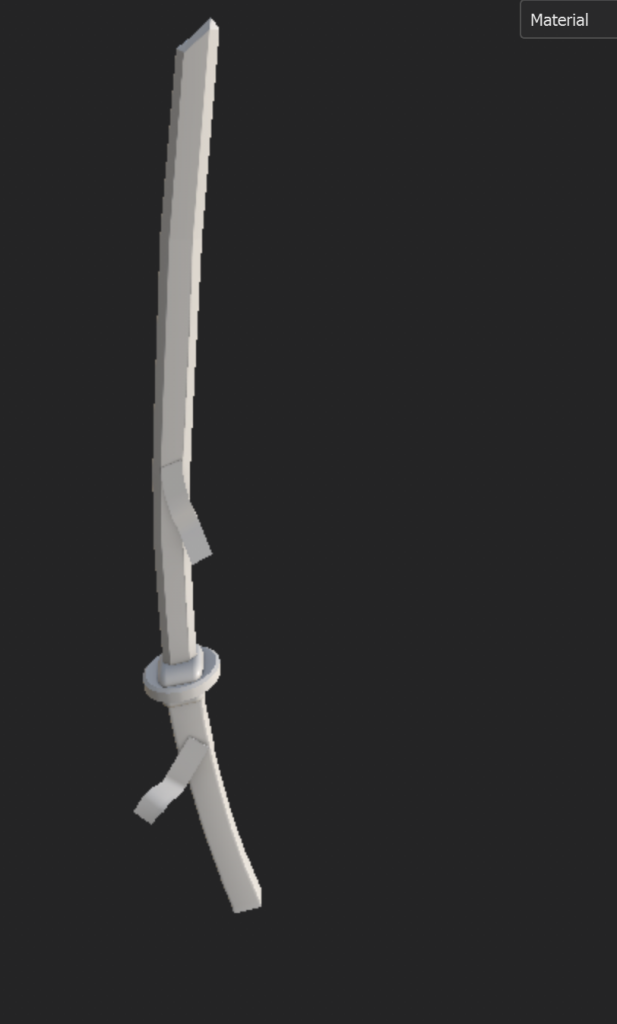
And here are some of the screenshots of the asset in the unreal environment. As mentioned before, I’ve had issues with adding the textures onto my model in unreal engine so I am relieved to say that the Maya version of the render has given the opportunity to show the model in it’s complete stages:
Reflection
When working with Maya, I found it quite difficult to understand the main interface and how I would be able to create the Katana model let alone the stands (shown in alternative designs) or the miscellaneous objects surrounding the weapon. However, this project has gave me much more confidence to create more complex models in the future.
Ontop of this, I was exceptionally pleased with the outcome of the Arnold render as the process included experimenting with the lighting that Maya provided. However, I noticed in the render shots that the indents on the katana don’t show up very well despite added in the correct textures. I hope that the screenshots presented in the texturing section will show the extent the model has in terms of the damages the sword received as well as the detail around the katana as experimenting with substance painter was one of the most interesting experiences in this project.
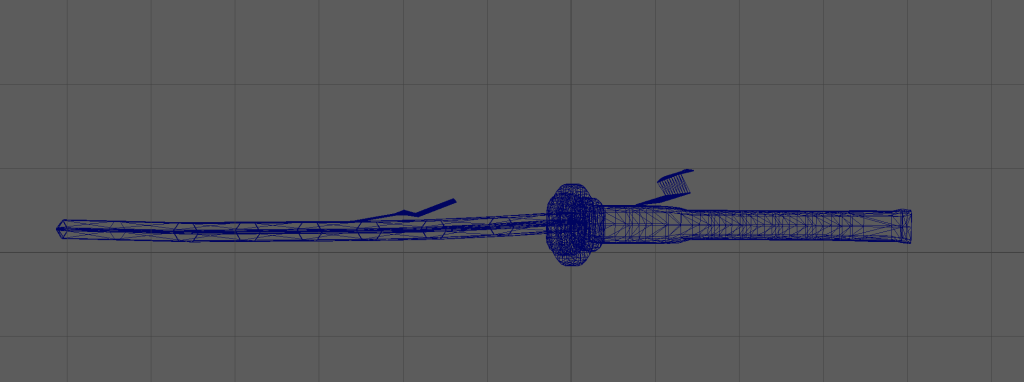
As someone who’s inexperienced with Maya, I decided to first start off with adding basic meshes to understand the model’s structure so I used the cube meshes.
Once I added them, I used the bevel tool to shape out the handle and the guard. For the blades shape, I used the vertex and edge tools so extrude the blades tip to make it sharp.
Originally in my first design, I included small fire orbs alongside the katana so in this image, I tried to model the shape of the orb. Although I was told through peer feedback that adding particle effects such as fire isn’t part of Maya’s software. So instead I decided to focus on just modelling the katana itself.
At this point, I was still trying to learn Maya’s interface, however I experimented with the scale and rotation tools to start off with to get a understanding on the different perspectives I’d have to work with. This also included the orthographic view which proved to be incredibly helpful when adding the talisman’s to the katana as well as adjusting the blade to the handle.
For the katana’s overall shape, I used the soft selection tool and rotated the blade and the handle around until the model was bending to the side. For this, I used a image reference to perfectly capture the angle for the katana.
Version 1 of Low Poly Model – In this image I was experimenting modelling a fire orb using Maya’s modelling and vertex tools. ( shown in original concept art 1)
Next, I added the paper talismans using the plane mesh, originally I didn’t extrude these shapes. However, during the model cleanup, I recieved peer feedback to extrude the plane meshes width so substance painter would be able to bake the paper a lot more easily.
For the handle, I was given verbal feedback regarding the anatomy of the mesh. According to the anatomy of the katana, the handle was too short in the model and too thick and the upper-half of the handle would be more thick as it accomposes the blade inside of it. So I adjusted the blade’s handle using the soft select tool and the face adjustment tools.
Added Paper talismans onto the model using the plane tool and extruding it later as feedback from my peers suggested.
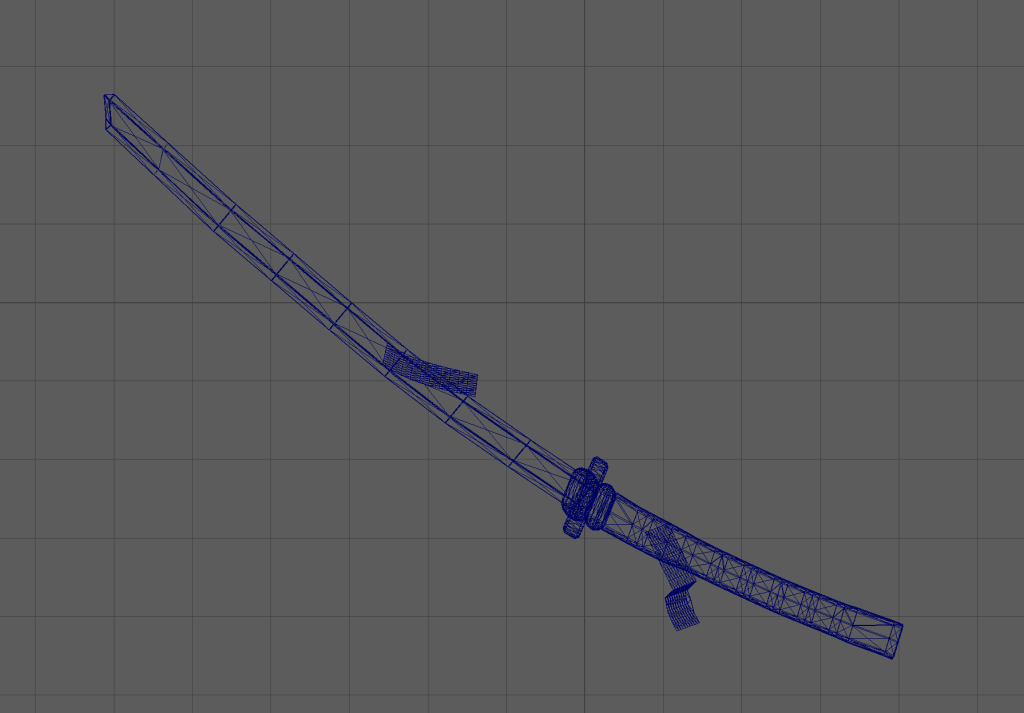
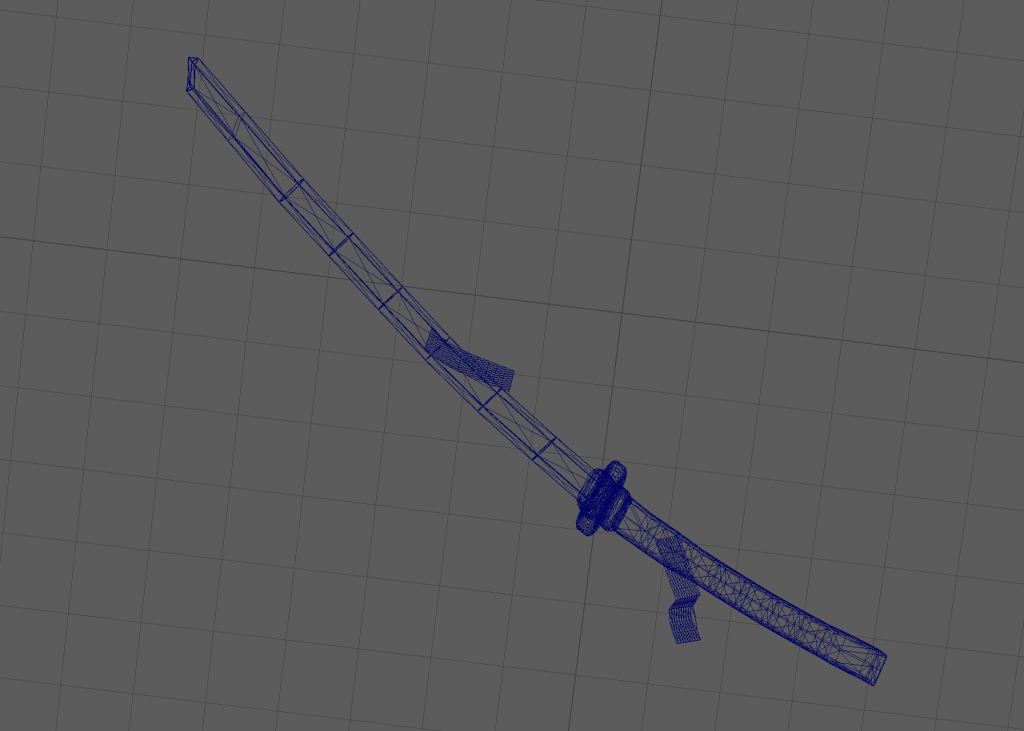
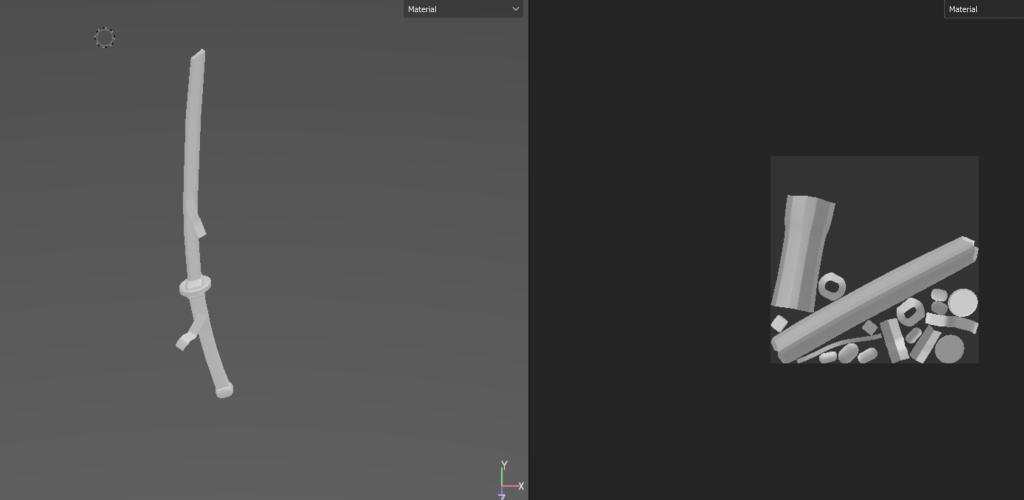
After creating the low poly model of the katana, I need to unwrap my UV maps, so I deleted the original maps and started working on creating different maps of the parts of the katana based on the camera’s view and unwrapping each part by using the cutting tool to separate the different areas.
Afterwards, I used the UV chequered maps to check if there were going to be issues with the texture stretching and luckily there were no issues.
My UV Map Checkered test – Texture mapping test passed – no issues with UV unwrapping
Afterwards I created a low poly and high poly version of the model in an fbx format and sent the low poly model to substance painter. Admittedly it took me a few tries to get the model through substance painter, although I solved this issue by enabling smoothing groups in the export options.
unbaked low poly model in Substance Painter
However, when I baked the higher poly model with the low poly model, there were some issues regarding the bake. This was mainly due to how substance painter baked the paper for the talismans.
Used High Poly mesh and it didnt work because the UV wasn’t rendering the paper properly
So instead, I used the low poly mesh as the high poly mesh in the baking options and it came out with a much better result as the paper was practically stuck to it’s low poly counterpart. This, however, meant the sacrifice of the high poly model and so less polygons. But this was the better option to bake an angled model.
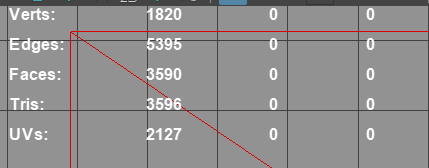
Used the low poly mesh as a high poly mesh for Substance painter to work (Used Low poly model as High poly mesh because the previous HP – LP bake did not work well to bake the paper talismans)Baked Model in Substance Painter This shows the polygon count after the bake
Texturing
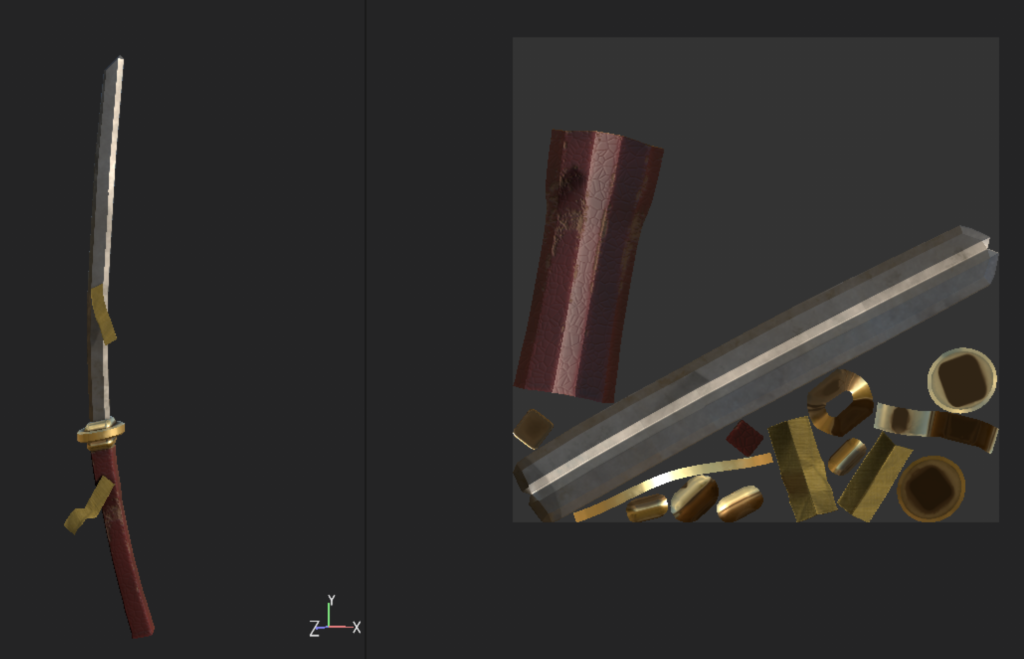
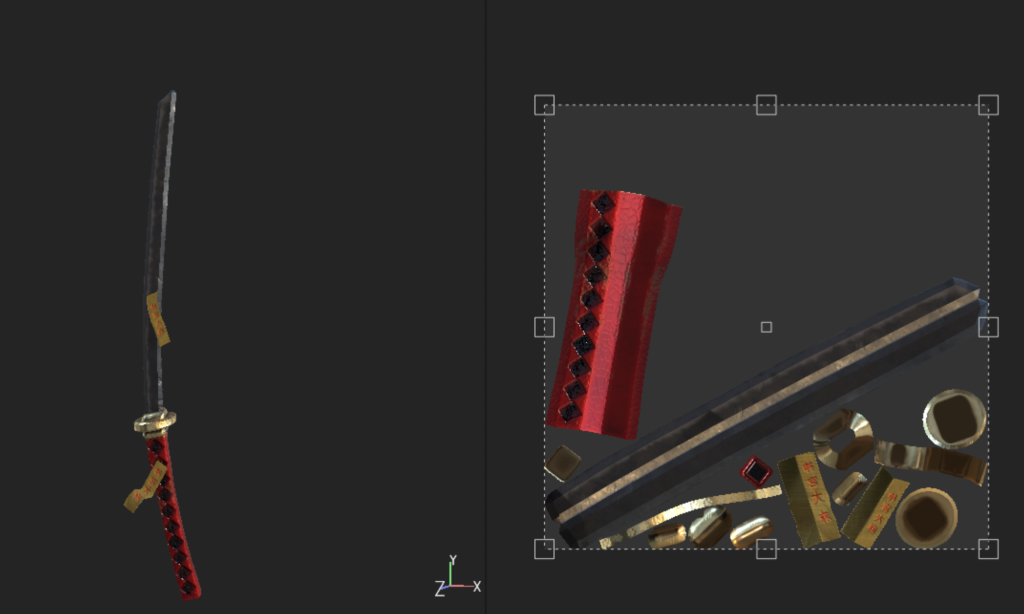
I then started texturing the katana based on my original concept art, however, I changed the colour scheme for certain areas. I used the preset materials for the texturing: for instance the damaged leatherette for the handle, the fabric for the paper’s texture and the titanium steel for the handle as well as gold for the blade collar and guard.
First Version of textured model (without alphas)
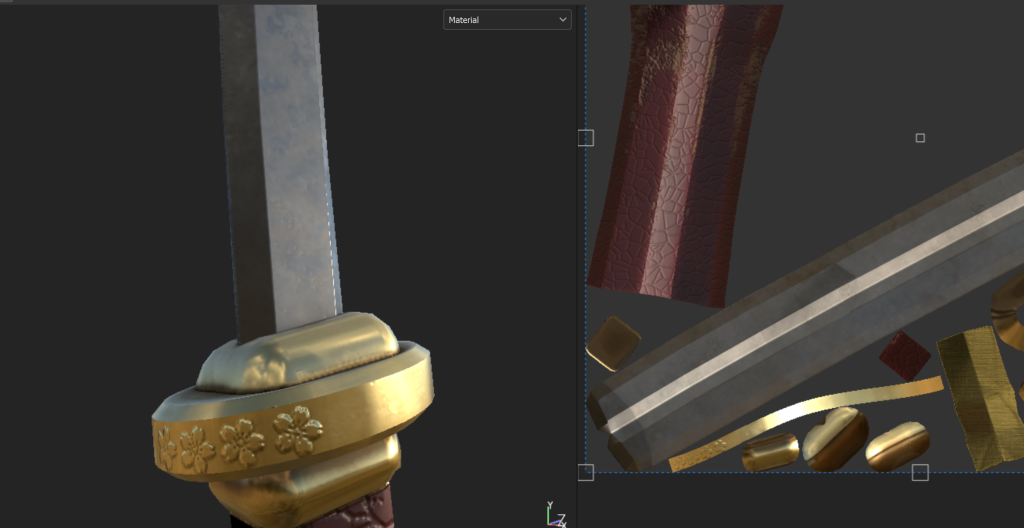
Next, I added alpha’s to the sword’s guard and later on to different areas of the blade. At this point I was just experimenting how to add them to the UV.
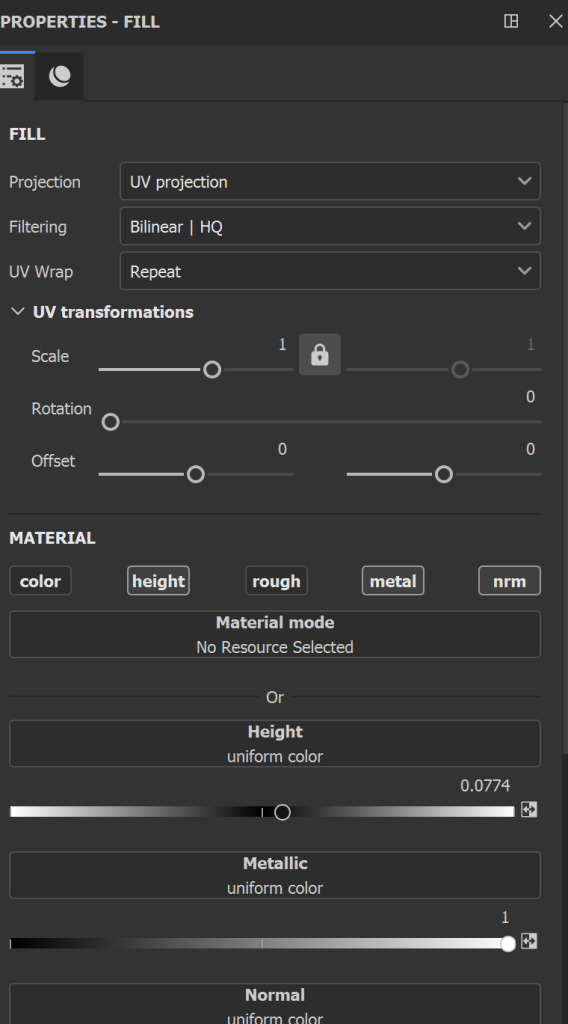
experimenting with the alphasExperimenting with the height and metallic settings of the Sakura Blossoms Alpha, eventually being able to simulate the alpha’s being apart of the engravings of the guard.
I added more dirt alphas to the blade as well as scratches to the blade and the guard to add the wear-and-tear element. From a narrative perspective, I added this element to indicate an unknown being using the sword as the marks are something that a human wouldn’t be able to create easily.
At this point, I was also messing around with the general parameters of the different materials in substance painter.
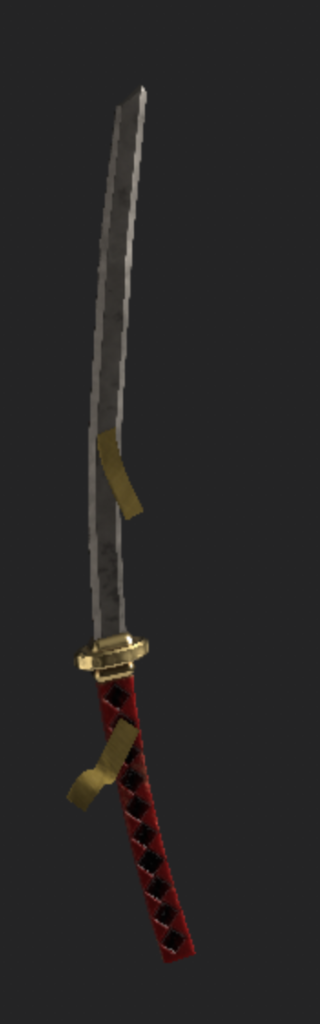
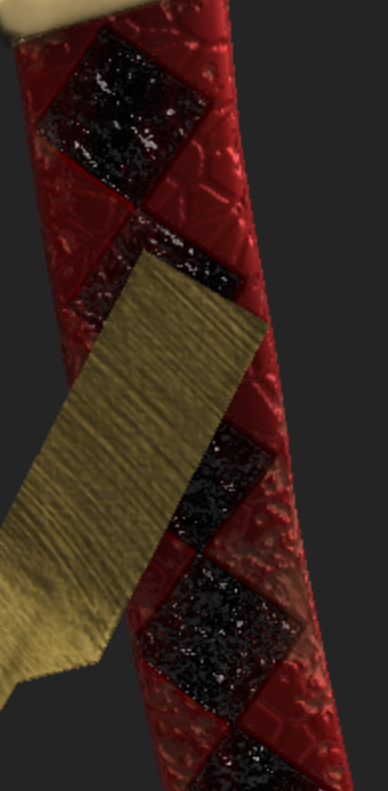
messed around with the colours and the parameters to see if I could create a more vibrant look to the katana Also added diamond alphas to the handle.
I also added a bamboo effect to the diamond alphas which gave the handle a more grainy effect. It makes the indents in the handle stand out a lot more.
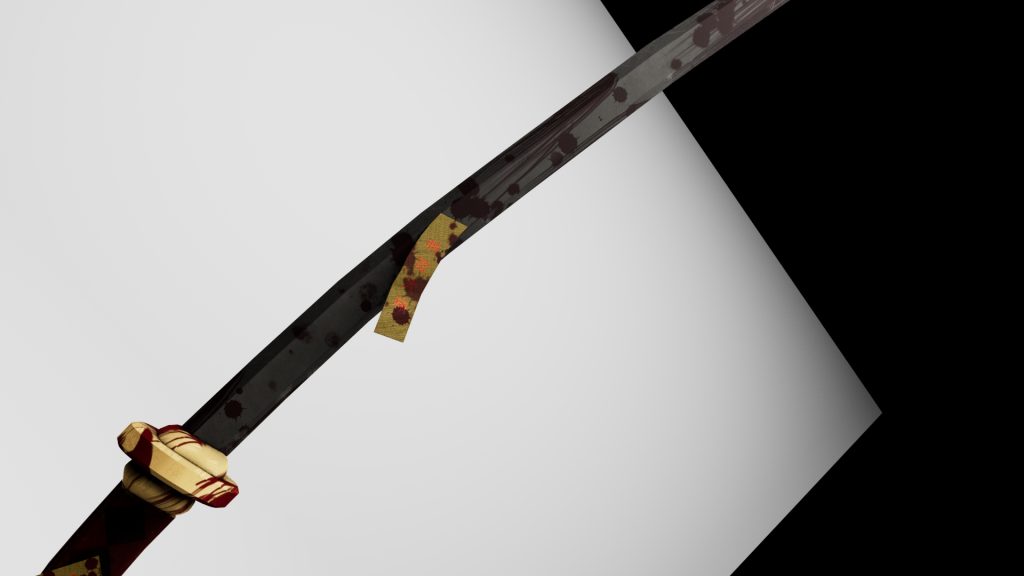
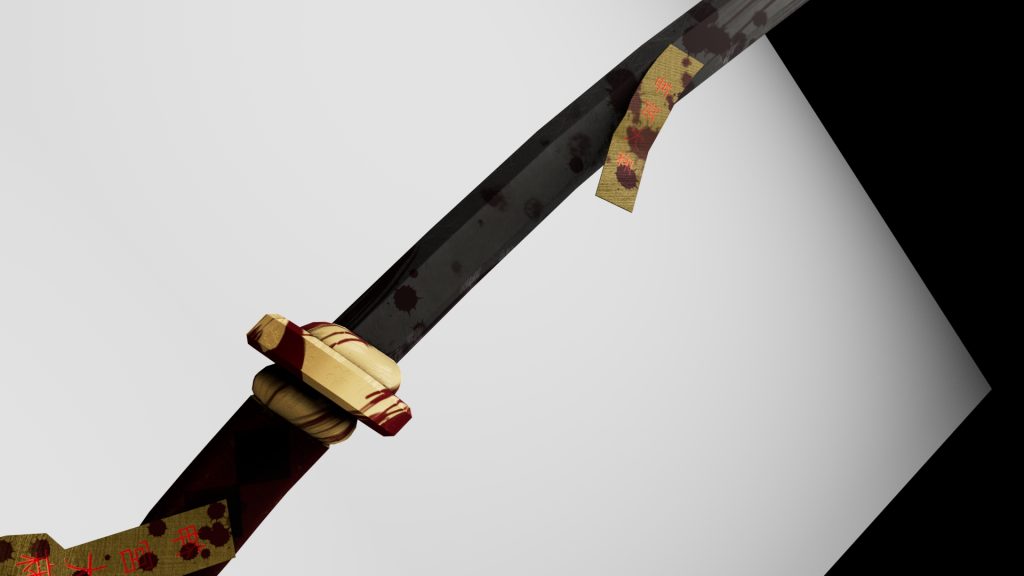
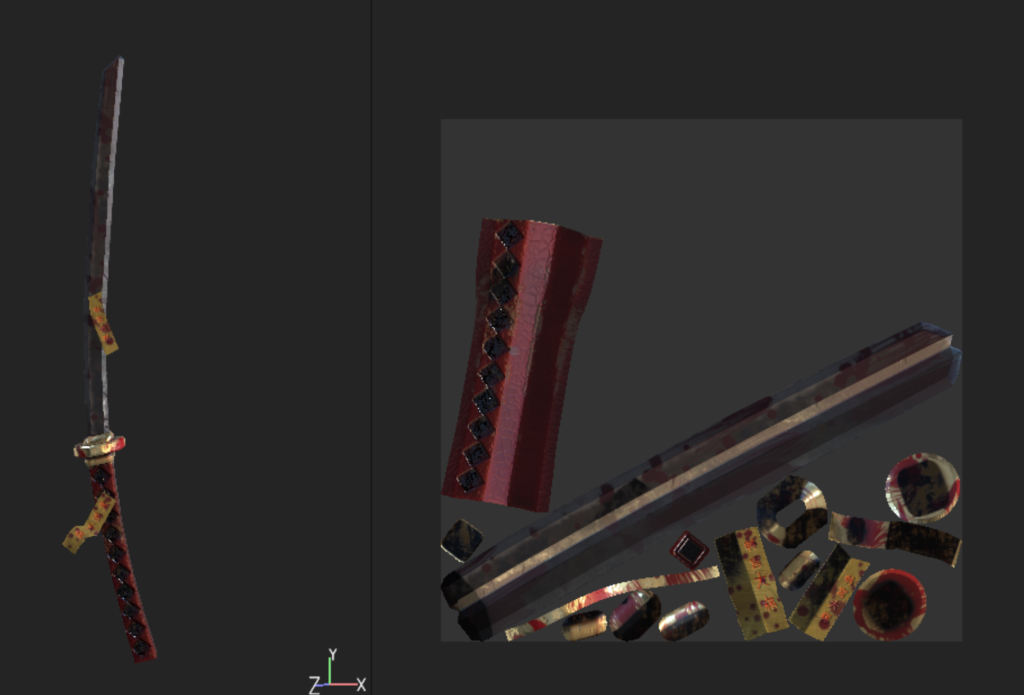
This is the area where I added more details to the blade as mentioned previously. I added finer details such as scratches and claw marks around the guard and the blade. Then I added Japanese text which were also made using alphas to the talismans ( Jingū Taima – Japanese purification wands).
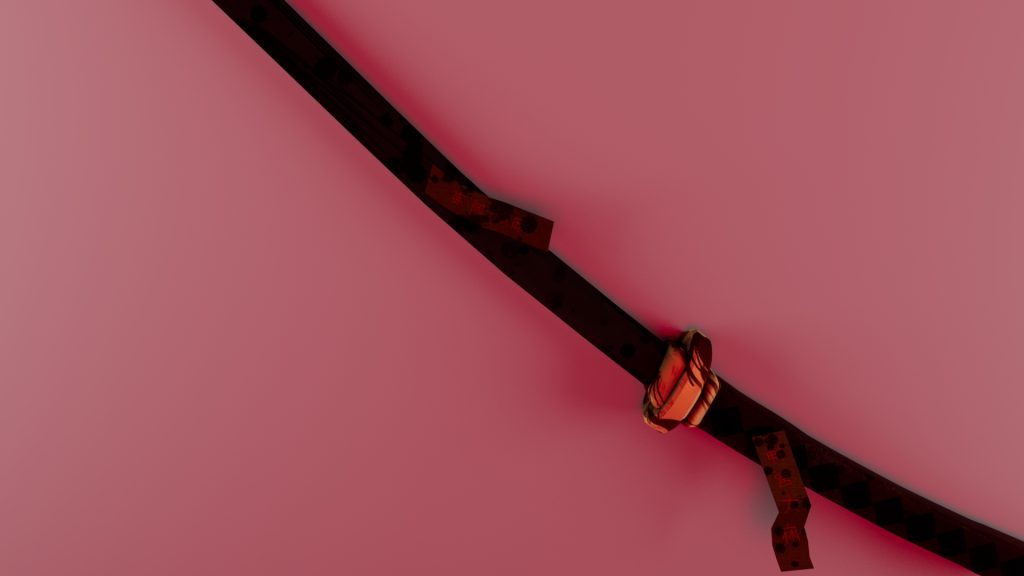
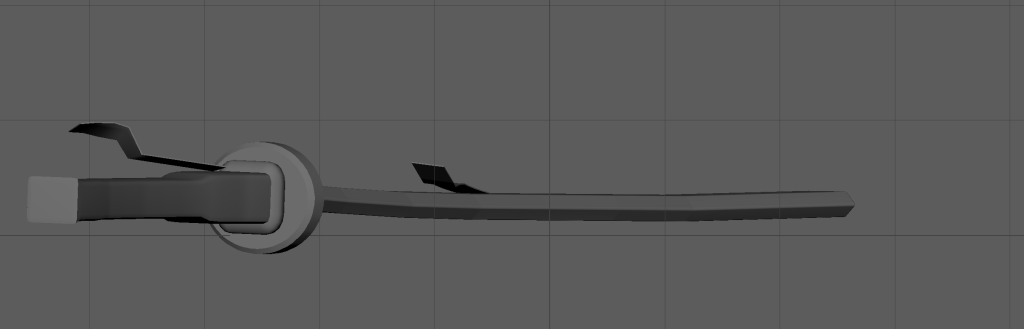
As a final touchup for the model, I added blood to the model to make the katana a lot more sinister. I was also experimenting with gradients and opacity. I placed the blood textures settings as an overlay which makes the blood blend in a lot more with the blade. As a final change, I changed the handle’s base colour.
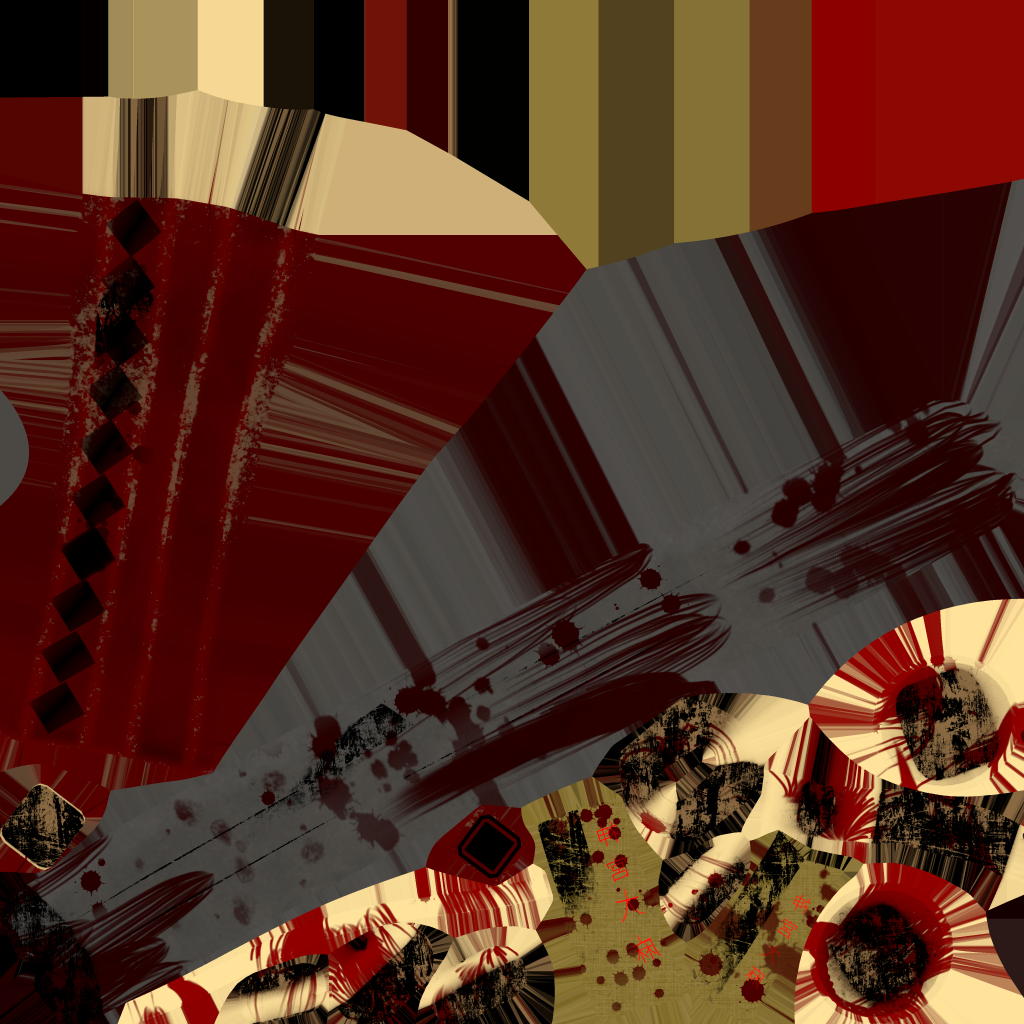
These are the 4K texture Maps that I’ve used for the final render of the Katana. In my environment design, they were some issues where Unreal wouldn’t be able to register the blood textures properly since they were created using a gradient. However, there was no issues with this in Maya:
For my 3D asset design hero piece, I wanted to focus on Feudal Japan weaponary as it would relate to both the blacksmith and Japan themes. My research mainly consisted of collecting different images of weaponary that were part of the time period, mainly different blades, shuriken’s, longbows and poles. I compiled them into a moodboard shown here:
After carrying out my research, I saw a concise pattern that a lot of Feudal Japan weapons they usually use are blades so for my project I wanted to create a katana so I started by working on concept sketches for the sword, using the moodboard as inspiration and also references.
As a quick reminder, the narrative behind the environment design goes as follows:
In our timeframe set in the story, the blacksmith’s has recently been ravaged after an large scale Oni attack, Oni’s are evil spirits that are mainly surrounded in Japanese folklore and they usually come in the form of demons or orcs. This narrative is also meant to show the destruction and remnants of someone’s generational acheivements. This katana is part of the tragic story of the blacksmith’s work turning into a work of malice and horror.
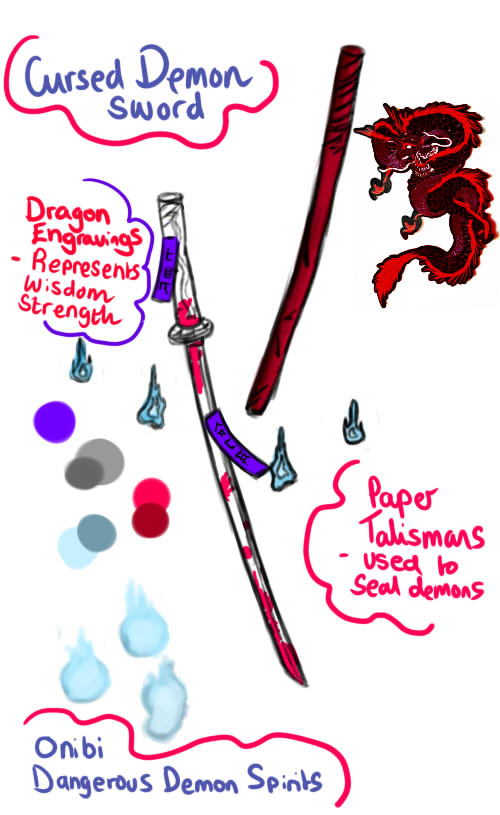
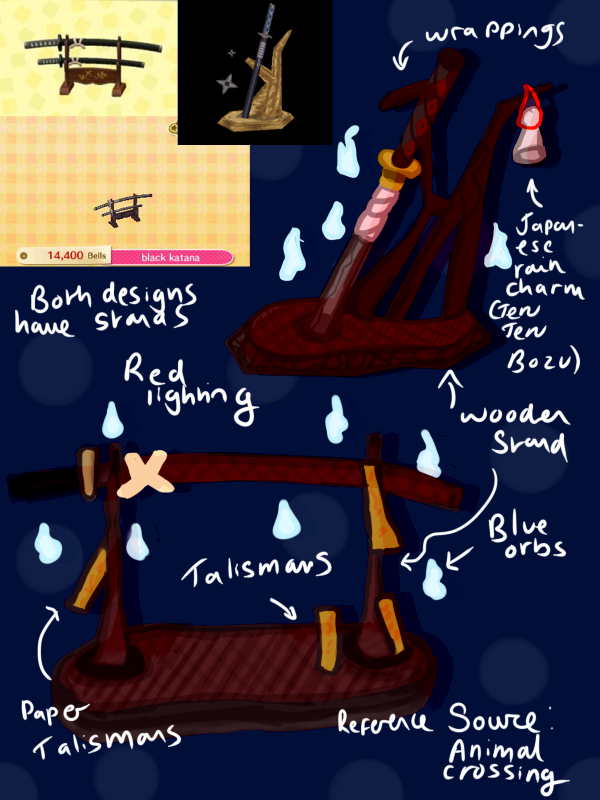
This was my initial design for the katana – I wanted to add different supernatural and horror elements to the design in order to for the sword to be implemented into the Environment Design’s narrative and to also visually tell a story about the hero prop. In the original design, I had a case for the katana. However, I decided against making it as I didn’t have a solid idea on how I would implement it along with the katana without covering the blade itself.
The blue orbs surrounding the katana were just additonal visuals that would make it more clearer that the weapon was cursed but instead I decided to add paper talismans to make it more of a subtle nod to the concept of possession. These are alternate designs I created before deciding on a final reference piece.
At that time, I was still trying to figure out how to implement my katana into my environment so I designed stands that I would model along with the katana. These designs were inspired from games that focused on having the katana as a household item, I chose these because at the time I wanted the katana to be inside the blacksmith’s building or at least a large display piece, possibly advertising the blacksmith’s works.
These katana’s designs were heavily inspired by funiture pieces in Animal Crossing since they are game-ready objects and they also provided an idea on how to possibly present my weapon in a display.
However, At the time, I had very little modelling experience with Maya or Substance Painter so as soon as I started modelling the katana itself I knew making the stands would also be ambitious to carry out. Ontop of this, I had decided to work on the outside area of my environment so I wanted to dedicate my own area to the katana. Ontop of this, my group had decided to work on different areas of the interior so since the building is quite small, there wouldn’t be much place to have the katana be it’s own centre focus so I took away the stand.
I wanted to give the impression that the katana was an threatening item so I wanted to add a sense of foreboding danger to the asset by adding paper talismans and blood to the model itself so I kept parts of the original design.
The katana is also meant to also hold a large significance to the visual story as in the environment, it’s meant to be out of place with the rest of the items. It’s shown visually that the weapon caused part of the destruction by the way it’s presented in the design.
In my final design, I also removed the dragon texture and instead added the wrappings around the handle to make the katana more historically accurate.
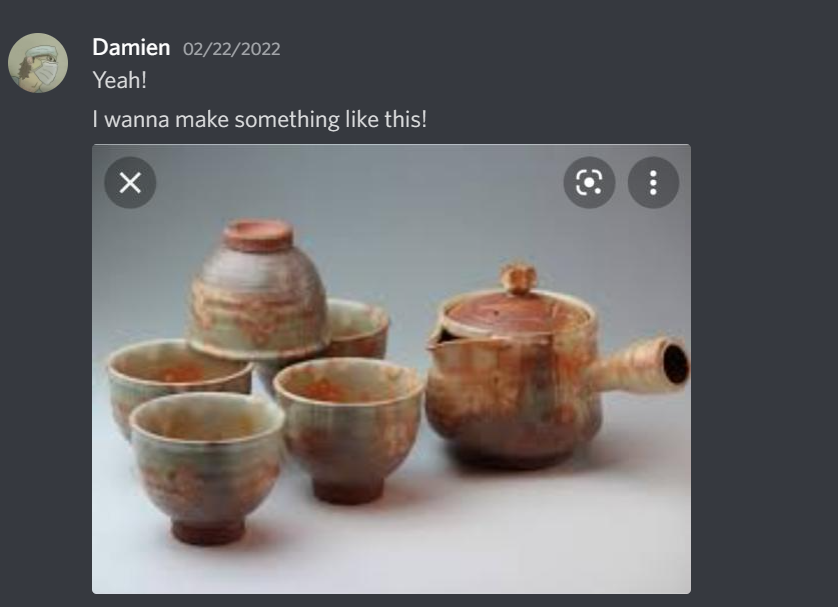
My environment design team are creating similar items however within different contexts, some being weapons that were forged in the blacksmith that would be presented inside the building and another member is creating an heirloom tea set that was damaged in the turmoil of the environment.
The correlations with each other assets is that these are meant the represent the blacksmiths valuables, with the high detail in our assets, it’s meant to show that they used to take pride in their work even taking care of something as fragile as a tea set, something that’s usually vulnerable in a blacksmith environment. However, the katana, being their most prized and dangerous project ironically took his life along with the lives he sworn to protect.
For environmental design, we were given a group assignment that mainly focuses around creating different spaces in an isolated environment. For this task, we were given the main theme “blacksmiths” and so decided to go for the sub-theme “Fedual Japan”.
As an individual, I’ve always been interested in the visual aesthetics and the cultural and historical meanings behind Japanese folklore, more specifically on demons (most commonly called “Oni” – a type of “Yokai” which is a class supernatural entities and spirits in Japan) and the various techniques used to exorcise them. This inspiration would also play a large role for my Hero asset in 3D asset design.
So we decided on a visual narrative for our Environment which goes as follows:
“we’re planning on setting up our blacksmiths in the aftermath of an demon invasion, The blacksmith’s area will show signs of damage and wear and tear to suggest that the residence is long gone but something was possibly left behind.”
We also decided not to produce an incredibly gory set piece however there will be signs of a struggle throughout the environment for narrative purposes (blood splatters and smashed items etc.).
For set design inspirations, I created a pinterest moodboard for all of us to contribute to: this included old Japanese building structures ( if we ever wanted to model the outside of the blacksmiths ) and different Blacksmith’s equipment as well as japanese blacksmiths and weapons that would’ve been created around the edo period.
When designing my area for the project, I originally planned to have a small plot of land to work with for the final product.
However, due to personal circumstances that affected my other team members, we decided it’d be best for me to work on a much larger scale so they’d work around the project as the main blacksmith’s building wouldn’t be done for a while. So I started working on a design I could make for the outside area. I started off with finding outside inspiration which I found from doing photography.
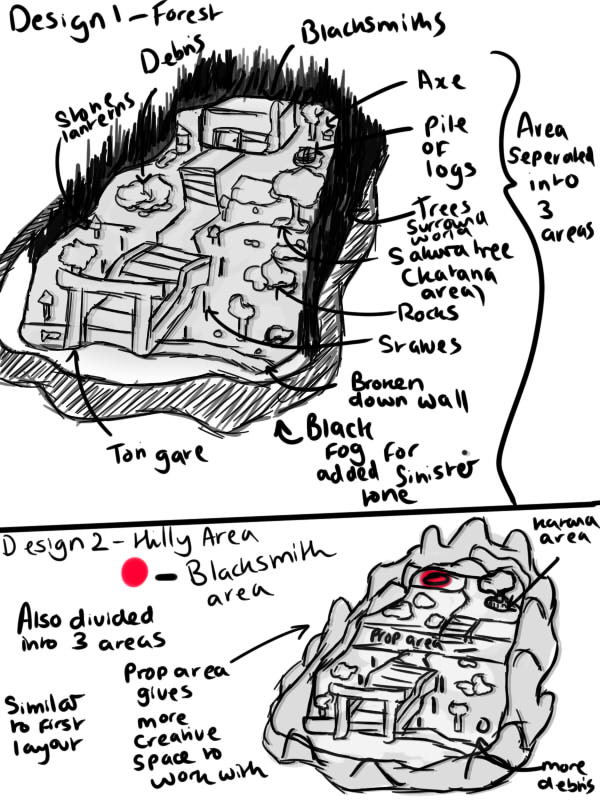
After gathering a couple of photographs, I was able to come up with two mock up designs for the area that I’d be sculpting as well as potential assets that I’d use in the scene.
These are the main two designs I created, they have a similar layout but I wanted to be able to replicate the isolation surrounding the area. The trees would have added a foreboding tone to the area but in terms of rendering, Unreal Engine would find it difficult to render lighting with large amounts of trees in the area. So instead I went for the alternate design, the hilly area which provided more flat space to work with which would make it easier to add larger structures into the scene.
I also wanted the ‘katana’ area to be a part of the travel up to the blacksmiths so I gave a more small but dedicated area to it near the blacksmith’s plot. Originally in my work, I was going to have broken down walls as part of the environment but difficulties with unreal engine prevented me from adding them. So instead, I created more debris in the surrounding area.
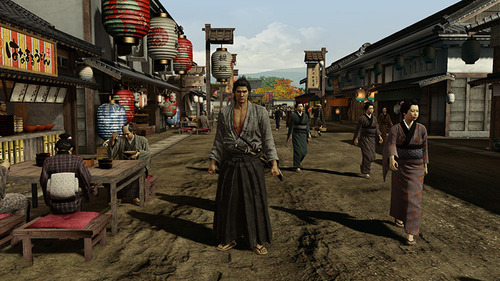
My main game inspiration for these designs comes from a game called Yakuza Ishin which is set within the Bakamatsu period, ahead of the edo period however still relevant as they still used traditional structures at that time. I would like to use some of the smaller details in the areas as well such as paper lanterns and possibly wooden signs as well as implementing wooden structures inside the blacksmith’s home.
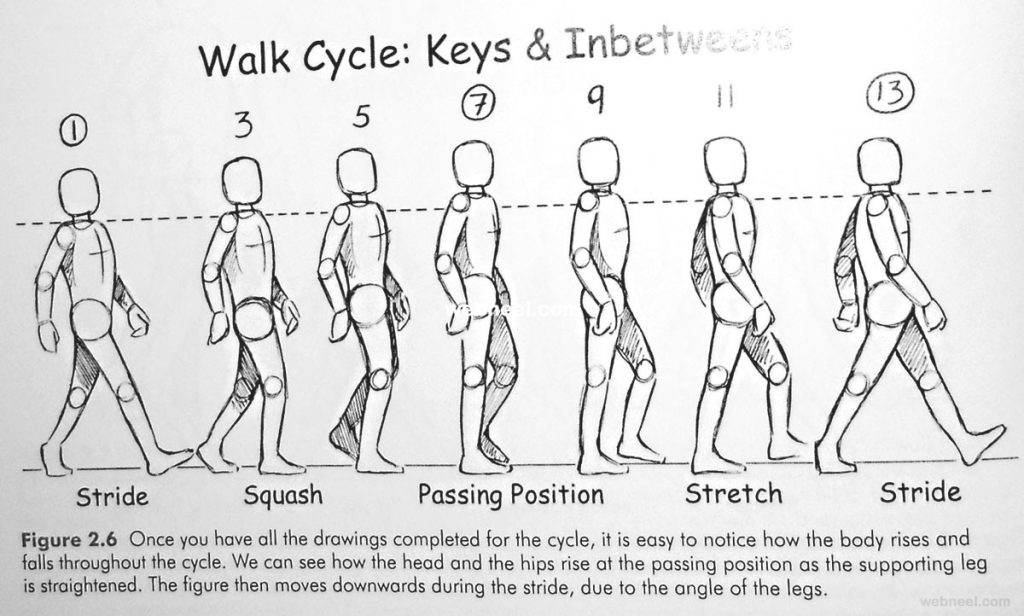
I’ve had basic animation experience before: mainly with mouth animations and basic keyframe tweening. However, I’ve dealt with movements in animation let alone walk cycles so this was a challenge for me to complete especially since I was using new software to animate with: Blender.
Since I’ve had no experience with movement animation I had to use a reference, this is where I learnt how frames work when it came to movement.
The reference taught me how to have a more dynamic walk cycle with the character’s position moving within every frame without a singular frame being remotely the same as the last. This is because, as humans, every part of our bodies move when we’re emitting simple actions such as walking or breathing. This reference helped demonstrate this by showing a squash and change in height when the character’s moving.
The minimum frames I did for this exercise was 8 frames since this animation was used as a practice to teach me not to focus too much on the anatomy but more of the flow and the movement of the animation. Since I set the frame rate to be 24 frames per second, I was able to experiment with the pacing between each frame and so I decided to have the keyframes have different pacing.
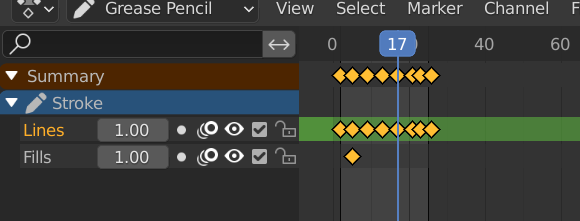
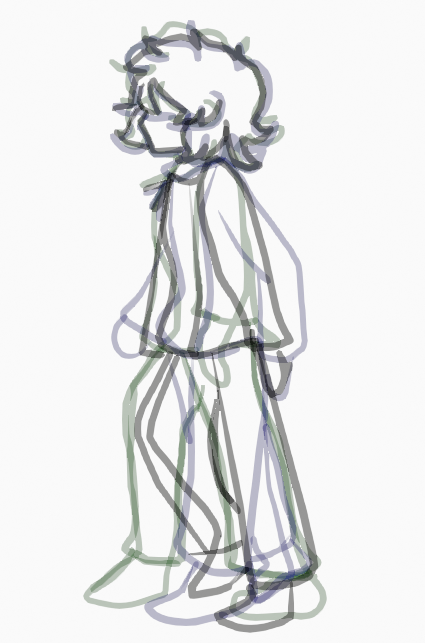
The main issue I came across when working with Blender was when creating each key frame. Blender has the option called onion skinning which allows me to draw over previous key frames to keep consistency, however since Blender wasn’t primarily used for 2D animation, the overall process for the walk cycle took longer to animate.
Blender also doesn’t have typical brush settings and instead uses strokes. This meant that rendering each stroke for the key frames took significantly longer and even slowed down the frame rate at certain points. So this meant I had to use less strokes when it came to drawing out my key frames, that also mean I couldn’t add details to the animation and had to focus on the overall movement on the legs.
In summary, Blender was quite difficult to use in terms of animation, I wanted to add basic colours and potentially draw a simple scene but the software was incredibly frustrating to use. In the future, I also want to sketch out the frames before animating it digitally.
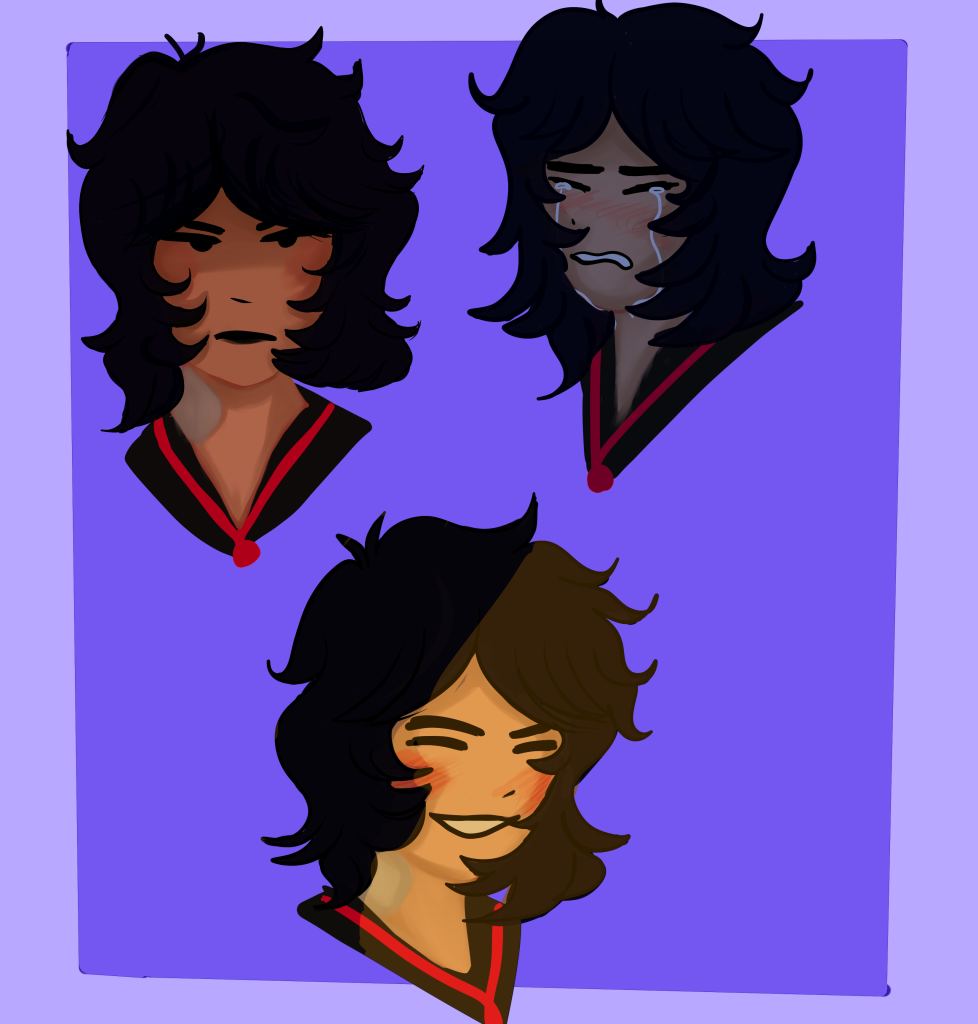
My main inspiration for these facial expressions come from the anime art style. I wanted to explore and practice drawing basic emotions. I wanted to use the different elements I’ve learnt throughout the module and apply them to this exercise. I wanted to apply my art style when it came to designing facial expressions, so I started off with drawing up what the expressions could look like.
The most difficult challenge in this exercise was the porportions of the face since I would be drawing different the face in different angles. However, with the help of my previous sketches I’ve done, I managed to outline where the faces would be.
Afterwards, I started to draw them out digitally, I wanted a more rendered look to the shapes and the faces so I tried to go for a neat approach when it came to filling in the lineart. I didn’t want to spend too much time on highlights but I added the shadows by blending darker tones into the skin along with a blush which was especially needed to show it’s varying usage within different emotions (for example happiness and sadness).
The next element I wanted to add was the lighting, knowing my work with shadows and lighting I wanted each face to have lighting which would represent their mood. So by using multiple filters such as shade, multiple and luminosity, I was able to make the facial expressions stand out more conveying the overall tone of the emotion.
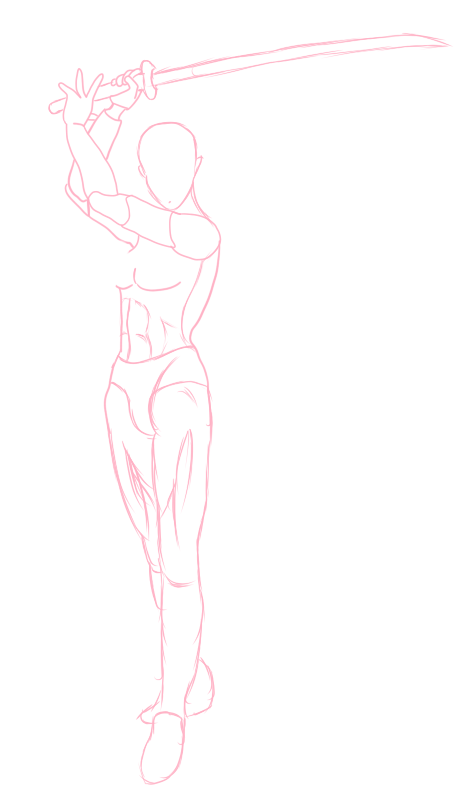
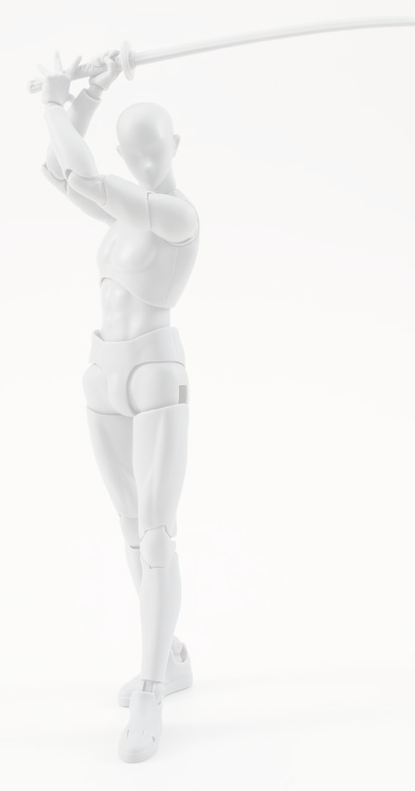
With character anatomy study, I wanted to focus on muscles as well as overall gesture anatomy. For this, I didn’t want to go for a neat look as the lines (especially for the muscles) give the character more rough edges and to experiment with direction. To achieve this, I started off with creating rough lineart to give me an idea on where the overall structure of the body would be using a reference to help guide this process:
With the help of the structure lines from the reference model, I was able to get an overall feel to how the body structure was going to work, especially in regards to the character’s stomach muscle and gesture.
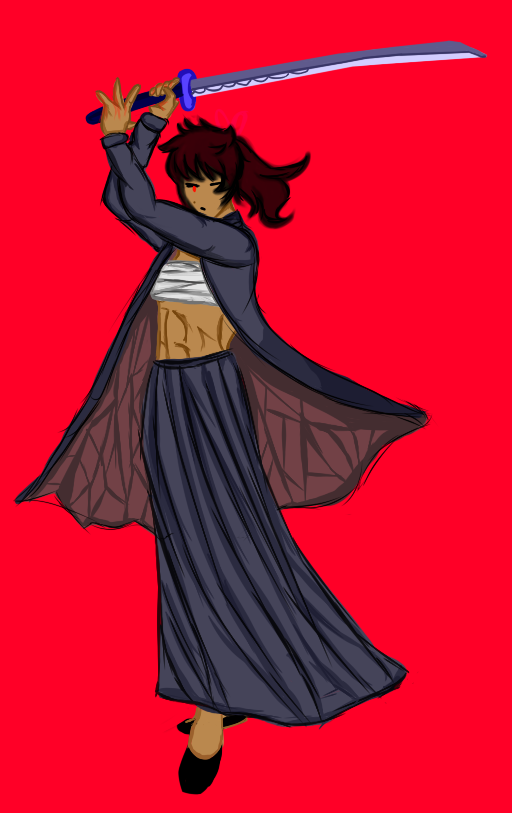
I wanted my character to have an intimidating look to her so I decided to give her a ragged yet feminine look, this is where I started experimenting with creating loose lines to add more flow to the clothes.
Afterwards, I worked on the colour and the shadows. From what I’ve learnt from I learnt from colour theory and shadows, I used bright red and a dark colour palette to not only emphasise the contrast between the character and the background but to also visually emphasise that this character’s ruthless and incredibly strong. Her gesture, being a fighting stance, suggests that she’s experienced and possibly dangerous which I wanted to emphasise through the colour choices.
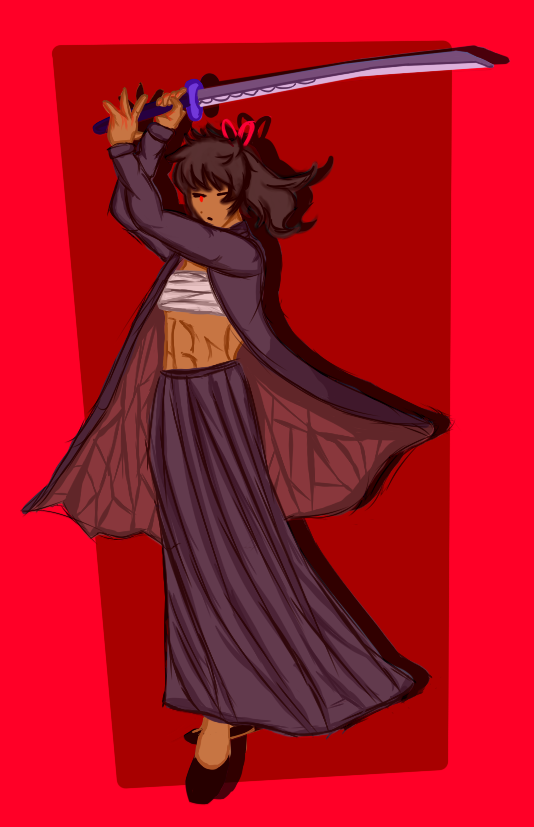
Once I finished the basic colors, I wanted to experiment more with the filters so I added a red multiply filter and duplicated the character and created a shadow effect behind her. Afterwards, I added a darker background to make her stand out more as well as make the background more appealing. The filters helped bring out the colors more on the character and the shadows help make her feel part of the background.
In terms of improvements for this piece, just cleaning up the lineart and the colours would make the piece much more neater, whilst still maintaining the loose artstyle. Adding more shadows the katana could potentially work as it seems to stick out more than the character does.


![Ryu Ga Gotoku Ishin Demo - Gameplay [Yakuza] - YouTube](https://i.ytimg.com/vi/LfqU3Sn514U/maxresdefault.jpg)