Categories
Emerging Technology 2: Portfolio Year 3

Emerging Technology – Portfolio

Introduction

For this module, my main objective is to create a 360 VR experience using Maya, Paint tool SAI and Premiere Pro in order to make an interactive, animated art gallery, serving mainly as a portfolio piece and a narrative vehicle for users to explore within a VR space. The goal here with this project is to also explore VR’s capabilities in storytelling.

The inspiration for this concept came from the interactive Alice in Wonderland VR experience I discussed within my research proposal prior, more specifically in it’s unique visual presentation which allows users to interact with the mixed 2D and 3D space. This style, as mentioned in interviews and promotional material, was inspired by pop-up books to give that 3D effect to 2D art pieces. This effect allows these images to ‘come to life’ and add depth within the user’s perspective, making the experience as if the user is exploring through the book’s narrative.

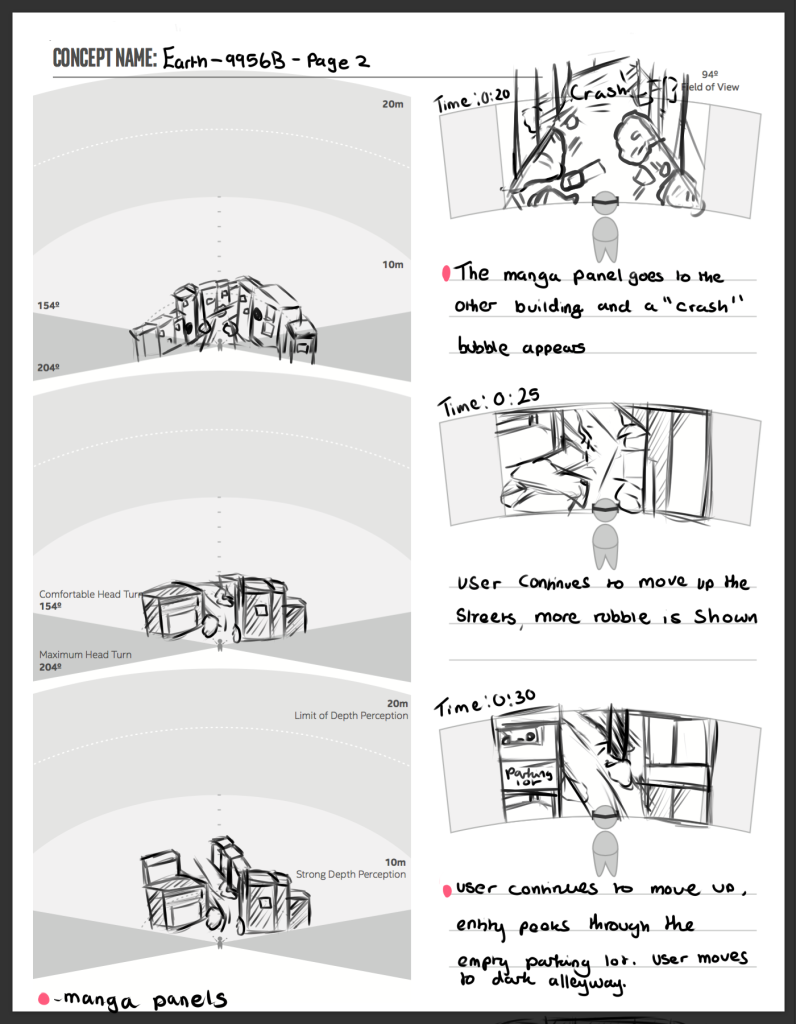
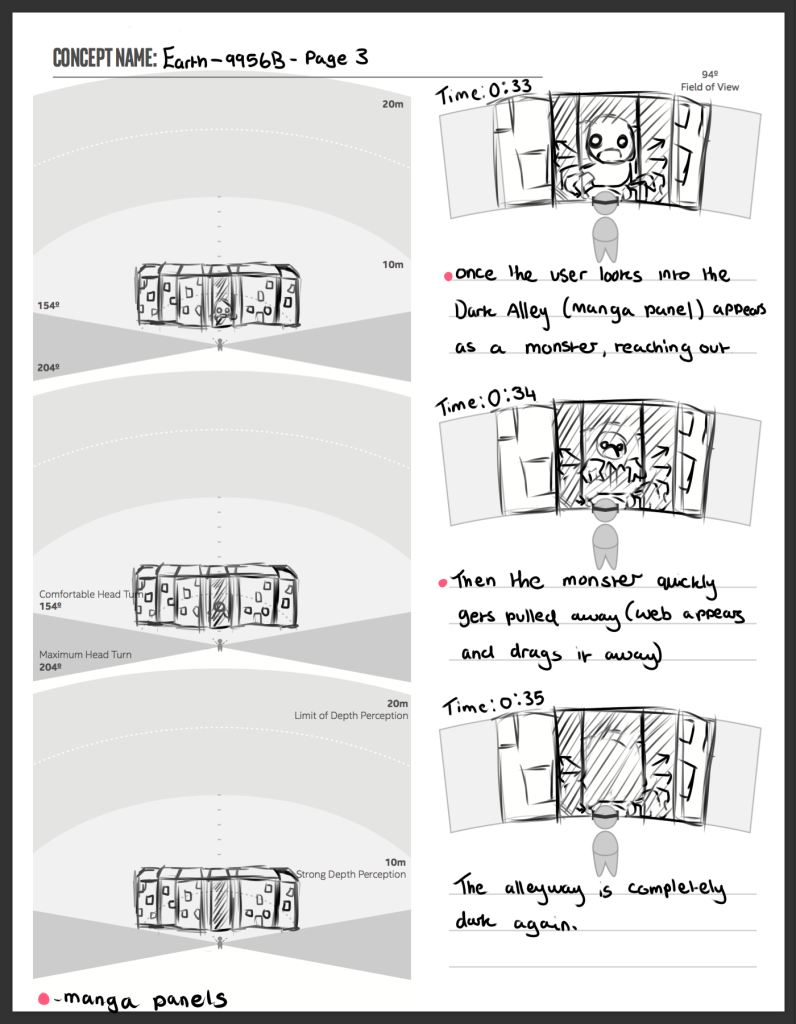
Therefore, in this project, I want to be able to replicate this effect within the art gallery space, allowing users to essentially weave through the world’s story. In this case, the plan is to replicate something similar to a pop up book but with manga, a form of Japanese graphic novels. Before I could start creating these art pieces, I had to research different visual styles in order to establish the tone and aesthetic to the 360 experience.

Idea Generation and Research

As mentioned previously, I wanted to create a similar pop-up effect using manga so each art piece that I make would essentially follow a similar style in order to make my art consistent whilst unique with each piece. The main goal when creating this collection of art is to show my best work as an artist whilst still forming a cohesive narrative with visual guides.

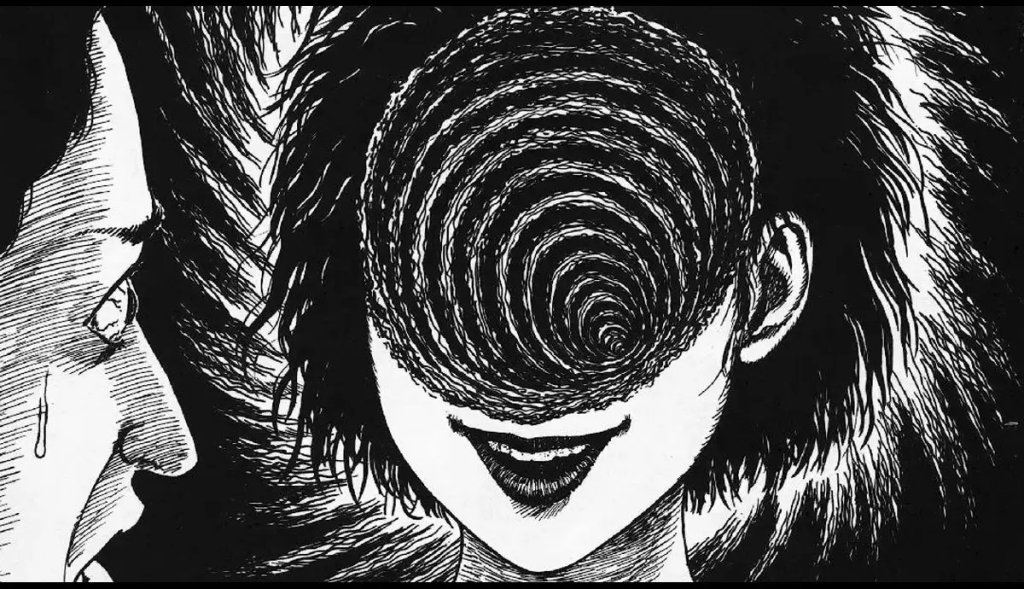
So, for artstyle, I started to research horror and action manga in order to understand the different techniques they use to make dynamic pieces in each panel. Whilst, in my research proposal, I discussed manga influences and it’s impact with the visual design of the world and it’s characters. I needed to put this theory into practice – so I started to research manga techniques by reading manga such as Chainsaw Man and Junji Ito’s works.

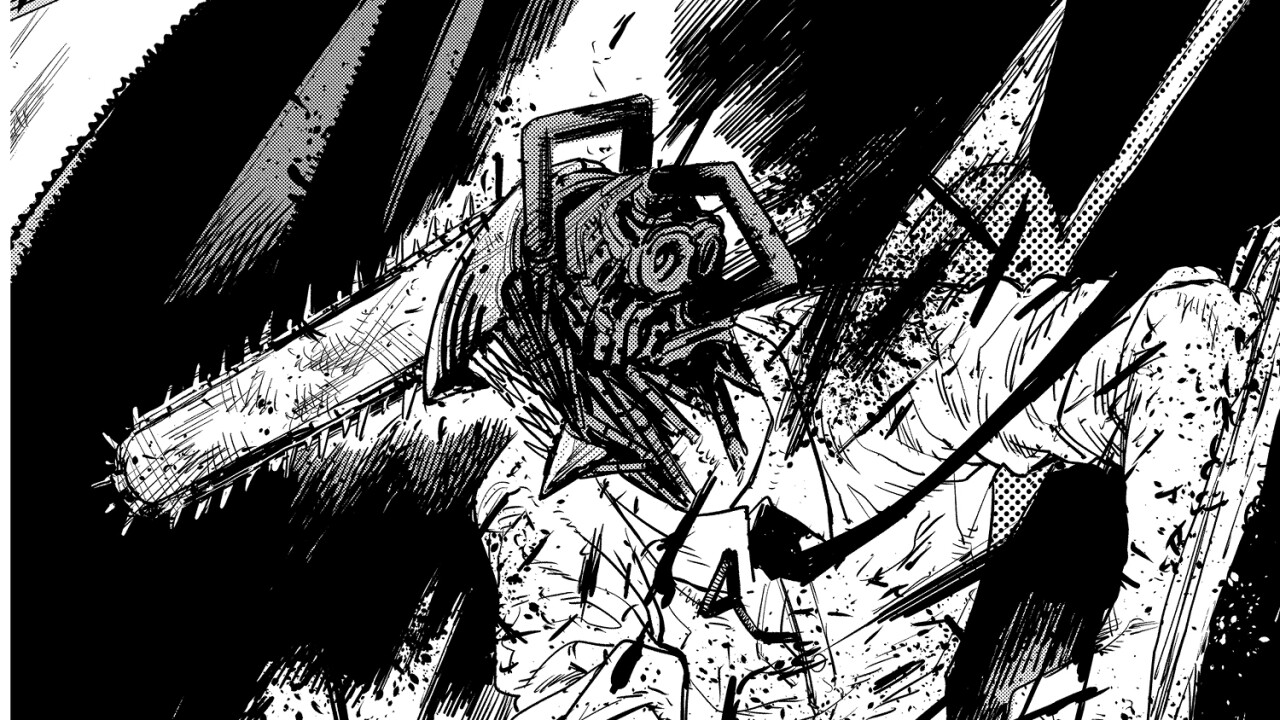
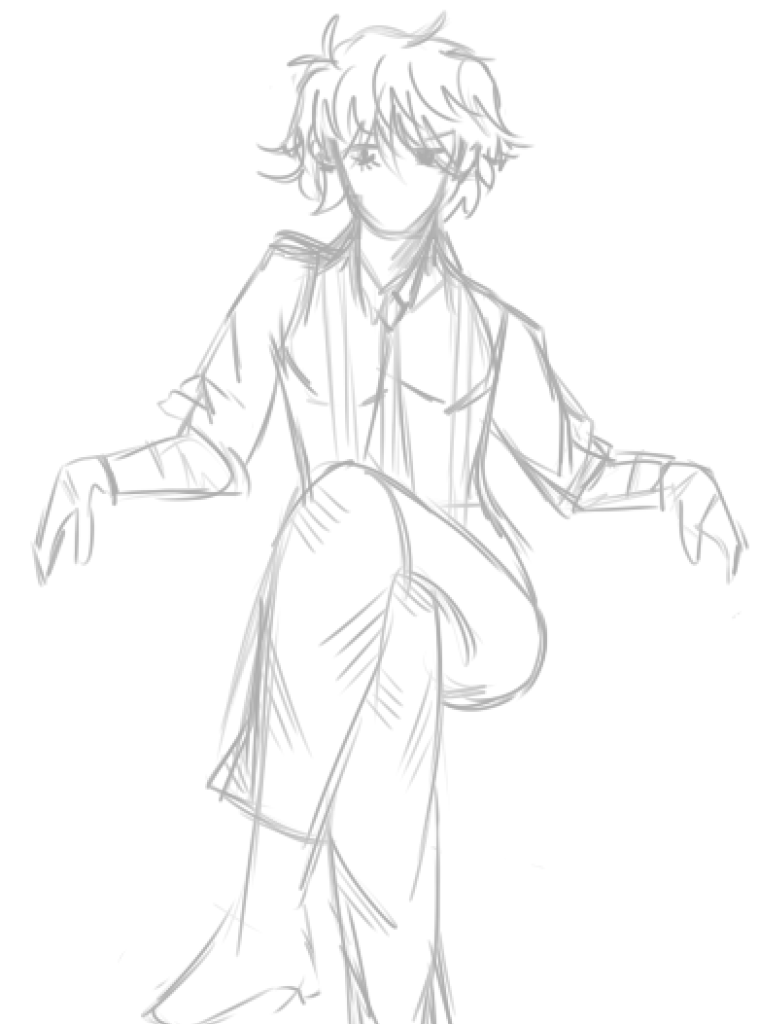
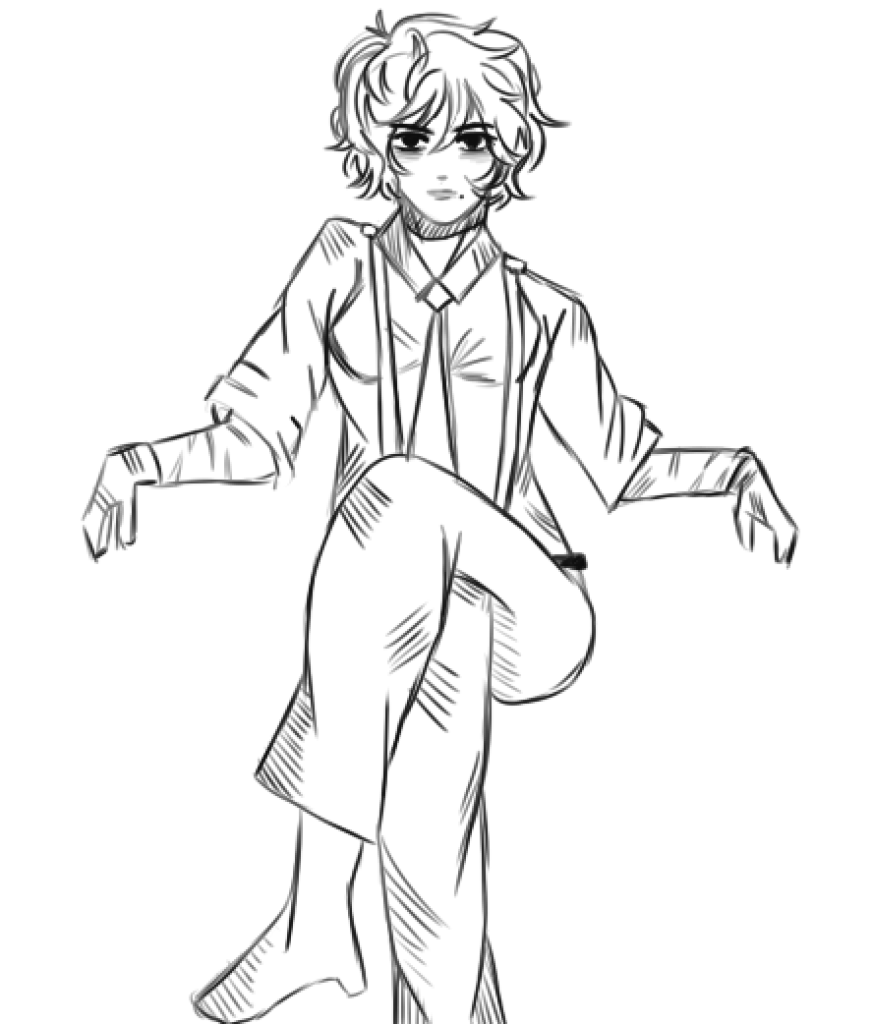
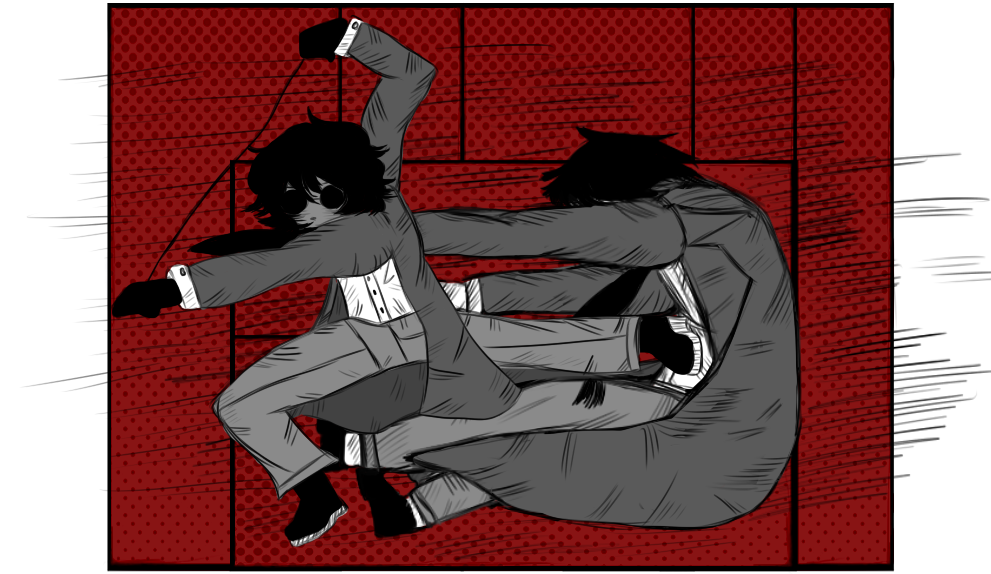
As shown here, Manga panels tend to use a lot rigid, thick lines within, being used to to amplify form in clothing, expressions and dynamic action, making the panels feel more alive especially during fight scenes. For shadows, they often using a solid black, gradients and cross hatching to create this illusion. This research had allowed me to start experimenting with this art style through designing the main character for my VR project.

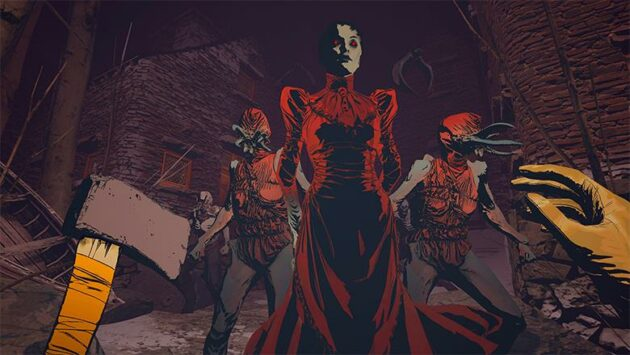
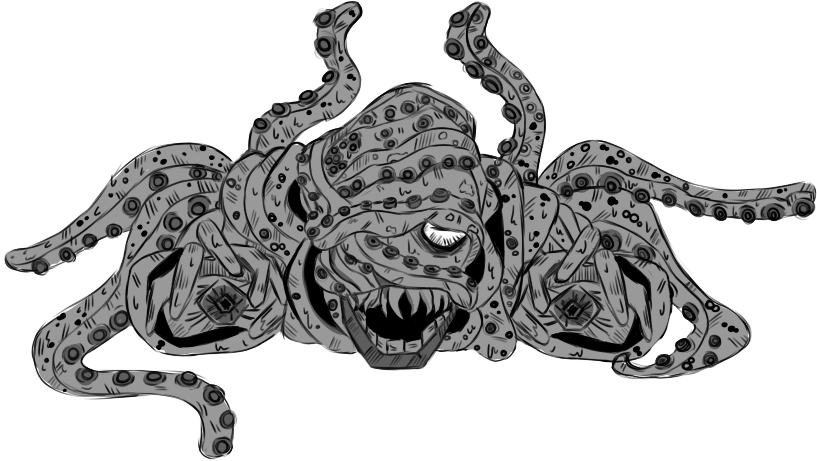
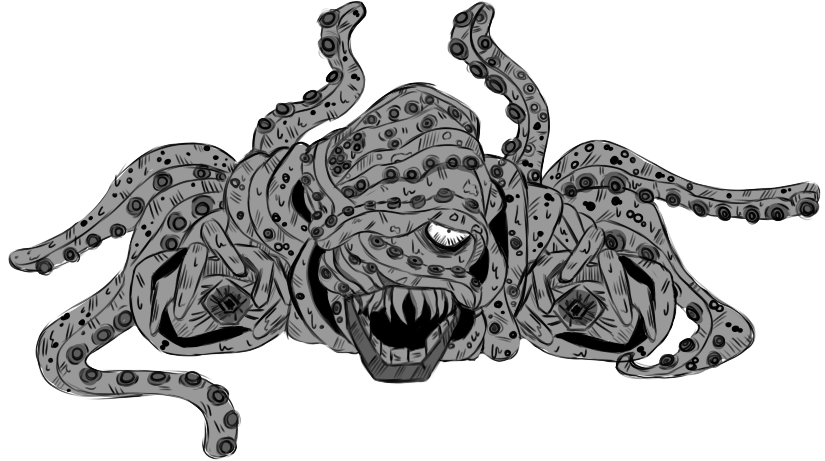
As I was researching influences for world building, I researched Limbus Company, A Korean horror gacha game known for it’s stylised art and extensive world building in it’s narrative. The game is part of a series that focuses on a hopeless world and a fight for survival.

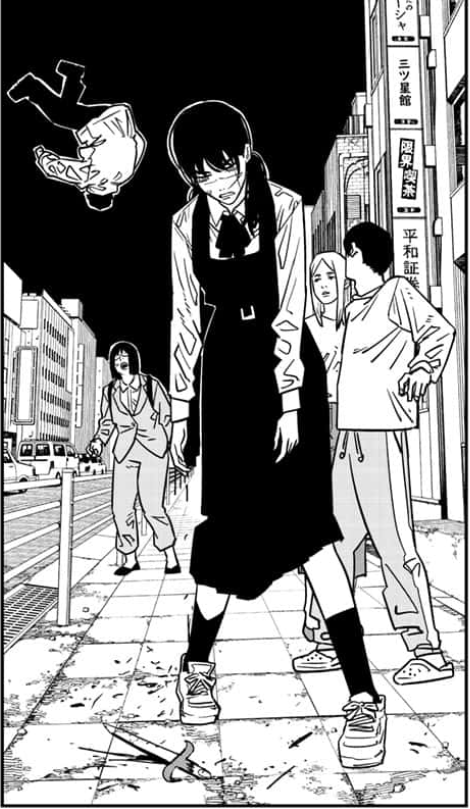
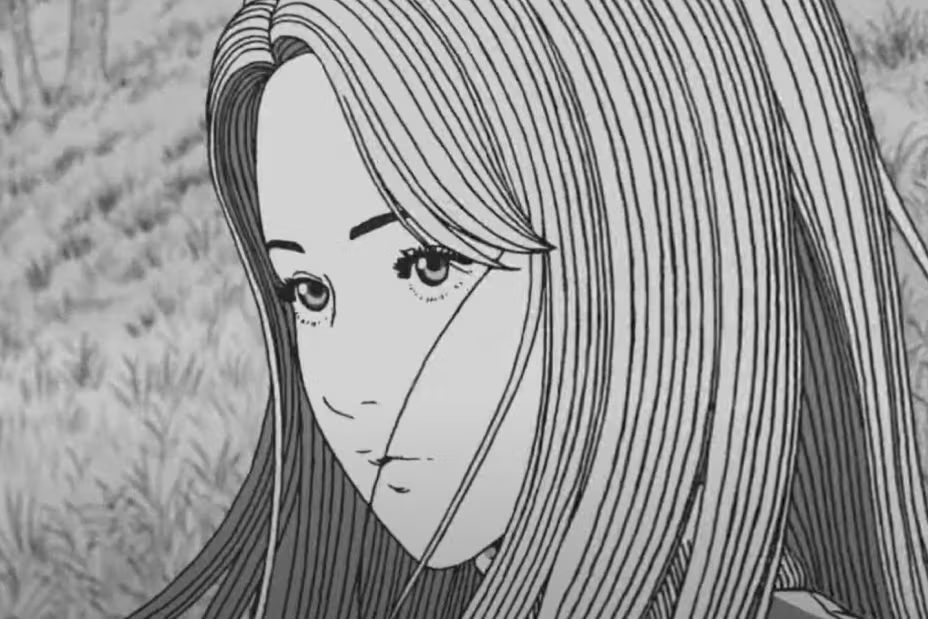
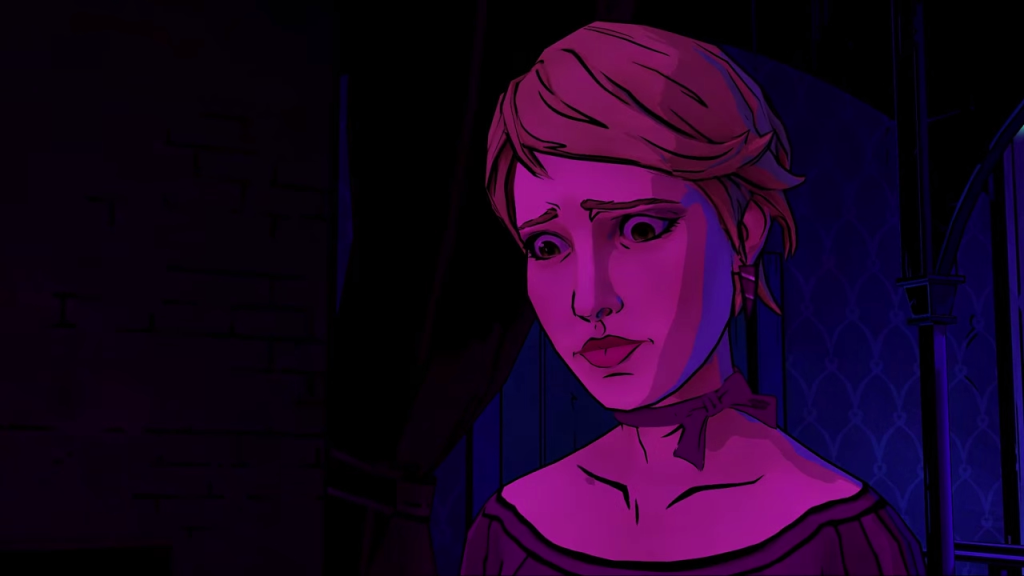
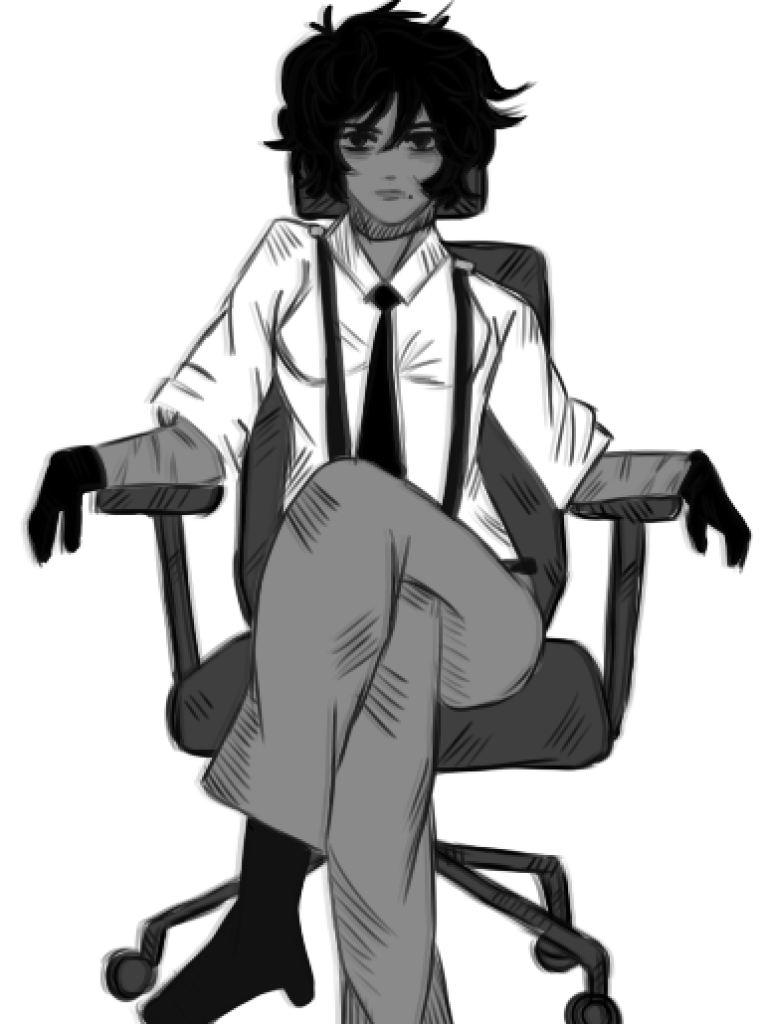
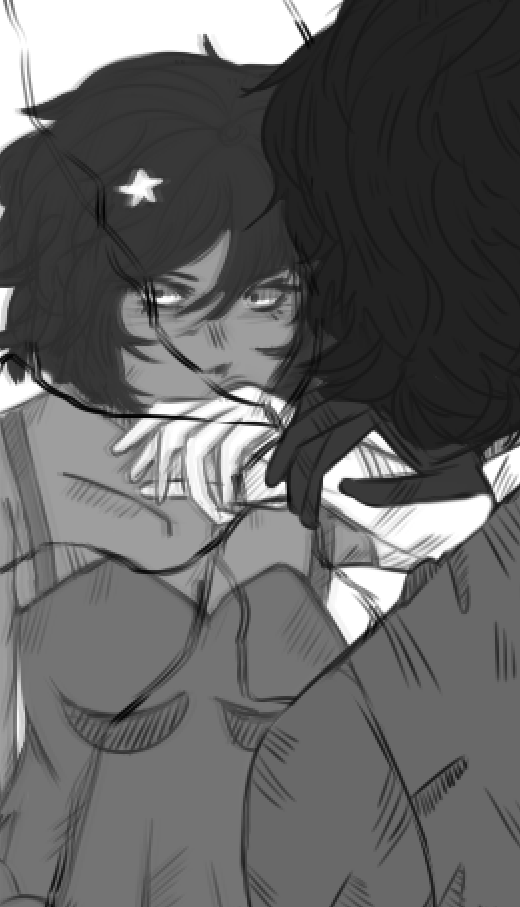
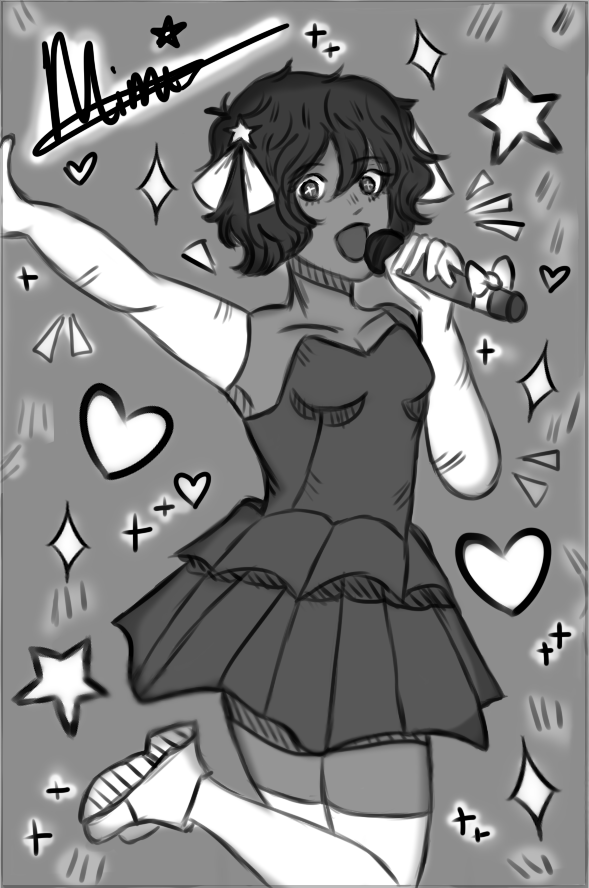
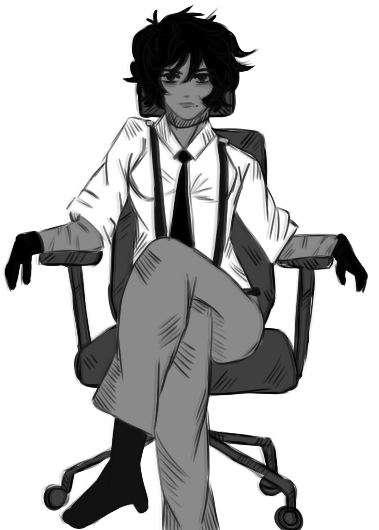
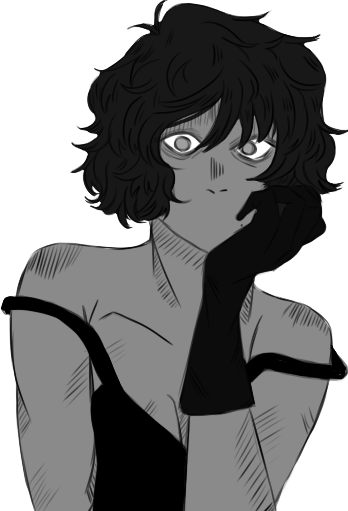
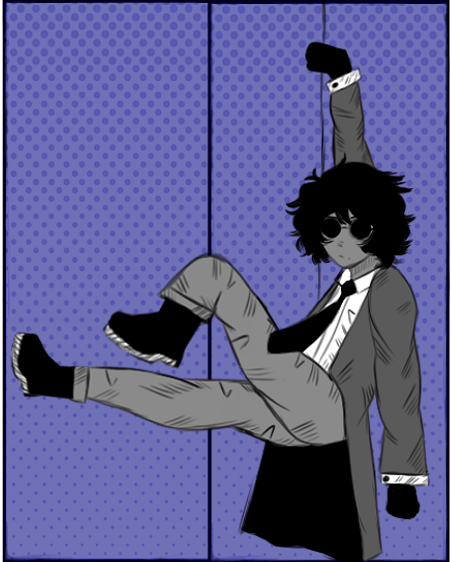
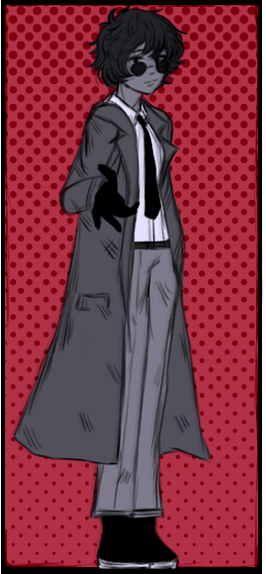
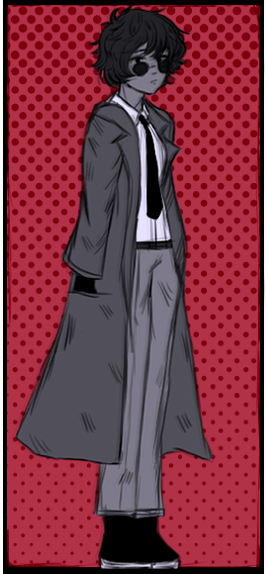
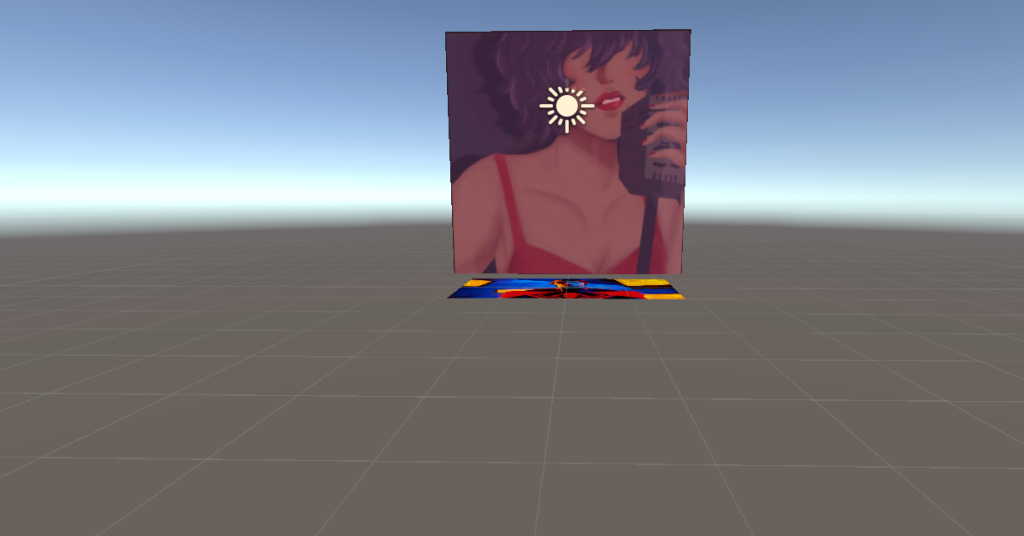
I created expression sheets mainly to visually convey the character’s personality through her expressions and her clothing. Since I used my research as references for applying techniques, this has also allowed me to create my own style of line work within my art, adding form to elements such as the hair, facial features and the clothes. Shadows were also applied to one of the expressions to amplify her emotive reaction without exaggeration.

This character, Mimi, is often depicted as emotionless or calm so when I was working with the expression sheet, the main focus was for her expressions to hold little or to no exaggeration whilst still giving her character life, including stronger emotions such as happiness or anger. Whilst this piece served mainly to practice reflecting the manga style, I was able to get a better visual understanding on how I wanted to portray Mimi during the experience – a silent guide for the player that merely observes. Because, essentially, this VR experience is navigating through her story and her world. Similar to Limbus Company, her world is cruel and unforgiving, so my main objective was to express how that world affected her. Even if she is the primary focus of the experience, She’s not the centre of the world, she’s merely a part of it.

Project Moon (2023). Limbus Company [Video Game]. Project Moon: Suwon, South Korea. Available Online: https://store.steampowered.com/app/1973530/Limbus_Company/ [Accessed on: 12/12/2023].

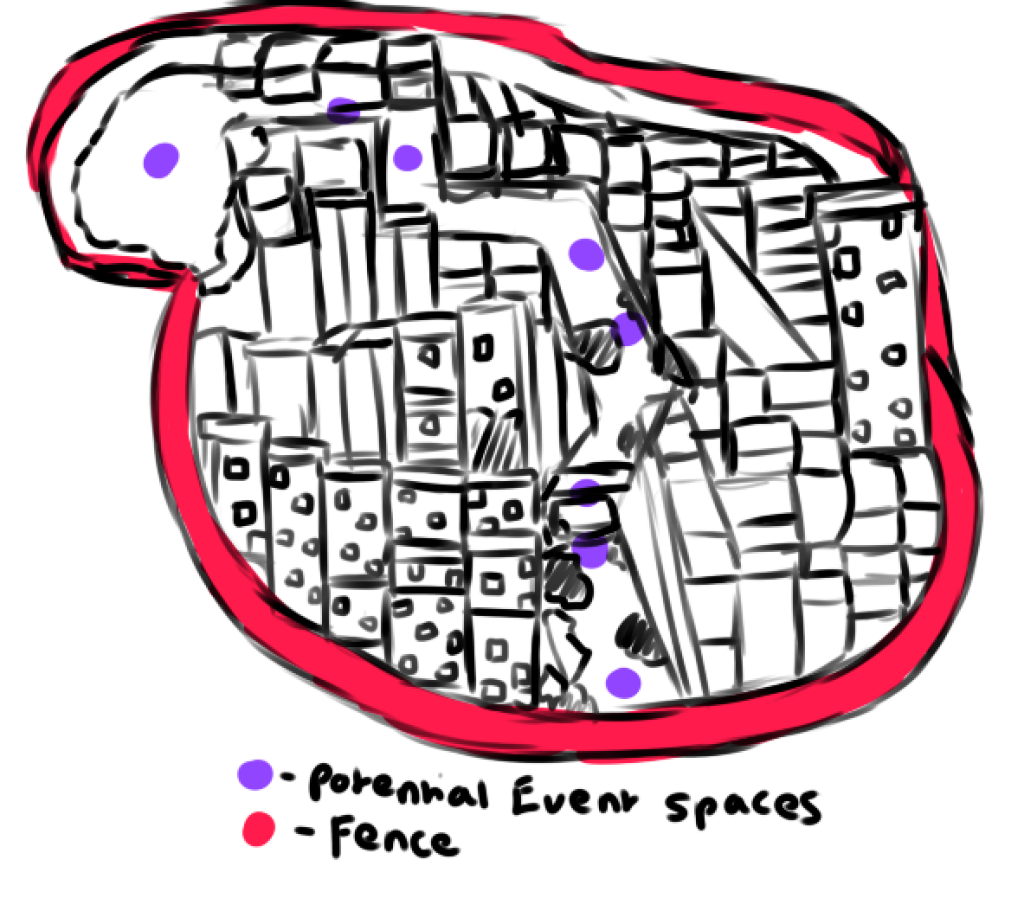
In terms of Mimi’s world, Limbus Company is set in a dystopian city with different sections representing ‘wings’ of each area, each place being corrupted by companies that enforce destructive laws upon a section they reside in. The areas are often depicted as either clean but incredibly artificial or a place filled with nothing but destruction – an area that has once inhabited a thriving population. It’s cruel world and it’s environments show that people are barely surviving. Each area encompasses greys, darker tones or contrasting brighter reds to emphasize it’s unwelcoming nature – some areas are even destroyed and filled with death.

Project Moon and Limbus Company Wiki. (2023). Limbus Company: The aftermath of Lobotomy Corp. [Image] Available at: https://limbuscompany.fandom.com/wiki/City?file=Lobotomy_Corporation.png [Accessed on 15/12/2023]

Whilst, I will keep gore to a minimum for user experience, this research further influenced the environment and narrative design for Mimi’s world by setting a visual tone for the project. A world that the main character is desperately trying to save but despite her ambitions, this world is cruel, surrounding by destruction in her wake. At this point during my research, I set up another objective for the environment creation – to create a striking contrast within the world’s surroundings, creating a theme: Order and Chaos. This is not only to keep a consistent style to the environment but to also visually amplify the main character’s struggle as she tries to ‘save’ the user from the destructive, dark world they inhabit.

Another large inspiration for the visual world building, is Spiderman Across the Spiderverse – this is due to it’s distinctive comic book style within it’s animation, often using contrasting lighting, cross hatching and halftone texturing and the animation’s use of different art styles to represent different universes within the film, adding in various details to amplify story telling aspects such as intense emotional scenes or to foreshadow and visually indicate a character’s struggle or mindset throughout the narrative.

Zahed, R. and Sony Pictures (2023). Spider-Man: Across the Spider-Verse: The Art of the Movie [Book] New York: Abrams books. Page 48.
Zahed, R. and Sony Pictures (2023). Spider-Man: Across the Spider-Verse: The Art of the Movie [Book] New York: Abrams books. Page 52.

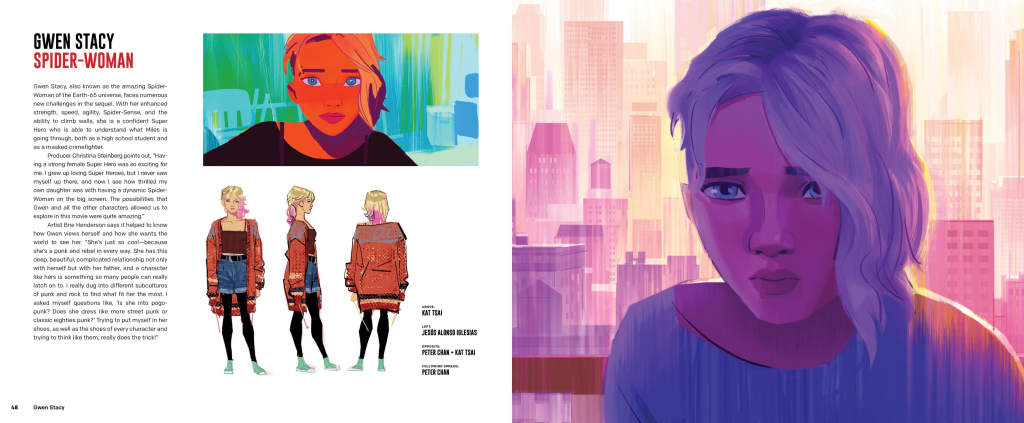
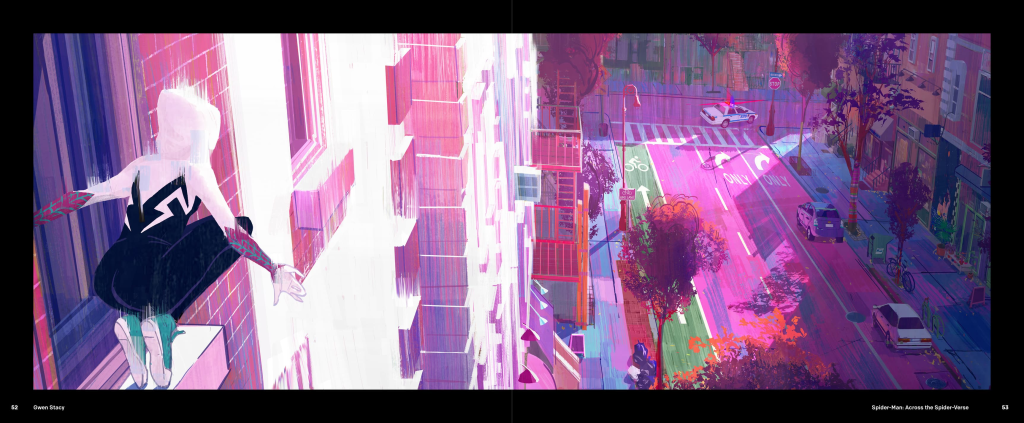
For instance, in Gwen Stacy’s universe, scenes are often presented with a watercolor effect with vibrant paint streaks that reflects the lighting and the mood of the scene using a different colour scheme to create a vibrant contrast.

Sony Pictures Animation. (2023). Spider-Man: Across the Spider-Verse | First 10 Minutes | Sony Animation. [Video] Available at: https://www.youtube.com/watch?v=Ek40XtVsO7g [Accessed on 16/11/2023]

Whilst I want to show a dark world, similar to Limbus Company, within my VR environment, I also want to replicate the same vibrance that Spider verse visually presents. Both media being entirely different in it’s visual and narrative structure. So I explored the Telltale game: The Wolf Among Us to find a middle ground between these two contrasting pieces.

Killham, E. (2014). An image of Vivian, one of the characters in Wolf Among us. [image] VentureBeat. Available at: https://venturebeat.com/games/the-cryptic-finale-to-the-wolf-among-us-explained-the-internets-two-best-guesses-and-one-crazy-one/ [Accessed on 17/12/2023]

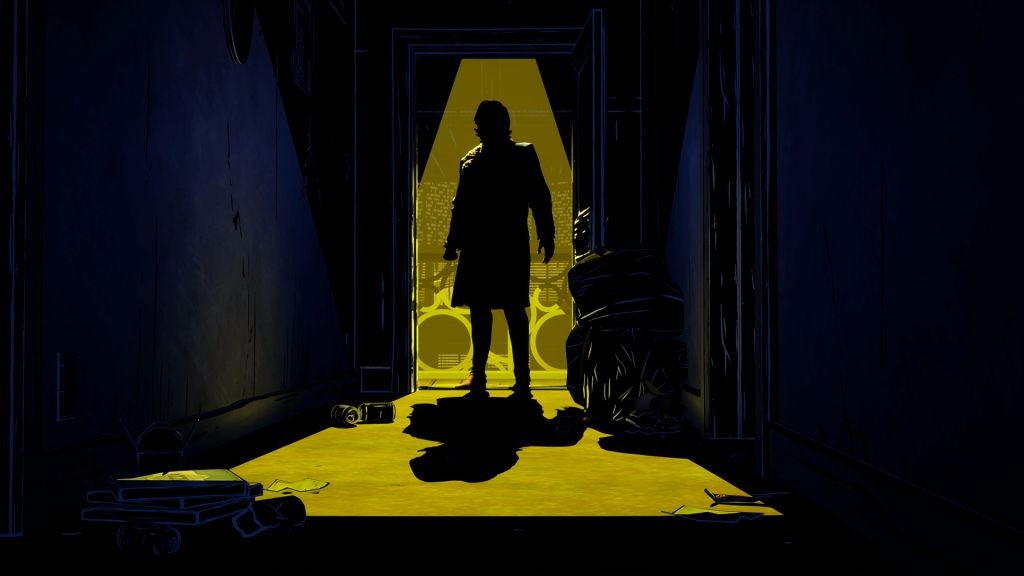
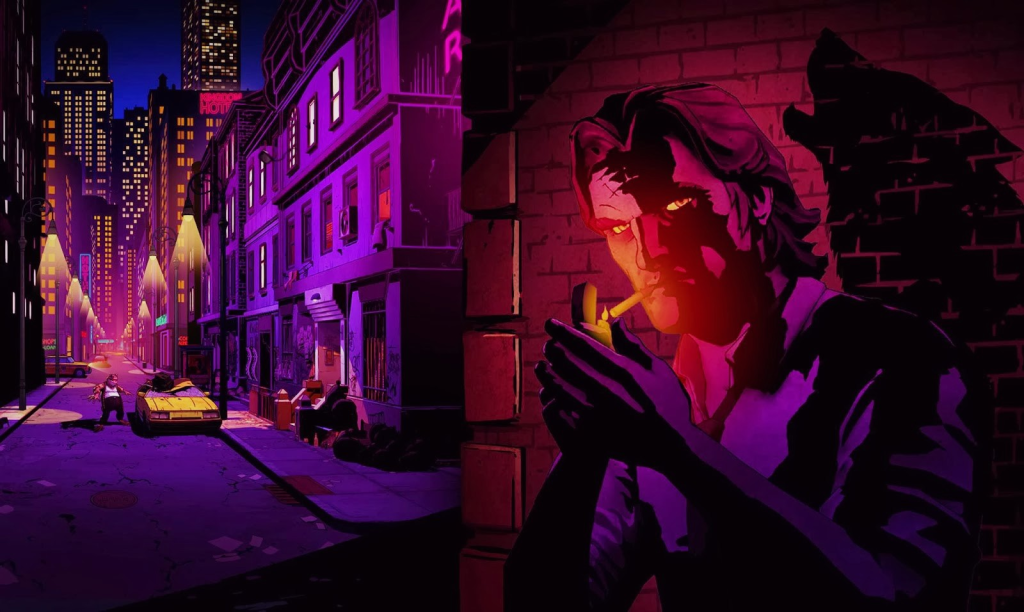
As shown, whilst the colors are vibrant, it’s often using purples and hot pinks to showcase the darker side of the city’s nightlife – with the colours also being affected by the lights and shadows in each scene. It’s visual style, therefore, is appealing without being too cluttered whilst also visually indicating the desired narrative tone to the scene.

The environments and characters also adorn thick linework to replicate the comic style of off the series the game is based off of.

These uses of contrasting, visually appealing colours bring the dark world to life. During my experimentation with colour theory during the later stages of my Maya environment section (Transition to Arnold Rendering), The Wolf Among Us’s visually striking style served as the main inspiration when working with the 3D style, adding a distinct contrast between the manga panels and the area.

In terms of VR visual styles, Lies beneath, A VR horror game, is also another effective example of implementing the comic style within a dark and gritty world.

Wilde, T. (2020). A Gameplay Screenshot of Lies Beneath [Image] Geekwire. Available at: https://www.geekwire.com/2020/review-drifters-lies-beneath-gruesome-virtual-reality-run-alaskan-wilderness/ [Accessed on 27/12/2023]

Project Management

My workflow throughout the project mainly consisted with prioritising the creation of the Maya environment and the 2D art.

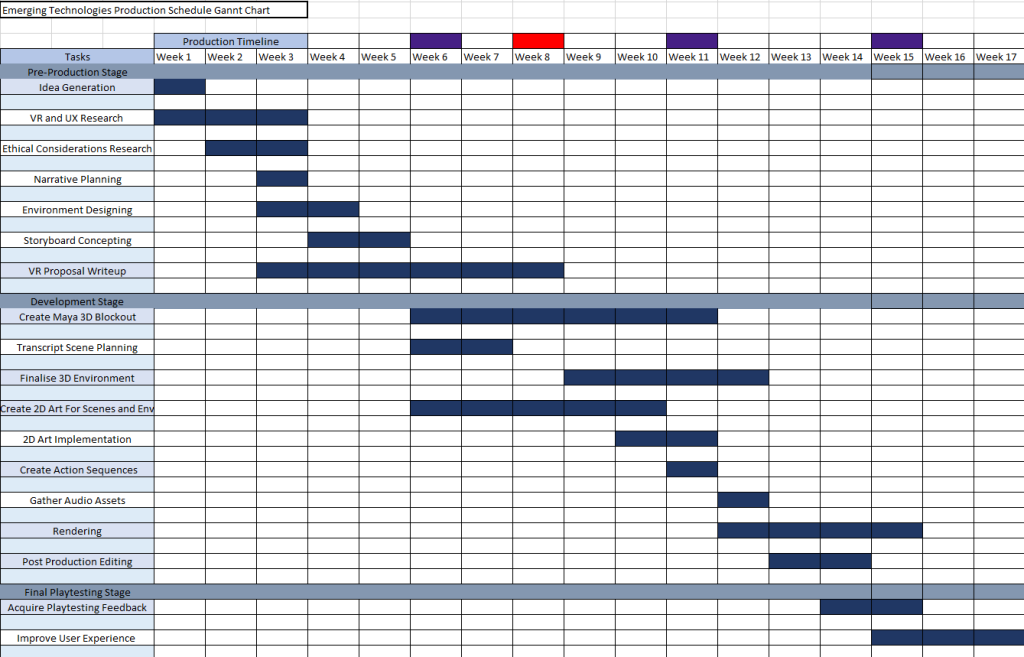
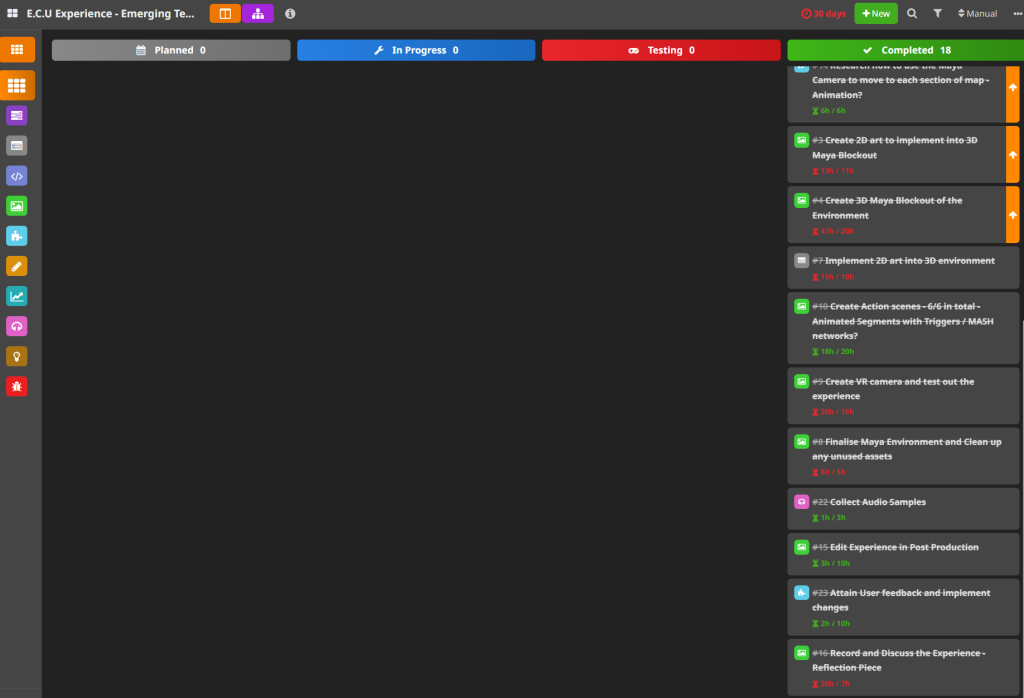
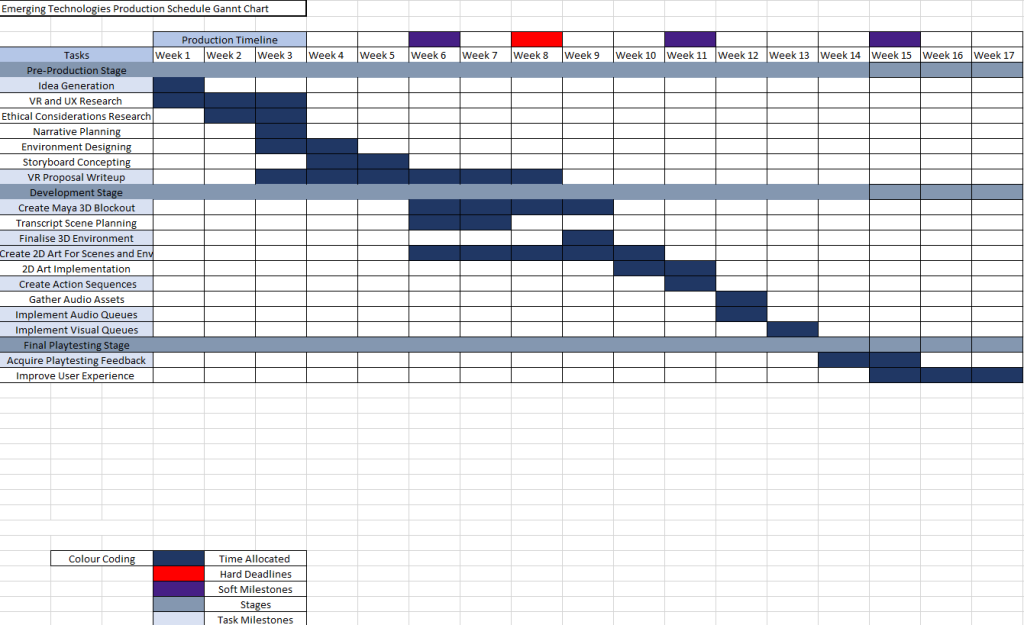
As shown in the gannt chart, – a lot of time is dedicated to these milestones such as: asset making, environment creation, rendering and user testing. This is to allow myself enough time to prioritize in understanding and translating 2D concepts into 3D. This is due to my main proficiency being in character modelling rather than environment modelling or hardsurface modelling.

The reason behind creating my own models for this project is to develop and improve my 3D modelling skills and, through this project, hopefully develop or even replicate my own style in a 3D space. Since this production is also a portfolio piece, there’s also an opportunity to be able to showcase what I learnt alongside presenting my strengths as a designer and artist.

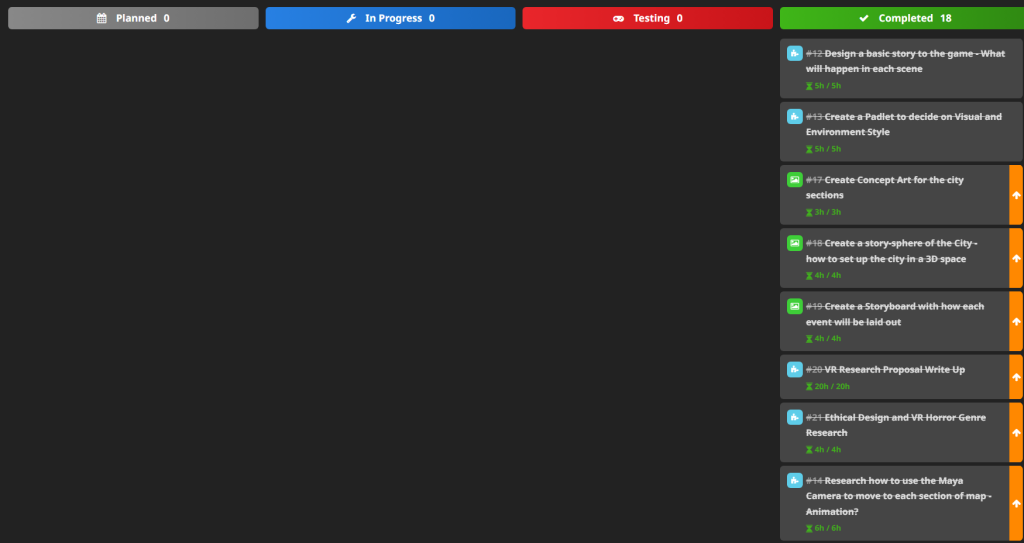
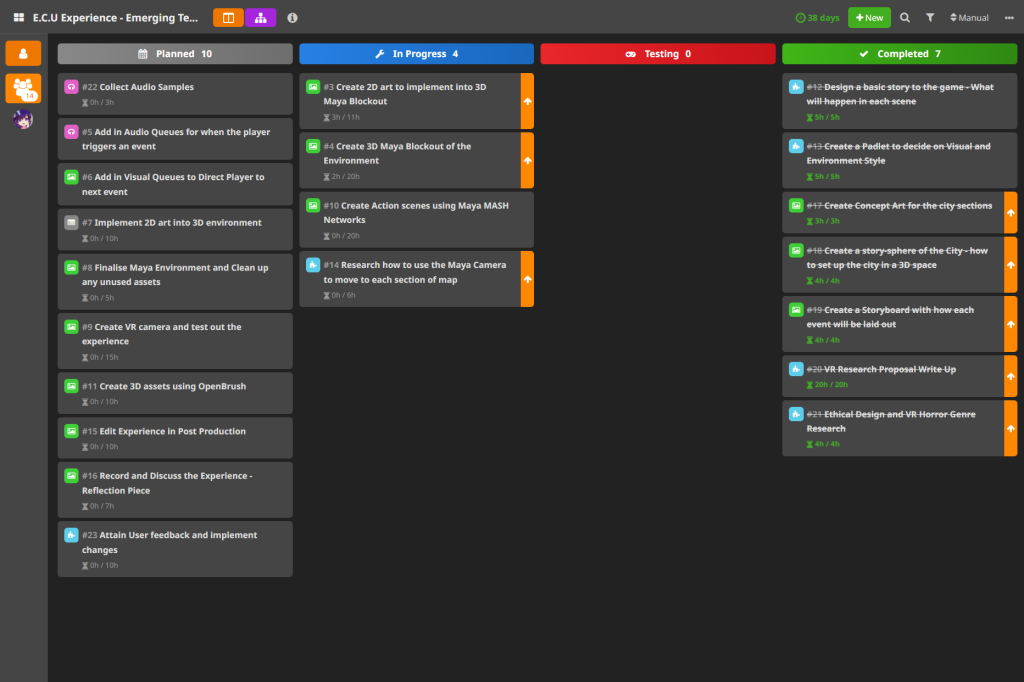
Each Milestone in the gannt chart and HacknPlan helps break down the workflow into manageable tasks for each section of the project. This way I can manage my time in between creating the VR space, making 2D art for the gallery and updating my project documentation weekly within this portfolio. The ideal work schedule is to work 45 hours a week. This time is split according to how much time needs to be spent regardless of milestone progression. This is because, the objective of this weekly schedule is to keep my time management consistent within the project, although, this is an estimated schedule.

The main challenges I faces during the project was taking into account obstacles that would drastically change the vision of the project as a whole in terms of cutting out smaller features or adjusting or changing visual styles entirely due to time constraints or technical foresights.

The main example and the biggest challenge of the project was the switch in rendering hardware – from Maya 2.0 to Arnold Shader. Originally, the main plan for rendering was to use Maya Hardware 2.0 rather than Arnold Shader.

At the time, this was due to how efficient the process would be, being able to render the entire experience within 30 minutes. The Materials, lighting and images were all created and optimized with this hardware in mind. However, unfortunately, despite efforts within editing and post production, it wouldn’t be able to register the environment’s surroundings, even in an 180 perspective, the footage would distort, making the experience incredibly disorientating and nauseous to preview.

Even with a 180 VR experience, it would easily break the immersion and this alternate plan would also go against my 360 VR objective, even if there needs to be compromises – the project’s main objectives should remain as a constant for a better, high quality prototype.

So this meant switching to an AI toon shader, adjusting and experimenting with different light sources and making adjustments to the 2D art. This lead to a week delay in terms of production scheduling.

For example, because PNG’s can only be read by arnold shaders if they had an alpha mask.

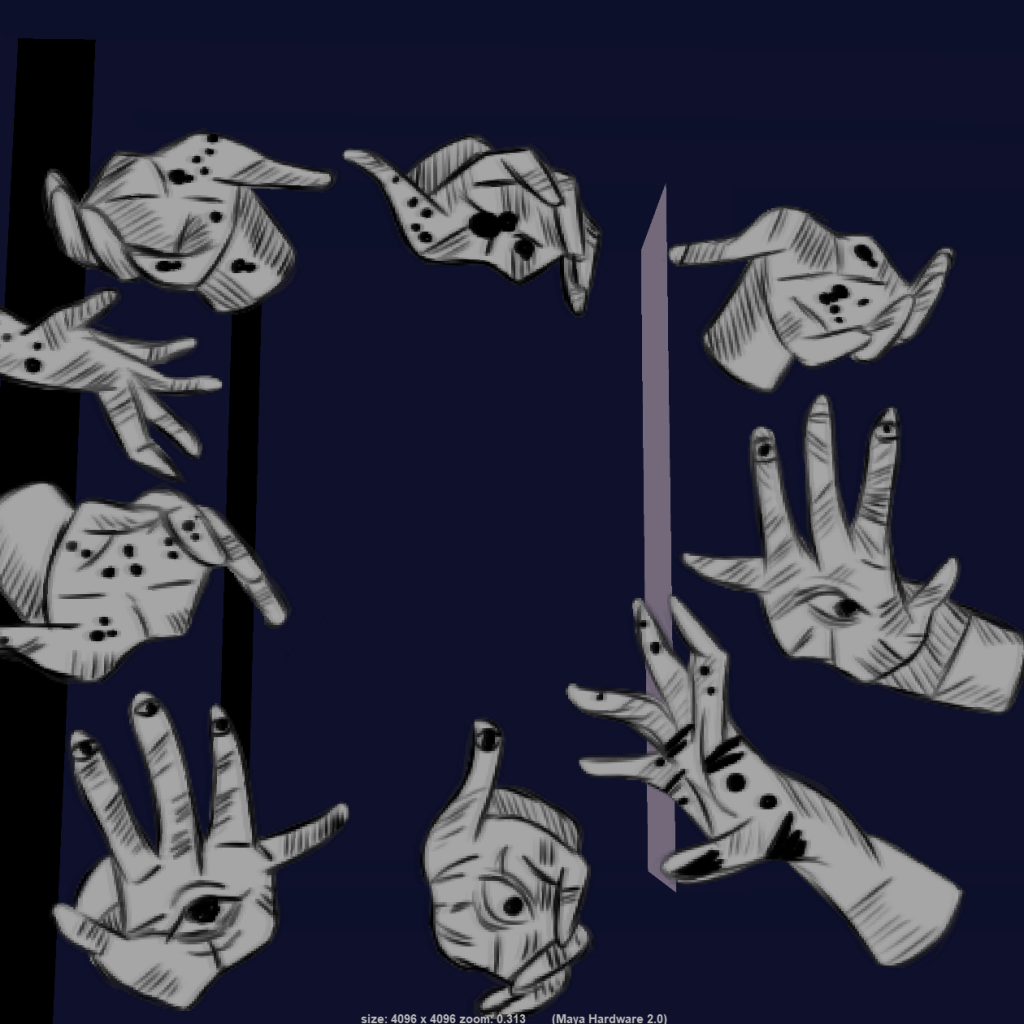
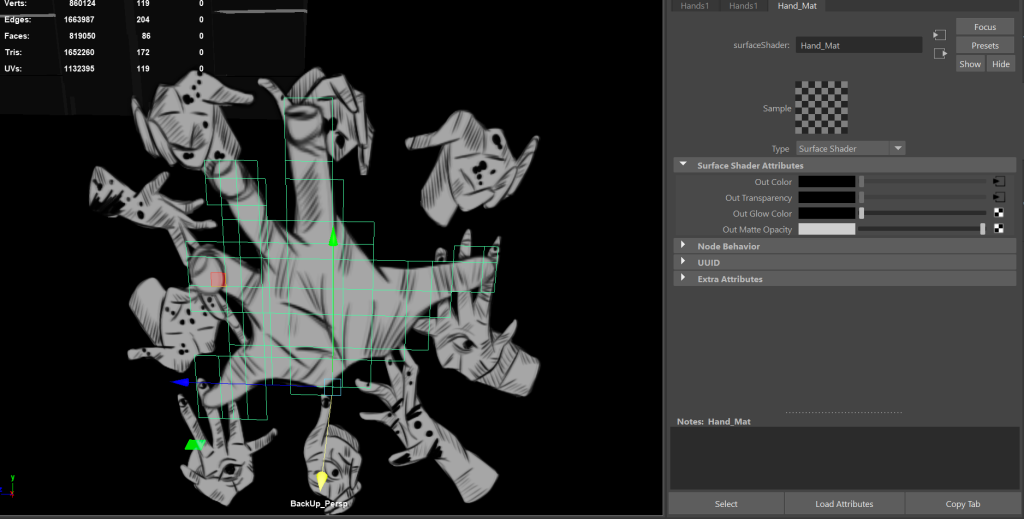
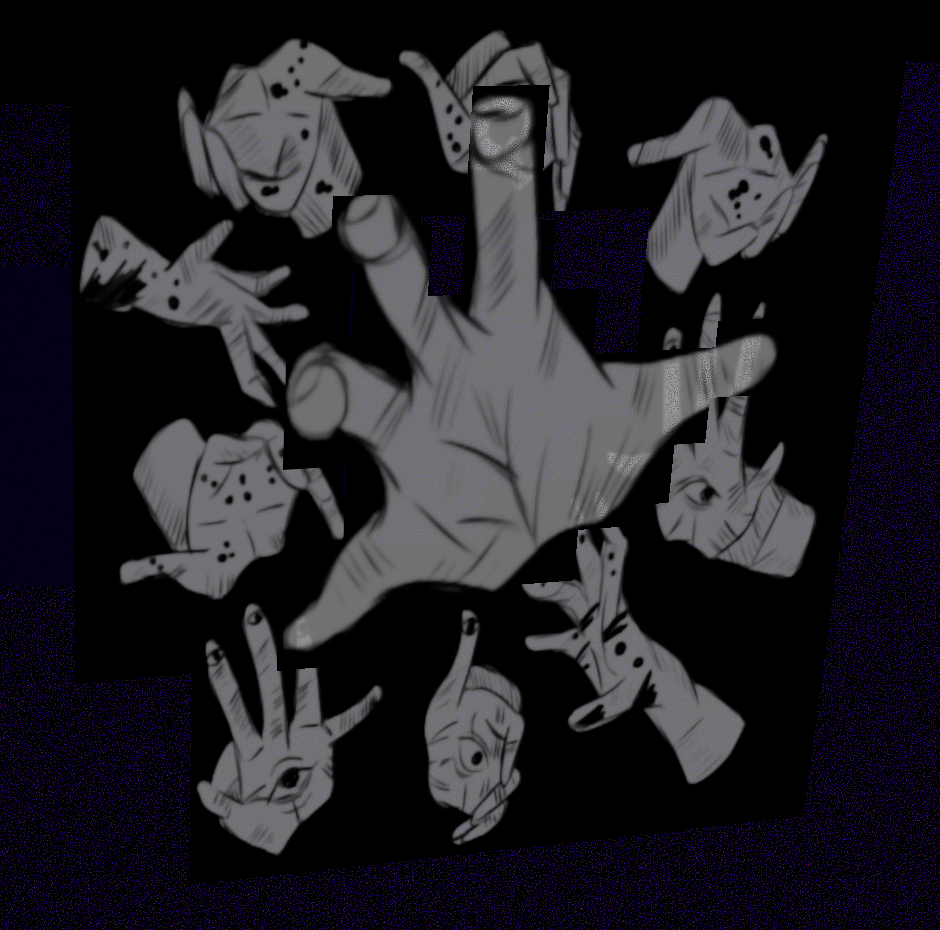
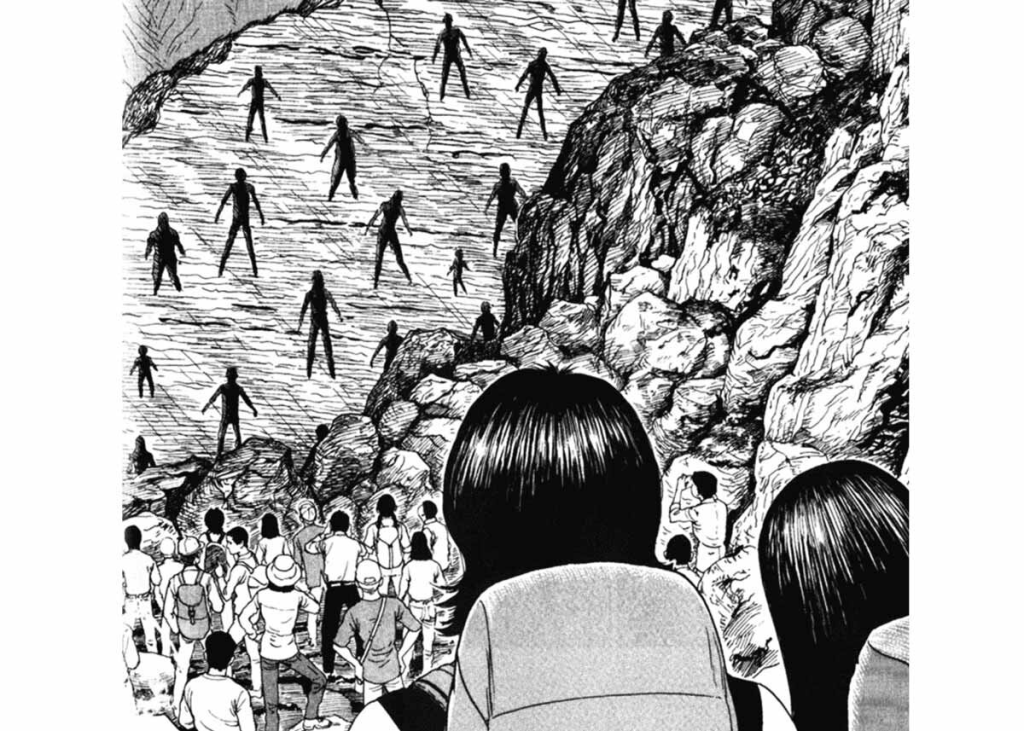
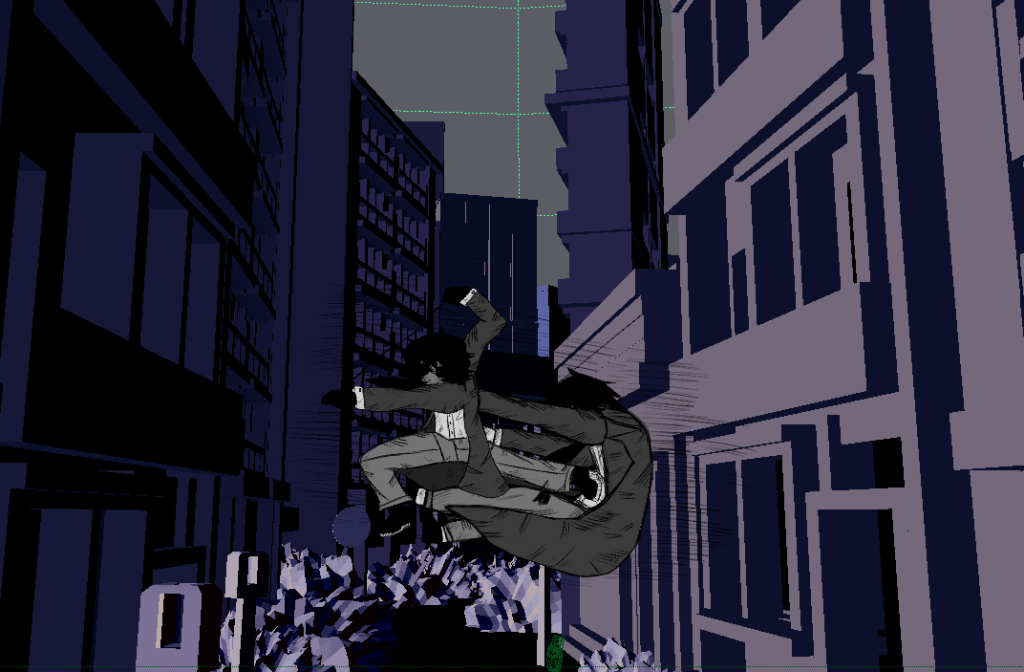
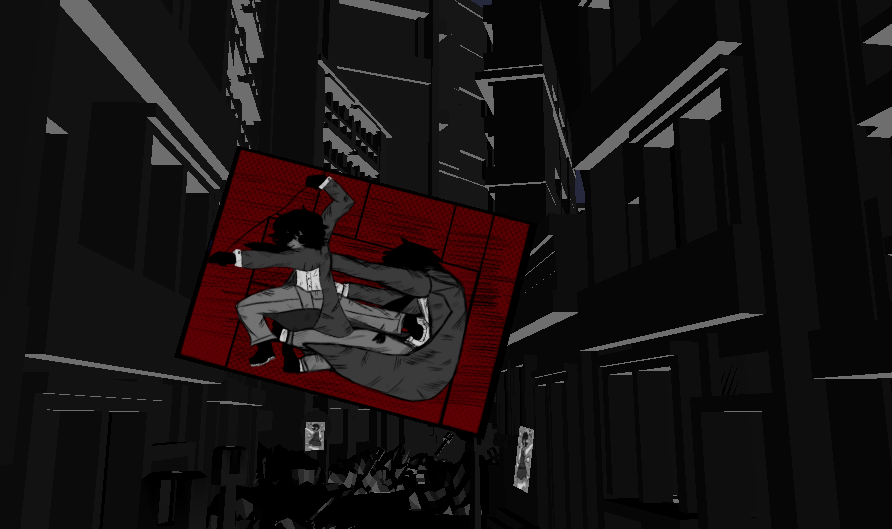
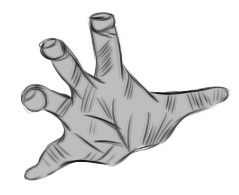
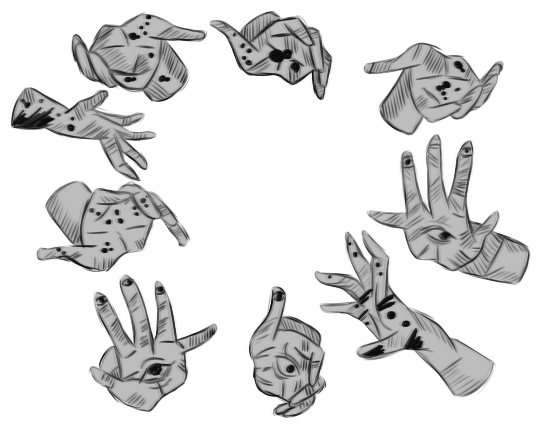
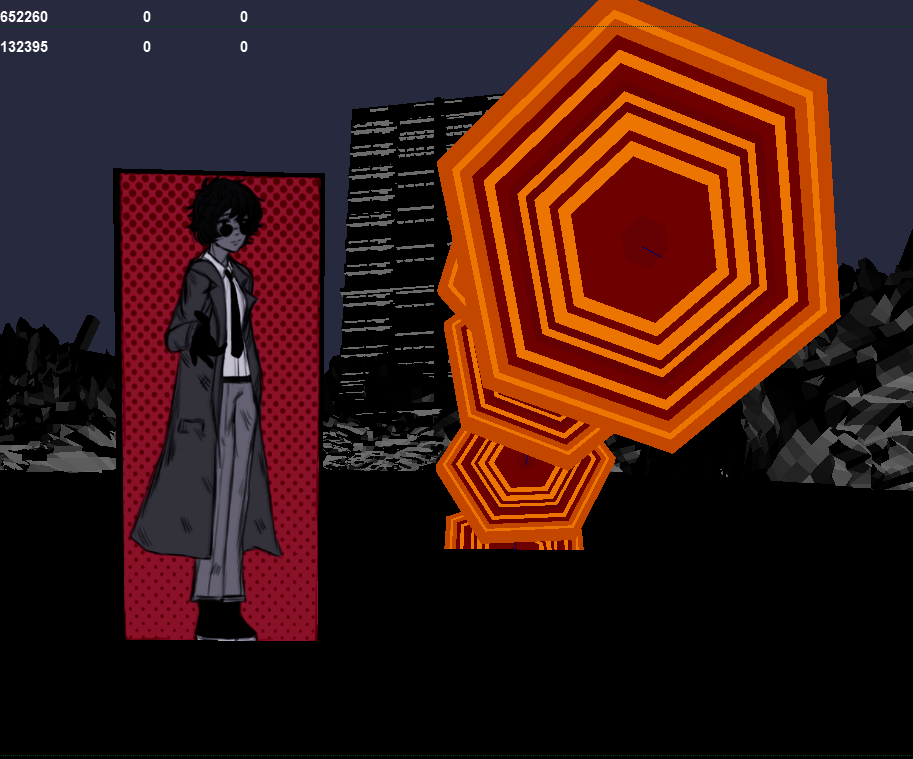
Only Maya hardware can translate the transparency. Therefore, due to time constraints, I had to find an alternate solution rather than creating an alpha mask for each art piece. For the hands art, for instance, I needed to use the multi-cut tool to cut out the black areas surrounding the hands, creating a hole within multiple hands to appear from. On the other hand, I had to find a different solution for the action panels, so I added a halftone background to keep that manga – comic aesthetic consistent even if it meant sacrificing the illusion of Mimi’s precense in the environment.

This also meant I had to cut out minor features such as more artwork to showcase a variety of advertisements in the world although this collection is to mainly to add in world building depth into the experience, to give users a further understanding on Mimi’s universe.

Whilst they may seem minor from a technical perspective, since this experience relies on art to guide the player, in future improvements I’d like to continue adding more art to make the city district feel lived in before it’s destruction. I would like to, therefore, add more Mash networks to further simulate further presence within the city as well as more monsters to emphasize the horror tone of the experience.

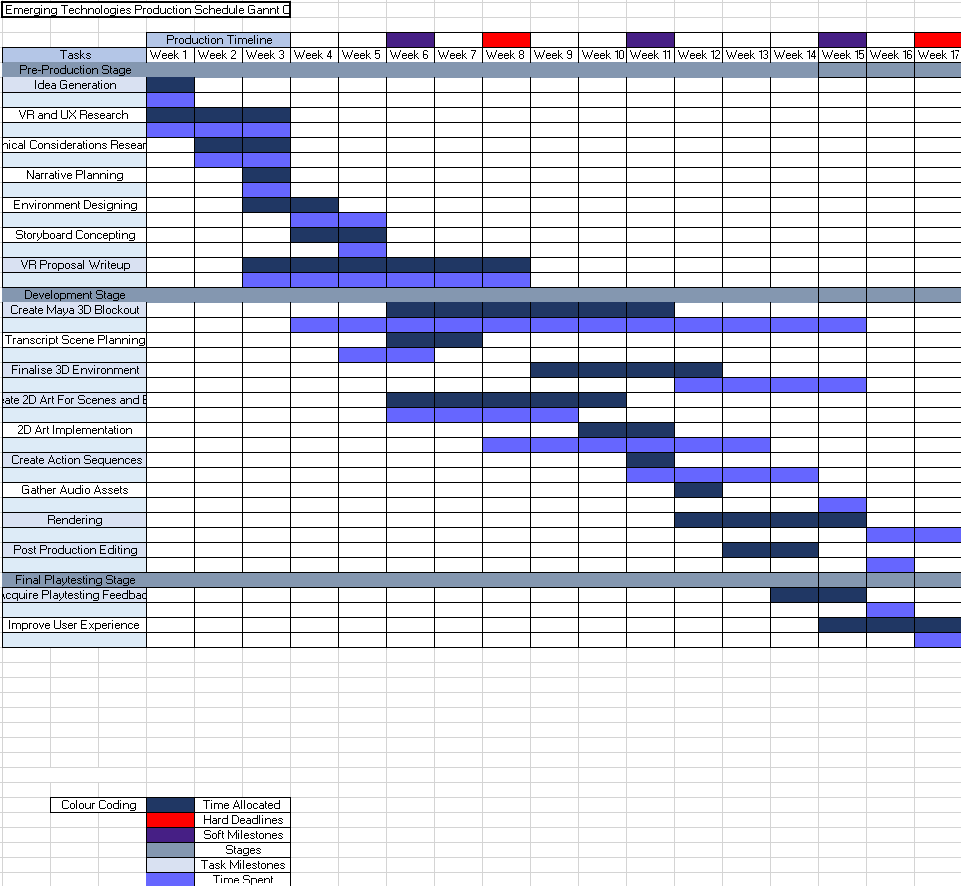
Here is the final gannt chart, showing the predicted time spent in comparison to the actual time spent on each task. In conclusion, I need to make me work schedule more flexible in order to allow delays such as these to not affect my workflow as much as it did in this project. But despite this delay, I was able to make enough changes and find alternate solutions to prevent further delays in my schedule.

Software Proficiency

During the project, I’ve been working with different software in order to bring the art gallery together. This area is seperated into 3 sections in order to showcase my workflow in detail.

2D Art – Paint Tool SAI

For the 2D art for example, I used Paint Tool SAI to create the art pieces – software that I have extensive proficiency with. Paint Tool SAI, whilst not as advanced as Clip Studio Paint (professional art software that specialises in anime art), it still allowed me to learn different techniques to replicate the manga style.

Whilst researching manga artists, I started to experiment with different brushes in my other works in order to see what would make the cleanest linework since, normally, in my art – my line art tends to be rough.

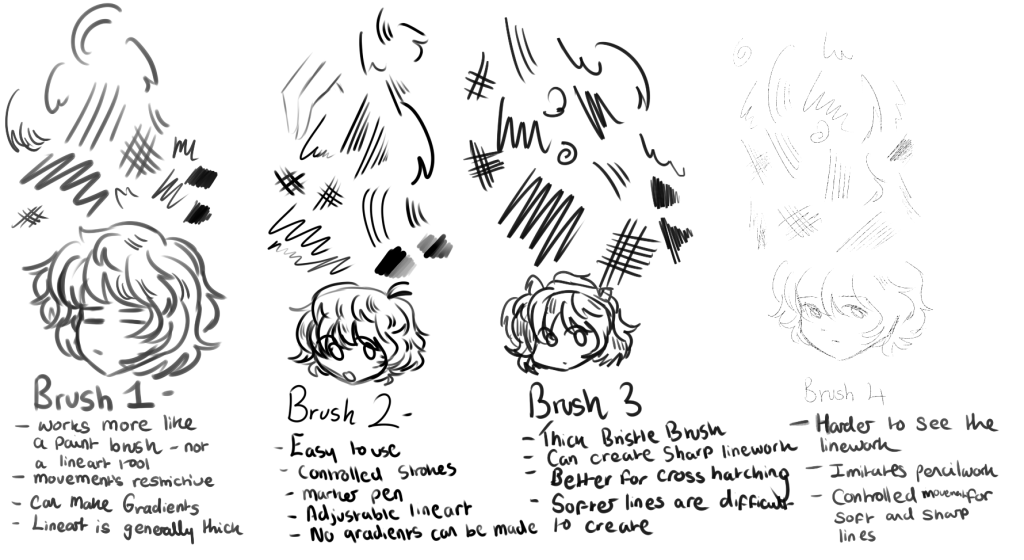
I found that brush 2 would be the best to use because when making short or long linestrokes, the brush was easier to control, creating clean lines even with dynamic strokes.

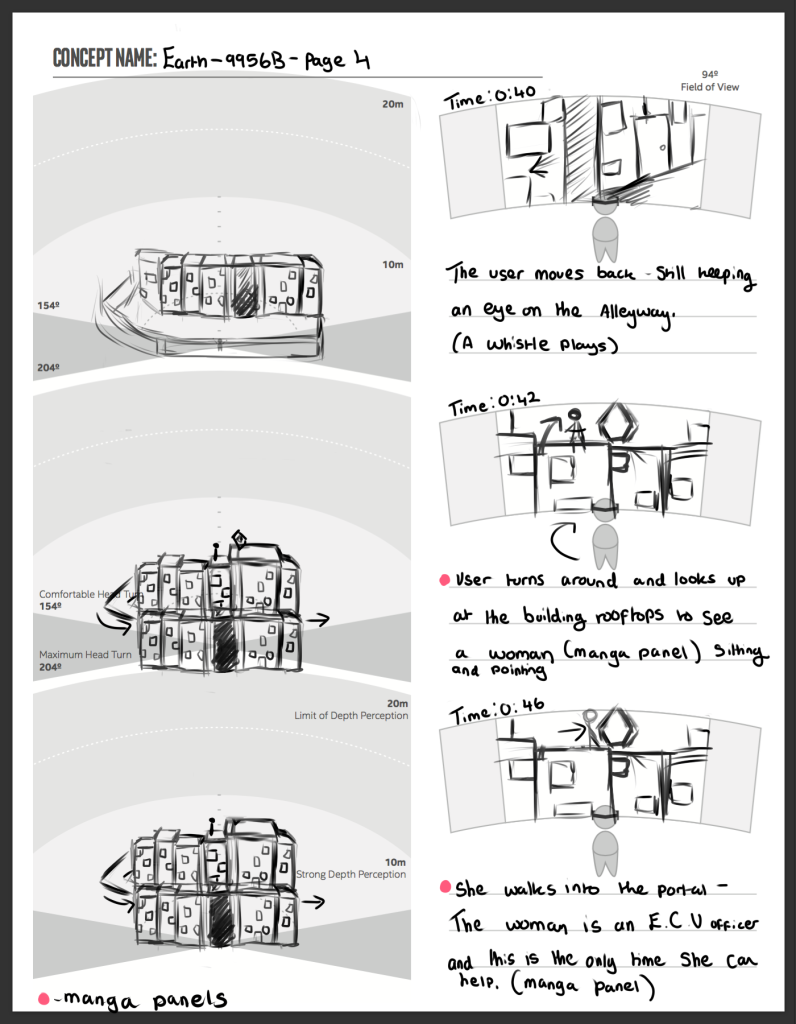
My workflow for this section is to work on an art piece once a day – this is mainly to avoid burnout as I was working on the Maya environment simultaneously. Most of the art pieces were made with the storyboard I made in mind: ( https://samsudeen-2021.hulldesign.co.uk/2023/11/13/emerging-technologies-research-proposal/ ).

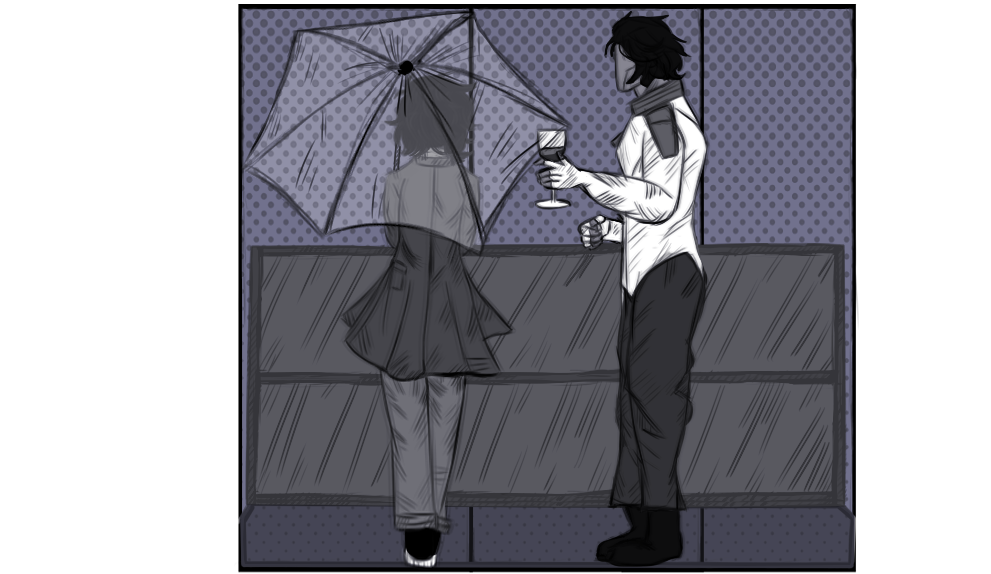
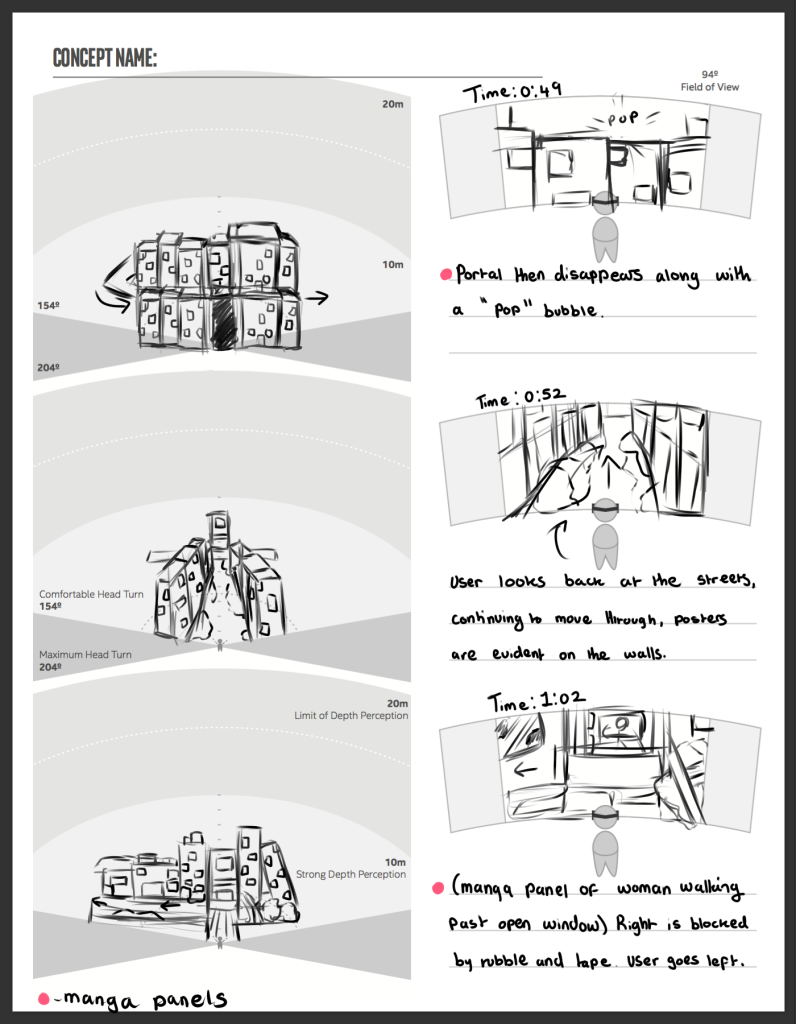
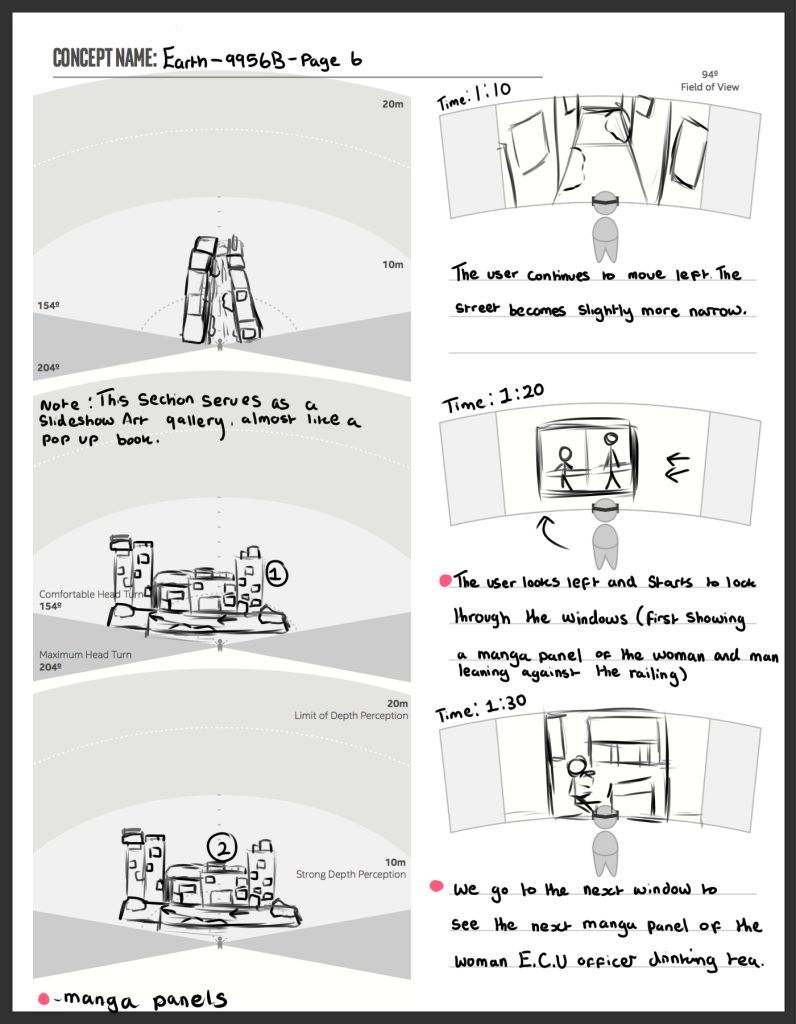
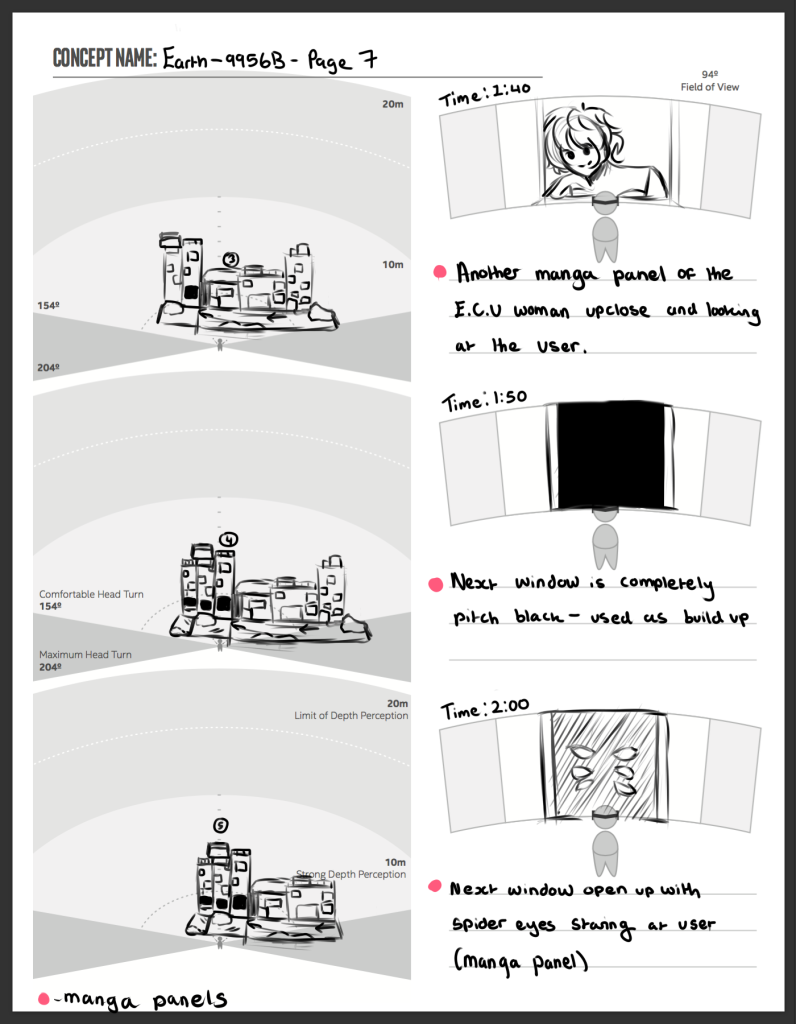
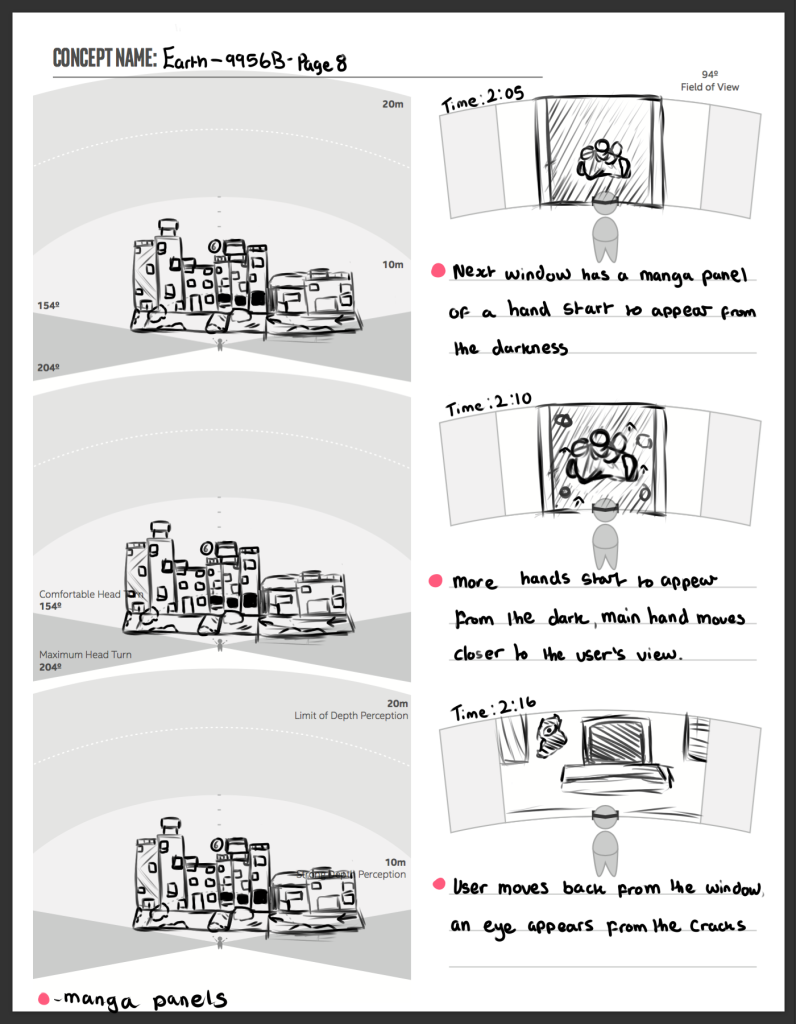
However, for the window section of the art gallery, I changed a couple of art ideas in order to add to the psychological horror theme of the world’s narrative and to also showcase Mimi’s melconcholic personality. I also added in some advertisements to show that transition between the first and second section of the VR environment.

As shown in this example, this is how my workflow consisted within each piece. I usually started off by sketching out the basic shapes and composition. Then, I work on the lineart, adding more details and cross hatching to the piece to add movement and depth. And finally, I worked on the coloring and shading process. Usually, in manga, shading is mainly consisted of cross hatching and black gradients.

However, whilst I was working on the art, I was testing the Maya environment – the majority of it’s environments are covered in black mainly due to lighting. I wanted to keep this to make the contrasting textures more effective.

But this also meant having to use a different shading techniques to prevent the art from blending into the background.

Eventually, as mentioned previously in the Project Management section, I had to add some halftone backgrounds due to shader changes. This was mainly added to action panels.

Here is a gallery of all of my art used for the project.

Environment and Asset Creation – Maya

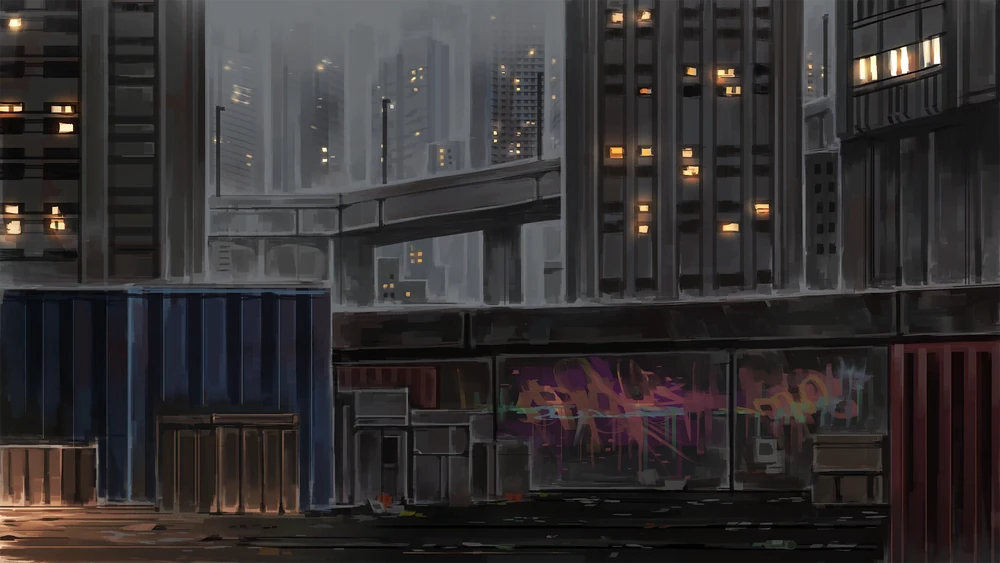
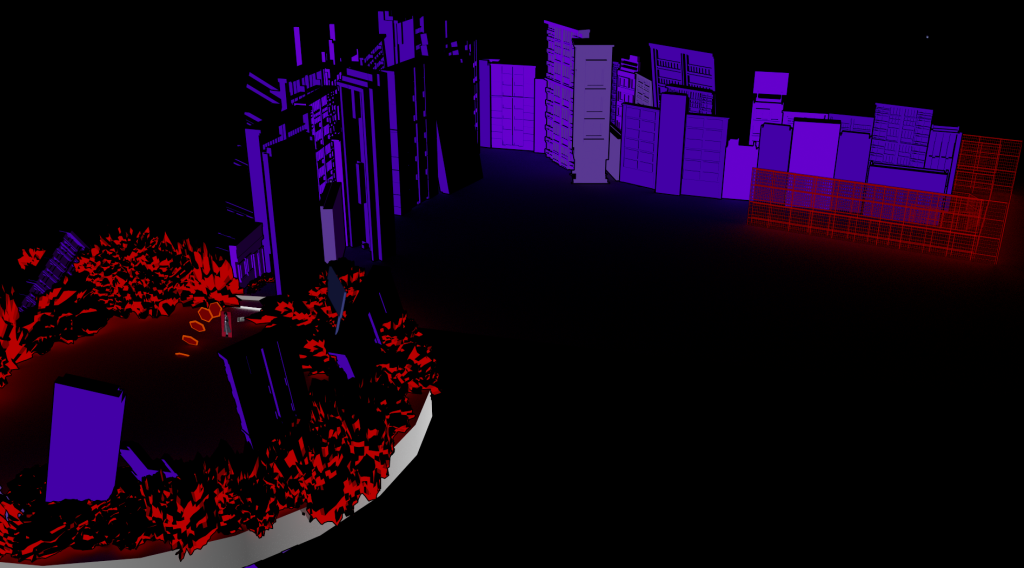
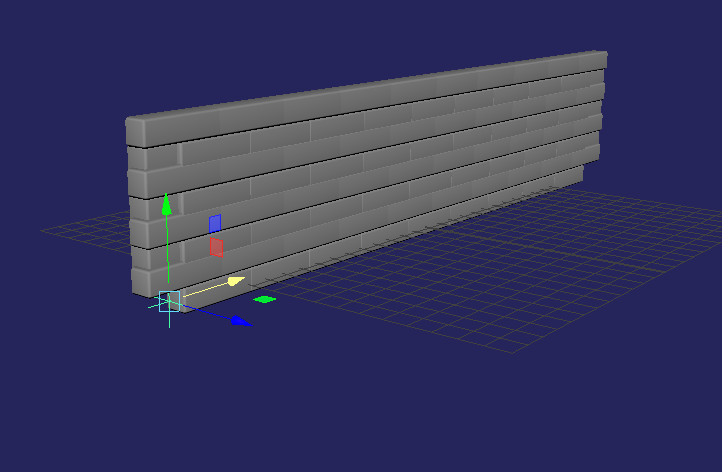
For my Maya workflow, I began with asset creation, making different buildings that could impose over the environment and the user. The main objective here is to make the buildings appear intimidating and artifical, almost as if it isn’t meant to be standing in an environment filled with horrors and destruction, once again, going back to the main established theme of chaos vs order.

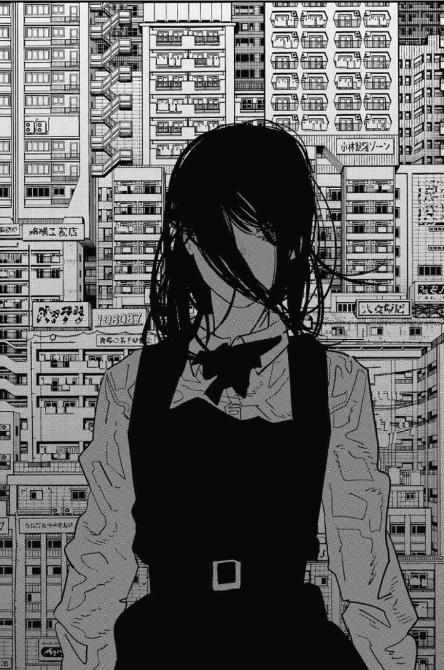
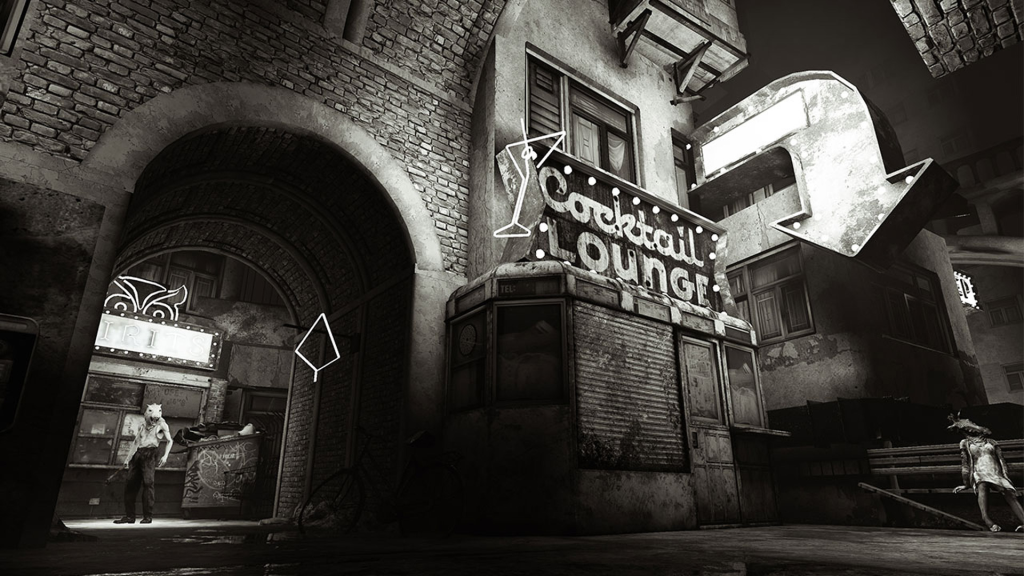
I used this image as reference for multiple of the building assets. This is due to how visually striking the city looks within this composition. A city that stands tall, making the character appear small despite being the main focus of the image, an effect that I’d like to apply in a VR setting.

Fujimoto, T. (2018). Chainsaw Man Volume 12. [Manga] Tokyo: Weekly Shōnen Jump.

This is mainly achieved by making different buildings, each with different sizes and details that allow them to stand out.

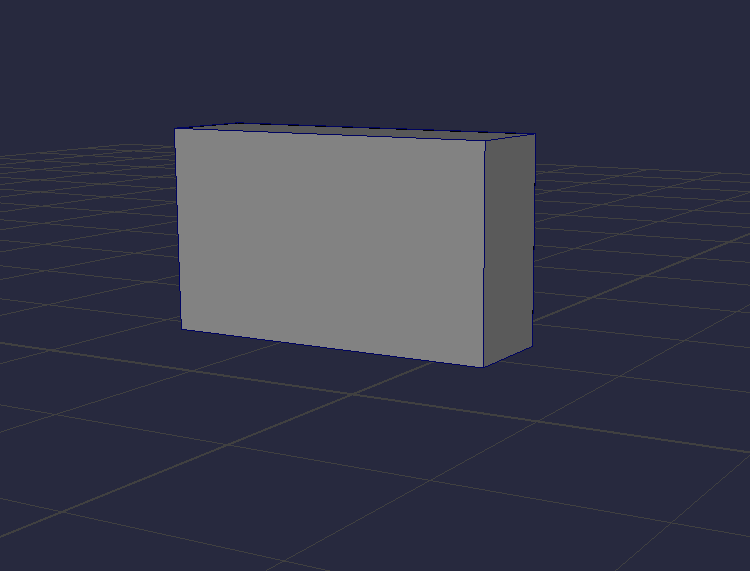
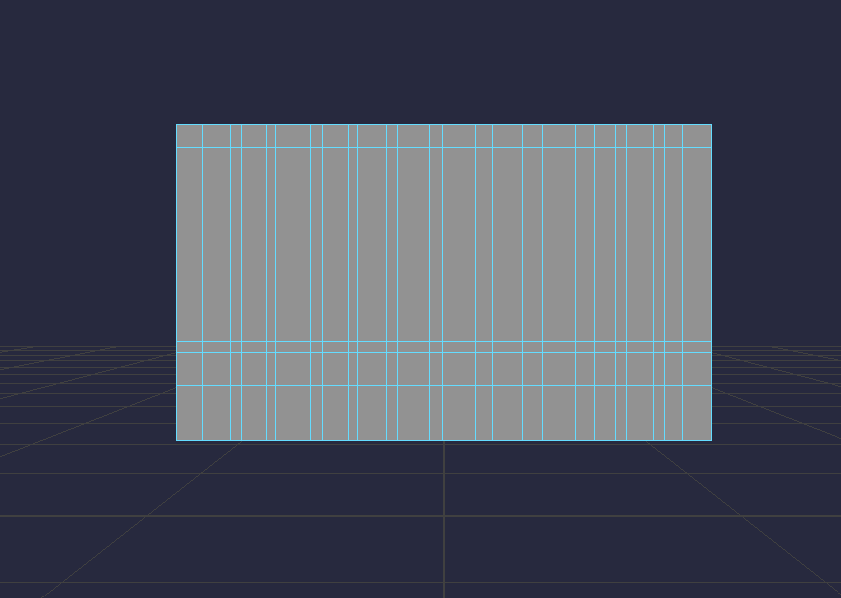
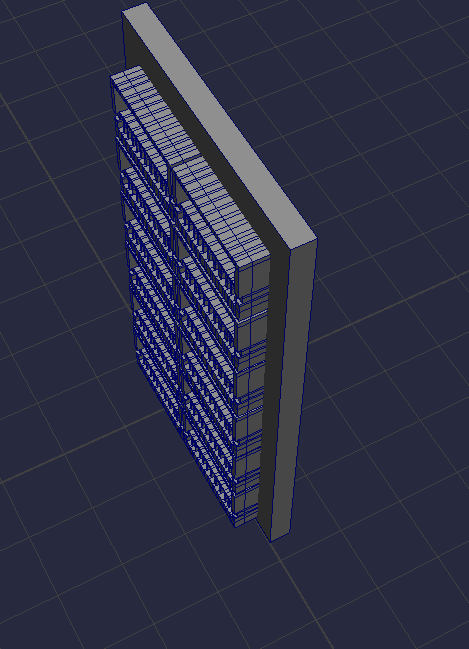
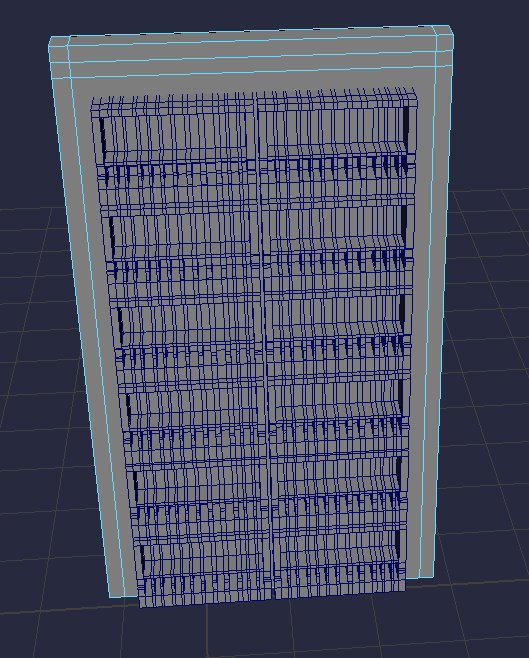
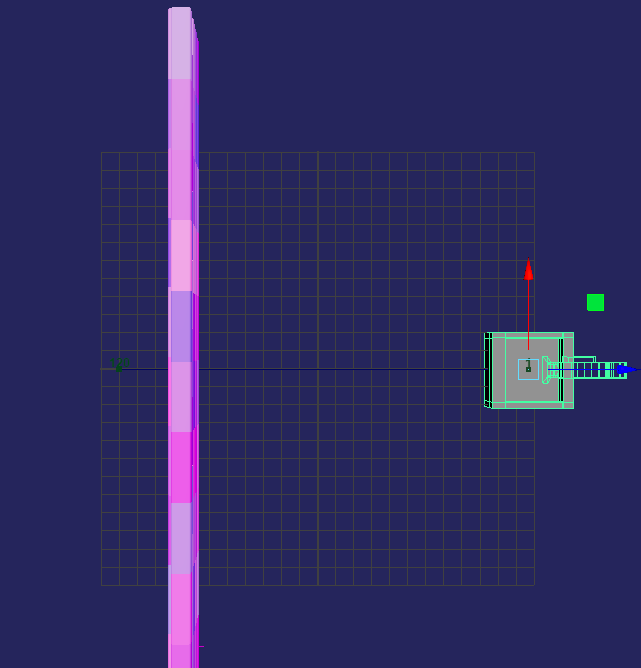
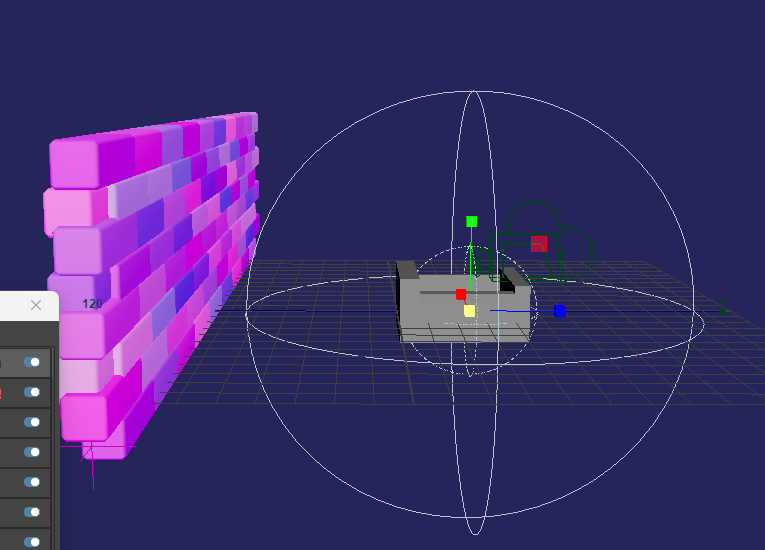
I modeled these buildings using the multi cut tool to separate the meshes into different sections before using the extrude tool to make finer details into the shapes and add depth to create certain objects such as railings, windows or balconies.

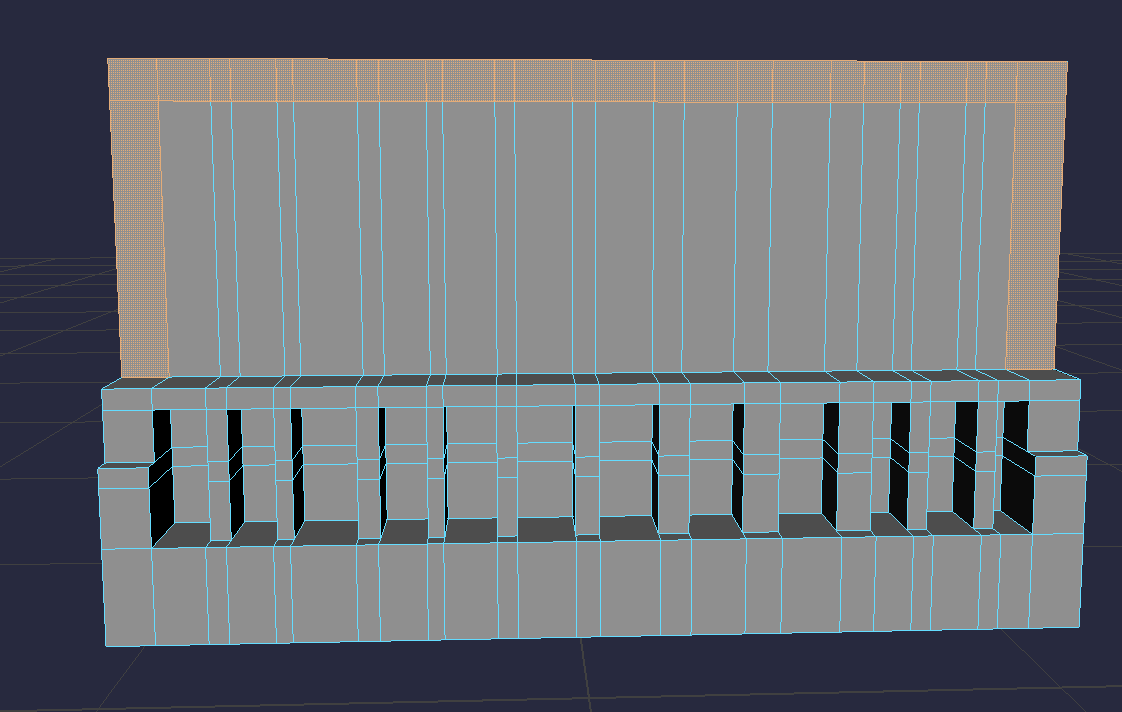
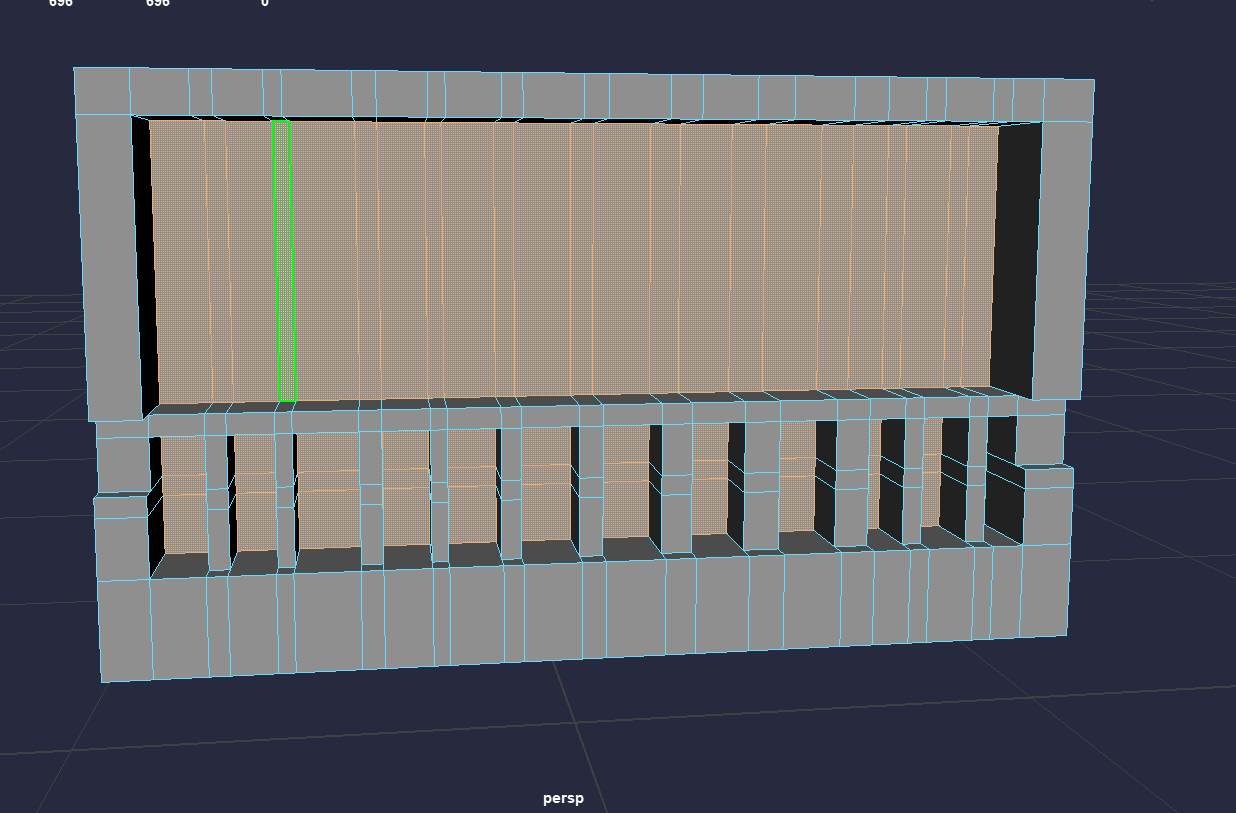
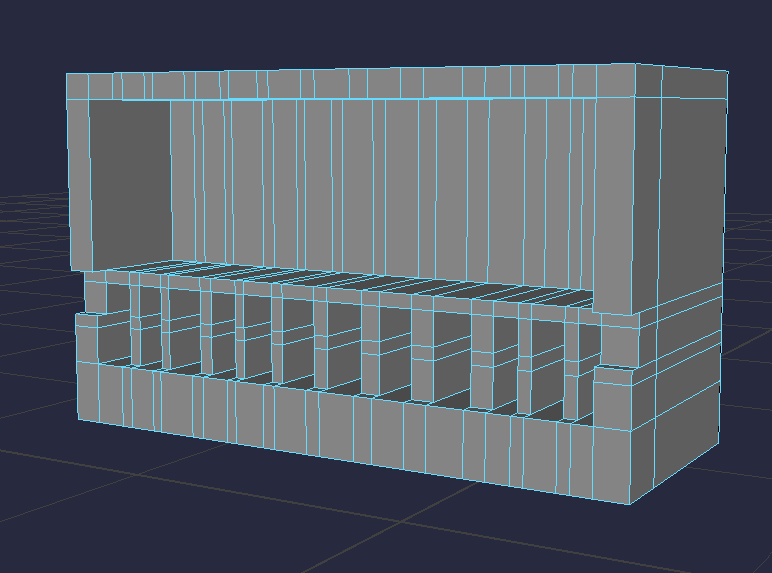
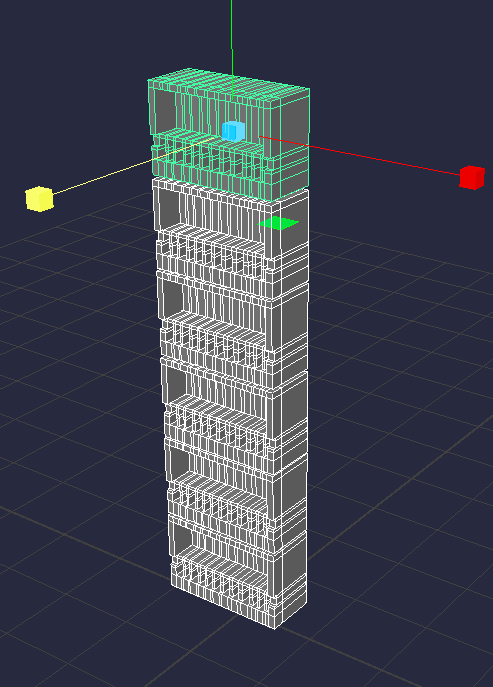
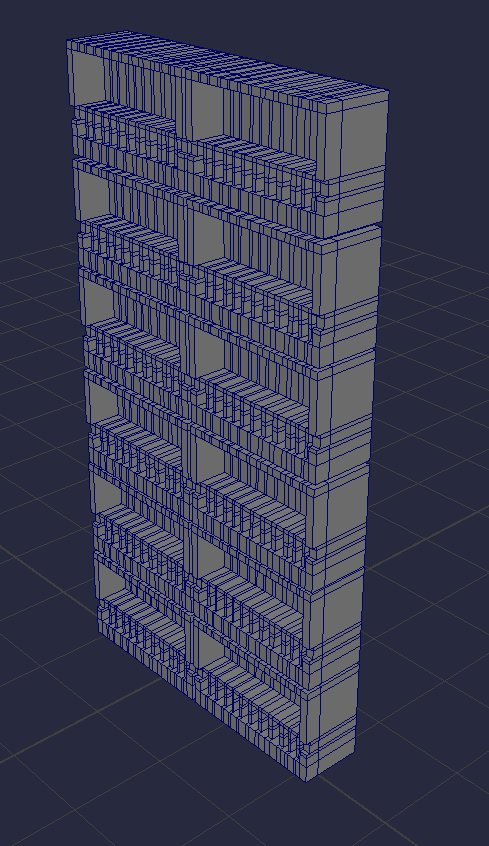
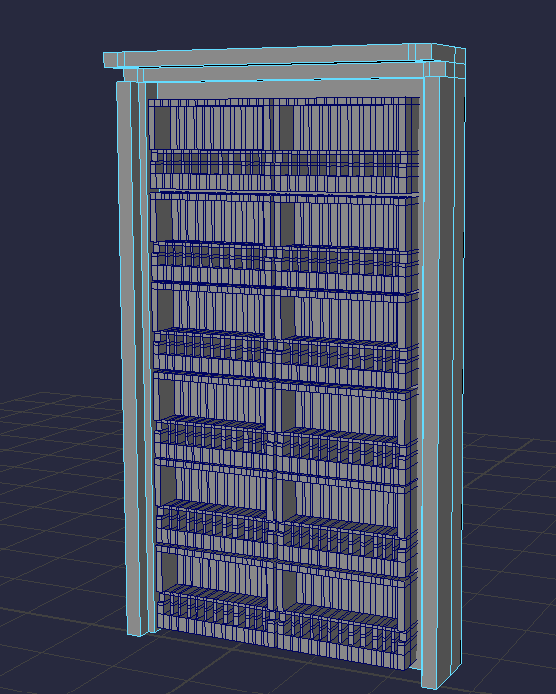
Afterwards I would duplicate this finished section into rows in which I make a separate mesh for the foundations of the building.

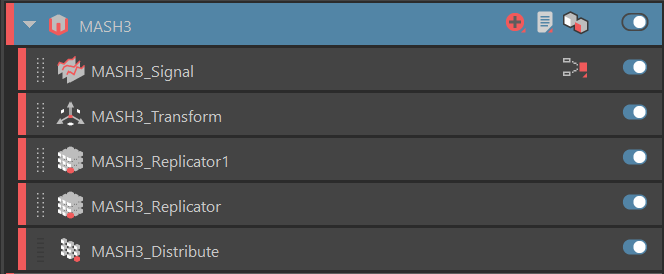
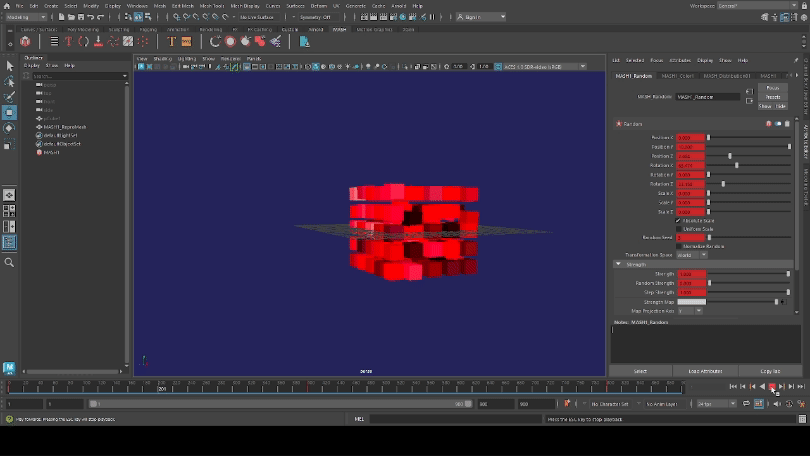
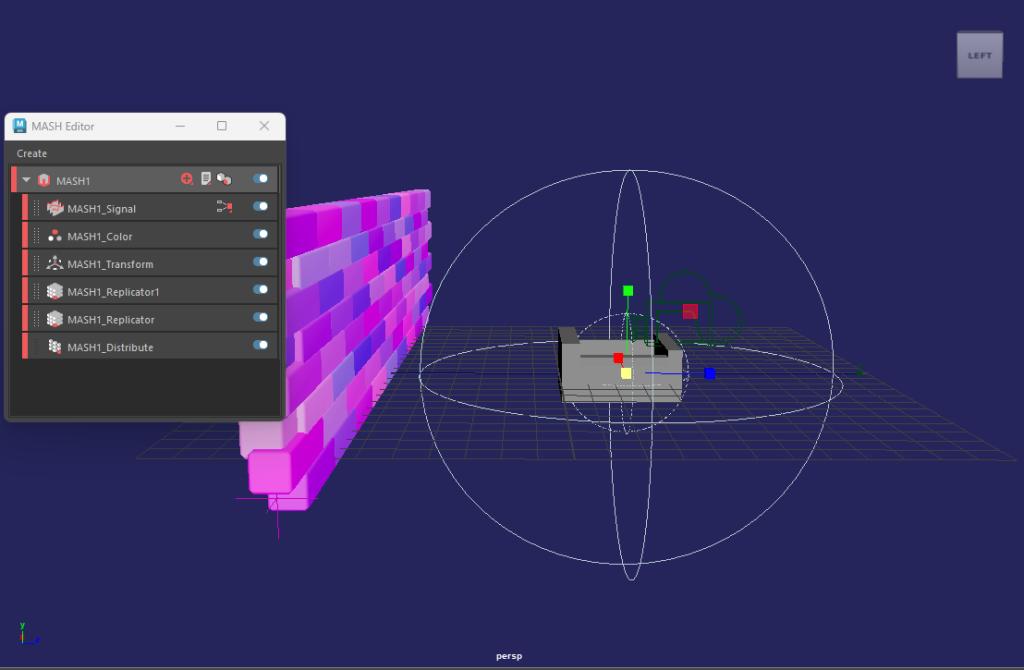
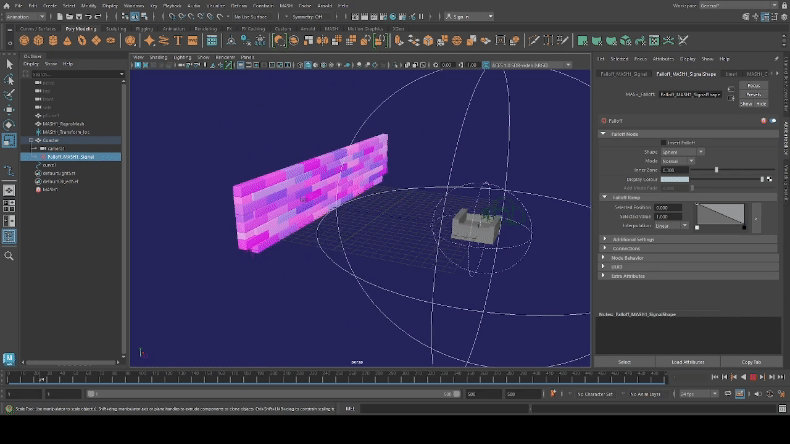
Originally, my plan was to use mash network’s replicator nodes in order to create these buildings efficiently, however I found that I couldn’t make multiple duplicates of the network. So instead, I made these buildings manually, taking longer within the production schedule but it meant that I had my own meshes. With my experience with Mash Networks, they sometimes tend to be unstable with multiple copies. Therefore, this was the best solution for this issue.

This was my general workflow for each building, although for certain ones such as the smaller ones I experimented with only making one mesh for the entire model rather than having separate sections built up. This was to add a detailed variety to the buildings such as having a convenient store or a smaller motel-like apartment.

Smaller buildings created in Maya

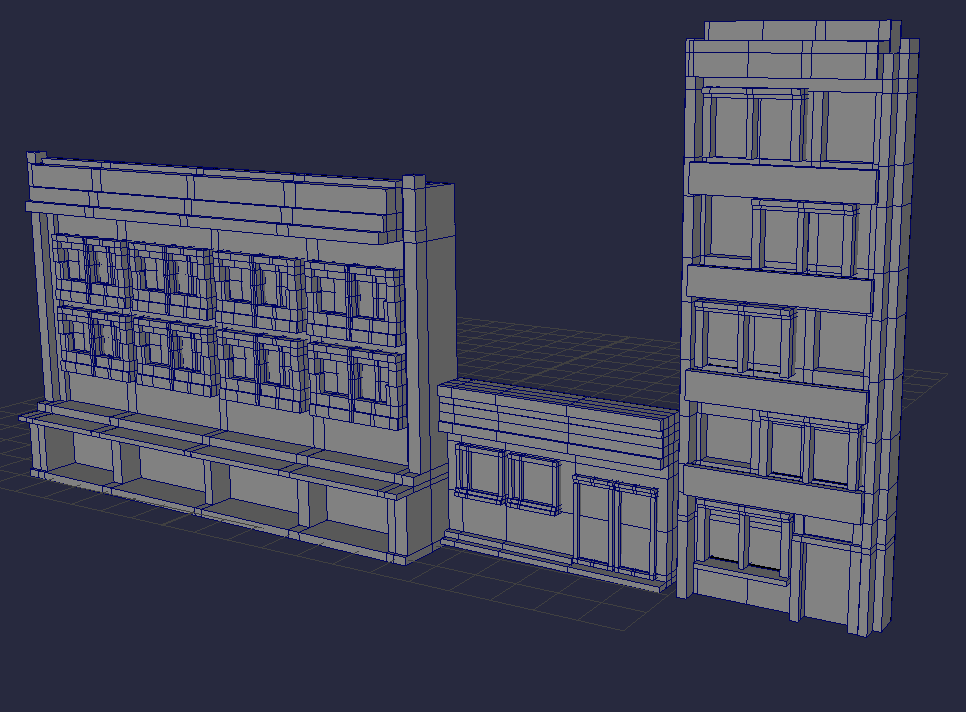
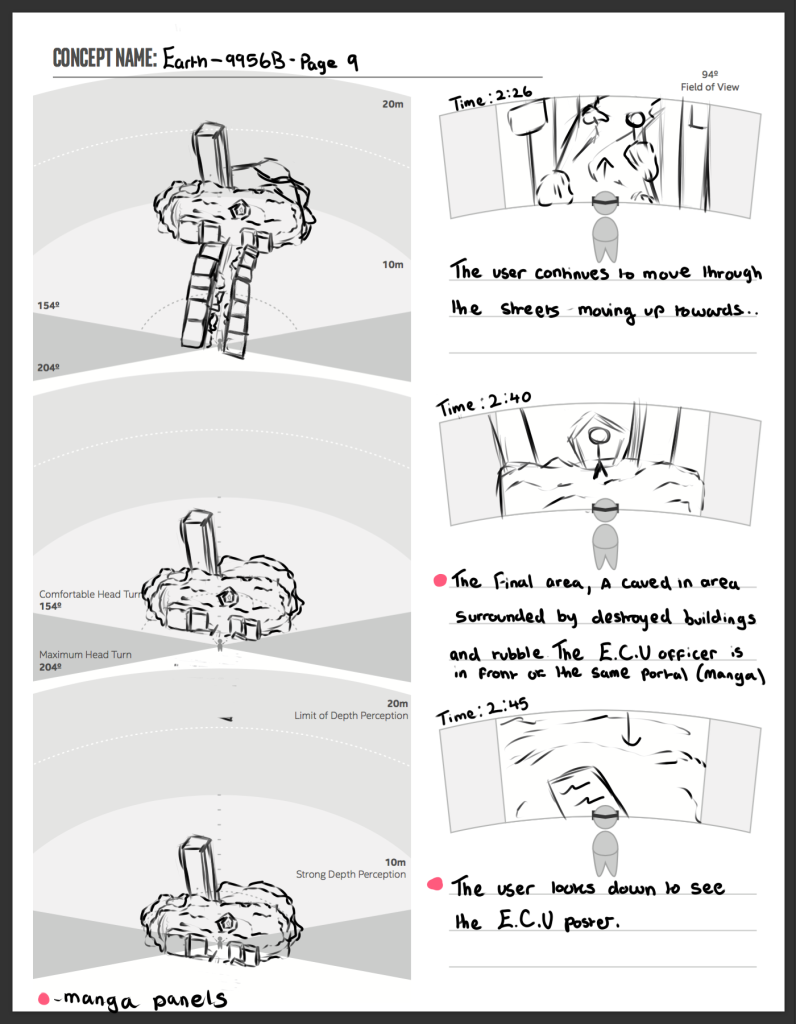
Due to this being a prototype and time constraints within the project, I only made 13 unique buildings with 7 of these buildings being variants with ‘open’ windows for the third section of the VR experience.

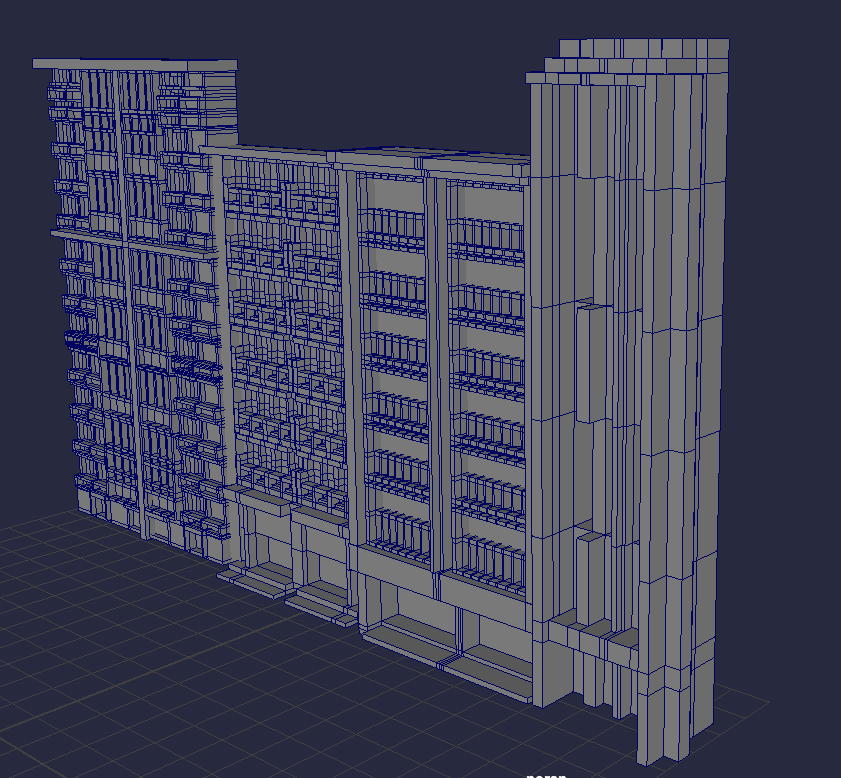
Because of this, my main concern was trying to make each building unique whilst reusing the same buildings throughout the experience. However, when I started setting up the city, by adding smaller adjustments such as proportion changes or rotating the buildings to make them fit within the composition. Once I added in the VR camera and animated it’s movements, this composition of neatly packed buildings felt different with each step in the city. Even if the buildings aren’t something that the user will fix their main focus on, they still make the walk through the streets visually unique whilst showcasing the models in different perspectives, therefore this solution resolves my concerns.

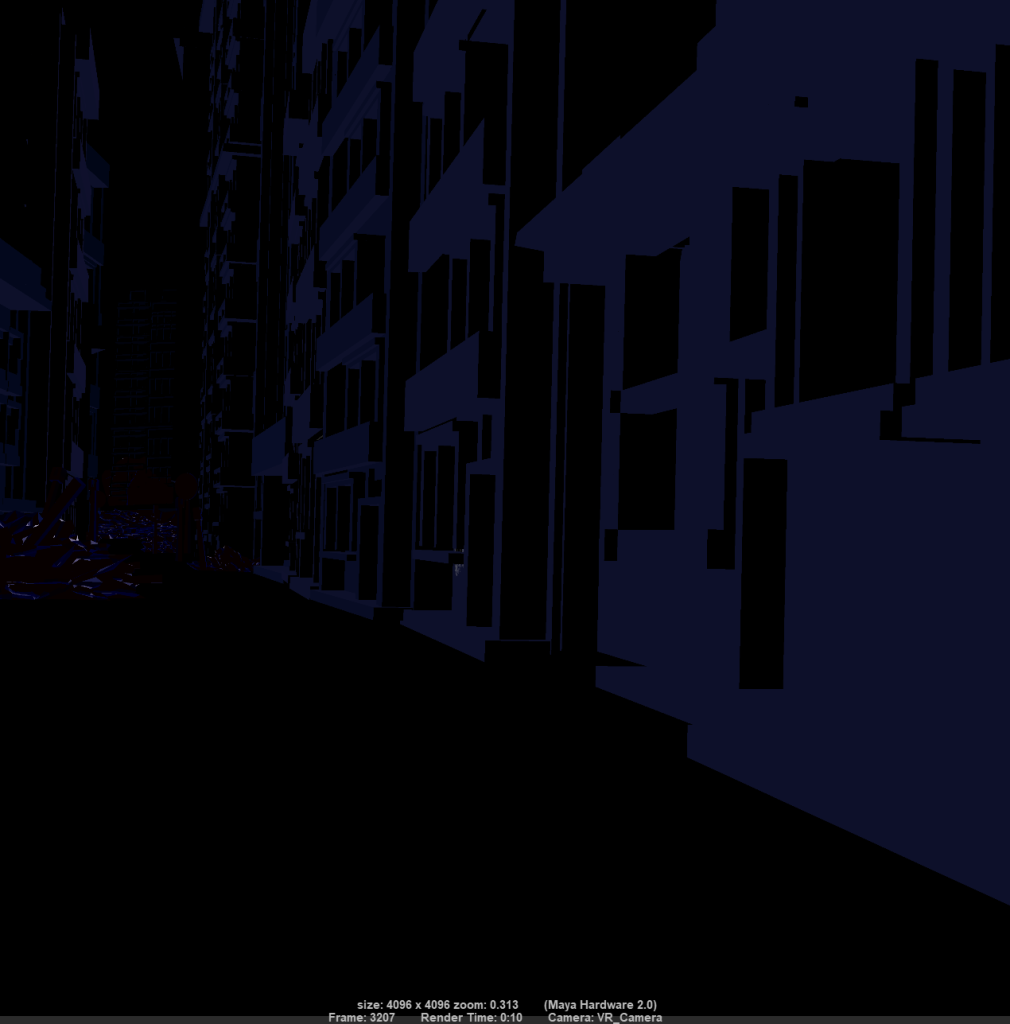
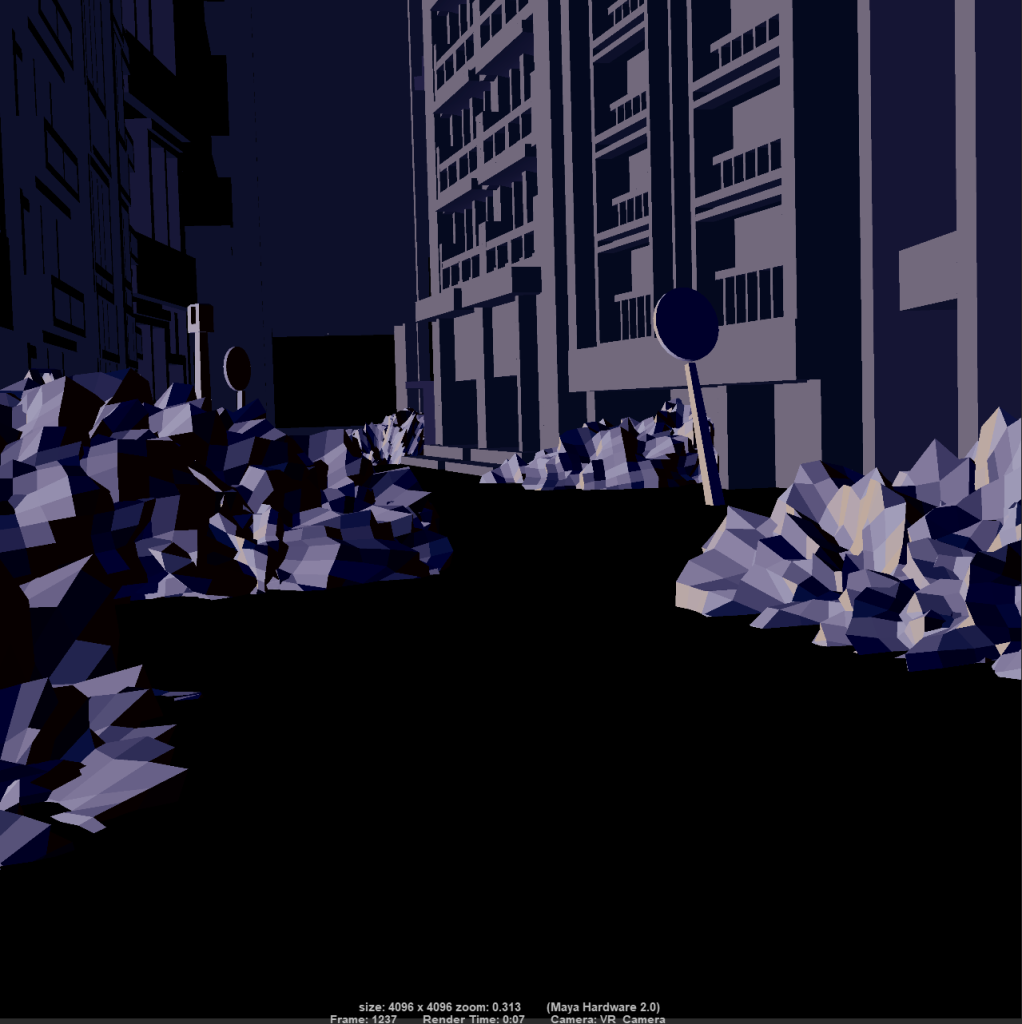
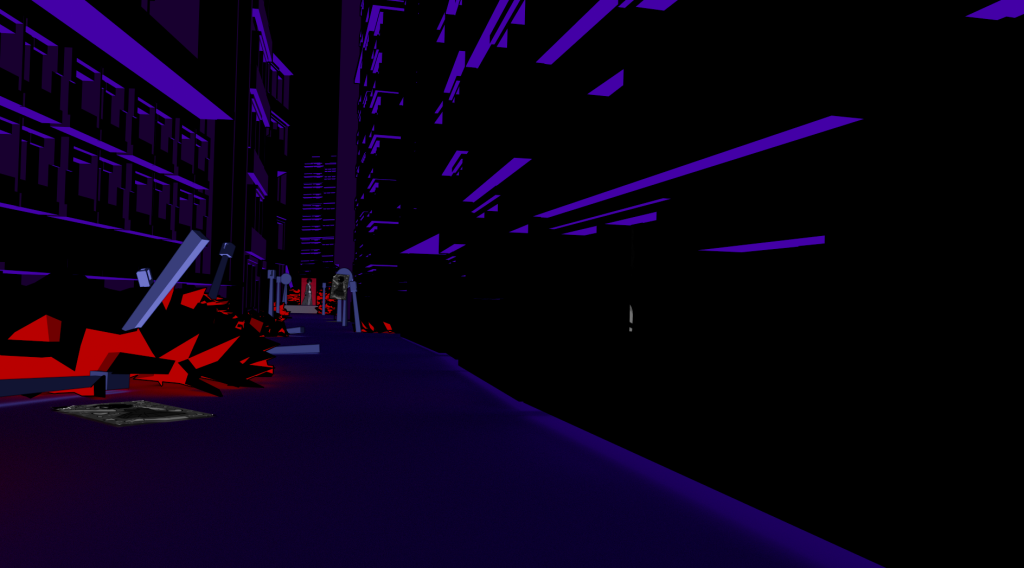
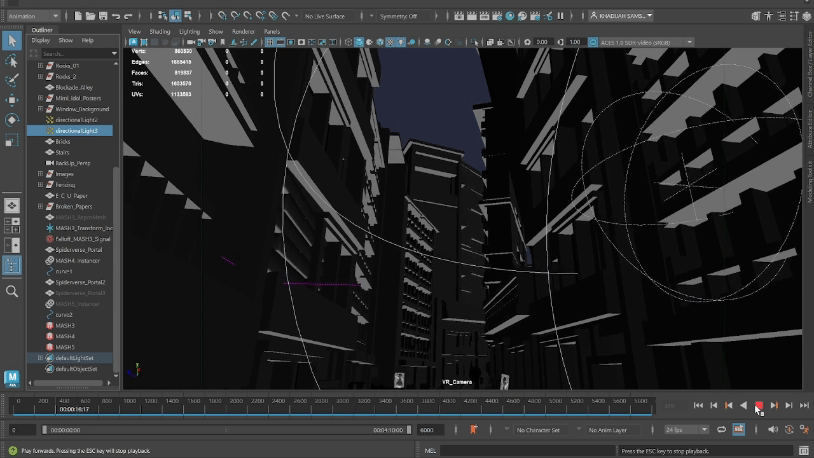
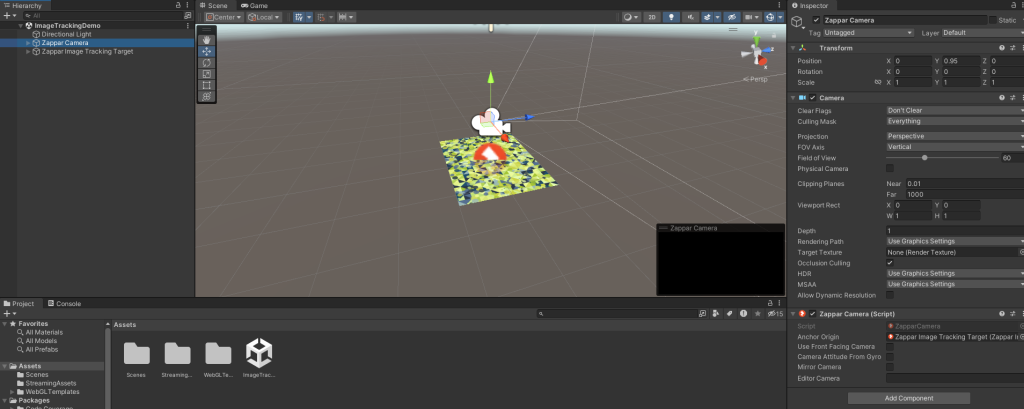
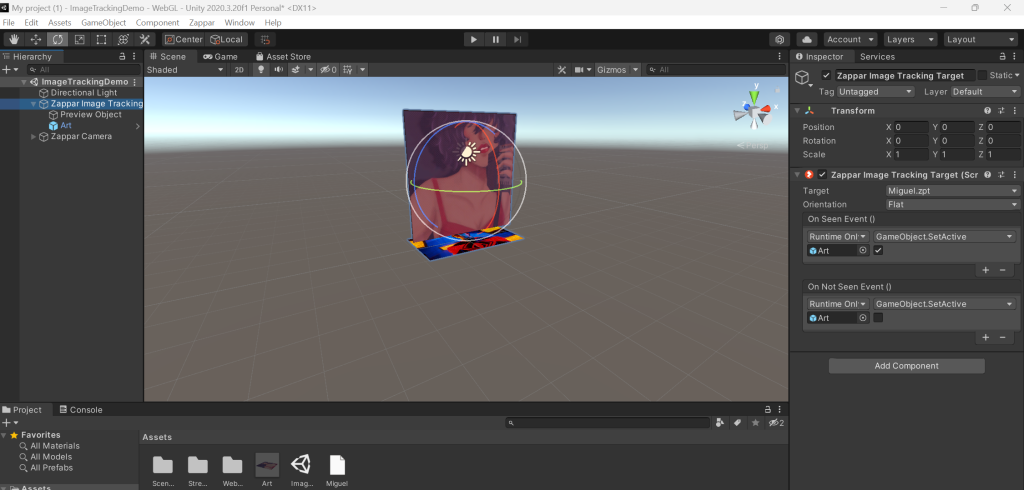
Once I applied the VR camera into the scene, I started to apply textures and lighting, experimenting with different tones and lighting techniques to see what the best render outcome would be. I created this shading effect using various colour ramps that helped adjust the lighting and shadows within the scene. At this time, I was planning to use Maya Hardware 2.0 to render.

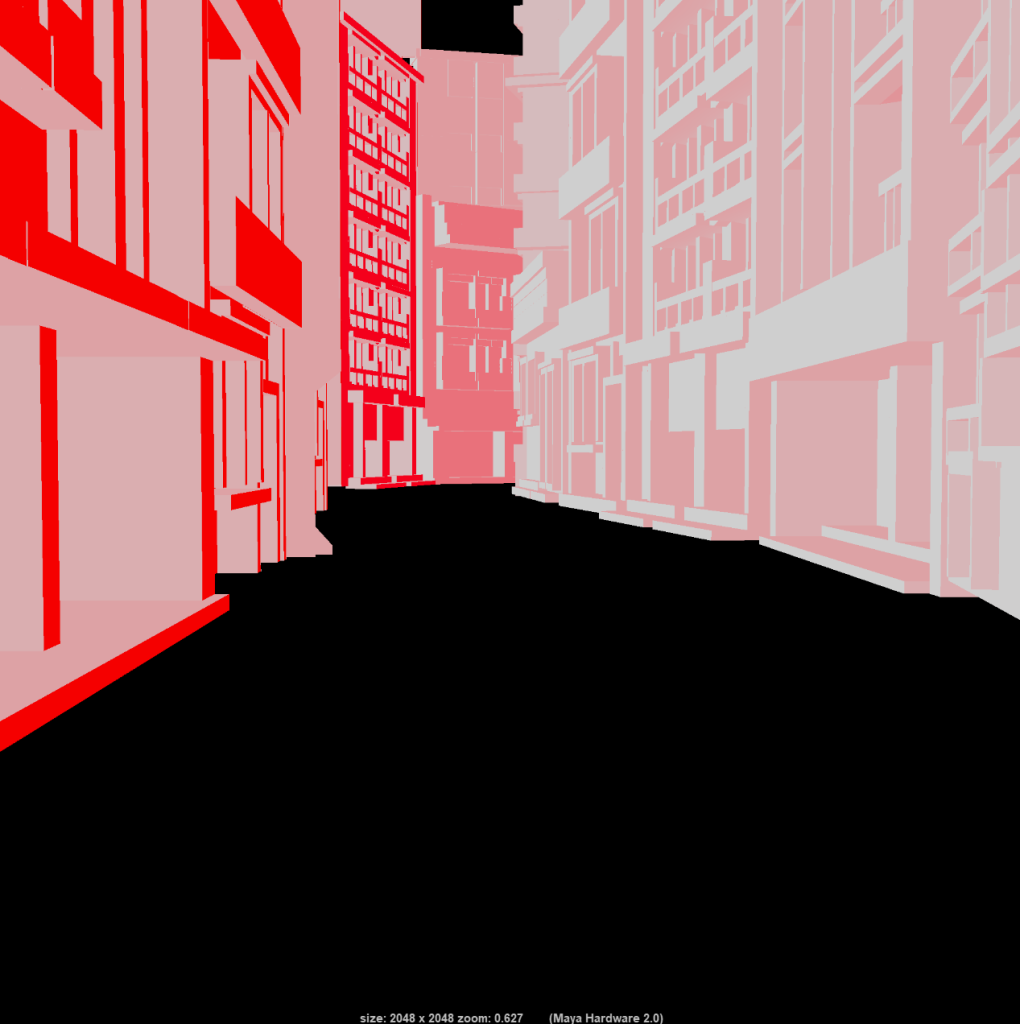
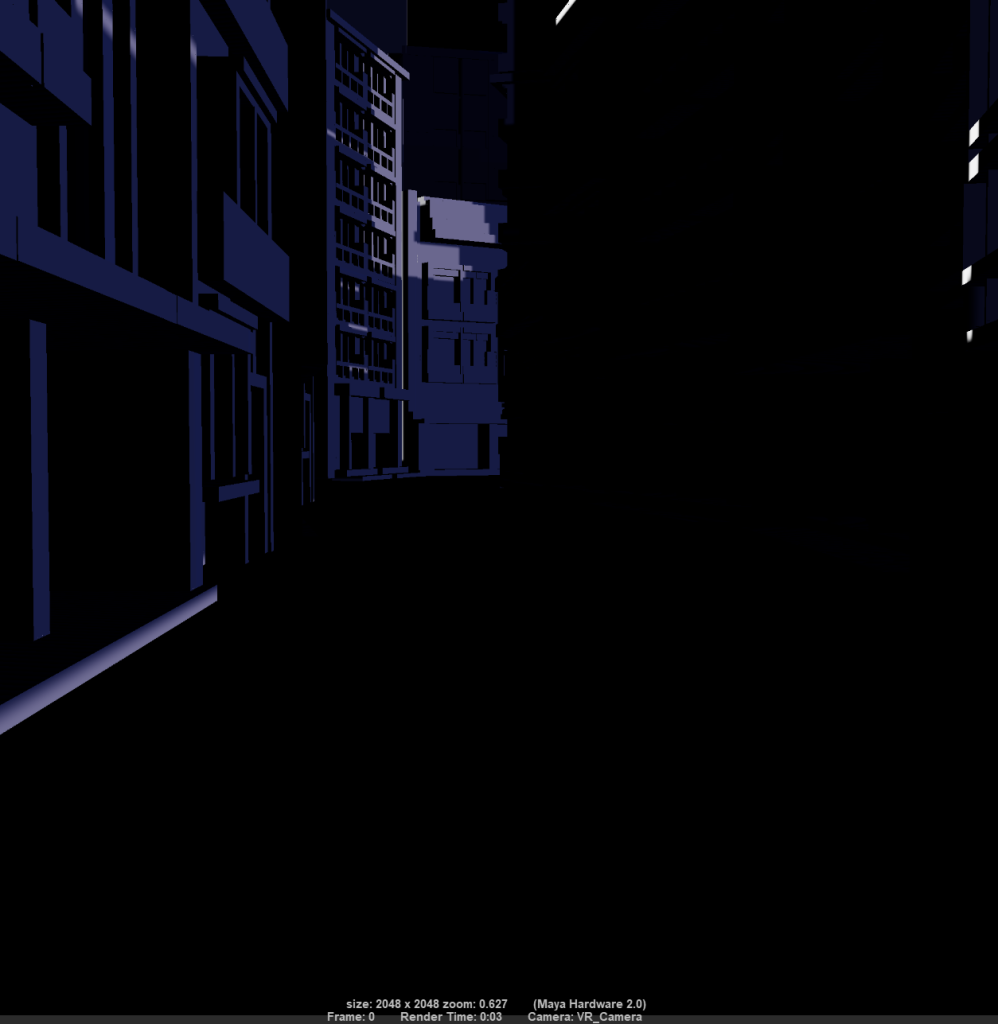
However, due to rendering issues talked about in the project management section. I had to switch to AI shader to use Arnold Shader, therefore having to change the textures halfway through production. Despite this delay, I found this exploration to help further influence my choice in colour schemes once I made the switch. Whilst I liked this paler colour scheme, in a VR perspective, the colours blend in to the different objects, making that contrast severely less prominent and visually expressive.

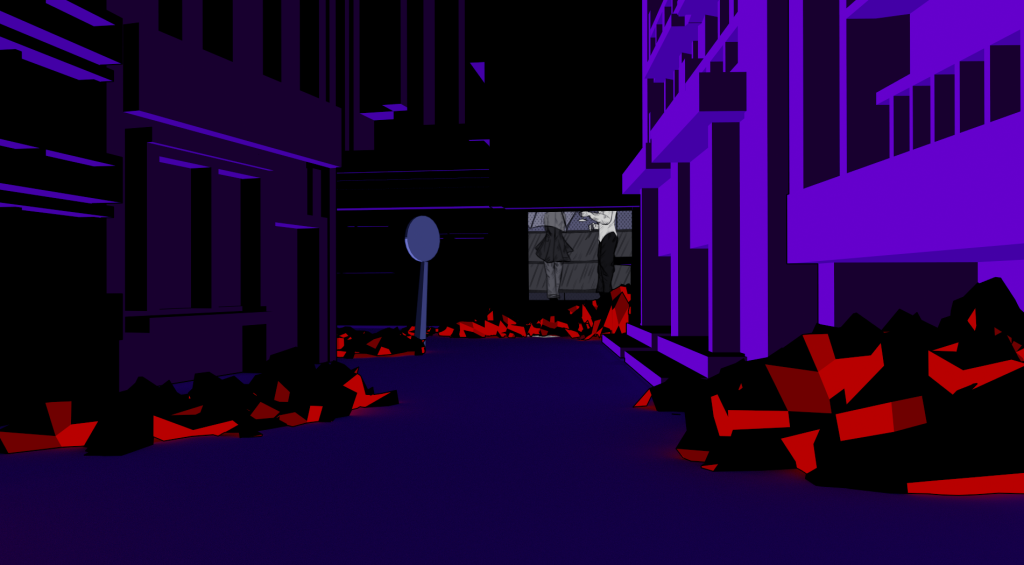
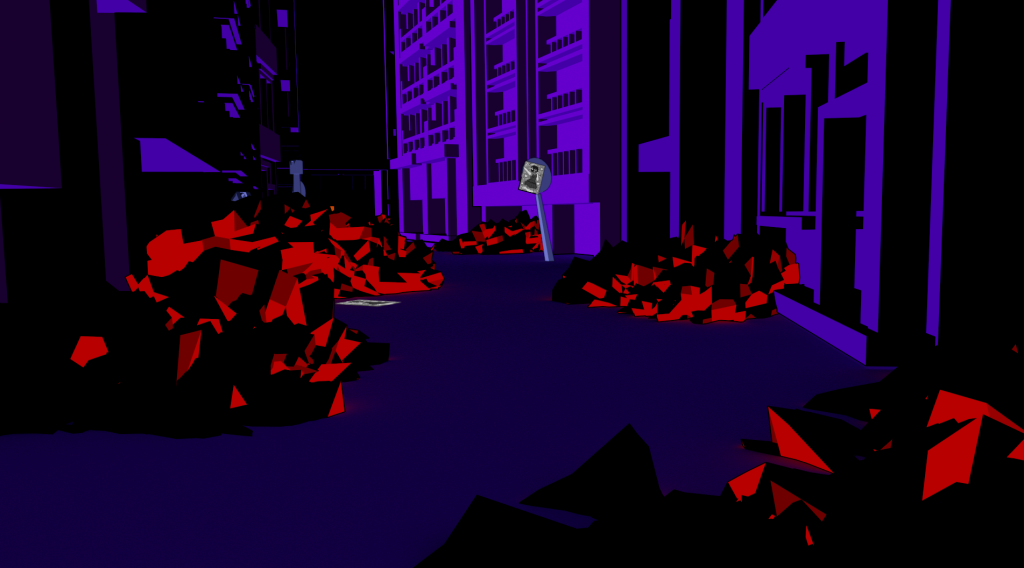
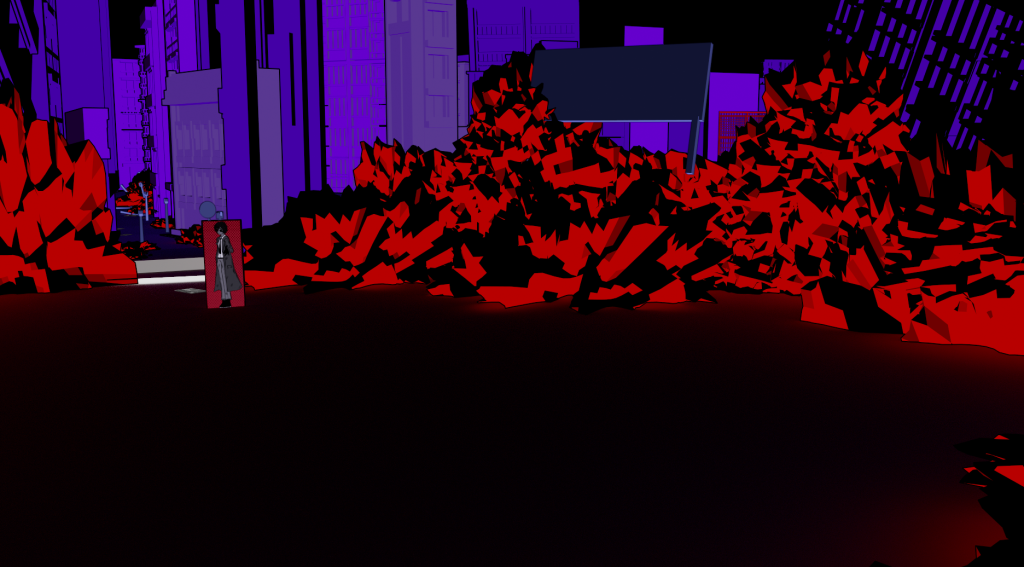
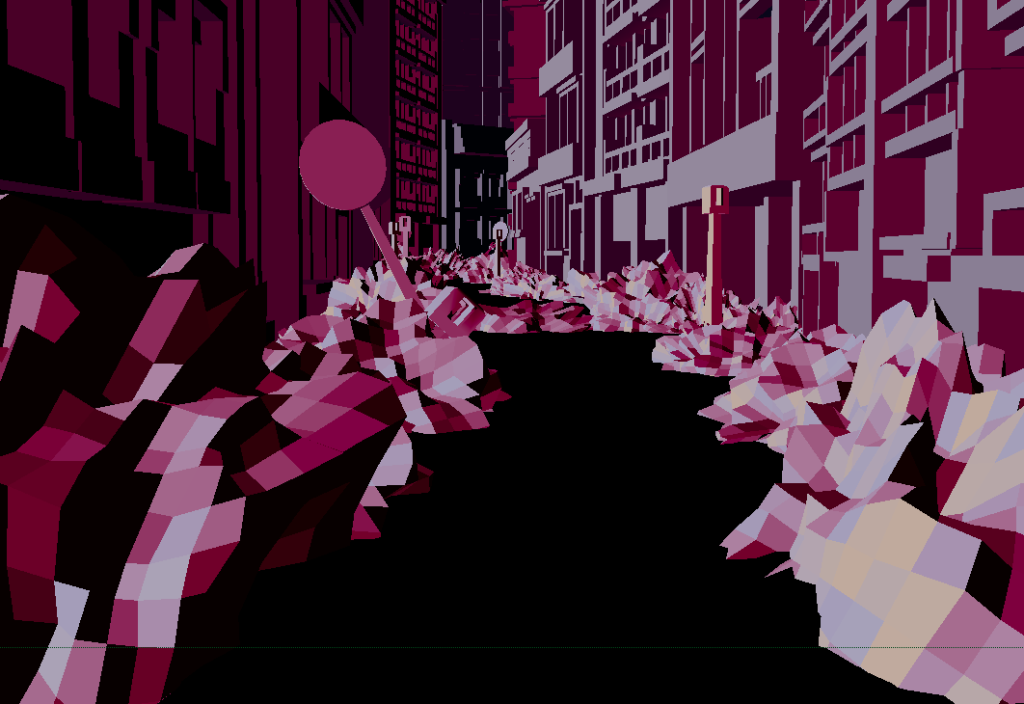
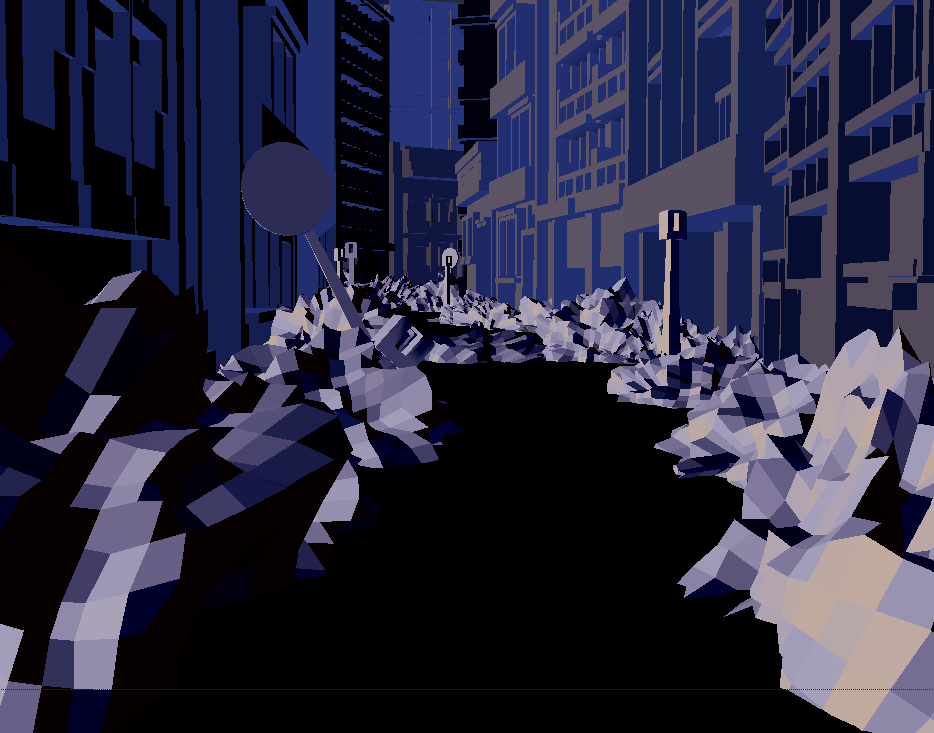
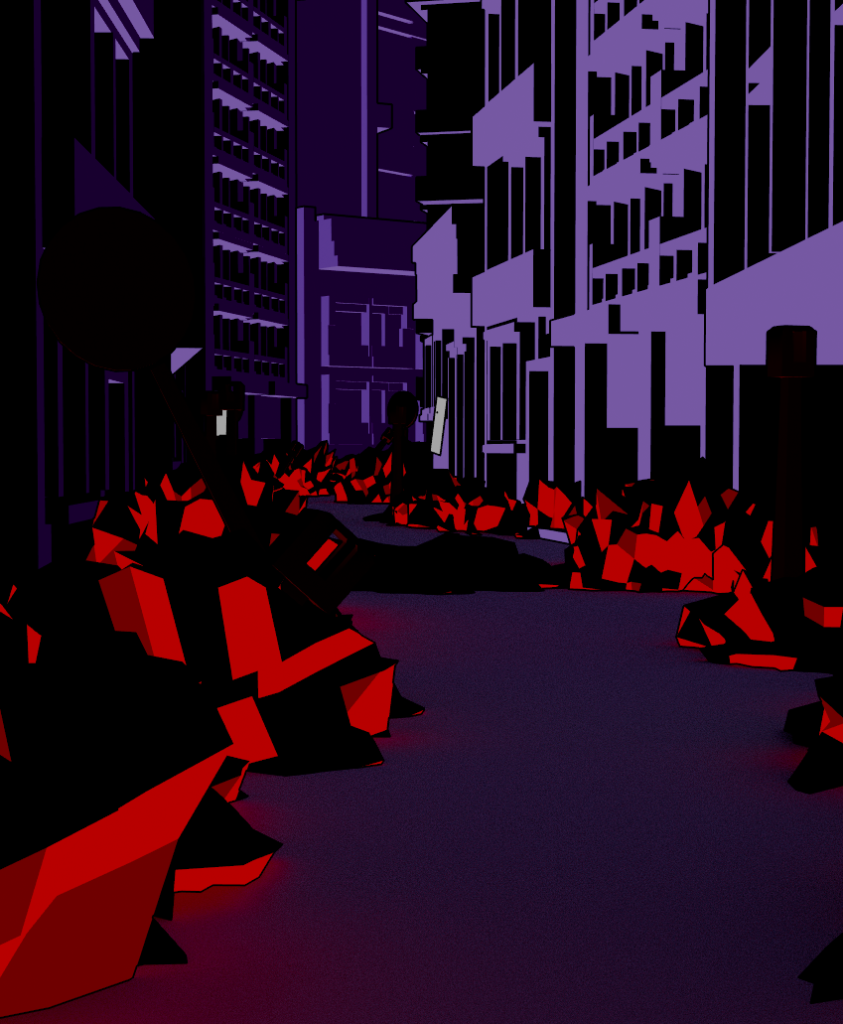
I started to also make objects during this time, such as simple street lamps, stop signs and billboards. The most challenging object to create and optimised however, was the rubble. I made two sets of rubble in blender, porting them into Maya to occupy the streets.

CG Geek (2020). How to Create Low Poly Rocks in 1 Minute. [Video] Available at: https://www.youtube.com/watch?v=4EqLyGsu3AA [Accessed 11/12/2023].

I arranged to in order to prevent them from being too cluttered and claustrophobic for the user. However, another issue arose when I finished applying the rubble onto the streets, I found out that the scene became completely unoptimized due to the rubble’s large polycount. So, to reduce the polycount – I used the reduce polygon tool and the count halfed, making the scene optimized for rendering in the future.

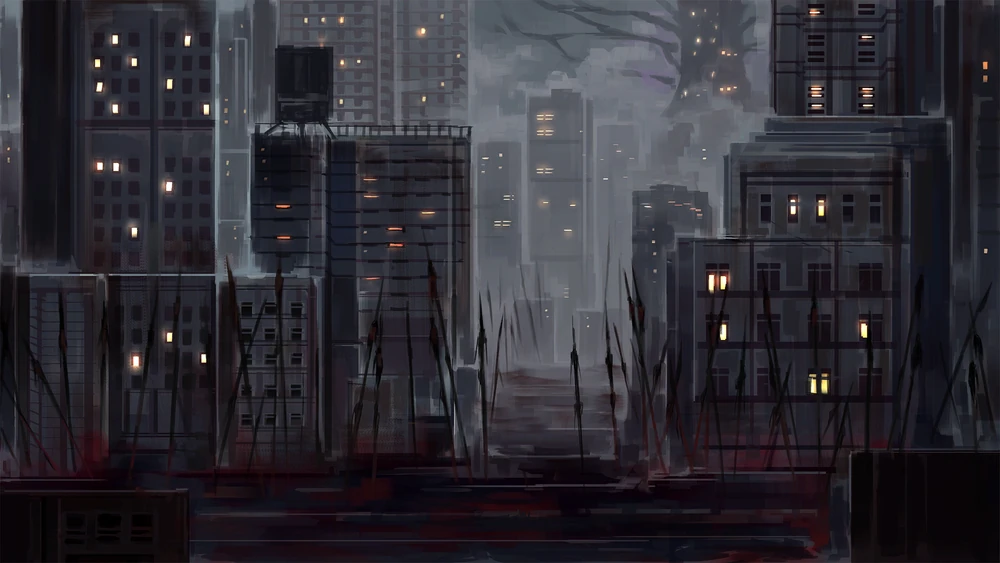
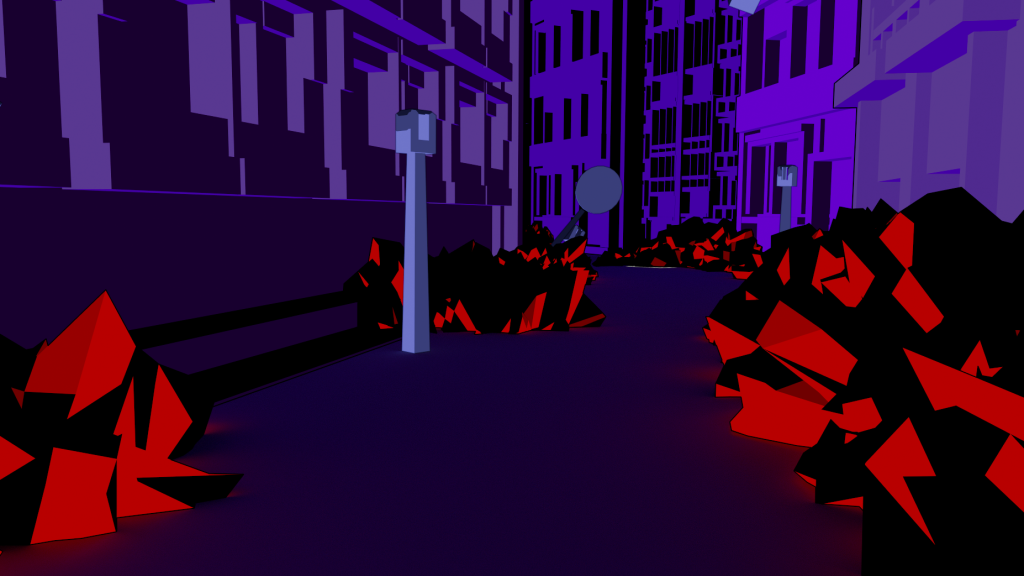
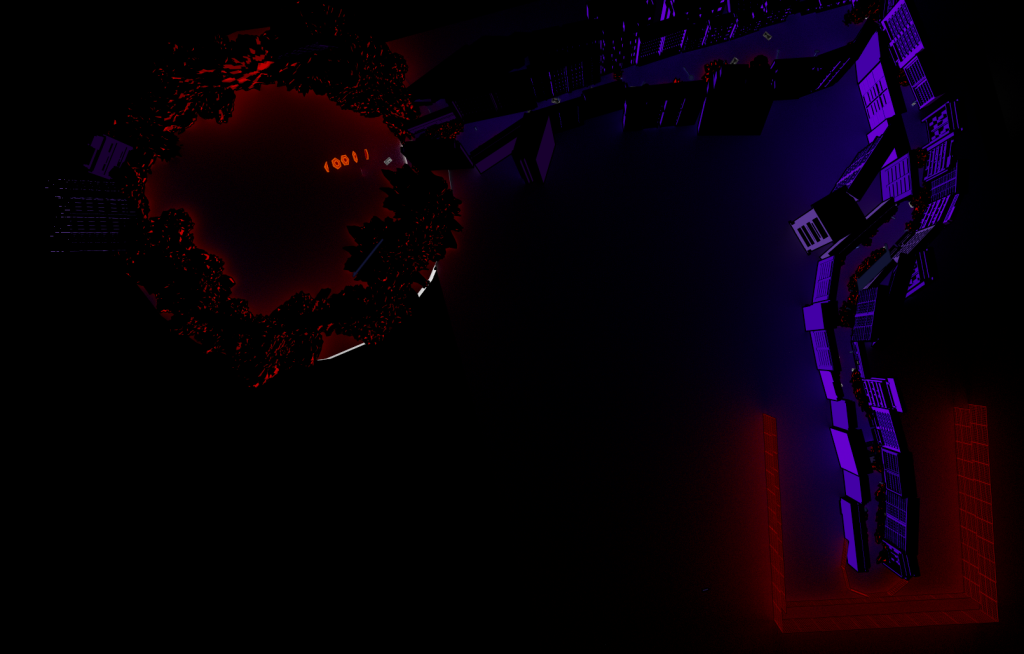
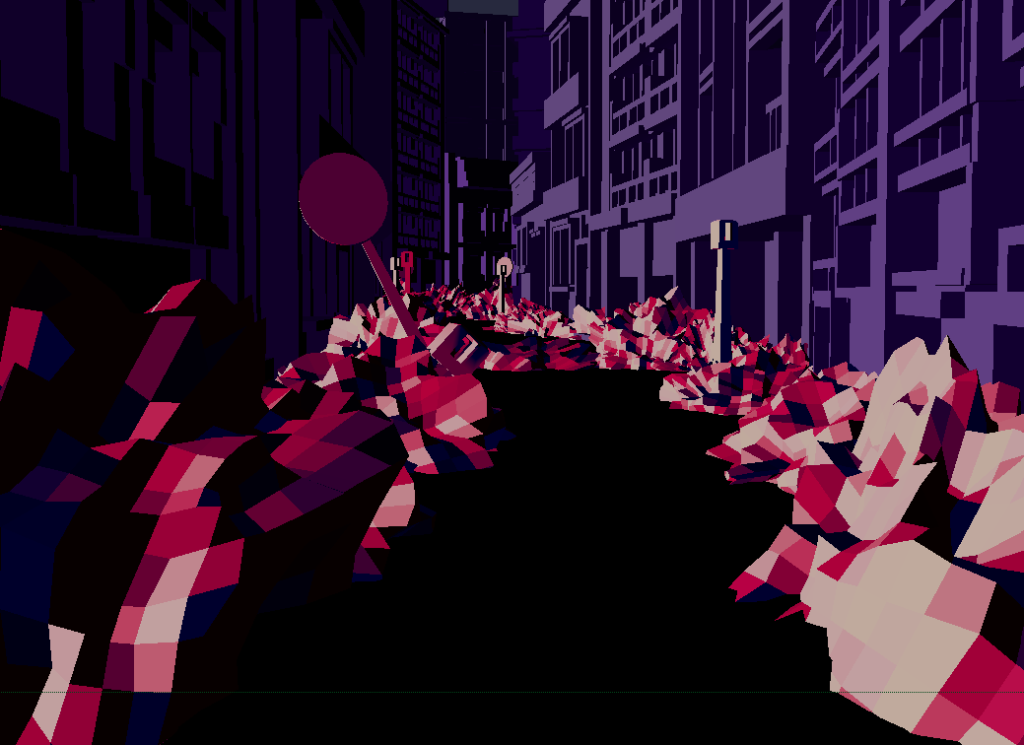
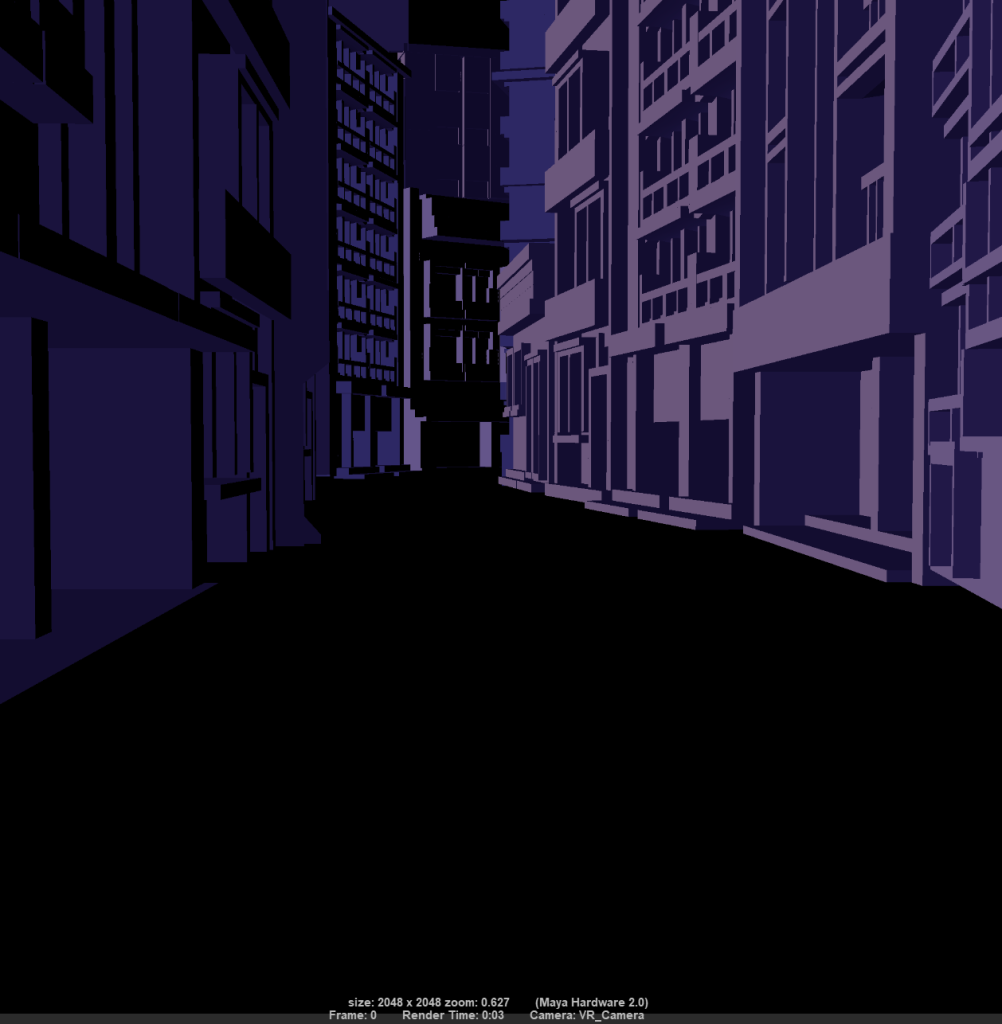
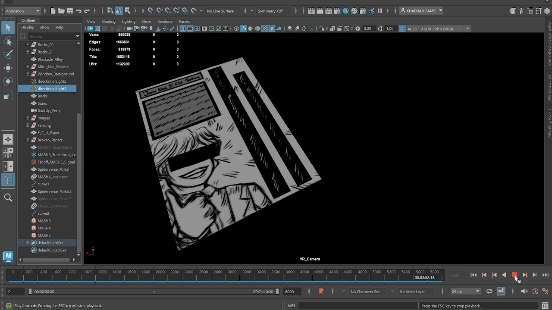
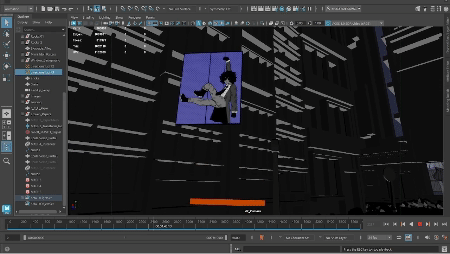
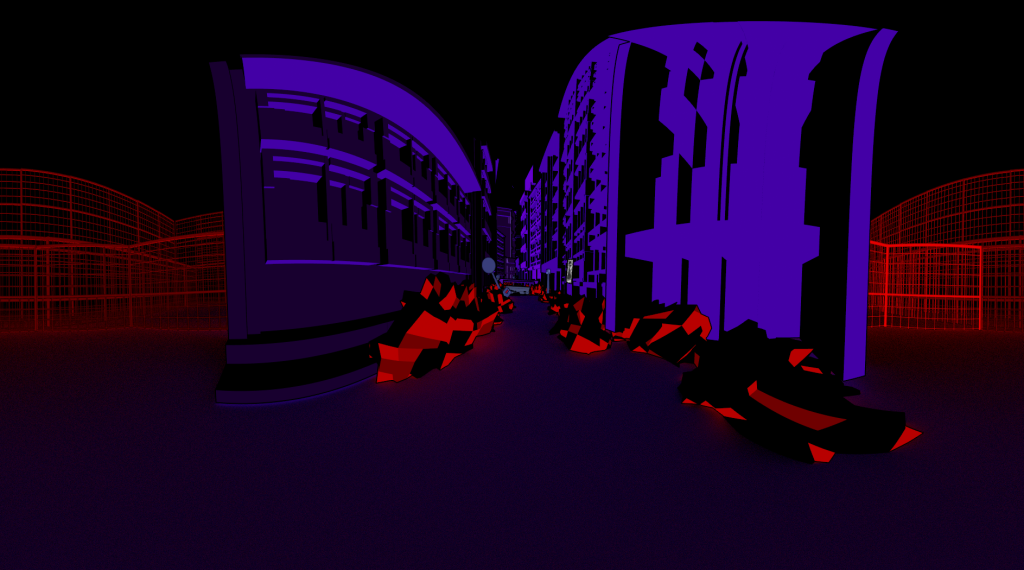
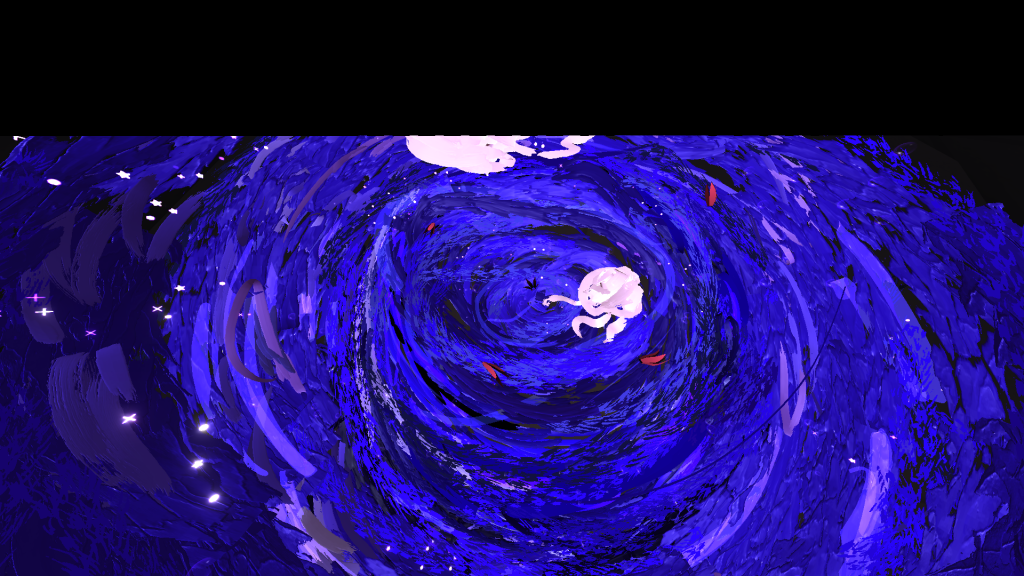
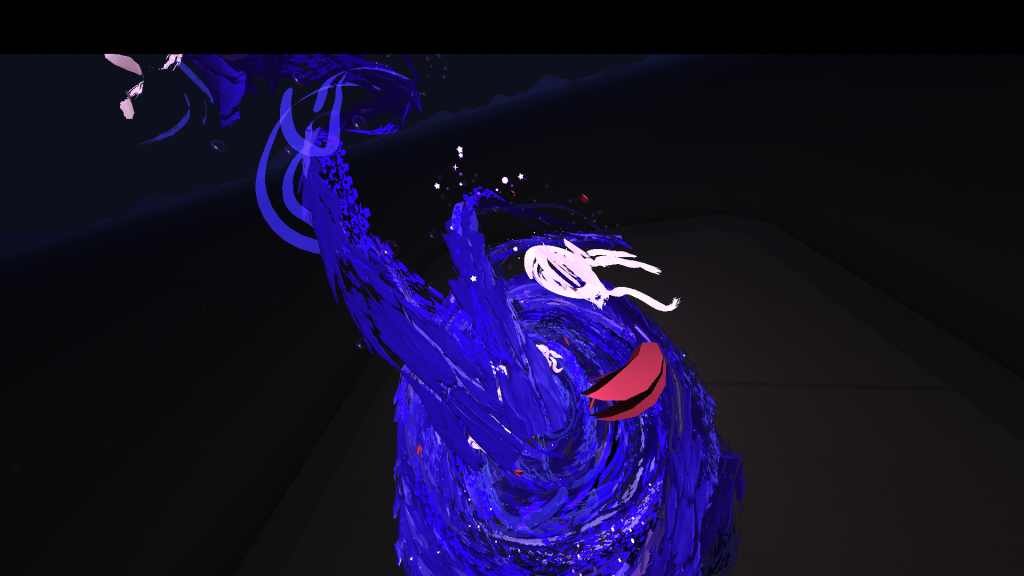
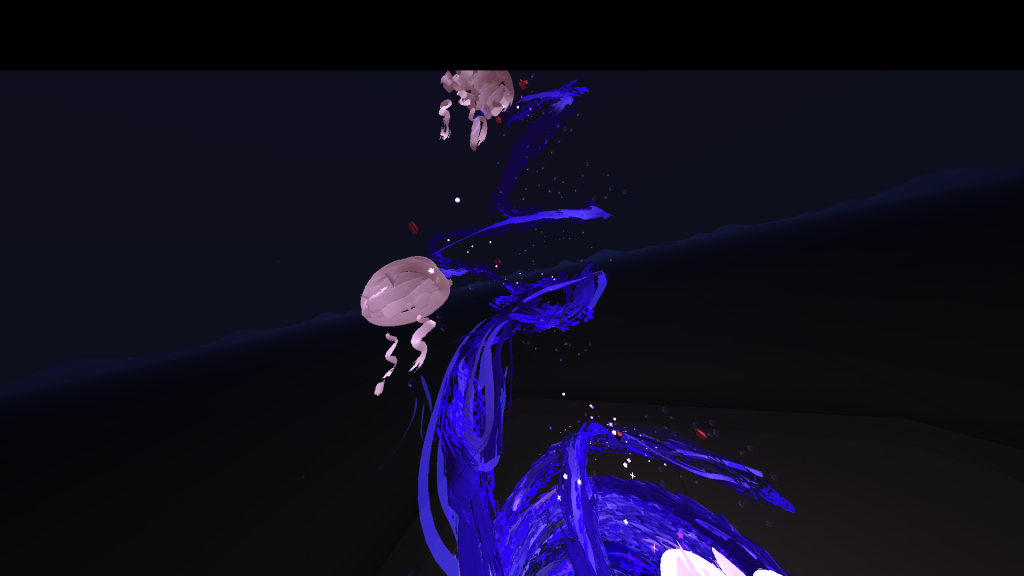
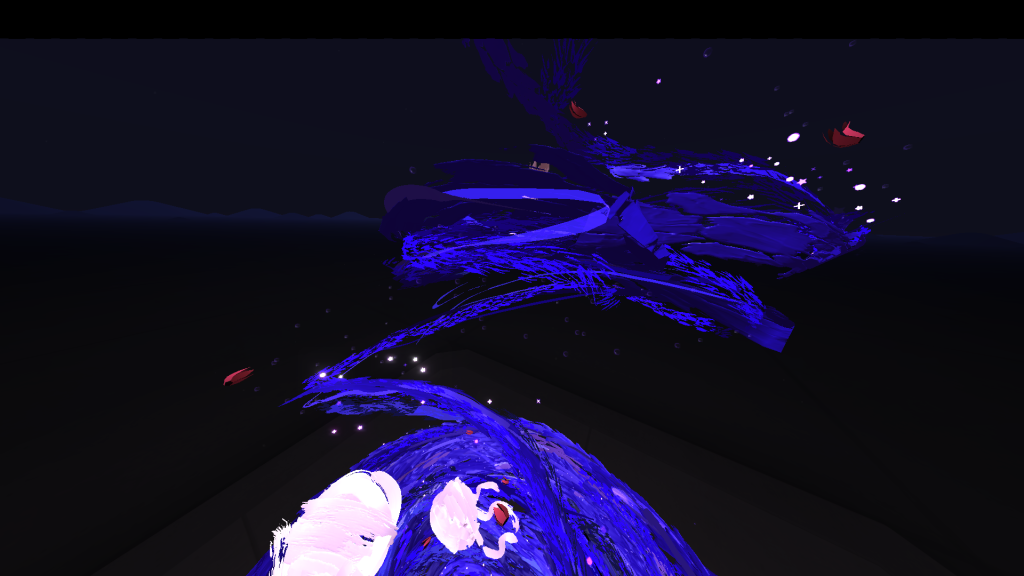
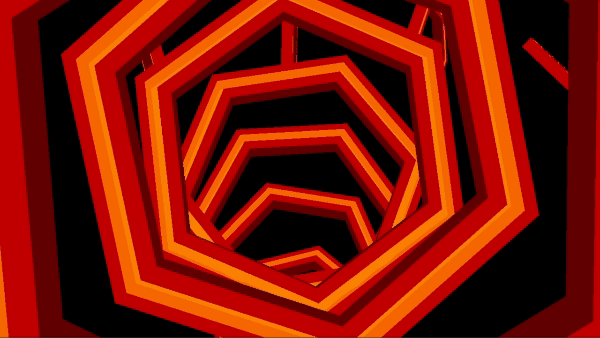
I also used this opportunity to offer a better visual contrast between the chaos of the rubble and the strict composition of the buildings. This also meant, however, that because I was using an AI toon shader, the line strokes for the outlines of each object makes them look more visually prominent. This also emphasized the visual manga theme and I was able to experiment with adjusting the lightning and line stroke width in order to make certain areas or items appear more prominent to the user. The images were added in as Arnold surface shader textures and images planes. The adverts, however, have AI toon, to add depth to the planes as they’d be the most noticeable to the user’s view as the user walks past, making these posters blend into the environment in a noticeable way.

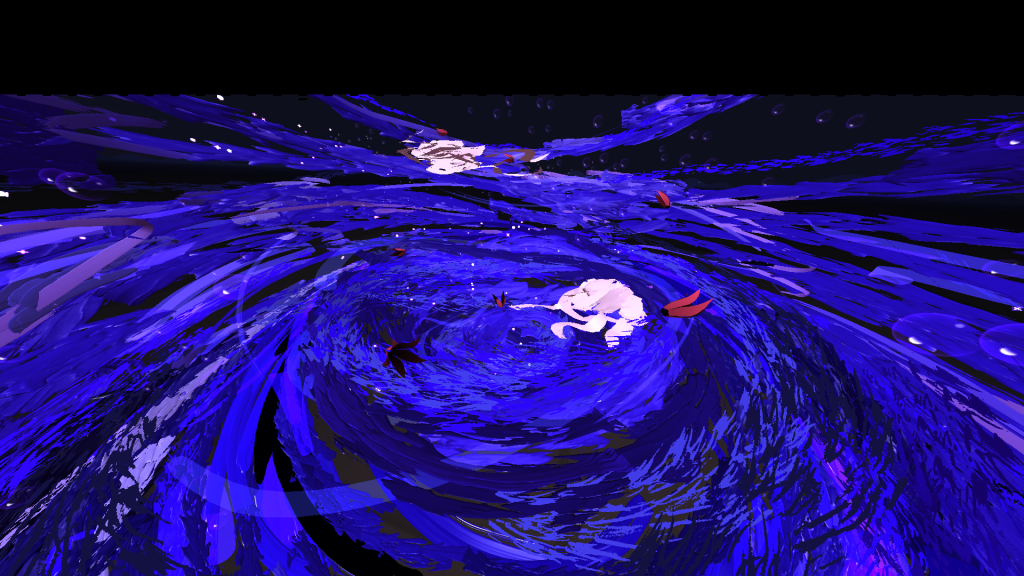
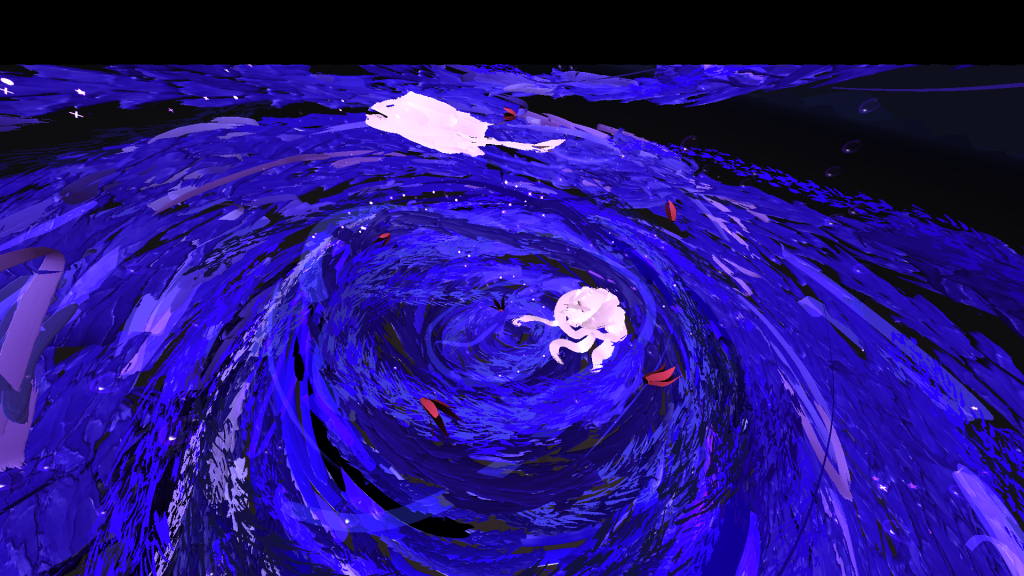
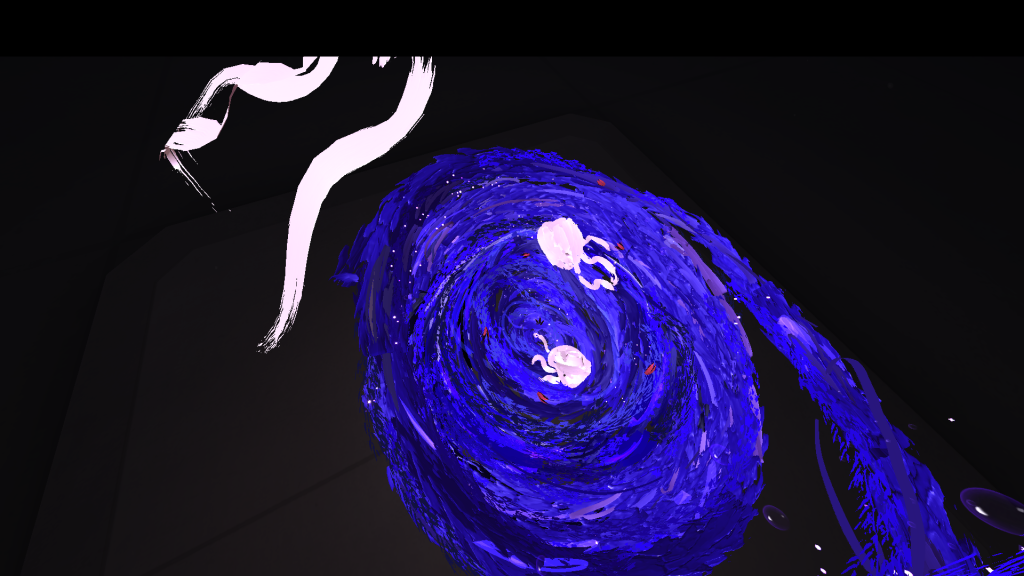
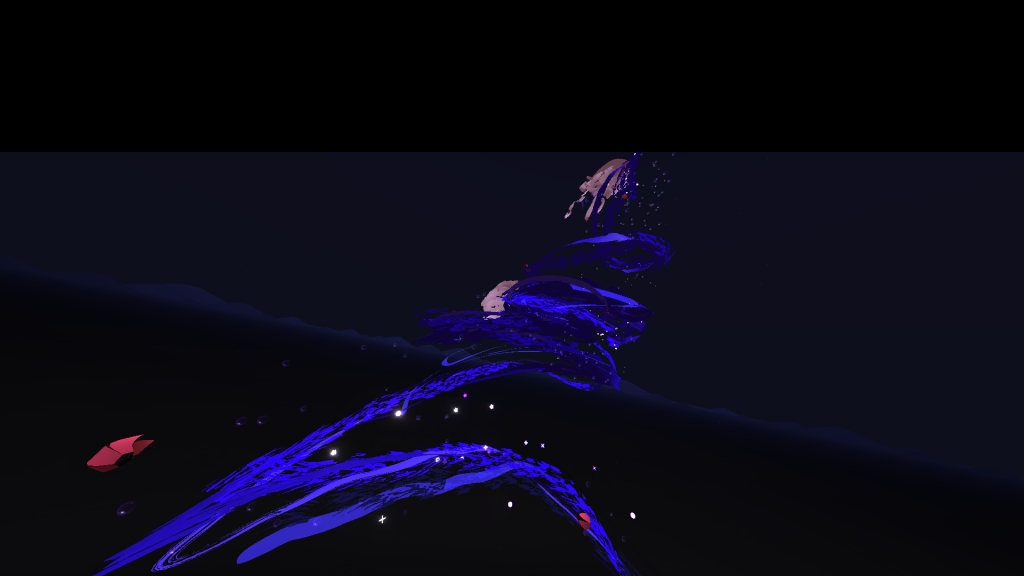
So, as shown here, I switched to an AI toon shader, here are a couple of shots to showcase the different environments with this shader. With this rendering method, there was also a slow, smooth transition into the darker areas of the district which makes each area more recognizable and tense as the user walks through the empty, visually emphasizing the horror elements without making it disorientating for the user.

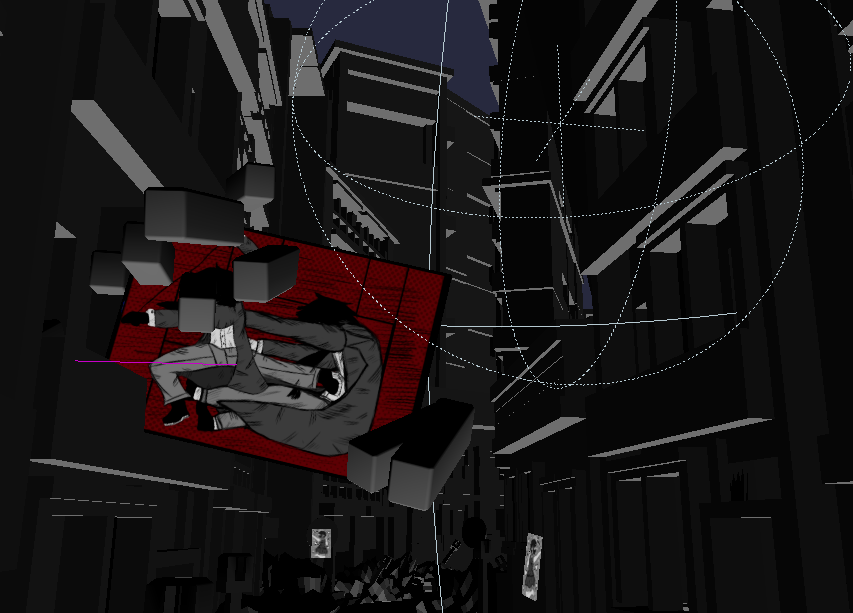
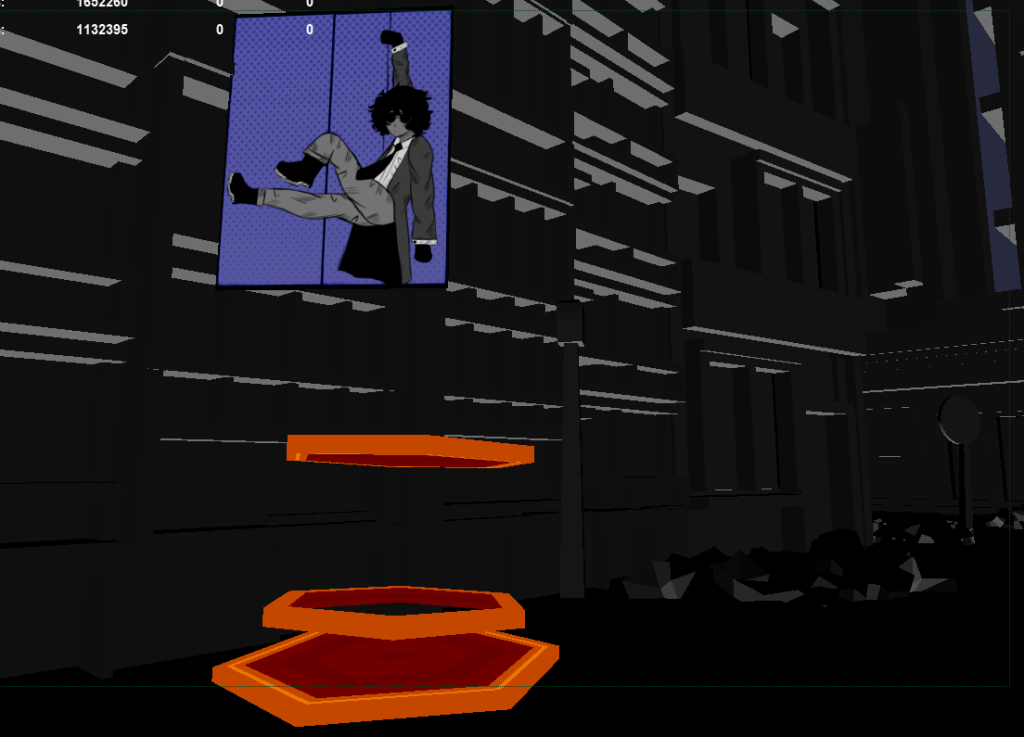
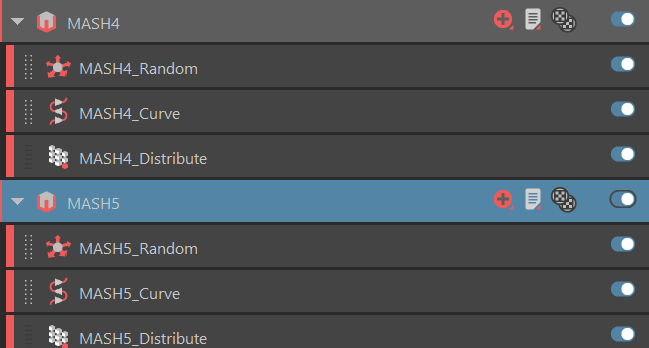
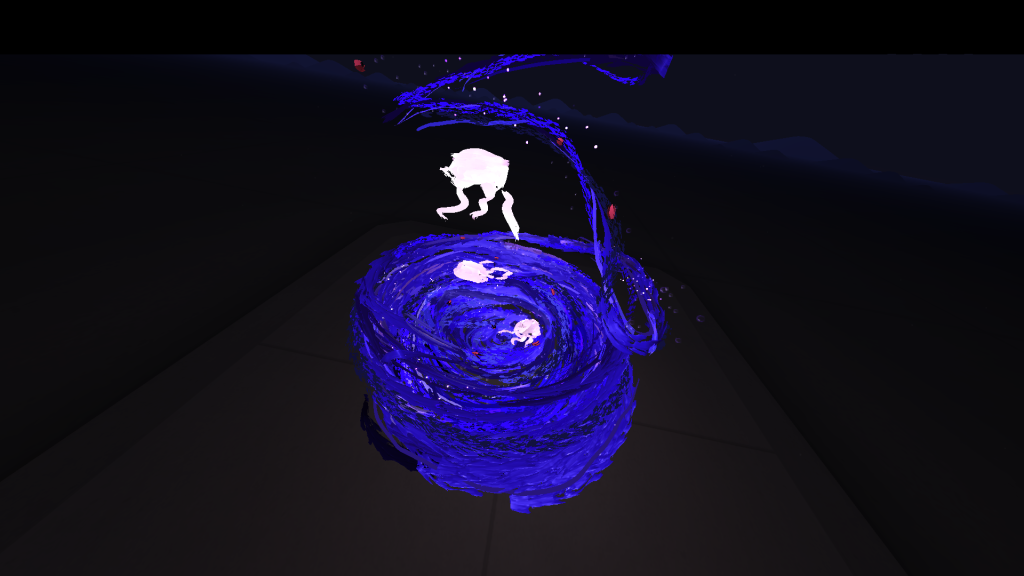
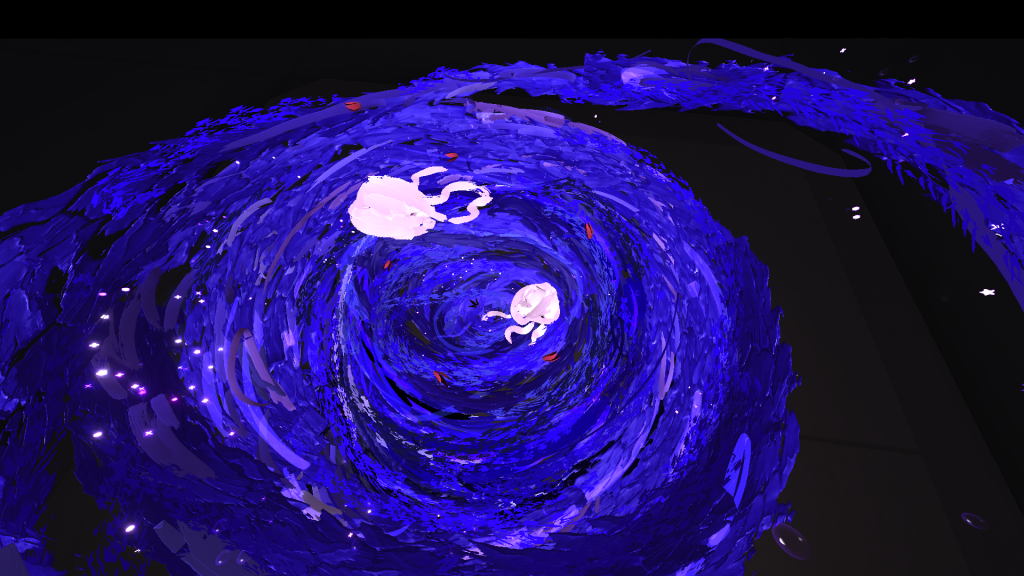
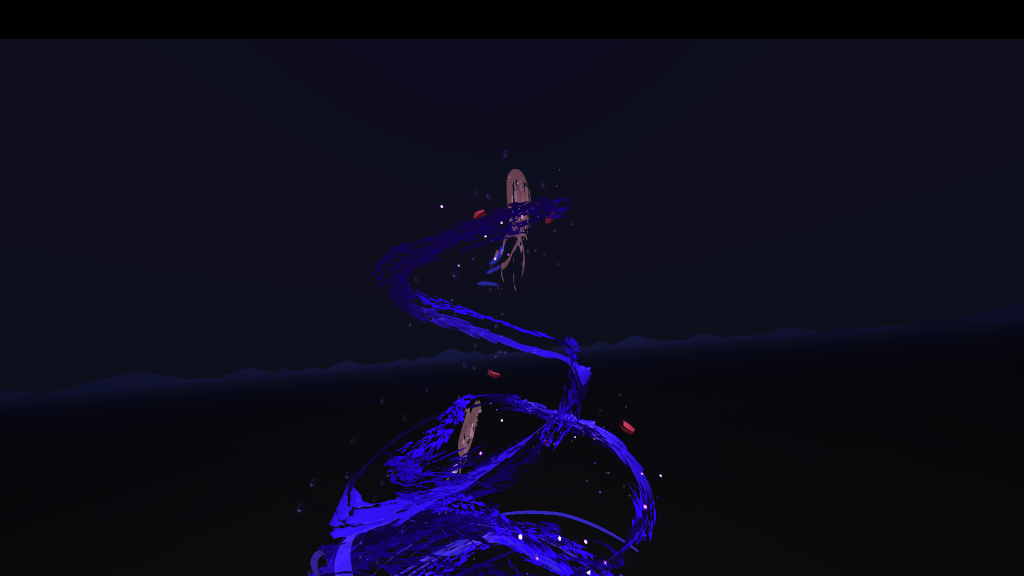
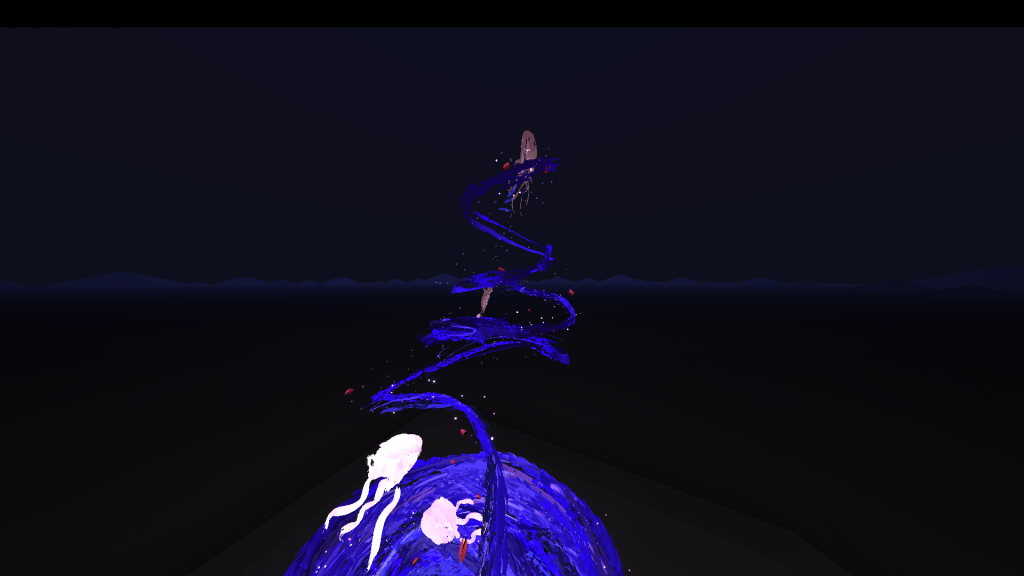
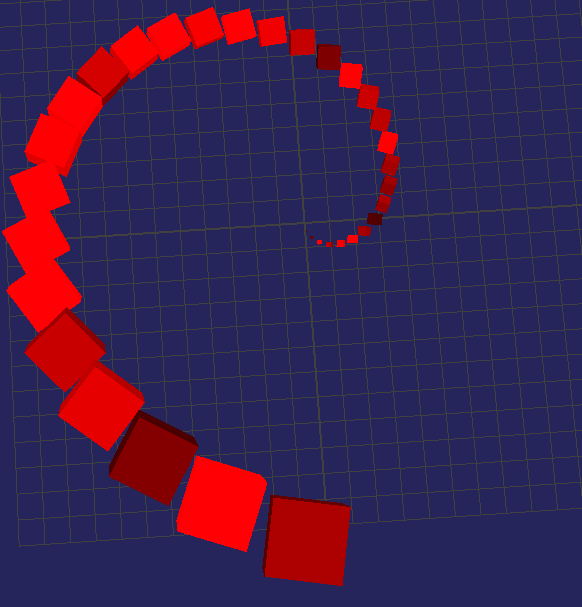
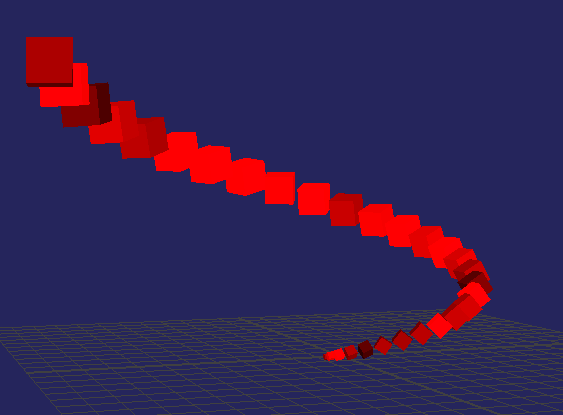
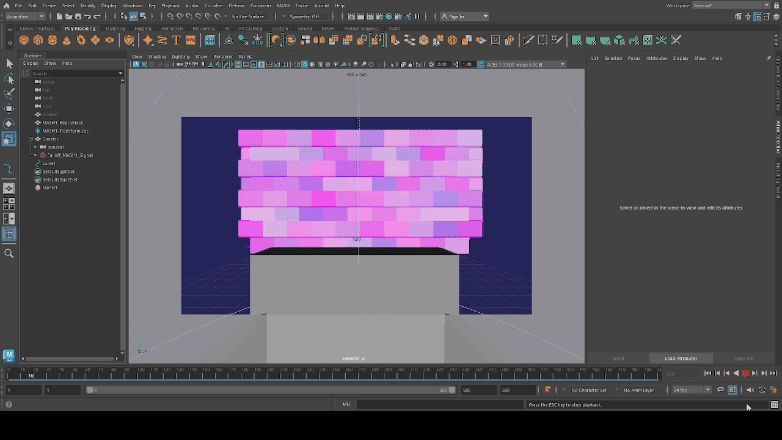
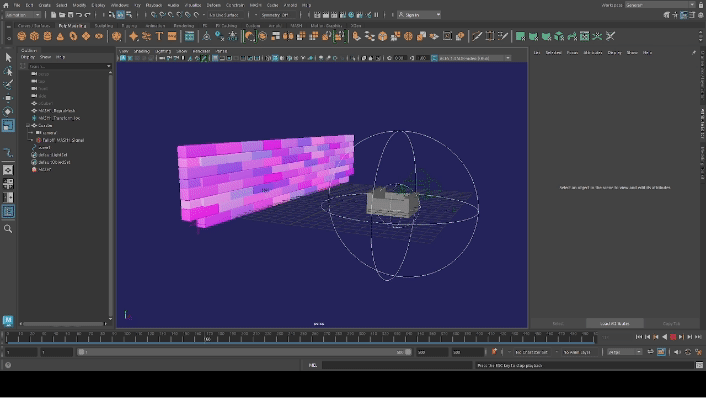
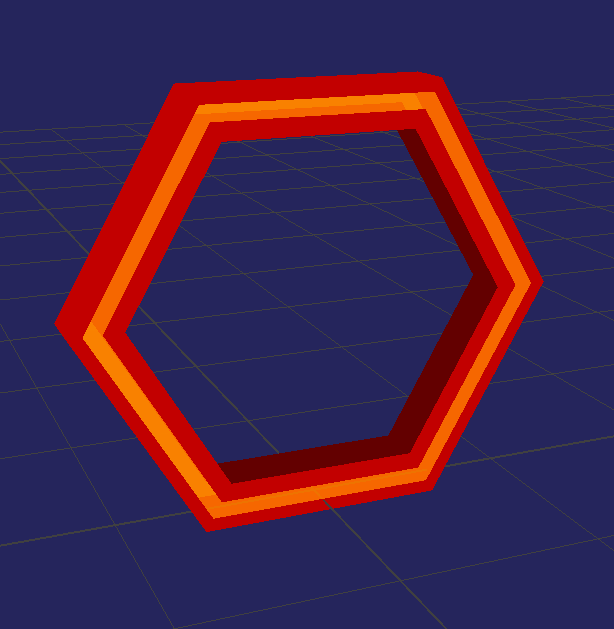
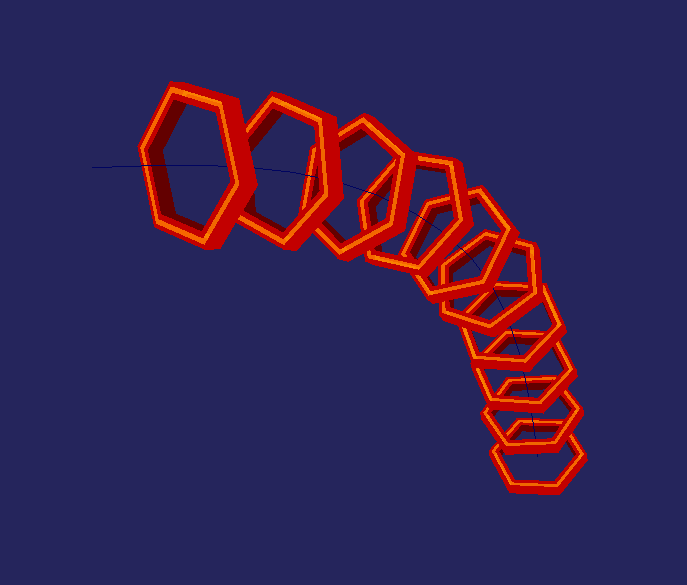
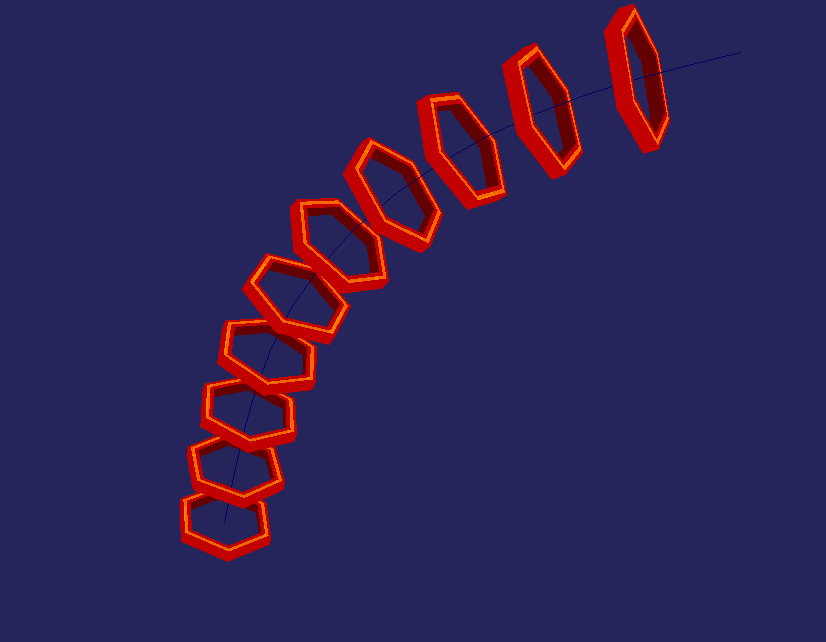
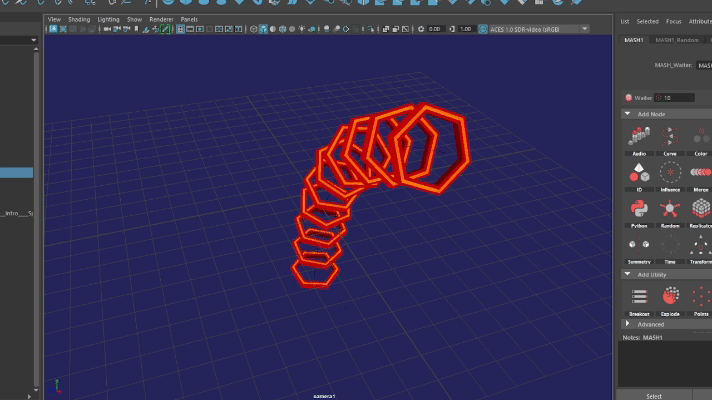
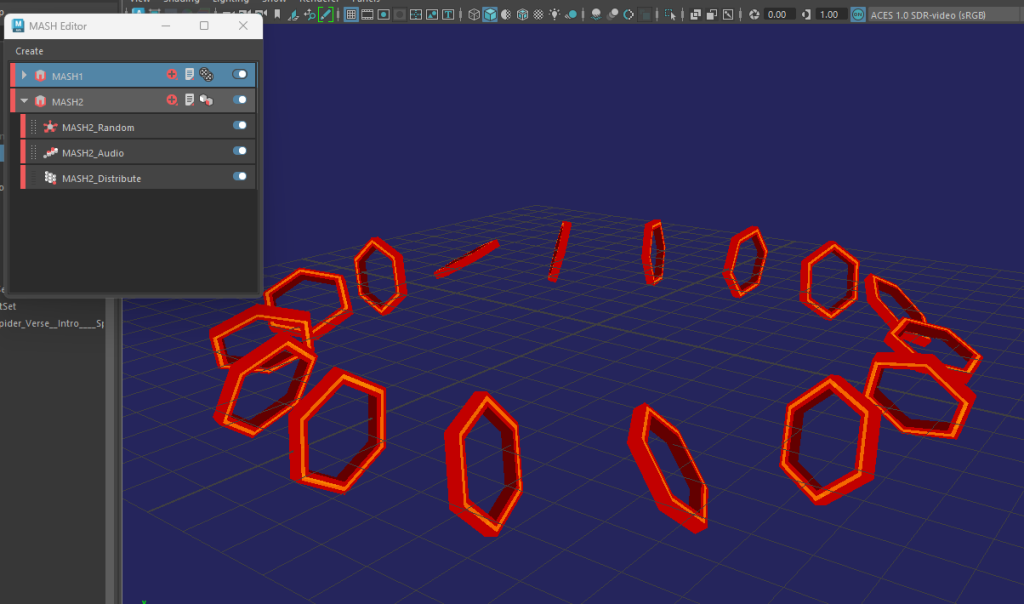
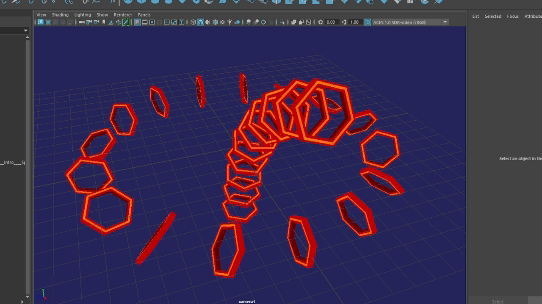
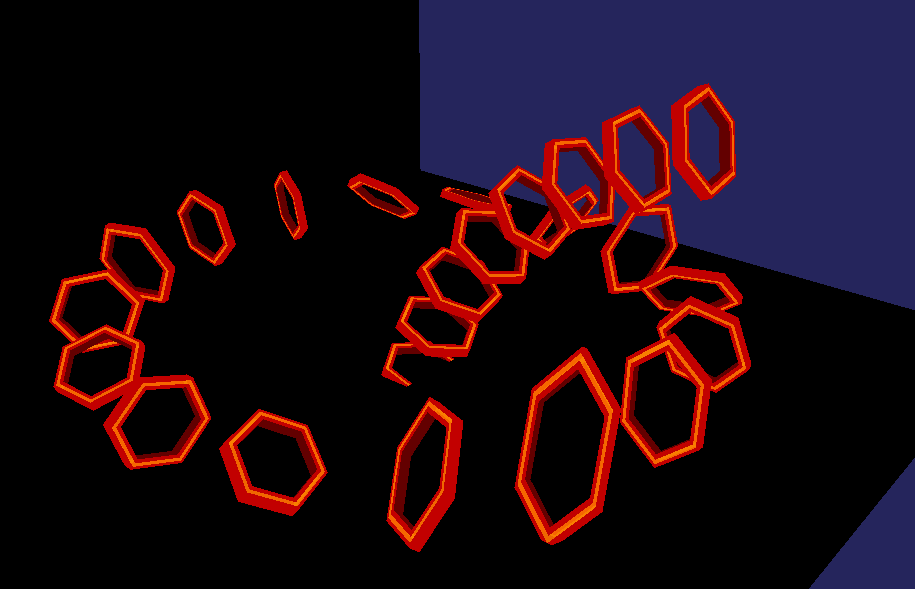
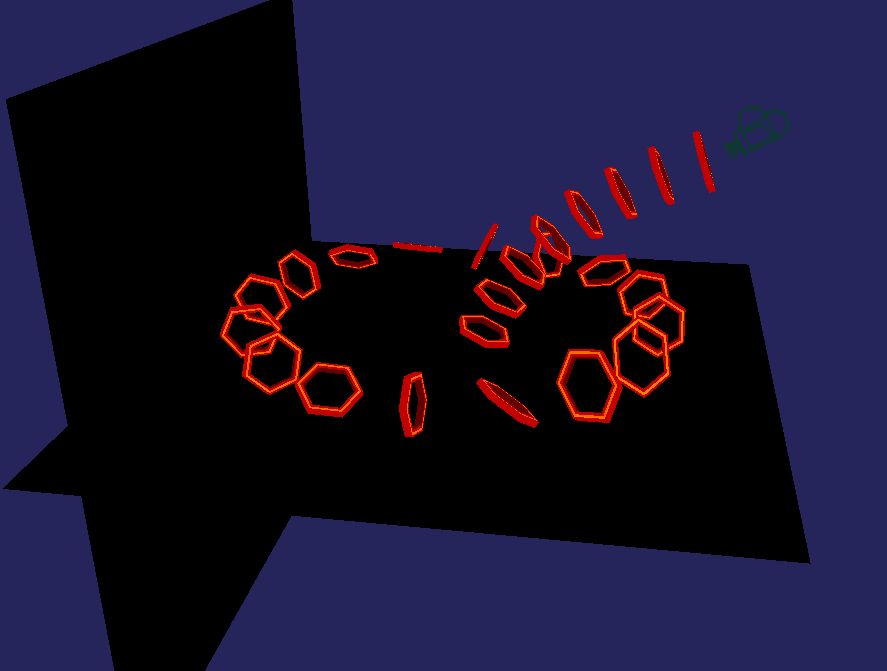
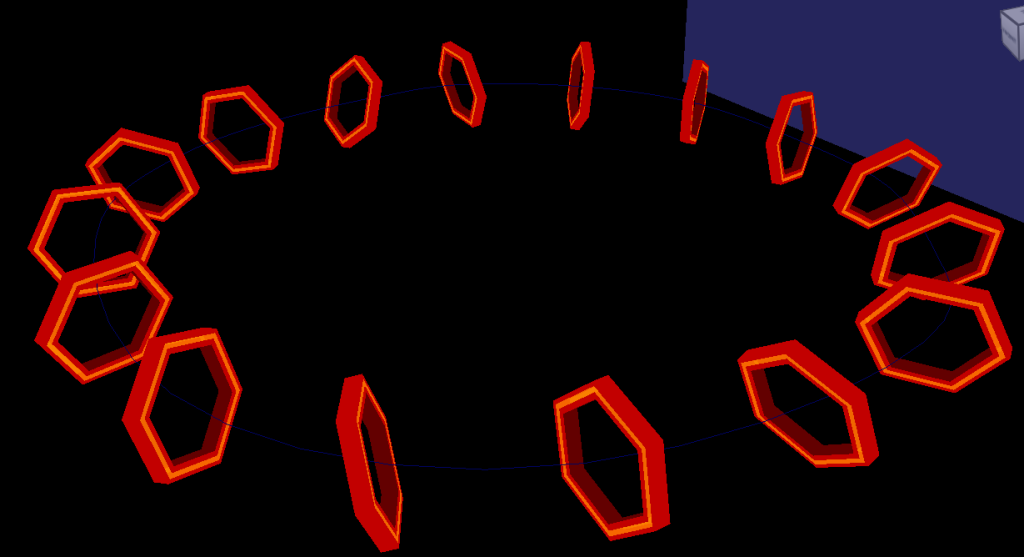
Before rendering and finalising the Maya scene, I added in the mash networks. There’s two different types – one being the wall destruction scene (which lasts for a couple of seconds before disappearing) and the spiderverse portals, inspired by the ones I created during my MASH network experimentation log ( https://samsudeen-2021.hulldesign.co.uk/2023/11/13/emerging-technologies-week-1-prototyping-your-immersive-experience-part-2/ ). These last a lot longer depending on the scene they’re in.

Finally I added a spherical effect to the VR camera, allowing it to render the entire environment from a 360 view. This spherical microscopic effect is similar to google images, creating flat image renders.

Finally, I started to render my environment in 10 second intervals using the Viper Render Farm. This was the hardest part of the project mainly due to the process taking two full days without breaks. In total, there were 22 render outputs and since Viper can be unpredictable, some renders would have to be redone. The reason why I rendered 10 seconds for each output was so I could calculate how much time it would take to render a set of outputs each day. This is so I could calculate any potential errors that could delay the rendering process. This is why, in my gannt chart, I left two weeks to dedicate to rendering in case any issues arise.

Editing – Premiere Pro

I used Premiere Pro and Adobe audition for my editing. I was working on this simultaneously alongside the rendering process. So I tested my renders to check if they worked in a VR space using Adobe After Effects. I was also following this tutorial during this time:

Ruan3D (2017). Maya Tutorial – How To Render 360 Degree Spherical Renders For YouTube and Virtual Reality [Video] Available at: https://www.youtube.com/watch?v=q4RK77jspvU [Accessed 25/11/2023]

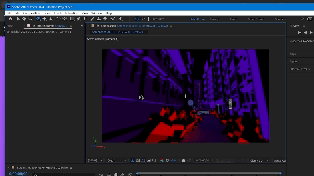
This how I safetly knew it was okay to continue with the rendering process with this spherical camera.

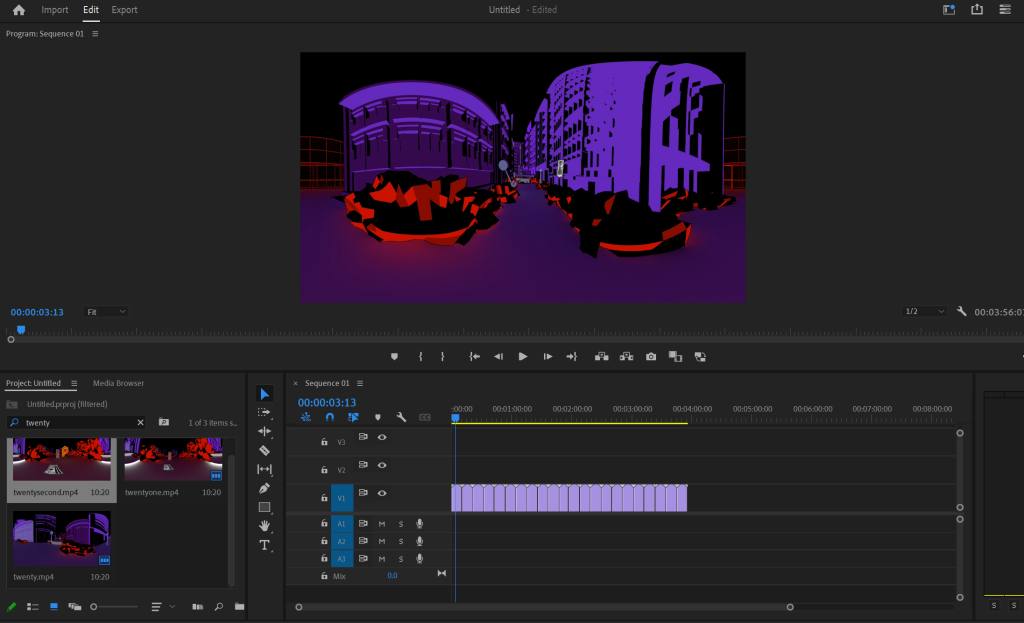
Using Premiere Pro was a lot easier than After effects, this was mainly due to how simple it was to connect the clips together, making each transition seamless to one another without tearing or any potential cuts.

Due to time constraints, I wasn’t able to add in the audio queues I set up for myself within the proposal. So instead, I compromised by adding in some city ambiance to make the city feel more immersive as the users walks through, editing the audio within adobe audition to add to seamless transitions.

However, this also means action scenes that would benefit to having audio (such as crashes or portal sounds) were unfortunately absent, making these scenes less visually impactful. More detailed audio queues is something I’d like to implement in future iterations of this prototype.

Finally, I rendered the sequence using Premiere Pro’s exporter – rendering the video at 12K before uploading the sequence onto Youtube, allowing accessibility to all users with or without a VR headset.

Ethics and Values

As discussed within my research proposal, a lot of my concerns and priorities lie within applying ethics and UX design into the art gallery. Here’s a comperative reflection between my proposal and the outcome of my project. I tested the project using a VR heaset and using youtube 360 view alongside another user to make these observations and discuss potential improvements.

Now, the main issue of this prototype is the camera work. This is a reoccurring issue that occurs throughout the ethics competencies and within this reflection I’ll also be discussing and reflecting the benefits but flaws to the camera usage in my project.

Ergonomics – For ergonomics, I discussed how the VR experience would be linear so that users could move through the experience at their own pace. During my research phase and due to user feedback, experiences with automatic movement causes disorientation and simulator sickness.

However, since I was creating an experience using Maya, I wasn’t able to add in key areas for players to manually traverse in. So instead, I added automatic movement to the project, making the cameras move slowly to avoid sudden movements for the user. Arguably, by having automatic movement in this experience, it means that those with physical impairments can still walk through the environment without excessive movement.

To avoid sensory overload, I tried to pick colors contrasts and soft lighting for the environment that were visually striking whilst applying color theory techniques (split complementary, use of hues and lighting) to create an appealing picturesque environment within a darker space. Since the VR experience is mainly accessed on YouTube, users can pause the experience at any time to step out and take breaks, allowing users to also take their time through their time traversing and experiencing the VR world at their own pace.

This also means that by uploading the video onto YouTube, it’s more accessible for users with or without VR headsets. Although, for users with visual impairments or limited wifi speeds, due to YouTube’s compression, the art pieces in particular are a lot harder to see without 4K resolution and during my research, this is unfortunately equivalent to 720p.

So, In the future, I’d like to experiment further with more detailed colour schemes in order to make the areas stand out and become more recognizable to the player beyond just different street layouts. For example, perhaps using more colour combinations similar to the Maya Hardware renders I showed previously.

Another potential idea in the future and something I’d like to consider in future iterations of this prototype resolves two of the main issues that affects visually impaired users as well as the overall quality of the experience. This is to port this project into VR software such as openbrush or FrameVR, therefore allowing easier access for user movement whilst still keeping a high resolution for the art pieces.

Range of User’s View – Originally in my proposal, the plan was to make the VR experience 200 degrees fully to prevent users from becoming lost within the environment. However, now with a 360 view, the world feels more immersive, allowing users to navigate their surroundings easily. Even if the experience is short, each area is also different than the last which keeps the user engaged with the environment and the areas more recognizable upon playback.

However, because of the camera movements, certain sections of the art gallery can feel restricting for the user’s field of view. This is mainly due to the camera moving to fixed points of each art piece rather than allowing the user to experience each scene for themselves.

User Interactivity – Due to time constraints, unfortunately, I was unable to add in audio queues for this prototype, instead adding in some background ambience to make the interactive video feel more immersive.

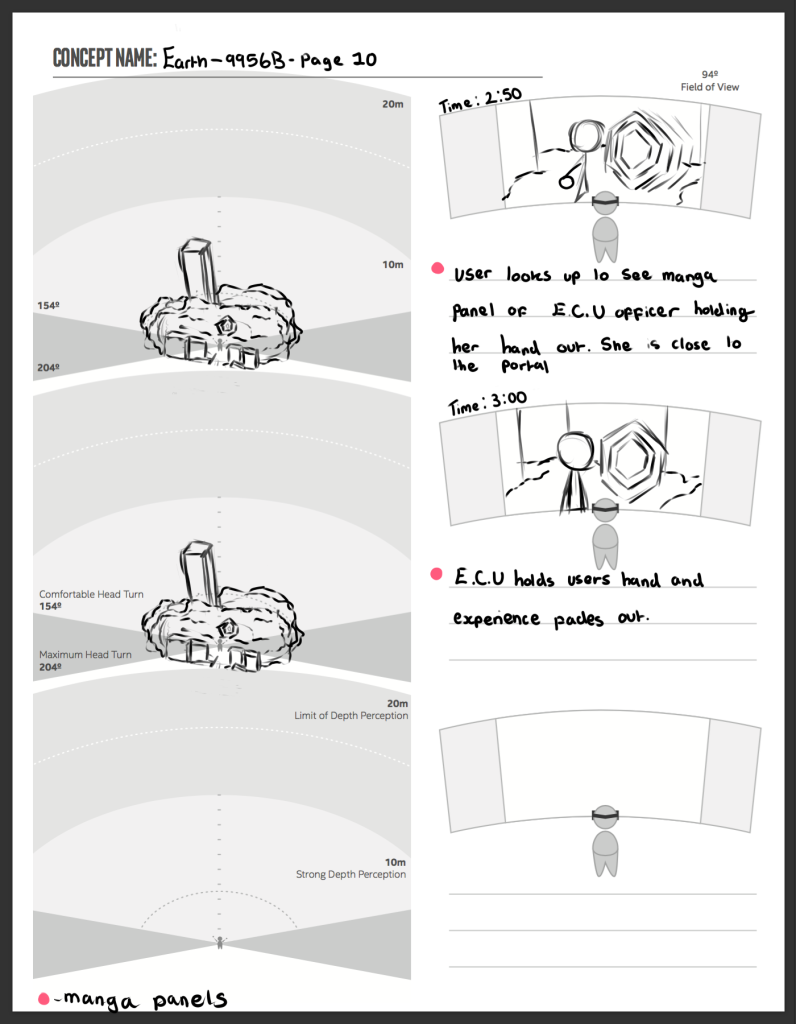
Users can have a 360 view of the VR experience and some art pieces have animated movements to them to make this aspect of the gallery interactive, even in a small sense. The animation also extends to the Maya Mash Networks too as they interact with the panels. Whilst the user’s interactive abilities is limited to watching the experience, the experience is able to serve it’s main objective of being an art gallery, allowing user’s to look at the different art pieces, how it blends into the world and it successfully establishes the user’s role in this world – a simple traveller exploring an unfamiliar district.

However, I’d like to improve on the limited interactivity by adding in elements I had left out previously such as audio queues and possibly more subtle visual guides like experimenting more with the lighting to make pieces appear more as a main focus. If I were to port this project to a different VR software, I’d also like to add the ability to allow users to look at pieces up close rather than at a distance, this is to further add to the art gallery appeal.

Avoiding sudden elements and simulator sickness – Overall, as mentioned in the ergonomics section, camera movements were fairly slow throughout the video, usually trying to keep a consistent angle without sudden turns. But with the restrictive movements, users that try to move their headgear around during fixed scenes, it can potentially cause some motion / simulator sickness and disorientation.

The reason behind relying on these camera movements is due to lack of testing, especially since rendering is a time consuming process. This meant however, with certain camera movements, it can leave the player feeling disorientated as to where their main focus is supposed to be, this is where the audio queues would’ve been incredibly beneficial.

If I were to continue working in Maya for my future improvements, I would like to add in audio queues and less camera work to allow users more freedom in their VR headset movement. I’d also research how to apply 4D audio potentially to users viewing the art gallery without a headset.

Researching Emerging Trends

VR art galleries have been done before, mainly for selling art pieces as NFTs – a unique identifer that cannot be copied. It is the equivalent of buying a unique piece that you own. Whilst there are benefits to owning these such as having digital ownership or owning a piece that is higher value – I’m not comfortable with the idea of NFT’s as it’s also known for harming the artist community as artists can essentially lose ownership of their work, making NFT’s easily exploitable for both the artist and it’s consumers since it’s also heavily linked to the blockchain.

Another trend, however, that I wanted to focus more on during the project was immersive videos. I used Youtube Videos as inspirations for my research – VR videos that showcased a unique 3D anime style to their production piece. For this, I looked at lepuha’s videos to see how I could apply camera work and storytelling to my work.

Lepuha. (2021).【360°VRホラー】幽霊峠 あおり運転をした男の末路 [Video] Available at: https://www.youtube.com/watch?v=Ey2zaaToKls [Accessed on 12/11/2023]
Lepuha. (2021). 【360°VR】ECHO VR作ってみた [Video] Available at: https://www.youtube.com/watch?v=SuNc6HDXm5Q [Accessed on 12/11/2023]

Whilst the first one is a short horror experience set in a stationary vehicle, the ECHO 360 Music Video has a forward moving camera that matches the intense tempo of the song. I liked both methods of camera movements – however, during my Maya production phase, I wanted to find a middle ground in order to keep user design in mind.

This is because, whilst the Echo music video was an engaging experience, the camera movements quickly became disorientating and hard to follow as the video progressed. Meanwhile, with the first video, whilst I considered the option of applying a stationary camera inside a vehicle to help the user travel around the street, in terms of Maya, it’d be difficult to set one up without further obscuring the user’s vision. I also realised that both videos use their environments, animation and camera work to keep their stories visually engaging.

So I used these inspirations to help further my understanding of immersive video techniques. From a technical standpoint, I made sure that the camera work overall moved at a slow, consistent rate which included slow turns for the user to adjust and for the creative viewpoint, I tried to make my art more recognisable in the user’s FOV, alongside adding small animations and darkening the lightening to visually envoke the horror tone of the production piece as the user delves into the video.

Reflection and Forward Thinking

In conclusion, this immersive 360 prototype served as a way to help me learn and understand how to develop an experience that could serve as a new and unique way to showcase my work as a narrative and creative designer. The main flaws of this project was not having a flexible work schedule that could take in account for any potential delays and restrictive camera work and youtube’s compression when rendering.

In consideration for further developments in this project, Openbrush is the best software to show examples of interactive art galleries, although not in a traditional sense. their environments often known for storytelling, often using 2D and 3D elements to showcase an entirely new world and was what inspired me to try and make an interactive environment in a similar fashion to begin with.

The way Openbrush allows users to explore the environment and the art within is the main inspiration of creating the city with my own art.

As shown in my experiments prior to my research proposal, I have used Openbrush in the past. I found the software to be intuitive but by making the prototype in Maya, I can understand the general layout and how beneficial my potential improvements could bring if I were to just work in an VR atmosphere.

In the future, I’d like to export or recreate this project to Openbrush and continue to work on the art gallery from there. This way I have a better understanding of an VR environment and how to better communicate and showcase my artwork to users within a narrative workspace without the reliance of heavy camera work or fixed scenes.

Production Pieces and Narrated Video

Categories
Emerging Technology 2: Portfolio Year 3

Emerging Technologies – Portfolio References

Inspirations and Research – Bibliography

Drifter Entertainment, Inc. (2020). Lies Beneath [Video Game.]. Meta Platforms Technology: California, United States. Available Online: https://www.meta.com/en-gb/experiences/1706349256136062/ [ Accessed on: 02/01/2024]

Project Moon (2023). Limbus Company [Video Game]. Project Moon: Suwon, South Korea. Available Online: https://store.steampowered.com/app/1973530/Limbus_Company/ [Accessed on: 12/12/2023].

Fujimoto, T. (2018). Chainsaw Man. [Manga] Tokyo: Weekly Shōnen Jump.

Junji, I. (1998). Uzumaki [Manga] San Francisco: VIZ Media: VIZ Signature.

Junji, I. (2002). Gyo: The Enigma of Amigara Fault [Manga] Tokyo: Shogakukan

Spiderman: Across the Spiderverse (2023). Directed by Justin K. Thompson, Joaquim Dos Santos, Kemp Powers. [Film]. California, United States: Sony Pictures Animation.​

Telltale Games (2014). The Wolf Among Us [Video Game]. Telltale Games: California, United States. Available Online: https://store.steampowered.com/app/250320/The_Wolf_Among_Us/ [Accessed on: 12/12/2023]

Zahed, R. and Sony Pictures (2023). Spider-Man: Across the Spider-Verse: The Art of the Movie [Book] New York: Abrams books.

Inspirations and Research – Online Images and Videos

Junji, I. (2023) Uzumaki Trailer Screenshot. [image] IMDb. Available at: https://www.imdb.com/title/tt10905902/?ref_=tt_mv_close [Accessed 30/12/2024].

Killham, E. (2014). An image of Vivian, one of the characters in Wolf Among us. [image] VentureBeat. Available at: https://venturebeat.com/games/the-cryptic-finale-to-the-wolf-among-us-explained-the-internets-two-best-guesses-and-one-crazy-one/ [Accessed on 17/12/2023]

Medium. (2020). The Wolf Among us teaser [Image] Available at: https://kevin67558.medium.com/the-wolf-among-us-all-story-no-gameplay-71e668a47577 [Accessed on 17/12/2023]

Project Moon and Limbus Company Wiki. (2023). Limbus Company: L Corp Nest’s destruction [Image] Available at: https://limbuscompany.fandom.com/wiki/Nests?file=L_Corp_Nest_Outside_Disaster.png [Accessed on 15/12/2023]

Project Moon and Limbus Company Wiki. (2023). Limbus Company: K Corp Nest [Image] Available at: https://limbuscompany.fandom.com/wiki/Nests?file=K_Corp_Nest_Outside.png [Accessed on 15/12/2023]

Project Moon and Limbus Company Wiki. (2023). Limbus Company: The aftermath of Lobotomy Corp. [Image] Available at: https://limbuscompany.fandom.com/wiki/City?file=Lobotomy_Corporation.png [Accessed on 15/12/2023]

Project Moon and Limbus Company Wiki. (2023). Limbus Company: L Corp’s former Nest – Outside. [Image]. Available at: https://limbuscompany.fandom.com/wiki/Nests?file=L_Corp_Nest_Outside.png [Accessed on 15/12/2023]

Sony Pictures Animation. (2023). Spider-Man: Across the Spider-Verse | First 10 Minutes | Sony Animation. [Video] Available at: https://www.youtube.com/watch?v=Ek40XtVsO7g [Accessed on 16/11/2023]

Telltale Games. (2023). The Wolf Among Us 2 screenshot [Image] Available at: https://telltale.com/the-wolf-among-us-2/ [Accessed on 17/12/2023]

Wilde, T. (2020). A Gameplay Screenshot of Lies Beneath [Image] Geekwire. Available at: https://www.geekwire.com/2020/review-drifters-lies-beneath-gruesome-virtual-reality-run-alaskan-wilderness/ [Accessed on 27/12/2023]

Project Management

HacknPlan. (2016). HacknPlan. [Website] Available at: https://hacknplan.com/. [Accessed on 07/05/2023]

Software Profiency

Autodesk, Alias Systems Corporation., (1998). Autodesk Maya. [Software] Alias Systems Corporation, Toronto, Canada. Available at: https://www.autodesk.co.uk/ [Accessed on 20/12/2023]

Community, B.O., (2018). Blender – a 3D modelling and rendering package. [Software], Stichting Blender Foundation, Amsterdam. Available at: http://www.blender.org. [Accessed on 20/12/2023]

Koji Komatsu, SYSTEMAX Advanced Illustrator., (2008) Paint Tool SAI (Version 1) – For High Resolution Art [Software] SYSTEMAX software. Available at: http://systemax.jp/en/sai/ [Accessed on 22/12/2023]

Environment and Asset Design – Maya

artist B (2021). How to make Toon Shader with Dotted Halftone, by using aiToon in Arnold Renderer, Maya – Part 4 [Video] Available at: https://www.youtube.com/watch?v=yaj5qUW1M7c [Accessed 05/12/2023]

Cartwright, B. (2021). Your Guide to Colors: Color Theory, The Color Wheel, & How to Choose a Color Scheme. [online] blog.hubspot.com. Available at: https://blog.hubspot.com/marketing/color-theory-design [Accessed 21/12/2023].

CG Geek (2020). How to Create Low Poly Rocks in 1 Minute. [Video] Available at: https://www.youtube.com/watch?v=4EqLyGsu3AA [Accessed 11/12/2023].

Ruan3D (2017). Maya Tutorial – How To Render 360 Degree Spherical Renders For YouTube and Virtual Reality [Video] Available at: https://www.youtube.com/watch?v=q4RK77jspvU [Accessed 25/11/2023]

Williams, K. HTC Vive Arts and V&A. Curious Alice: The VR experience. [Online]. https://www.vam.ac.uk/articles/curious-alice-the-vr-experience [Accessed 17/11/2023].

Editing – Premiere Pro

Adobe Inc. (1993). Adobe After Effects [Software] Adobe Inc. California, United States. Available at: https://www.adobe.com/uk/products/aftereffects.html [Accessed 3/01/2024]

Adobe Inc. (2003). Adobe Audition [Software] Adobe Inc. California, United States. Available at: https://www.adobe.com/uk/products/audition.html [Accessed 3/01/2024]

Adobe Inc. (2003). Adobe Premiere Pro [Software] Adobe Inc. California, United States. Available at: https://www.adobe.com/uk/products/premiere.html [Accessed 3/01/2024]

Ethics and Values

IEEE Digital Reality. (2022). Ethics in Virtual Reality – IEEE Digital Reality. [online] Available at: https://digitalreality.ieee.org/publications/ethics-in-vr#:~:text=In%20its%20broadest%20sense%2C%20ethics. [Accessed 20/10/2023].

Vinney, C. (2023). UX for VR: Creating immersive user experiences. [online] Available at: https://www.uxdesigninstitute.com/blog/ux-for-vr/. [Accessed 15/10/2023].

Emerging Trends

Dash, A. (2021). NFTs Weren’t Supposed to End Like This. [online] The Atlantic. Available at: https://www.theatlantic.com/ideas/archive/2021/04/nfts-werent-supposed-end-like/618488/ [Accessed on 07/01/2023].

Immersion VR. (2019). VR Video | What Is VR Video & When Is It Used? [online] Available at: https://immersionvr.co.uk/about-360vr/vr-video/ [Accessed on 22/11/2023]

Liquona (2021). Benefits of 360 Videos. [online] Liquona. Available at: https://www.liquona.com/blog/benefits-of-360-videos/ [Accessed 10/11/2023].

McAnally, M. (2022). VR Galleries + NFTs = Art In The Metaverse. [online] Medium. Available at: https://michael-mcanally.medium.com/vr-galleries-nfts-metaverse-70dd573058ce [Accessed on 07/01/2023].

Saggio, G. and Ferrari, M. (2012). New Trends in Virtual Reality Visualization of 3D Scenarios. [online] www.intechopen.com. Available at: https://www.intechopen.com/chapters/38742 [Accessed on 04/01/2024].

Lepuha. (2021).【360°VRホラー】幽霊峠 あおり運転をした男の末路 [Video] Available at: https://www.youtube.com/watch?v=Ey2zaaToKls [Accessed on 12/11/2023]

Lepuha. (2021). 【360°VR】ECHO VR作ってみた [Video] Available at: https://www.youtube.com/watch?v=SuNc6HDXm5Q [Accessed on 12/11/2023]

Forward Thinking:

BBC News. (2021). Google’s Tilt Brush VR painting app goes open source. [online]. Available at: https://www.bbc.co.uk/news/technology-55826249 [Accessed 02/01/2024].

Found Assets used for Production Piece:

Simion, D. (n.a) Street Sounds [Audio] Available at: https://soundbible.com/2175-Street.html [Accessed 06/01/2024]

Categories
Emerging Technologies Production/Portfolio

Emerging Technologies – Research Proposal

Research Overview

For this project, I plan to create a linear VR Art Gallery experience using a mixture of Maya and it’s MASH networks as well as the Openbrush software, making a 2D and 3D mixed environment for players to explore in.

In terms of the genre of the project, this will be a mix between action, horror and dark fantasy – inspired by the Shonen manga, Chainsaw man. My main objective with this project, is to design and develop a short VR experience that would both create tension in the open environment it’s set in and excite the user with suspenseful action sequences which will also serve as the main guide to each section of the narrative.

Before I started the project planning, I needed to research VR horror as a genre and how they handled different scripted sequences. This is also mainly so I could apply ethical considerations within the UX design.

For VR Horror, a lot of experiences use jumpscares to get a short term thrill out of the player. This is because, whilst jumpscares are impactful in other mediums such as traditional video games, manga and film – it’s especially effective especially when the threat is directly in front of the player’s perspective.

Reading an interview from the creator of Here They Lie, Cory Davis – he states: “I do believe that it’s good to have a reminder that this is a very extreme experience. [We’re] still in the infancy of what we’re going to learn in terms of what these experiences can do.” , mentioning that marketing the game’s experience honestly is the best ethical way set up the player’s expectations, especially with an experience that plays on the user’s emotive ‘fight or flight’ responses. This prevents deception and exploitation on player’s vulnerable senses.

Hayden, S. (2018). PSVR Horror Adventure ‘Here They Lie’ Coming to PS Plus Members for Free This Month. [Image] Road to VR. Available at: https://www.roadtovr.com/psvr-horror-adventure-lie-coming-ps-plus-members-free-month/ [Accessed 11/11/2023].

I want to also apply this advice onto visuals as well – therefore I’ll refrain from adding in interactable weapons or excessive gore or mutilation. This is because, even if my project is not entirely focused on the horror elements, shock value is seen as a cheap way to create suspense from a narrative standpoint but the emotive response, disgust is the last thing a user should experience. These elements could also exploit player’s visual senses which goes the ethical considerations guides.

In the interview, he also mentions removing player agency within the experience. Not only does this amplify the horror mechanics effectiveness but, from an ethical perspective – it prevents users from being in a violent setting as it was never the game’s intention. Of course, still allowing the player to move at their own pace as a fundamental to VR UX design.

I’ve also explored different UX principles within VR design and how to apply them within a horror game. With these main principals, I’ll discuss what I how I’ll apply them within the broader scale of the project:

Ergonomics – This mainly includes physical, visual and auditory accessibility. As mentioned later on, Visual and auditory queues will be applied to not only guide players to important areas but to also allow accessibility for those with different impairments especially in a VR space.

The VR experience will also be linear, allowing players to move from different locations within their own pace. This is because, due to user feedback, I’ve found that VR experiences that have players automatically move could cause sensory overload or motion sickness as their mindsets struggle to comprehend the reality, ultimately restricting player movement and causing the player to feel claustrophobic within their own space.

By considering interactivity, I plan to have the player to move by using key areas to traverse. This also ensures player’s safety especially in smaller areas. This also means that players that may have physical impairments can comfortably explore the game without the need for excessive movement.

Range of User’s View – Because I plan for the project to be a linear experience, the range for the user’s view will be 200 degrees, allowing for players to observe their surroundings fully whilst preventing them from getting lost or disorientated when trying to search for scripted events or exploring the environment.

Avoiding sudden elements and motion sickness – I’ve mentioned these elements previously when discussing the ergonomics considerations but I want to keep the visual style consistent throughout the experience, only adding different imagery in the background. This helps prevent discomfort when players explore the environment around them. I’ll also keep the color scheme simple – going for a more monochromatic palette to reflect the manga art style whilst improving accessibility for those with color blindness.

With the sudden elements, since this project is not centered around horror and more action based sequences, once again I’ll allow player movement from one scene to another to make sure players have enough breathing space between each sequence, allowing them to move through the experience in their own pace. In addition to this however, there’ll be a build up in audio when sound effects plays, giving the player a chance to anticipate the sequence without causing emotional distress.

User Interactivity – Another potential design flaw that could occur within VR development is a player missing out on a significant events or cutscenes – therefore subtle visual guides such as lighting or colour saturation or even audio stingers to help guide the player to the main objective. Other visual guides could also include arrows pointing the player to the primary focus, however I find this method to be immersion breaking and I find that, for accessibility, it’d be best to use visual and audio queues especially those for with audio or visual impairments.

From researching, “Here they Lie”, UX ethical design considerations and the overall visual style – I finally set up a set outline to how I wanted to approach the project in a technical sense. With this research, I also created set guidelines for myself to follow throughout the project’s development, which will help create a visually appealing action horror experience with user experience and immersion coming first within the design pipeline.

Project Plan

When I started my project planning, I created an mood-board to help establish what visual styles I wanted to explore within the experience. My main inspiration, as mentioned before, came from Chainsaw Man – with both the manga and anime. This is due to their different approaches when handling the dark fantasy nature of their mediums as well as the action scenes, creating dynamic visuals within each shot.

Emerging Technologies (padlet.com)

In this padlet, I researched Chainsaw Man’s manga style analysed the use of contrast in action scenes within the story’s environments. For example, In the manga, linear line work is used to for structures around the city, making the buildings appear lifeless, perfect and daunting. This helps structures to tower over the main character, making them appear smaller in the grand scheme of the narrative.

By applying this environment design within the experience, it helps keep that immersion around the user by making them feel small from a story standpoint. But, from a technical UX perspective, As a new VR user, I’d like to have an open space to adjust myself in and take a breather during high impact scenes. And as a VR art user, this also allows me to take time to explore and appreciate my surroundings and the artwork and the details that help contribute to the worldbuilding.

However, this use of linear line work also allows the contrast of dynamic and messy line art to be more effective when used in fight scenes, symbolizing the chaotic and destructive nature of the main character and his enemies every time they destroy a building or attack one another. I want to be able to replicate this style within my visual work and concept art in order to create unique visuals such as these to entice the wider anime market. This experience will serve as a homage – like an art gallery of different events.

By using a manga art style, this also means I can add in violent elements such as blood splatters without making scenes explicit, using ‘black ink’ to signify overflow and power. But, unlike in Chainsaw Man, this element will be limited to environmental storytelling rather than a tool for shock value or gore imagery due to not wanting to exploit people’s vulnerable senses for a thrill response.

For this project, I plan for the user to be a civilian watching the action happen from an outsider’s perspective – this way the user has time to piece together the narrative and it’s world building whilst making the experience less disorientating for players.

In terms of Narrative, I set up a basic story, inspired by the multiverse motif from the film: Spiderman Across The Spiderverse. The Motif, in summary, are worlds that are all connected based on Spiderman’s ‘events’. With this world, whilst different, The main character, a government field agent, is a hero – but not in the traditional sense, she’s just doing her job. Because of this narrative inspiration, there’ll be subtle nods throughout the experience that suggest she’s part of that multiverse.

Kamal, N. (2023). Oscar Isaac Threatens Miles Morales In The New Spider-Man Trailer. [Image] GIANT FREAKIN ROBOT. Available at: https://www.giantfreakinrobot.com/ent/oscar-isaac-spider-man-trailer.html [Accessed 01/11/2023].

In short (More details on the narrative are in the padlet) – the story is set in a city divided into two sections – the Safe Zone and the ‘Red’ Zone. In the ‘Red’ Zone lies entities, inspired by eldritch beings, that cause destruction and chaos to the city. These entities are then captured by a goverment led organisation as the E.C.U.

Within this experience, the user will play as a civilian accidentally stumbling into the ‘Red’ Zone and having to be rescued by an government officer. The player will see different art of entities roaming around, destroying dilapidated buildings, getting into fights with the main government officer or even stalking the user throughout the experience.

As a 2D artist, I want to be able to see artwork, whether it be 2D or 3D, utilize the VR space. This is so the artwork appears more dynamic even if the piece was created primarily within a 2D canvas.

Therefore, the way I want to handle animating action sequences within the project is a similar approach to the Chainsaw Man manga PV’s – PV’s are essentially promotional videos created to announce and market a new manga volume to the public.

The way Shonen Jump presents this is by animating and showcasing certain panels to show readers what they’re prepared for as well as the dynamic art style and action based scenes that come along with the narrative.

Scenes are fast paced whilst movements are slow to capture that essence of destruction and chaos seen in Chainsaw Man’s world, A visual animation style I’d like to replicate within my VR experience. This animation technique not only efficiently uses timing to create suspense but also allow action scenes

Athena. (2023). Chainsaw Man Vol 12 PV. [online] Available at: https://www.youtube.com/watch?v=-eGalkakxsU [Accessed 01/11/2023].

In terms of the scope of the project, since this will be a very creative heavy experience, a lot of the work will be done to create the world to replicate that manga style, using A 2D style within a 3D environment. Since I’m confident with using Maya and my proficiency in 2D art, the project’s scope isn’t incredibly overwhelming since I’ll be using techniques and software that I’m already familiar with, experimenting with elements such as the MASH networks beforehand.

However, As an artist, I want to explore with different software so I can experiment with multiple mediums in a 3D space. So for example, OpenBrush experimentation to possibly create the different designs for the entities. This way, the effectiveness of scenes such as entities looming over the player or stalking them throughout the environment will help amplify that fear of being watched.

For my Project Plan, I created different tasks for my HackinPlan based on the level of importance during this stage of development. This is also so I can estimate how much time needs to be spent within each task and time management in regards to player orientated movement or larger milestones such as being able to finish the 3D blockout or the 2D assets for the experience. HackNplan serves as a tool to also log in my hours personally in order to keep in track how long I spend on each task.

Milestones within this project are set around not only my work produced as an artist but also implementing the UX design considerations and guidelines I have mentioned within my research overview. Because, this project relies on creating a comfortable and accessible experience for all users. This includes researching VR cameras, playtesting and finalising the Maya Environment as well as finishing concept planning.

With this gannt chart, however, it gives me a better understanding on my set timeline of tasks – primarily based off of how many weeks it’ll take as an estimation. Using the hours in my HackNplan, I was able to create a simple gannt chart, including soft deadlines for each major milestone. By adding soft milestones, this keeps my workflow consistent throughout the project and allows me to manage my time efficiently with each task.

However, there are less soft deadlines than a longer project due to the stricter time constraints between the development stage and the final play testing stage. This gannt chart presents the workflow that has been followed throughout the project’s development.

Further VR Research – Artistic Immersion

Whilst looking into visual styles for my 360 video prototype, I began to also research by exploring different VR art showcases to gain an understanding on the visual and experience expectations and design elements that help contribute towards player accessibility and narrative flow. This mainly helped me understand art showcases in general and how to present my art in a effective and aesthetically interesting manner.

For this exploration, I started off by researching and analyzing Sutu’s artwork, presented through different VR experiences. These settings are mainly based off of futuristic cyberpunk aesthetics, being inspired by films such as Heart of Darkness or Ready Player One. They’re very abstract art pieces being created using openbrush and they showcase different worlds using bright neon lighting paired with a dark background. The player moves through these futuristic worlds, often being greeted with glitch-art – an artform of vaporwave aesthetics and a overwhelming but visually active world with details amongst their environments.

Whilst I may not be going for an abstract style, Sutu’s VR art showcases also gives me the option to automatically move the camera through the experience I want to create, wanting to explore the “Droste effect” Sutu’s art galleries present. The art showcases are mainly visual presentations which means a lack of interactivity or player agency for users, but the main experience makes up for it by presenting narratives through Sutu’s art; helping me understand how to apply visual story telling into my work.

The Curious Alice VR experience (Made for the V&A art museum), however, allows interactivity, the art style being a lot more akin to a storybook style. This style is incredibly helpful for the similar manga style I wanted to go for, especially with how they managed perspective for that pop up book style, with the mixture between 2D and 3D art. This mixture helped inspire me to use this technique when building up the environment, wanting to use manga line work to emphasise the structures rough shapes or adding shadows to the debris surrounding the environment, keeping the setting consistent as well as making the difference between foreground and background more recognizable, enhancing player navigation.

Concept Storyboard

Finally, I created a set of concept art to help determine a consistent 2D art style when making the art pieces for the experience. Here, I’m playing around with monochromatic shading techniques and linework for different posters that will appear in different scenes, including alternative versions depending on which section the user is in.

Here are some a couple of shots of a potential storysphere I’ve made: With this – it allows me to see the entire environment from a 3D perspective, allowing it to become easy reference for blocking out my city landscape.

And here’s the full storyboard for the project, since the experience will only be 3 minutes long, there will be 5 action sequences set up as scripted events. These action sequences will be created using MASH networks, inspired by my experimentation I’ve done prior to this research proposal and I’ll experiment with having a VR Camera that the player could control or a Camera that automatically moves through each scene, similar to Sutu’s approach.

Categories
Emerging Technologies Lab Exercises Year 3

Emerging Technology – VR Immersive Art

VR Art

As an artist, VR Art created an incredible opportunity when it came to designing my art work within a 3D space. Whilst Maya is more of a modelling software, Openbrush is a collaborative tool designed with both 2D and 3D art in mind.

I experimented with Openbrush by creating a small diorama, using different paint brushes and techniques to create a 2.5D experience. Due to technical difficulties regarding the VR screenshots, I wasn’t able to document my process in a traditional sense. Therefore, I’ll describe my workflow.

To start off with, I used different thick and oil brushes to map out the whirlpool at the bottom of the diorama, using dark and light blues to add shadows and highlights. I made a tornade-esque spiral pattern to help map out the area I wanted to work in. Despite this area being small, it means that I could contain this diorama into a small section and could expand on it’s design / world by adding more in the future.

For now, I continued this spiral visual motif, moving up to the top. The process for this was inspired by spruce trees with the lines serving as the main focus of the diorama. To imagine this from a user’s perspective, the user would start from the bottom of the diorama and work their way to the top, being a more linear approach when handling the VR space.

I continued to add darker shades of colour to add depth to the piece, as well as adding different highlights of complimentary hues such as purple or navy. The bright colours contrast with the dark background help amplify these cooler but vibrant colour schemes.

As shown in the screenshots, the main theme of this diorama is the ocean. But I also wanted to add further colour contrast to the piece. Therefore I added jellyfish into the scene to further guide the user through the diorama.

One thing that I found when creating these jellyfish was the issue of the lack of depth – often being as flat as paper. I was able to combat this issue, however, by adding movement to each of the jellyfish, making them curve around diorama using the highlighter tool.

Once I finally finished adding in the jellyfish, I experimented with extra effects and brushes such as the flower brush and the star effects to further entice the user around the diorama, giving the environment some light whilst also working with 3D Meshes.

In conclusion, Openbrush was my favourite software to experiment with, not only for it’s artistic capabilities but also working within a 3D VR space for the first time. It allowed me to naturally produce art whilst being able to adjust it in Maya later on. It also allowed to me to freely explore my artistic capabilities without being restricted to a singular canvas and with the effects, it only enhances that experience, being able to create beautiful pieces.

In terms of concept art and storyboarding, Openbrush is the best option for me to use purely because I’m able to work in a 3D artistic space, making sure that the environments I create are user friendly and can be accessible to a wide range of playtesters.

As previously mentioned, storyboarding in Openbrush is also beneficial due to it’s lack of restrictions especially when I jumped from a 2D canvas initially.

This also means it’s easier to create 360 experiences, when working within the player’s perspective. Therefore for my larger project (Especially as a manga artist), I’d like to use this alongside MASH networks to create scripted events – these two mediums being mixed together would allow me to make a 2D and 3D world, the main hook for my project’s storytelling and environment.

Categories
Emerging Technologies Lab Exercises Year 3

Emerging Technology – Immersive User Experience (UX) and Augmented Reality (AR) 

With Augmented Reality, Whilst it may not directly contribute to my larger VR project, the medium was still interesting to explore as I’ve mainly experienced the format through mobile games such as FNAF AR or Pokemon GO with these games utilizing real world environments to create interesting set ups and mechanics that make these characters interact with the real world around them.

During my research into the capabilities of AR, I also noticed that AR could be used to advertise products or contacts such as the use of QR codes. QR codes, in our modern society, has been essential due to it’s accessible nature especially for users with visual impairments. With AR, by scanning a QR code, users could be greeted with a small animation alongside someone’s contact details to add uniqueness to any contact card or promotion.

In terms of games, as mentioned previously, AR can also be used to virtually interact with a real life environment. For instance, bringing art layers to life or having characters or different animations interact with the world around the user. AR is used primarily as an artistic medium in this case.

Creating AR using Zapworks and Unity

During this experimentation, I worked with Unity to create a small AR product that would allow users to scan a QR code so that when they used their camera over the image, it would pop up within that Unity environment

So I started off by setting up the Zapworks assets and plugins in Unity, adding in an image scanner, a rear facing camera and an image tracking target. For the image tracking target, it helps Zapworks identify the object when scanned, allowing the image to rotate or move alongside the user’s camera movements

Once I set up the environment, I adjusted the AR camera so that it’ll be able to scan and identify the image during the training process and added in an example image into the scene.

Sony Pictures Animation (2023). Spider-Man animator gives that one tip that might make all the difference to budding animatorsABC News. [Image] 9 Jun. Available at: https://www.abc.net.au/news/2023-06-10/spider-man-across-the-spider-verse-animation/102463650. [Accessed on 30/10/2023]

I also adjusted the workspace so the image scanner would be able to easily identify the AR trigger alongside adding the image as a tracking target.

Here is a video of the first part of the AR experimentation, This was just a test to help understand and experiment with Unity and Zapworks’s functions and capabilities. However, I wanted to add something further into the experimental AR project: adding in a 3D object that can interact alongside the image target.

So I created a seperate object using the plane mesh and added an extra drawing as a material. Along with this, I added some triggers to the 3D object so that the mesh would pop up along the image.

Here, I added runtime events that would allow the art to only be visible if the user’s camera was hovering over the AR trigger.

Despite trying on multiple attempts, unfortunately the 3D popup for the AR experiment was unsuccessful, but I’d like to continue exploring and improving this concept within the near future.

Test attempt with trying to get the 3D pop up to appear, unfortunately this did not work.

With this medium, I could definitely use and experiment this to further my art similar to my research prior. I could also potentially use this as a way to also showcase different art pieces for my portfolio or for any commission work with employers within the near future or even create some art and showcase them using the animation format. Either way, this medium within emerging technology could help users experience art through an 3D virtual lense and in the future, I’d like to experiment with this medium by mixing different 2D and 3D elements, such as this exploration piece, in order to present my art work in a visually engaging manner.

Categories
Emerging Technologies Lab Exercises Year 3

Emerging Technologies – Prototyping Your Immersive Experience: Part 2

Maya – Mash Networks

For the second half of this exercise, I was experimenting with MASH networks to create abstract visuals that I could utilize with my future VR project.

To start off with, I used different MASH Network Nodes to understand the different shapes and patterns that could be made with different nodes being used.

I then started to work with different colours, using the colour node to adjust the colours to random hues and saturation. I also used seeds for each node to create different patterns. The most interesting patterns coming from the random node to simulate explosions. I also found that the random node would create unique distributions in their rotation which allowed colours and shapes to overlap with one another.

These visuals made the patterns gravity defying and aesthetically appealing to view. Although, within a VR perspective, these shapes and vibrant colours could potentially cause motion sickness especially in a bright environment.

Here, I continued to work with different colours, shapes and compositions, now going for a more linear approach within my work whilst still experimenting with different hues; again, wanting to experiment with more abstract imagery.

Here, I worked with perspective, creating illusions that can only be seen in certain angles. For example, the everlasting winding staircase. An illusion that could further impact on VR immersion, potentially being used as a way to question the experience’s true reality, much like the Alice In Wonderland VR experience.

However, some considerations to keep in mind when creating these illusions, were the user experience. Since users, especially newcomers to VR, will find illusions that involve questioning reality disorientating. Especially since VR is meant to transport you into a new reality essentially. So, if I were to use optical illusions within my project, it’s best to keep them at a minimum to avoid disorientating perspectives.

I also experimented with animation for the MASH nodes. Here, for example, I used the random node to increase the strength of the explosion as the animation progresses, adding at least 3 keyframes to add anticipation to the sequence.

This will be incredibly useful later on, especially when making various action sequences for my VR project due to it’s unique animation possibilities.

Wall Destruction Experiment

I continued to experiment with the MASH function, starting off with making a wall destruction sequence in order to further explore different possibilities for scripted action sequences.

Created using Replicator MASH and Grid Distribution as well as Transform MASH

To start off with, I created a single block, soften the edges to turn the block into a brick. Afterwards, I used the Replicator Mash and Grid Distribution nodes in order to shape the bricks into a simple wall structure with different patterns. I also added a colour node, using different shades and hues of pink and purple to make the bricks aesthetically pleasing.

Created a small box and attached a camera – Also added a Colour node to MASH network

Once I set up the brick wall, I created a small box cart using the extrude option as well as adding in a first person camera and parenting it to the cart. This is to test out the perspective once the box collides with the wall itself.

The use of camera work, especially in VR, needs to be tested regularly in order to immerse the player into the sequence. Therefore, I’ve also added a border, to keep the perspective centered on the main focus as well as adjusting the focal lense to make the wall appear closer than it actually is.

First Person Camera View

After adding in the camera, I created a curve in order to make the cart move in a linear direction, creating constraints between the curve and the cart in order to create this simple animation.

Top Down View of the distance between the Wall and the box cart – Added a custom curve.

Once I adjusted the camera, I added a signal node, parenting it to the cart itself. This node allows the cart to react with the wall collision sequence, making it so when the collision sphere is near the wall, the bricks will gravitate away from the signal sphere.

As shown in the MASH signal settings, I customised the way the bricks will react to the collision sphere, mainly adjusting the rotation and the position of each brick to create that warping wall effect.

Here are a couple of shots of this action sequence from different perspectives. As shown, in the first person perspective, there’s the illusion of the cart immediately hitting the wall.

However, in retrospective, whilst the cart does collide with the wall; due to the collision sphere’s range, the cart collides with the bricks too early. In addition to this, from a VR perspective, with the bricks directly hitting the camera, I can imagine this could briefly disorient and startle users during the sequence.

Nevertheless, this experimental task was incredibly beneficial when learning how to create scripted events by showing how objects and structures can react to different node collisions. Not only this, but since I’ll be working on a city environment, by learning the distribution and replicator nodes gave me a better understanding on how to create an efficient and consistent blockout for taller, repeating structures when I started to work on my VR project.

Finally here is an outsider perspective of the animation, with the sequence being varied based off of the size of the signal collider, once again, creating unique and bouncy visuals. These perspectives are also dependent on how much the user can see from the first person camera.

For example, there is more warping within this animation – however, the wall reacts before the cart could properly collide with the wall. However, this could be used as an opening portal to another section of an environment. This is also beneficial for 360 perspectives.
This example is more suited for a more linear VR experience, with the cart realistically crashing into the wall. However, there’s less of an unique impact when colliding with the wall.

Experimentation 3 – Portal and Audio MASH

For this experiment, I was interested in creating potential VR assets for my larger project. Being inspired by Across The Spiderverse Visuals, I decided to recreate the portal effect seen from the movie to hopefully add into my environments later on in development.

Gvozden, D. (2023). The Definitive List of ‘Spider-Man: Across the Spider-Verse’ Easter Eggs. [online] The Hollywood Reporter. Available at: https://www.hollywoodreporter.com/news/general-news/spider-man-across-the-spider-verse-easter-eggs-list-1235506838/. [Accessed on 25/10/2023]

I started off by creating a simple shape for the portal, adding in coloured textures to each part of the model (including lighting and shadowed textures inside the hexagon) in order to emphasise a 3D effect that can be seen once the portal is animated.

Once I finished the model, I made a CV curve (much similar to the linear curve made in the Wall destruction experiment) and added a curve node onto the MASH network for the hexagon. Once I attached the curve onto the node, the vertical pattern was automatically created, moving downwards and creating an infinite loop based of the directional axis of the curve line itself.

After creating this sequence, I started experimenting with the random node in order to make the patterns feel more realistic – as if you’re going through a portal that’s constantly changing. I slightly adjusted the rotation values based on randomness and this was the result:

Next, with the same mesh, I wanted to explore the audio nodes that MASH had to offer – wanting to create a unique sequence that makes it as if the world exists around the player.

So, by using a song from the Spiderverse soundtrack, I used the spherical distribution node alongside a random node to once again adjust the mesh’s into different patterns and I added the audio node in.

Usually, the audio node is mainly used on simpler shapes such as spheres or squares so, at first, whenever the hexagon moved alongside the song’s wave length, it was distort and clip through the portal effect itself. I managed to fix this issue, however, by adjusting the lowering the strength of the song’s wavelength.

After adjusting the audio MASH network, I added in a simple black background to further add into the illusion, clipping the black image plane into the portal effect in order to make the loop appear more immersive when it started to move.

And then, I added a simple camera set up, adjusting the focal lense to focus on the portal’s warping effect as each hexagon passed by.

Camera and Scene set up

The portal effect worked in order to create the illusion of infintely gliding through. However, as shown with the audio network, because network is static, it breaks the illusion fairly quickly.

So, similar to my process for the portal effect, I created a CV curve in reference to the spherical distribution, allowing the portal effect to take place once again but this time with the audio synced up alongside the sequence.

This was the final result of this experiment, with different portals gliding the user through and around them. On one hand, the colours and composition help create the illusion of user movement, however, in a 360 environment, I’ll need to consider how the user will handle the claustrophobic space that the portal effect provides.

For my larger project, I would want to work more with MASH networks such as these – it has helped me gain a solid understanding on how to approach the VR project, wanting to work with more illusions such as portals or warped effects. MASH networks also allow me to experiment with world building and action sequences.

With UX design especially, I want the user to be able to experience these effects but possibly in a smaller and less space-intrusive scale for user accessibility. So for instance, if I were to add the portal effect into my project, I’ll need to keep the sequence short or adjust the camera to prevent motion sickness – which usually comes from experiencing VR in a claustrophobic sequence or constant moving objects.

Categories
Emerging Technologies Lab Exercises Year 3

Emerging Technology – Prototyping Your Immersive Experience

When it comes to new technology being introduced every year comes with new explorations and discoveries to be made especially when it comes to new heights in player experience. VR has been a medium I’ve always been interested in but never fully experienced, nor was it a subject I was incredibly knowledgable on besides the Oculus Rift, A VR headset that was released in 2013.

Regardless of this, In these experimental blog posts, I’ll be exploring different techniques and practices in order to grasp not only a better understanding on the potential possibilities of creating different environments but also learn the technical aspects such as UX design and player accessibility.

VR 360 Camera

To begin exploring VR, I started off by using Maya to understand the basics of experience creation. For this, I created a basic environment with different structural shapes in order to simulate the player’s height within the world.

I also added some basic sky dome lighting to the experience – giving the area more depth especially when rendering the scene. The simple composition of these structures helped create an a domain that towers over the user without making it too overwhelming on the senses.

The VR camera helps add that sense of immersion by allowing users to feel as if they’re in a much smaller position. Whilst, at first, this was difficult to create first time due to the proportion considerations; This exercise helped shape my basic understanding on environment building and assisted me to begin to research and apply one of the fundamentals within UX design in VR: Immersion.

Since the VR video won’t be able to work in the browser so please download the video for the full experience.

WebVR – Exploring FrameVR

FrameVR is a web based VR creator that allows users to create their own experiences and to allow other members to see your own spaces in both PC and VR. The website also allows other users to collaborate on your space. These spaces could facilitate anything from work spaces to personal projects or even blockouts for bigger VR projects, allowing users to test out the space in the earlier stages of the production timeline from both a VR and PC perspective.

This is incredibly helpful due to these spaces being accessible upon multiple device types, arguably being able to reach for a wider market and playtesters especially within the blockout phase of any project.

For FrameVR, I was mainly experimenting with the tools that the software provided by creating my own personal space that players could relax in within both PC and VR.

For this small project, I wanted players to draw their immediate attention to the table, using eye-catching objects such as cakes and food models to urge the player to inspect the area as soon as they came into the space.

My main theme for this space was to serve as a ‘Shrine’ – So adding food, plants and candles onto the table helped contribute to the theme alongside a large angel statue to amplify the calm and warm aesthetic to the space. Whilst a casual environment, this project was to mainly experiment with the different tools FrameVR had to offer such as it’s ability to import different models and images into the environment and even features such as the drawing whiteboard, text signs and screen sharing board.

Whilst it was interesting to explore FrameVR and it’s capabilities, I won’t be using this for my blockouts during the production of my VR project, mainly due to my familiarity with Maya as a software as well as Frame’s limitations such as limited polycount and the lack of experience with Frame’s modelling tool.

Nevertheless, This website was interesting to experiment with, especially when it came to understanding visual aesthetics when it came to capturing the user’s attention without making the area overcrowded.

Categories
Emerging Technologies Lab Exercises Production/Portfolio

References – Emerging Technologies

Emerging Technology – Prototyping Your Immersive Experience – Assets Lists Frame VR

dwij8405. (2023). Miguel O’hara Spiderman 2099 Rigged Textured [Model] Available at: https://sketchfab.com/3d-models/miguel-ohara-spiderman-2099-rigged-textured-69f61cec7d60453e95ad2e54c5e08919 [Accessed on 13/10/2023]

TowerDweller.com 3D-Scans. (2023). Broken Wing Angel Statue 3D-Scan [Model] Available at: https://sketchfab.com/3d-models/broken-wing-angel-statue-3d-scan-ee2dfa611cb84ef5816036277a818477 [Accessed on 13/10/2023]

3DMish. (2023). Pancakes [Model] Available at: https://sketchfab.com/3d-models/pancakes-a2fdb4034e0d4d4a99cdc42d79129f67 [Accessed on 13/10/2023]

Parkinson, M. (2023). Strawberry Cream Cake (shortcake) [Model] Available at: https://sketchfab.com/3d-models/strawberry-cream-cake-shortcake-9bfd31a63aa14e1e8261d95358d0b0fa [Accessed on 13/10/2023]

Ergoni. (2023). Cake Roll [Model] Available at: https://sketchfab.com/3d-models/cake-roll-1595205785684e43b7c7be6c1e9ff246 [Accessed on 13/10/2023]

chenkl. (2020). Stylized Salmon Nigiri Sushi PBR Learning [Model] Available at: https://sketchfab.com/3d-models/stylized-salmon-nigiri-sushi-pbr-learning-2fb933a56822411f982e259e3b04671c [Accessed on 13/10/2023]

deekshitkandregula. (2022). Pomeranian – @Venkydeexu18 [Model] Available at: https://sketchfab.com/3d-models/pomeranian-venkydeexu18-b9bfc1303d694de5872bd398da9afbc5 [Accessed on 13/10/2023]

Cookies and Cream. (2023). Vending Machine [Model] Available at: https://sketchfab.com/3d-models/vending-machine-3e5ff64c2608443a8c2b5bffd11773ad [Accessed on 13/10/2023]

Miku. (2018). Meiko Figurine [Model] Available at: https://sketchfab.com/3d-models/hatsune-miku-project-mirai-2-meiko-figure-7094e903e2384f7c90344f303661056d [Accessed on 13/10/2023]

deratege. (2023). Sakura Bonsai [Model] Available at: https://sketchfab.com/3d-models/sakura-bonsai-9cc2ccb408c9432fae1d455f9ce91bb8 [Accessed on 13/10/2023]

newmag2207. (2023). Bougies / Candles [Model] Available at: https://sketchfab.com/3d-models/bougies-candles-833a3818b2534fbab5dac61c45c0587b [Accessed on 13/10/2023]

Gatto, G. (2023). Japanese Tonkatsu Sign [Model] Available at: https://sketchfab.com/3d-models/japanese-tonkatsu-shop-sign-061d310a6a3d4f23bc02e3ef5a4fea81 [Accessed on 13/10/2023]

Cookies and Cream. (2023). Pink Dessert Set [Model] Available at: https://sketchfab.com/3d-models/pink-dessert-set-3833777cf83344be997945132f267085 [Accessed on 13/10/2023]

loriscangini. (2014). Kars [Model] Available at: https://sketchfab.com/3d-models/kars-25758f82847d48589590c7972731d989 [Accessed on 13/10/2023]

Emerging Technology – Prototyping Your Immersive Experience – Images Frame VR

Anka, K. (2023). Summer KeyFrame magazine Miguel Art Cover [Image] Available at: https://twitter.com/kristaferanka/status/1666945612284309504 [Accessed on 13/10/2023]

Emerging Technology – Prototyping Your Immersive Experience – Music

Pemberton, D. (2023). Across the Spider-Verse (Intro) [Media] Available at: https://www.youtube.com/watch?v=d_dEQ_V9YAg&list=PLRW80bBvVD3XsSk0eXKIQW_kZMMsQtlz- [Accessed on 12/10/2023]

Emerging Technology – Immersive User Experience (UX) and Augmented Reality (AR) – Images

Sony Pictures Animation (2023). Spider-Man animator gives that one tip that might make all the difference to budding animatorsABC News. [Image] 9 Jun. Available at: https://www.abc.net.au/news/2023-06-10/spider-man-across-the-spider-verse-animation/102463650. [Accessed on 30/10/2023]

Emerging Technology – Research Proposal – Videos and Templates

Kamppari-Miller, S. (2018). VR Sketch Sheets. [Image] Medium. Available at: https://blog.prototypr.io/vr-sketch-sheets-4843fd690c91 [Accessed 01/11/2023].

Athena. (2023). Chainsaw Man Vol 12 PV. [online] Available at: https://www.youtube.com/watch?v=-eGalkakxsU [Accessed 01/11/2023].

Emerging Technology – Research Proposal – Research References

Vinney, C. (2023). UX for VR: Creating immersive user experiences. [online] Available at: https://www.uxdesigninstitute.com/blog/ux-for-vr/. [Accessed 15/10/2023].

Green, H. (2017). Here They Lie and the ethics of VR horror. [online] Game Developer. Available at: https://www.gamedeveloper.com/design/-i-here-they-lie-i-and-the-ethics-of-vr-horror [Accessed 01/10/2023].

Campbell, S. (2019). Stuart Campbell: Sutu Eat Flies. [online] Available at: https://www.sutueatsflies.com/. [Accessed 05/10/2023].

Loux, B. (2018). Step into the Weird World of Sutu’s Immersive VR Painting. [Online]. Available at: Step Into the Weird World of Sutu’s Immersive VR Paintings – VRScout [Accessed 05/10/2023].

Williams, K. HTC Vive Arts and V&A. Curious Alice: The VR experience. [Online]. Curious Alice: the VR experience · V&A (vam.ac.uk) [Accessed 05/10/2023]

Emerging Technologies (padlet.com)

Bibliography

Tangentlemen (2016). Here they Lie [Video Game]. Tangentlemen: Los Angeles. Available Online https://store.playstation.com/en-gb/product/EP9000-CUSA05344_00-DANA000PS4000123 Accessed on: [01/11/2023]

Illumix (2019). Five Nights At Freddy’s AR: Special Delivery [Video game]. Illumix: USA. Available Online: https://fnafar.com/ Accessed on:[18/10/2023].

Niantic, Inc. (2016). Pokemon Go [Video Game]. Niantic, Inc: San Fransico, USA. Available Online: https://pokemongolive.com/?hl=en Accessed on: [18/10/2023].

Spiderman: Across the Spiderverse (2023). Directed by Justin K. Thompson, Joaquim Dos Santos, Kemp Powers. [Film]. California, United States: Sony Pictures Animation.​

Jojo’s Bizarre Adventure Anime: Part 2 – Battle Tendancy (2014). Directed by Toshiyuki Katō. Written by Hirohiko Araki [TV Programme]. Netflix.​

Fujimoto, T. (2018). Chainsaw Man. [Manga] Tokyo: Weekly Shōnen Jump.

Chainsaw Man Anime: Season 1 (2022). Directed by Ryū Nakayama. Written by Tatsuki Fujimoto [TV Programme]. Crunchyroll.

Categories
3D Character Animation Year 2

Character Animation – Rendering and Conclusion

Before rendering, I set up some basic lighting with each animation. For the Voice-over animation, I created a scene to mimic a TV interview, adjusting the camera close to Mimi’s face as she speaks. With the other two animations, I added cameras that would showcase the entire model and it’s motions. Once this was done, I rendered all my animations and edited in the voice lines for my final sequence.

Conclusion

The main aspect that I learnt were the importance of applying animation principles into 3D. I also learnt different techniques that helped with the planning as well as the conception of dynamic movements as well as teaching me the rigging process despite taking up the most time in the development process.

In the future, however, I would like to refine my animations. For the running and dance animation, it could be improved with the help of graph editing and further adjustments to the timing in order for her movements to appear more life like because especially in the dancing animation, certain movements feel too delicate. Another issue were weight painting errors such as clothes clipping and especially with the hands as they were dislocated from their wrists, causing the arms to look unnatural.

Therefore, in the future, I’d like to continue practicing and refining my skills in this medium and also enhance my first set of sequences in the process.

Categories
Collaborative Game Project Year 2

Dev Log #7 – Play testing and finalising the game.

1st May – 7th May

This week, we heavily focused on finishing the game as well as adding certain, small features that would help new players be able to navigate through the office levels.

Whilst my tasks, at this point were relatively complete. There were still some areas that needed work on – especially when it came to the script.

We asked a couple of individuals to playtest our game and provide some feedback. One of the main pieces of feedback given were the lack of hints throughout the game. Kuba and I had discussed the possibility of adding hints into our game last week, however we were unsure how to tackle this without making the key cards location too obvious.

Originally we had an idea to potentially add an audio queue to the keycard, so the closer the player was to the item, the louder the sound gets. However, for players that want to take their time reading exploring the narrative, this could become incredibly grating really quickly which could ultimately lead to them rushing through the game and having an overall unpleasant experience, leading to a lack of replayability. On the other hand, this could lead normal players to rush through the game without looking at any of the items and therefore feeling underwhelmed or confused by the experience.

I also came across a similar issue when looking back at last week’s post. The fact that players may not either have the time or the patience to look through different items in order to find the keycard, especially since the game’s relatively fast pace. It slows down the game’s pacing and could take the player out of the experience. So in order to counteract these issues and concerns, we added special dialogue for levels that require a keycard to access the next stage or an area in the level.

After completing the script, I finished off the project by completing my tasks in the hack n plan and logging in the hours completed throughout the project’s development.

Conclusion

As a short conclusion to this project, the game underwent some major changes from it’s initial planning and prototype stages mainly either due to time constraints, over ambition or simply stylistic choices.

Nevertheless, working with Kuba and Damien, even on a small project such as this, has taught me that communication is vital as well as keeping a consistent schedule. I felt, as a concept artist and writer, this was an important learning curve to undergo especially when communicating and receiving feedback from my group.

Throughout development, this has also helped me keep motivated as getting positive feedback as well as critique positively impacted our game today. It’s very polished in comparison to it’s prototype counterpart. The game, overall, turned out to be a unique piece that, as a group, we can’t wait to develop further as well as the universe surrounding it.

Gameplay Video