Before rendering, I set up some basic lighting with each animation. For the Voice-over animation, I created a scene to mimic a TV interview, adjusting the camera close to Mimi’s face as she speaks. With the other two animations, I added cameras that would showcase the entire model and it’s motions. Once this was done, I rendered all my animations and edited in the voice lines for my final sequence.
Conclusion
The main aspect that I learnt were the importance of applying animation principles into 3D. I also learnt different techniques that helped with the planning as well as the conception of dynamic movements as well as teaching me the rigging process despite taking up the most time in the development process.
In the future, however, I would like to refine my animations. For the running and dance animation, it could be improved with the help of graph editing and further adjustments to the timing in order for her movements to appear more life like because especially in the dancing animation, certain movements feel too delicate. Another issue were weight painting errors such as clothes clipping and especially with the hands as they were dislocated from their wrists, causing the arms to look unnatural.
Therefore, in the future, I’d like to continue practicing and refining my skills in this medium and also enhance my first set of sequences in the process.
The run cycle took the longest amount of time due to the different moving parts, the changing directions of the limbs and the timing.
This was, however, the best sequence to start off with because this introduced me to the basics of animation.
I blocked out the key poses from the reference, starting off with anticipation, with the character floating down, adding in a squash and stretch in the action by having her land and jump back up again in preparation of the run.
The many key poses for this sequence was due to the clear difference in animation between the sources. The video source is from an 80’s anime – therefore there are lot of extra frames to provide a smooth action cycle. This meant it was best to use the stepped animation technique. However, this also means that the movement can be precise and it’s a good learning tool for positioning as well as experimenting with the straight ahead actio
This took the longest because of the limbs having to consistently move in time with one another. This also created arcs within the sequence as the limbs would slow in and out of position.
I had also started to notice issues with the weight painting as the gloves start to clip upon movement. I tried to fix this issue – without re-altering the model.
There where restrictions to chest movements, which prevented the model from twirling around. So this section had to be scrapped and replaced.
Once I finished making the first cycle of frames – I was able to duplicate them throughout the sequence. The blockout, timing and motion were the most important part with adding in-between frames making the movements slower but smoother. Then I went into the graph editor and translated the graphs to produce stepped animation.
Whilst the stepped animation does simulate that 2D style, the sequence became blocky and unnatural despite the use of extra frames.
Whereas in the interpolation version, the movements were still snappy but they were able to produce a much smoother outcome. I adjusted the timing with the legs and added neck movements as secondary actions to make the animation dynamic.
Animation 2: Dancing
I started with a simple block out of a couple of key poses rather than making all of them from the reference. This process is known as Pose to Pose method as this sequence won’t use the stepping animation style. This helps speed up the animation process as I don’t have to block out the hand gestures or neck movements till much later on.
The main focus is the coordinated movements. Whilst the character isn’t constantly moving, each limb moves at different times. For instance, the legs would slow in and out of movements whilst the arms would consistently create large arcs.
After blocking out the dance sequence, I adjusted the timing and added in-between frames to produce smoother movements. I also added in neck and hand gestures as secondary actions.
The only issue with this sequence however was the jump when it came to moving the controls. So instead, I added a small squash and stretch to the jump.
Animation 3: Voice-Overs
My final animation sets out to overcome the challenge of animating voice lines. Because of this, I don’t plan to make a overly dynamic sequence – instead this will be used to show blendshape capabilities.
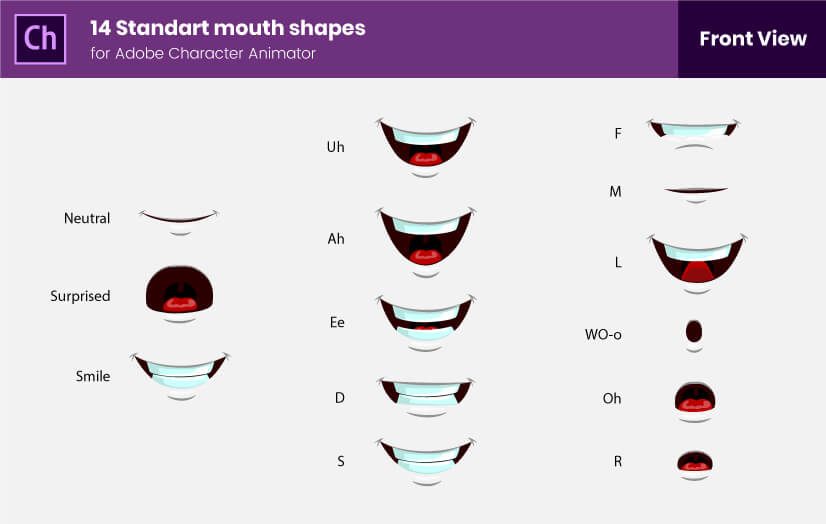
In 2D animation, I’ve had previous experience in animating voice lines using the standard mouth guides as shown here:
However, I was also planning to experiment with a different variant of lipsyncing – mainly used in a lot of anime to simulate speaking. I used this video as a reference for this technique.
However, whilst I’m trying to imitate an anime style, if I were to only translate this method into 3D, it could possibly create stiff movements and therefore it’d be difficult to understand the character’s speech if we were to take out the voice lines.
So I decided to combine both methods together. I had a limited amount of blendshapes mainly due to the lack of flexibility in the models retapology but this meant I can experiment with different mouth shapes to create even more blendshapes possibilities.
So before I started animating the mouth, I worked on adding secondary actions by blocking out some movements with subtle queues in her body language. This allows her to become much more expressive, further adding to her appeal.
After finishing the blockout, I started to animate the facial expressions and mouth movements. So I used the straight ahead method to mimic the spoken lines. Her speech also slow in and out within the animation depending on the word’s duration.
Finally, I adjusted the timing of the different lines to sync the Mimi’s body movements along with adding her facial expressions into the final rendition, slowly becoming more apparent and her face moves away from the camera.
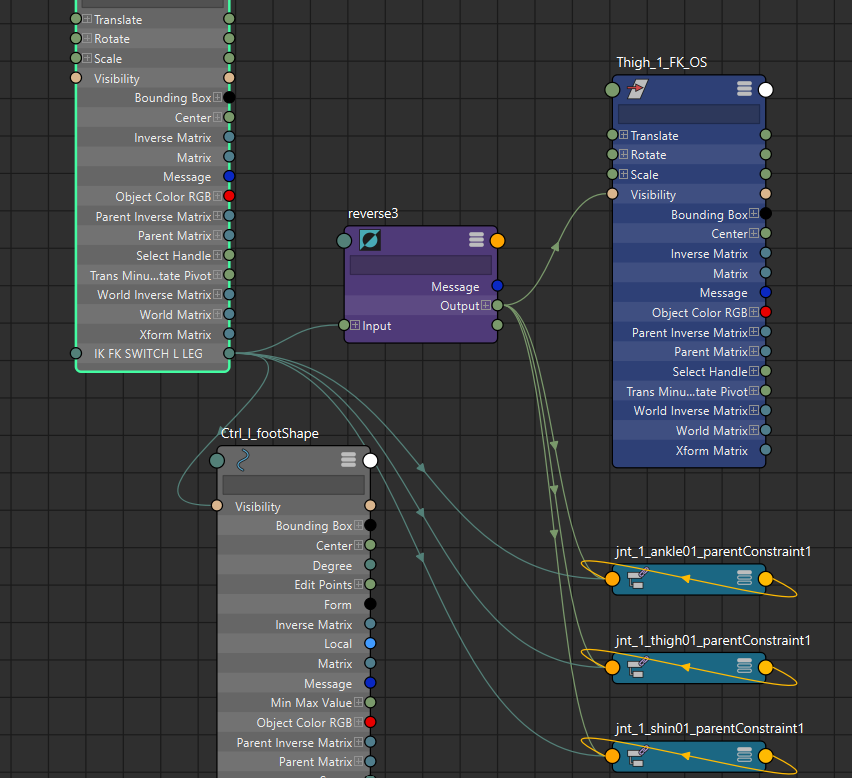
Implementing FK’s are vastly different to the IK’s. FK do not have any conventional handles unlike IK. FKallows us to move certain parts of the joints rather than as a collective IK, it gave more control during animationand it was a potential fix for the elbow snapping issue.
Demonstration of Elbow Snapping Issue
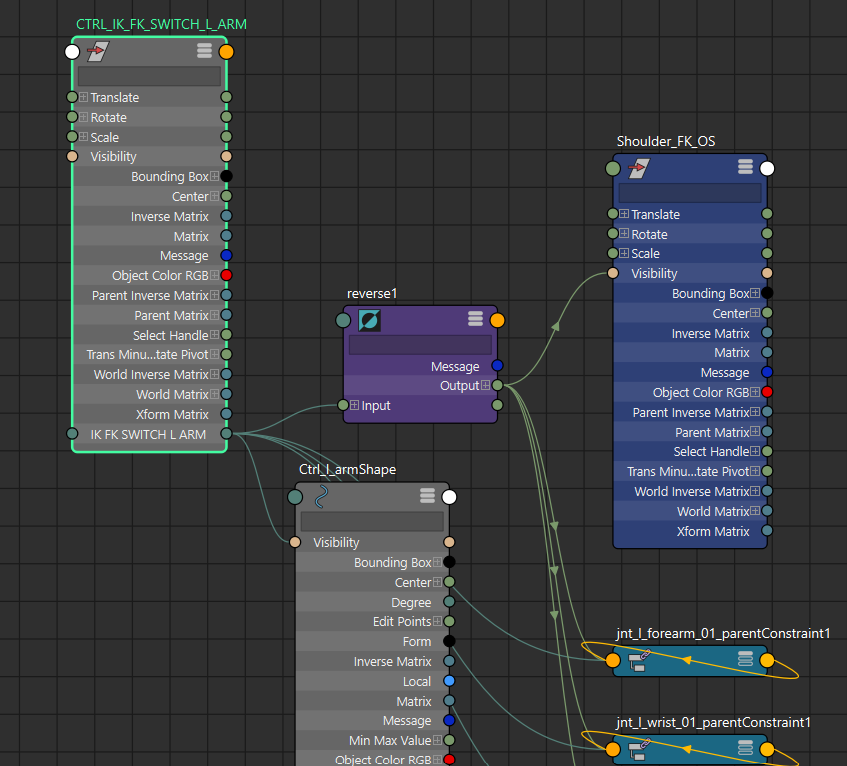
So I implemented the FK’s into each limb by adding parent constraints and controls onto each joint as shown here.
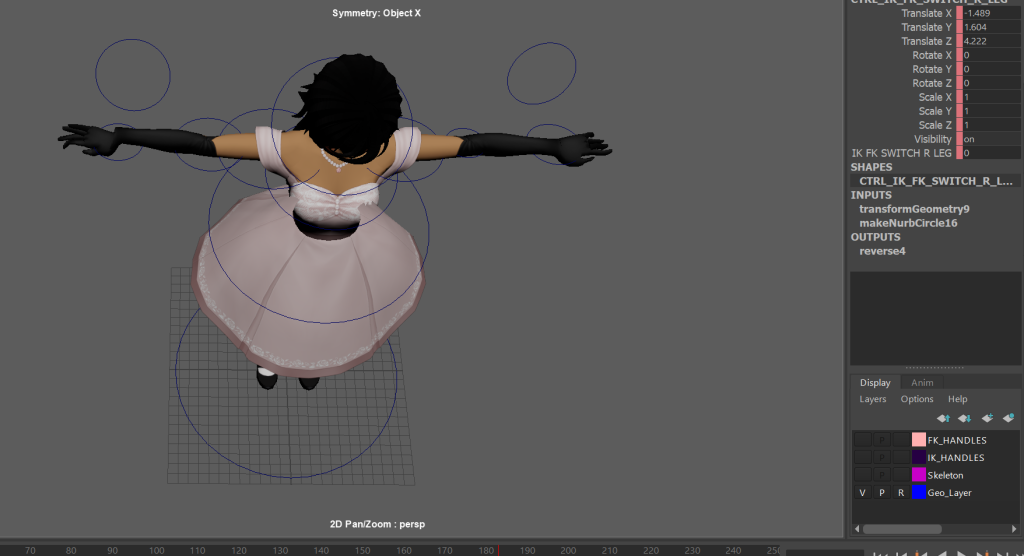
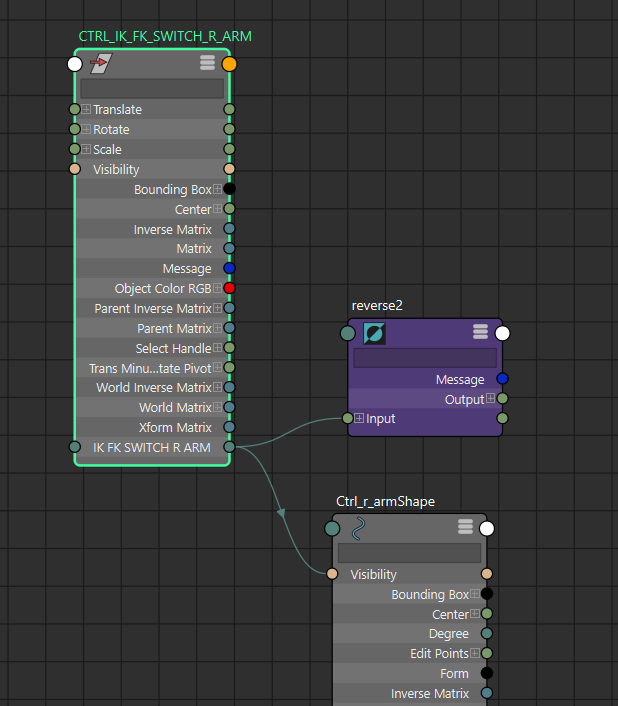
A system called the IK/FK switch was implemented.
But whilst I was experimenting with this change, I still wasn’t able to find a solution to the ‘elbow-snapping’ problem.
Once I implemented this system, I noticed another issue which directly affected the spine and the right arm’s FK.
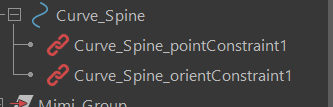
So I had to remake the spine curve, readjusting the positioning back onto the root joint.
I was able to remake my hand controls with ease. The hands also improved, although the thumb would still stick out.
I was able to fix the ‘elbow snapping’ problem by adding extra controls that were directly connected to the elbow. This allowed me to control the elbows positioning using the control’s pole vector attatchment.
These major changes have allowed me to start the animation pipeline as my rig was now fully ready to be used within the workspace.
I skinned the model, allowing me to now experiment the joints and the IK handles with the model. This process made it easier to spot any potential mistakes during the IK’s implementation.
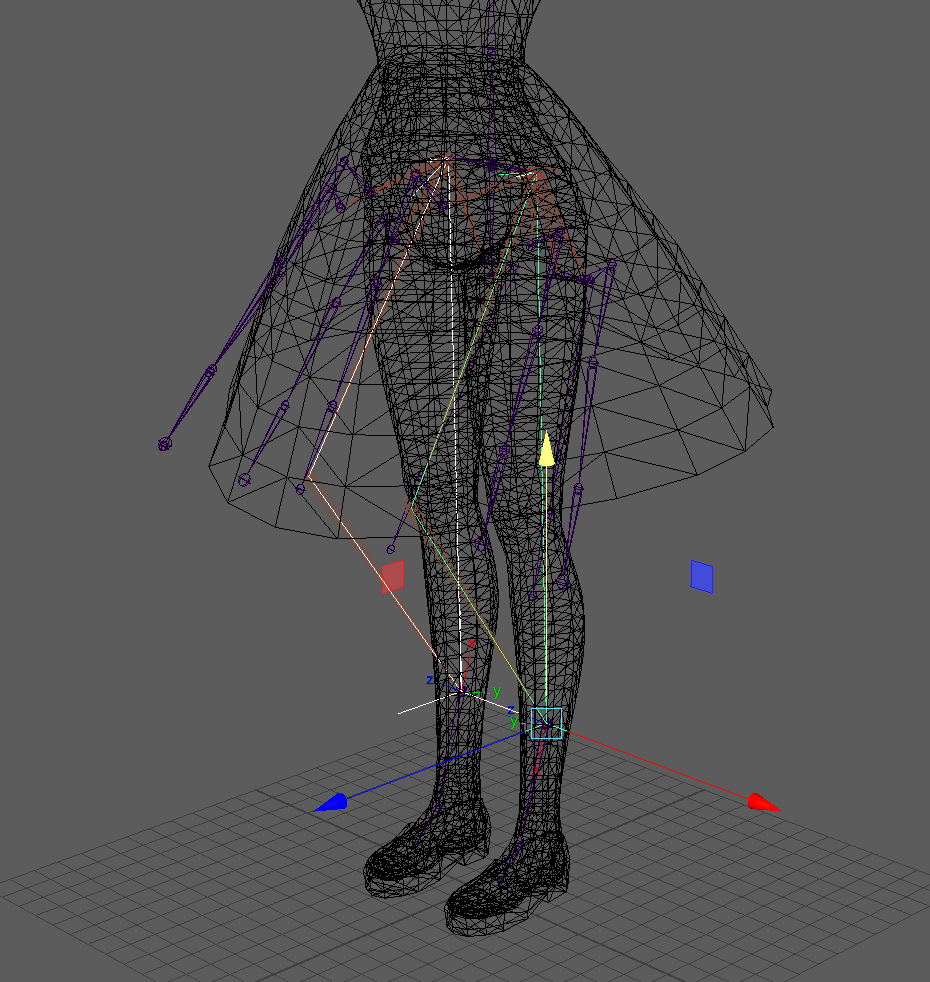
Adding in Controls
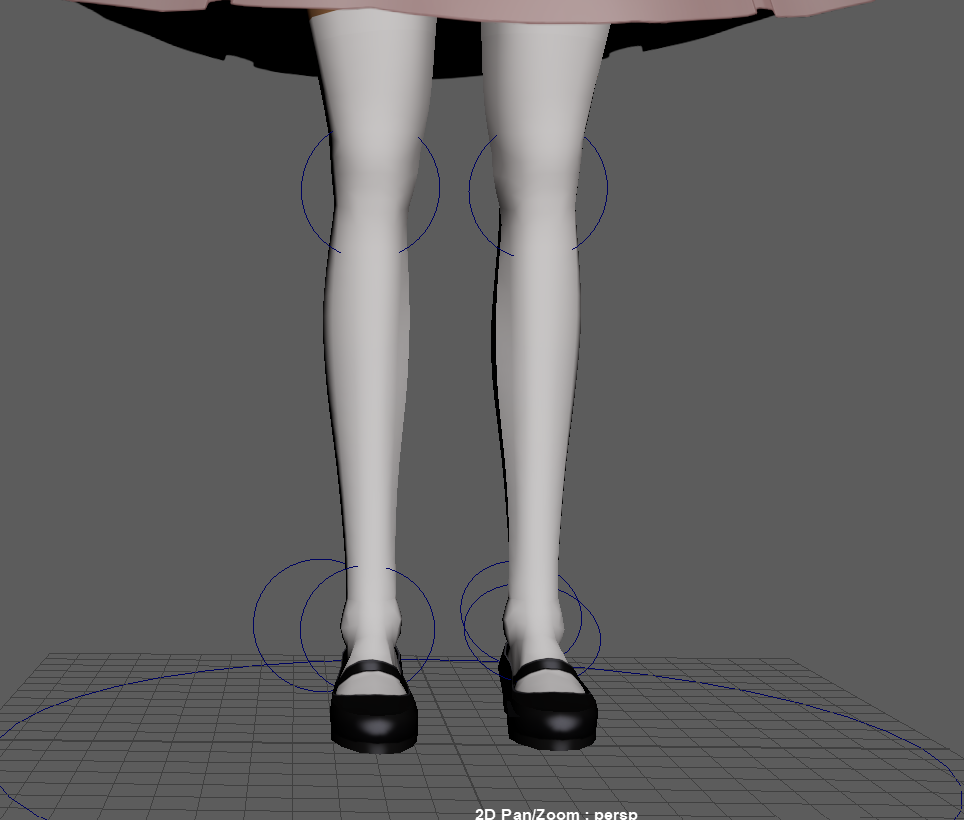
I added controls by starting at the feet. It becomes easier to animate the model as rather than selecting specific joints or IK handles, therefore being a less destructive method of animating by allowing me to deform the model without permanently contorting the rig.
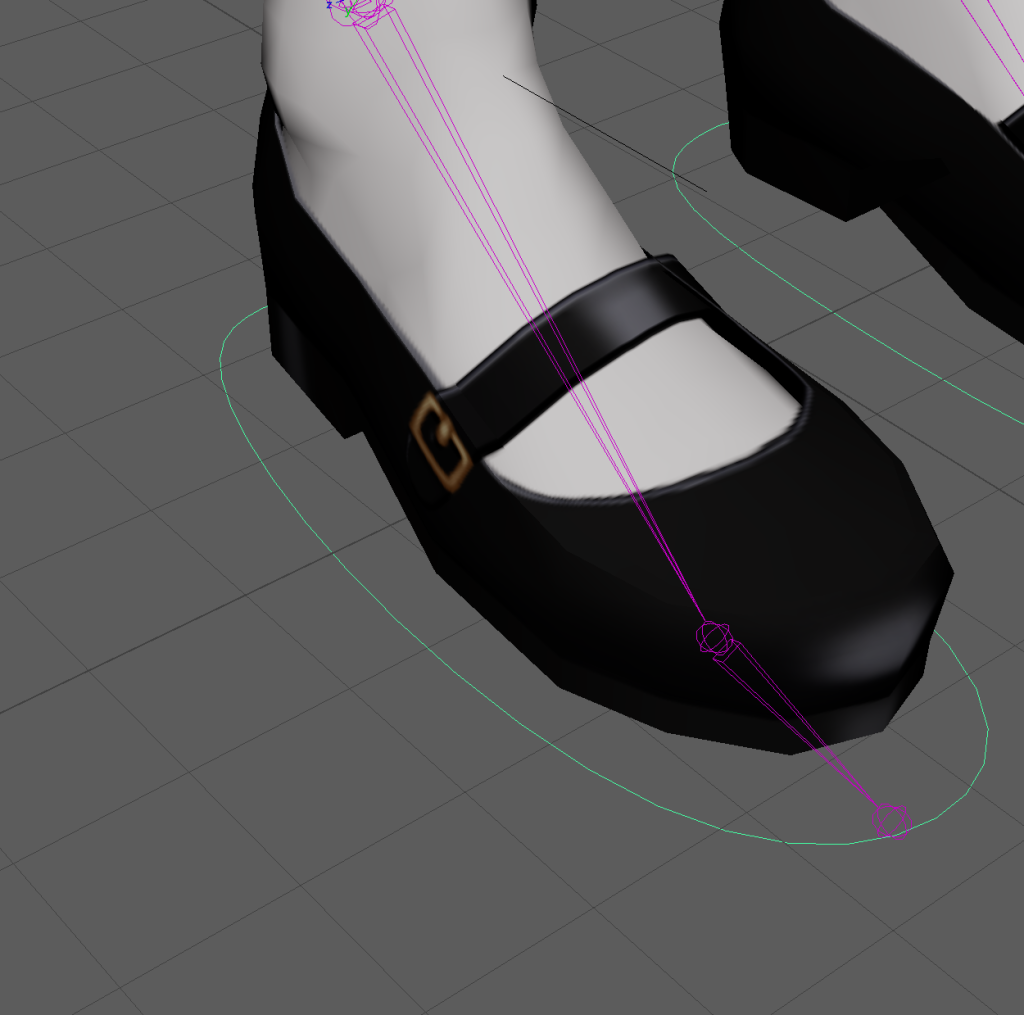
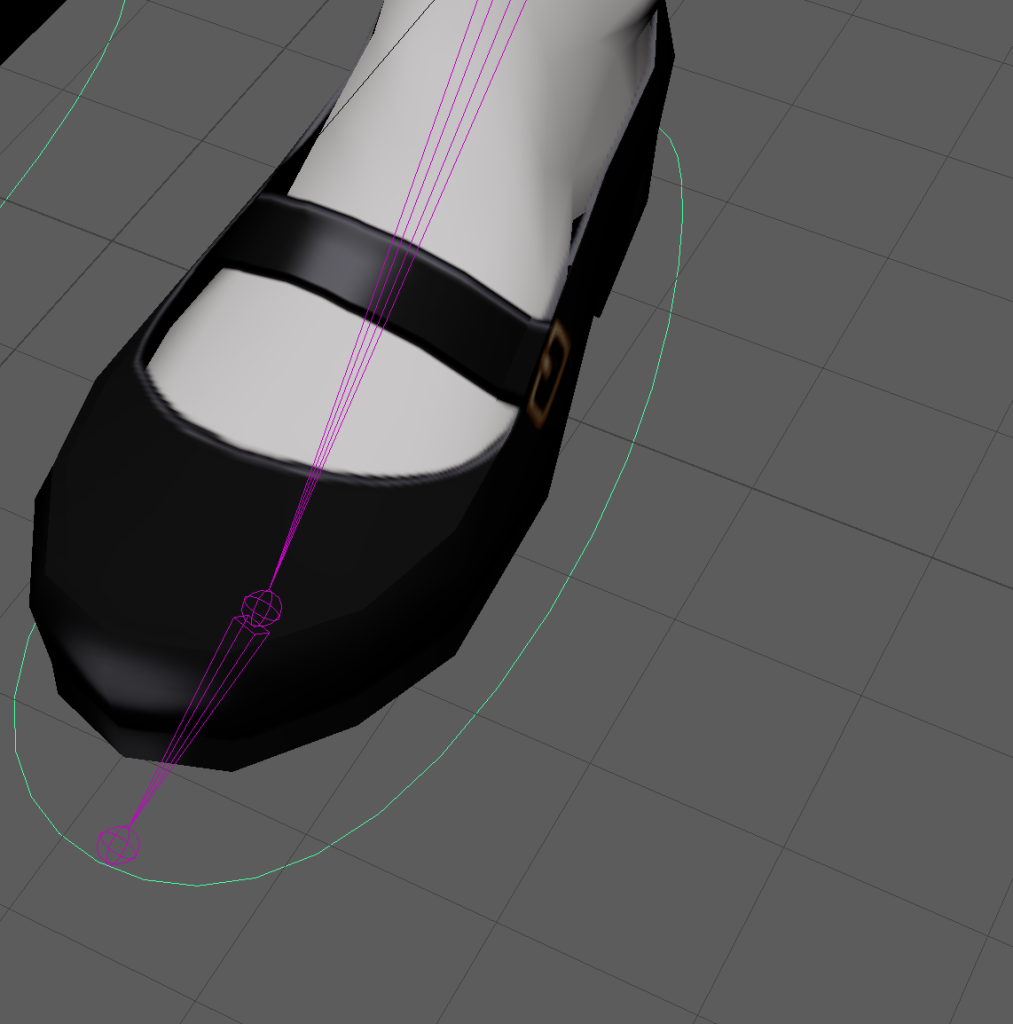
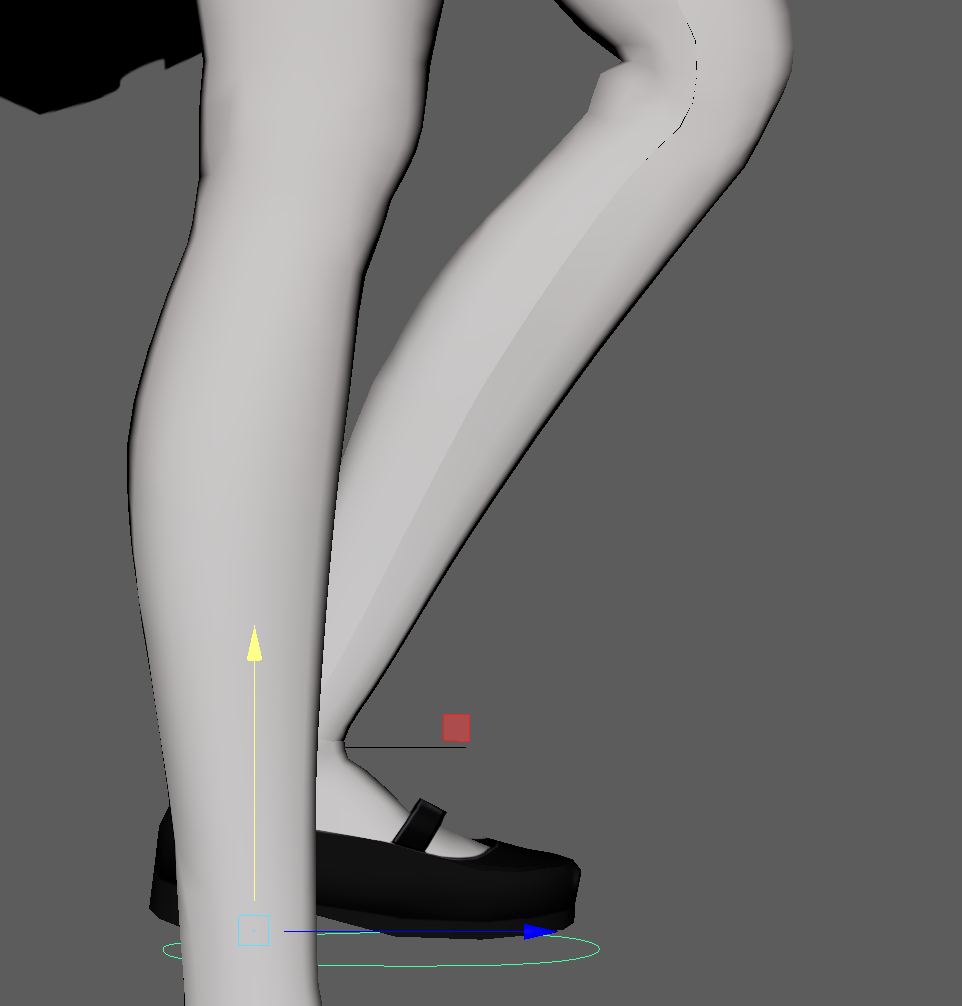
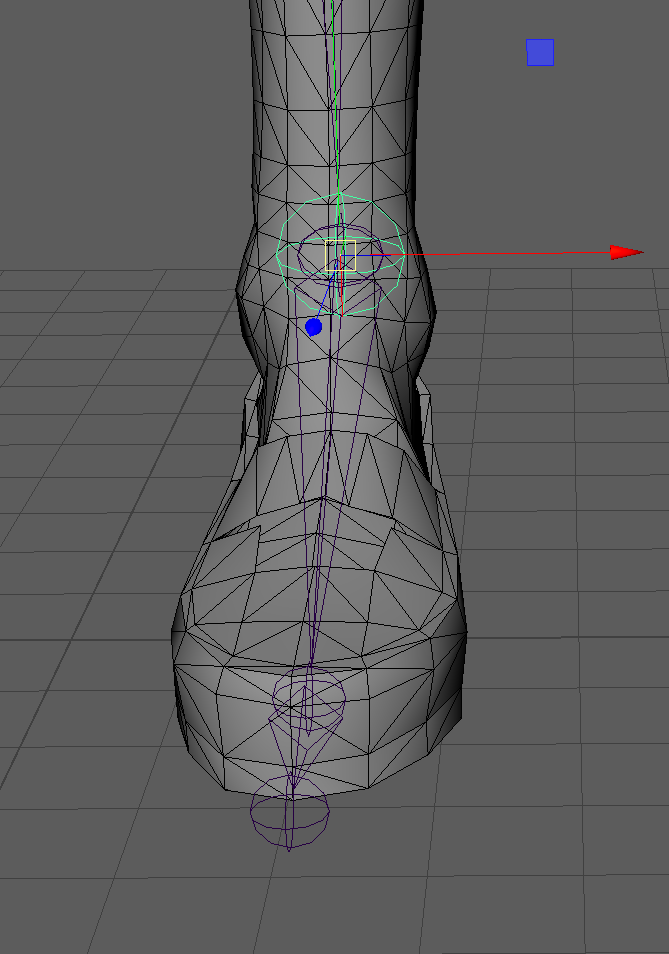
I started with creating foot controls to learn the basic process.
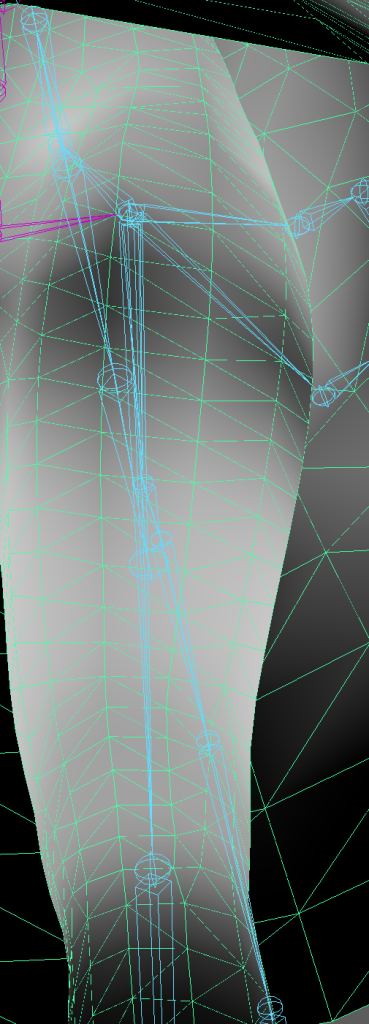
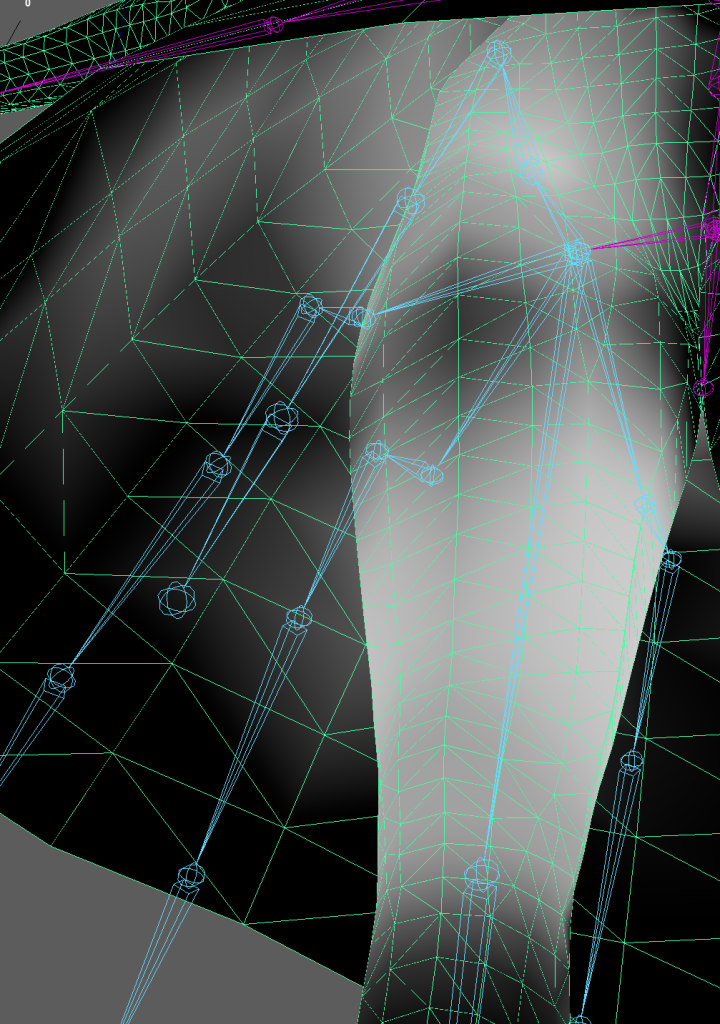
I added point constraints to the IK and Orient Constraints to the foot and leg joints – this means that when moving the foot controls you can move the legs which will cause her dress to move due to her dress bones being connected to the pelvis. This helped prevent clipping issues.
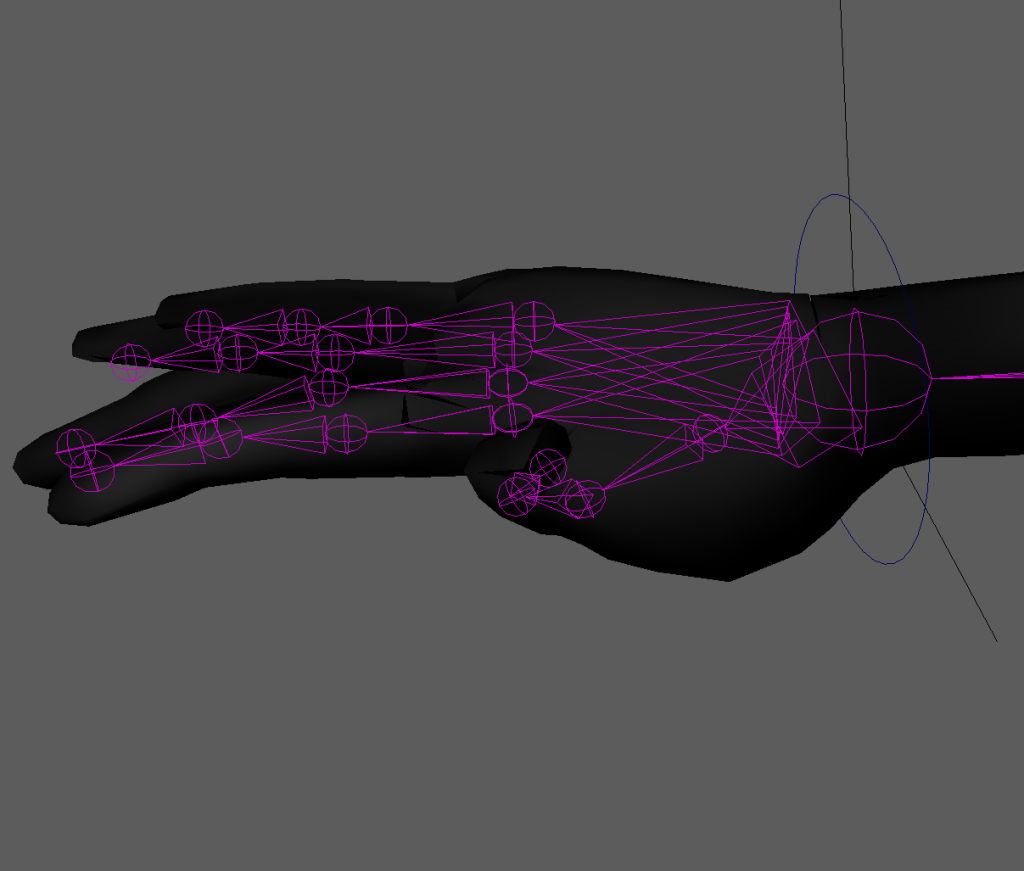
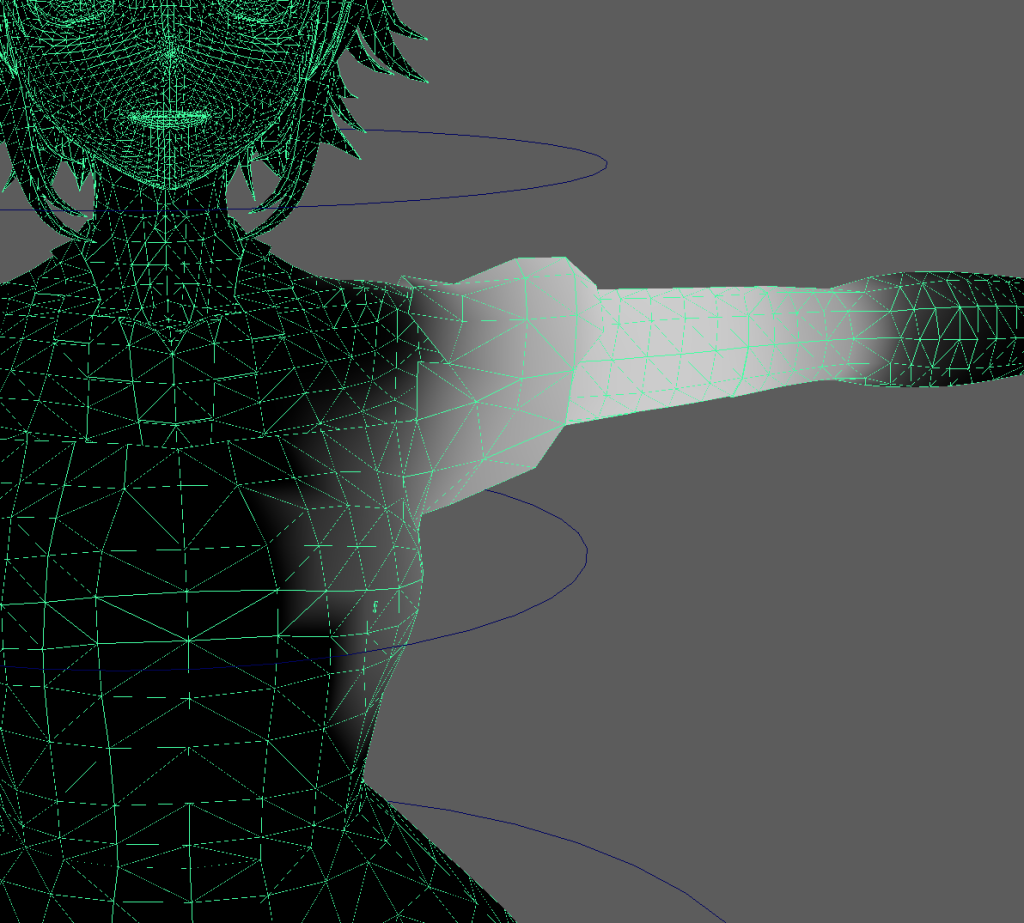
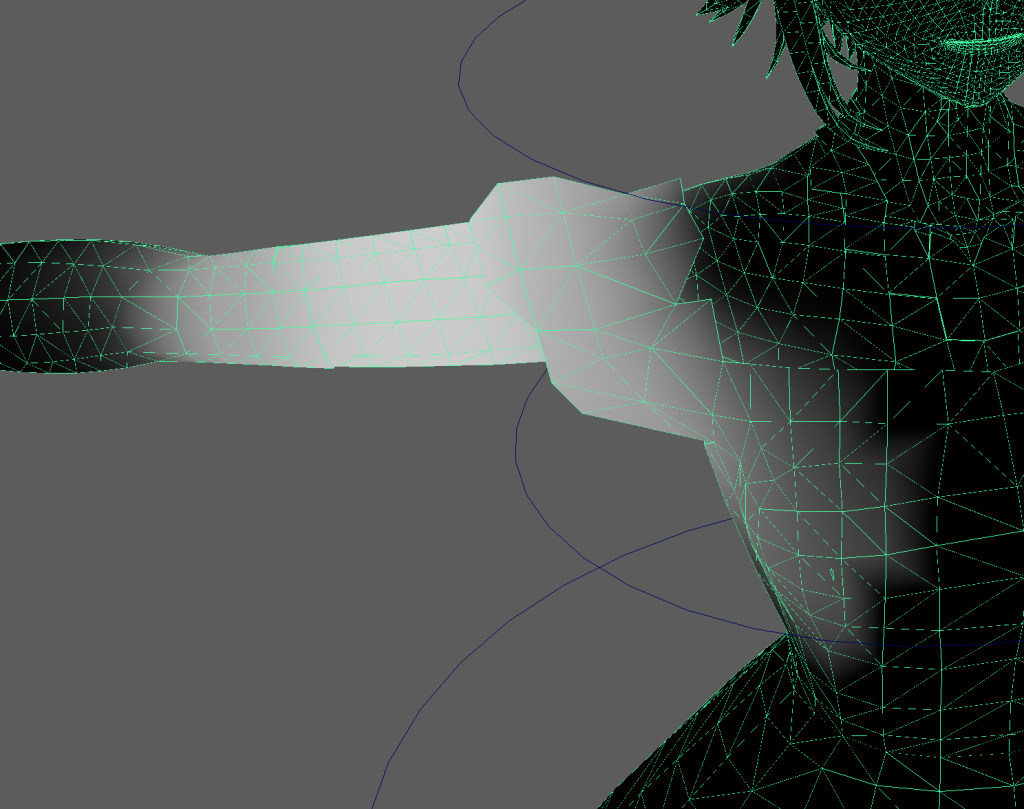
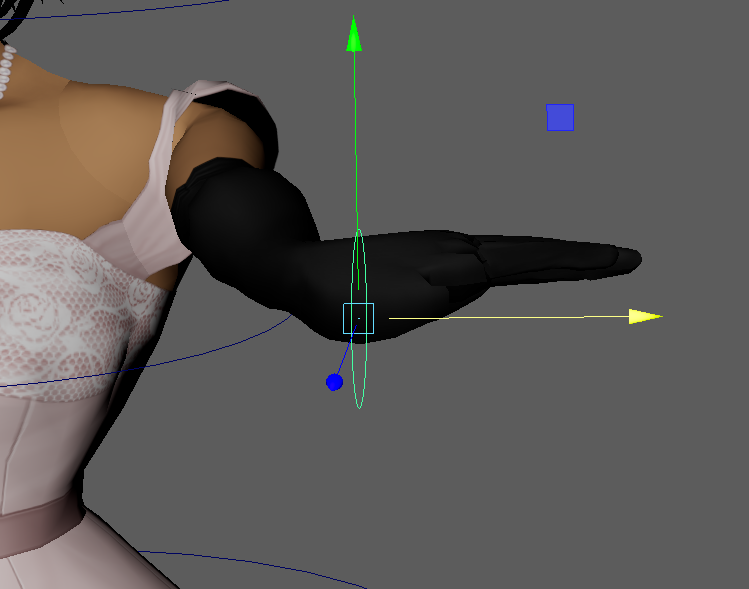
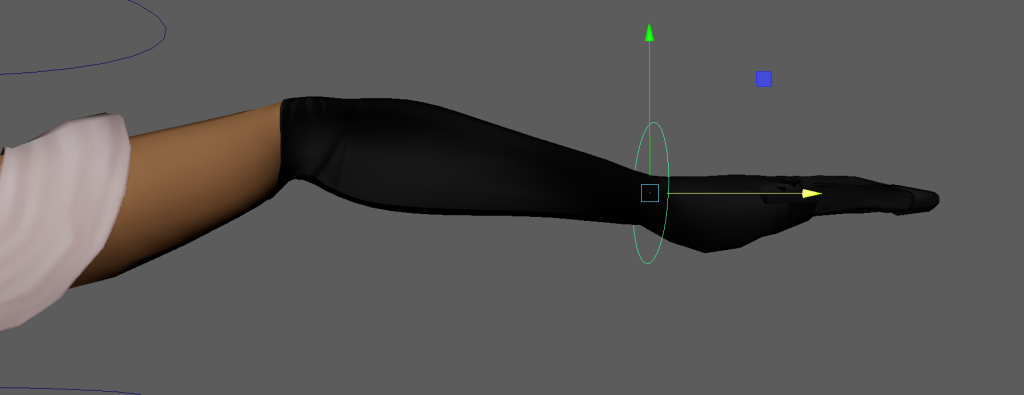
I added point and orient constraints to both the hand joints and IK handles. This allowed me to rotate the wrist joints, and move the arm joints. The issues with elbow snapping were still prevalent – this would not become a priority until I started doing test animations.
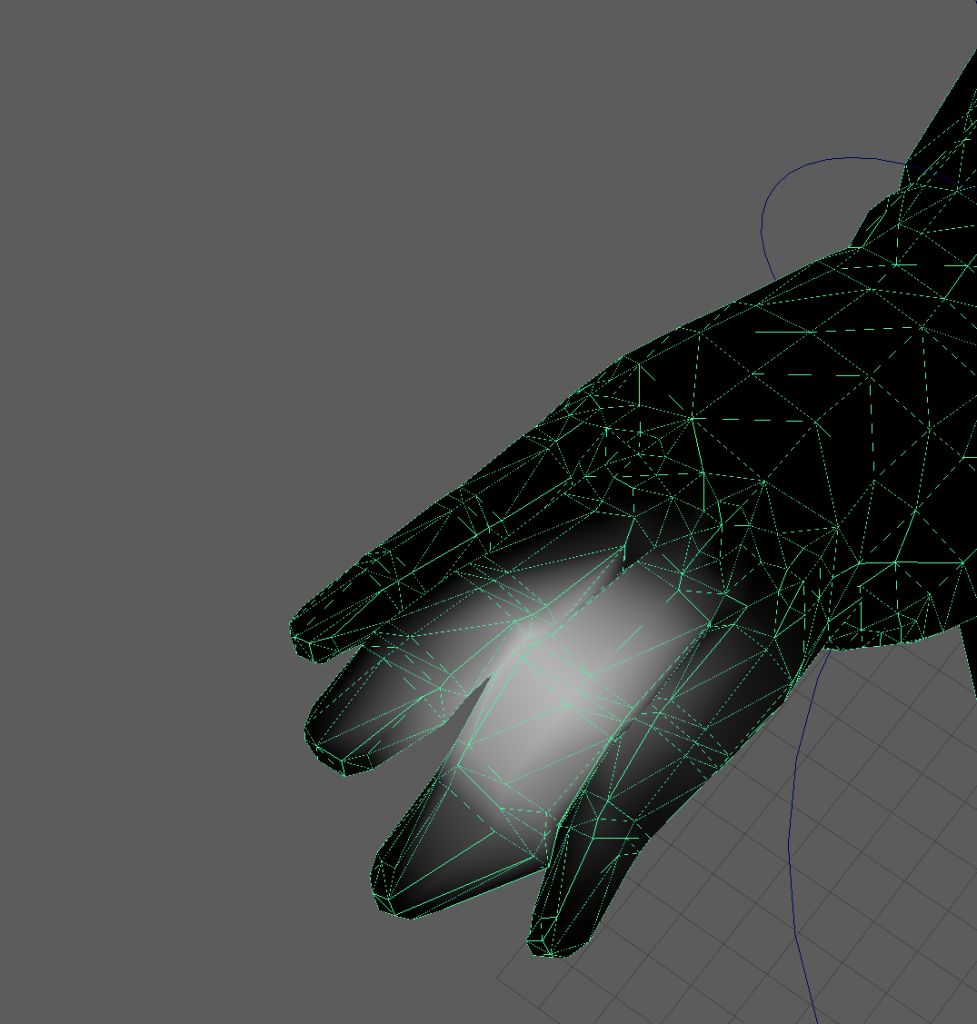
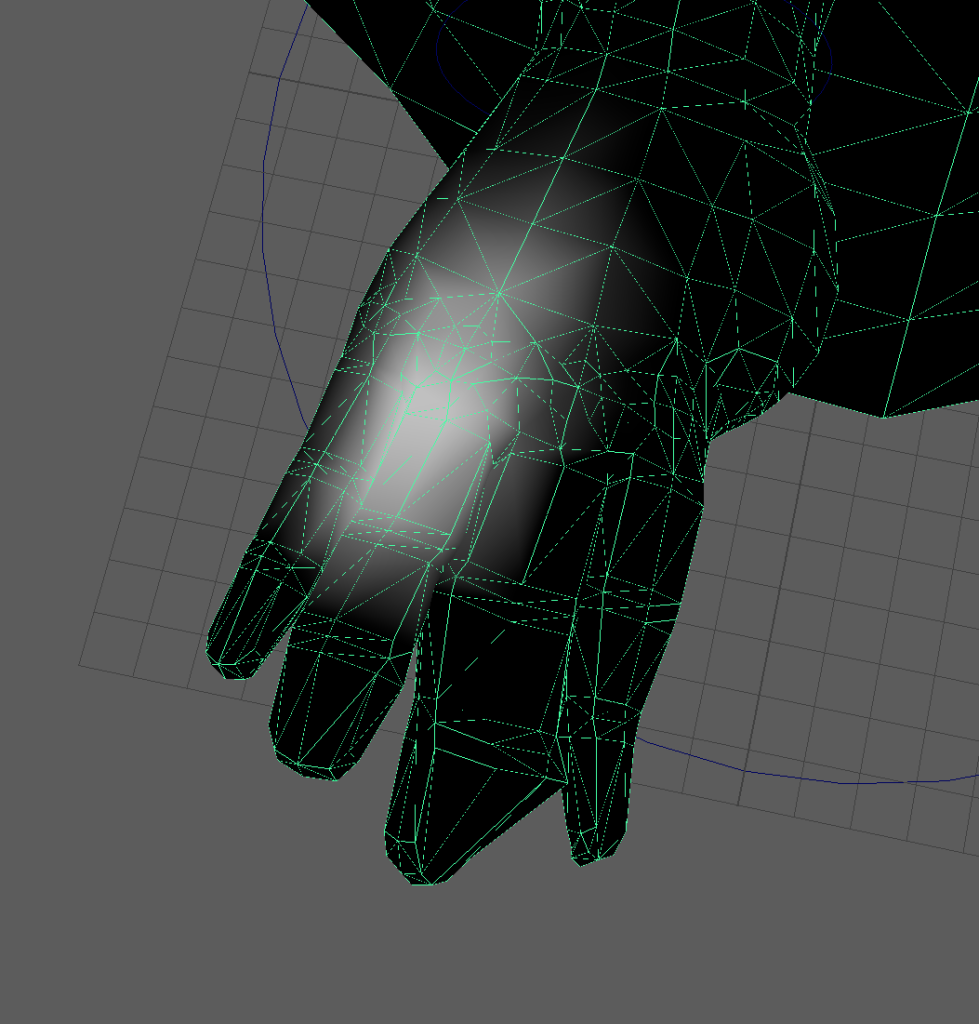
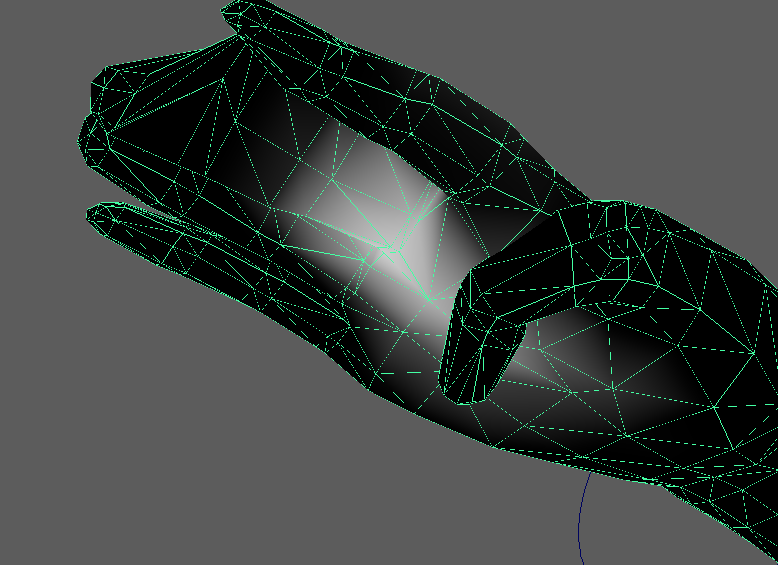
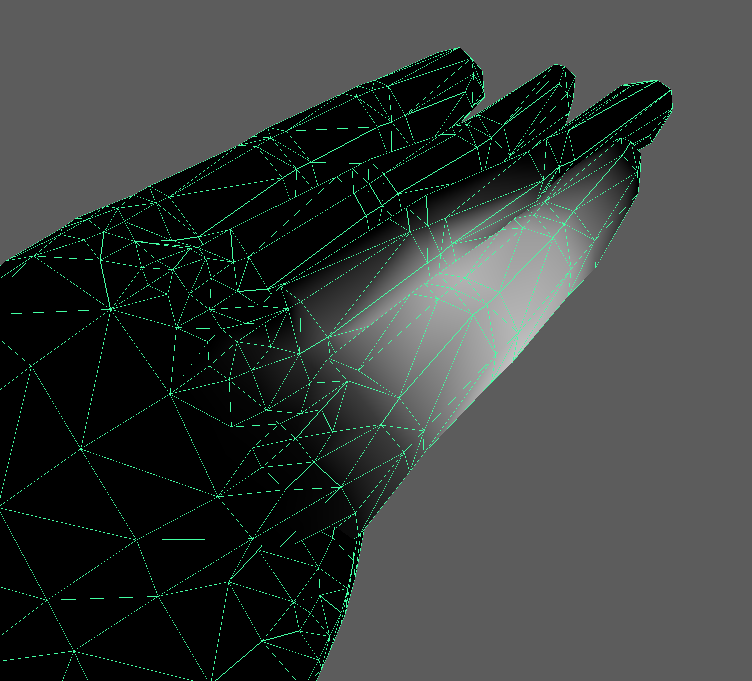
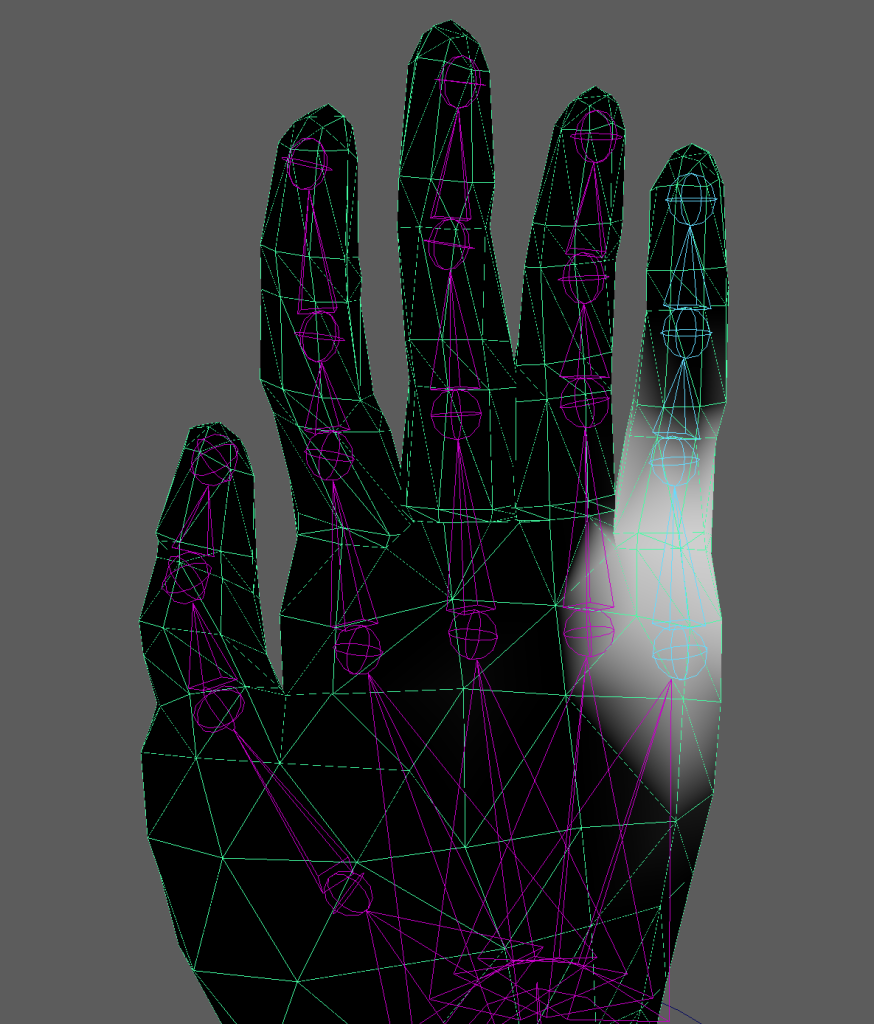
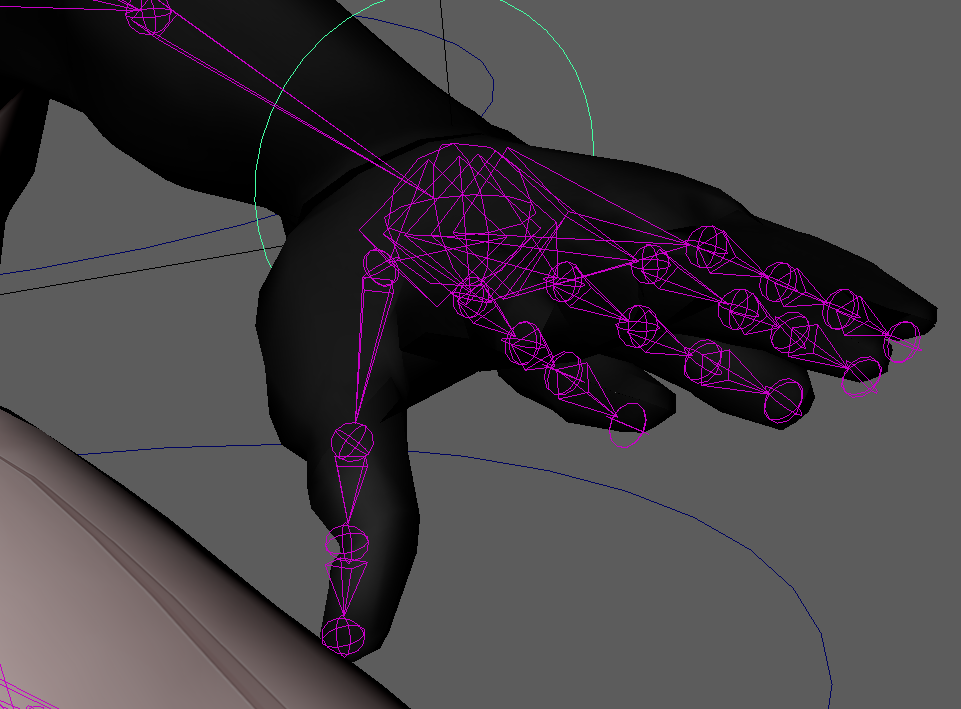
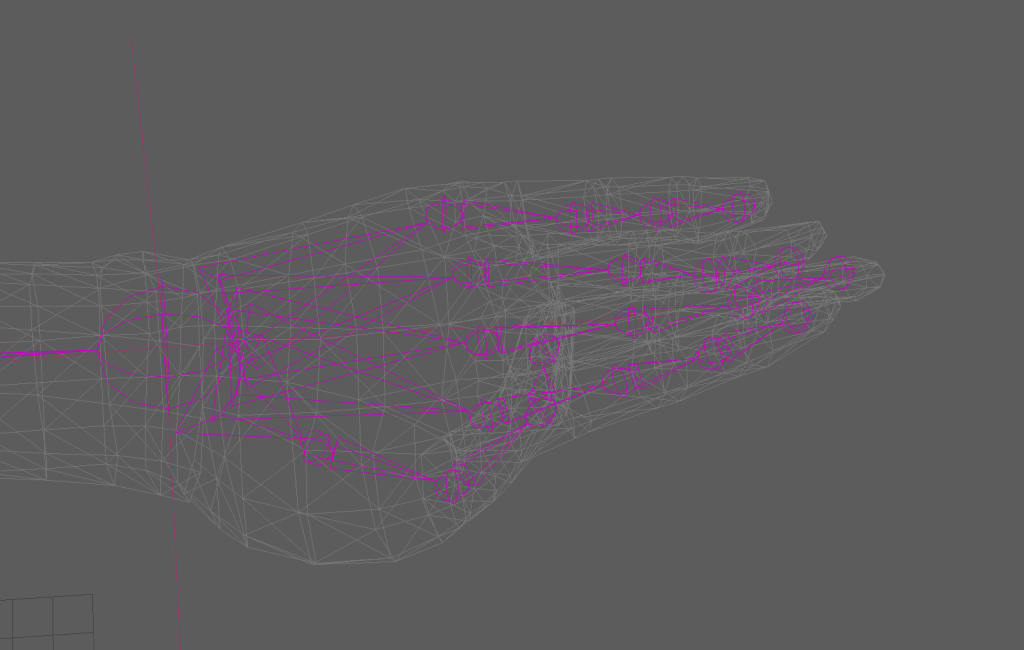
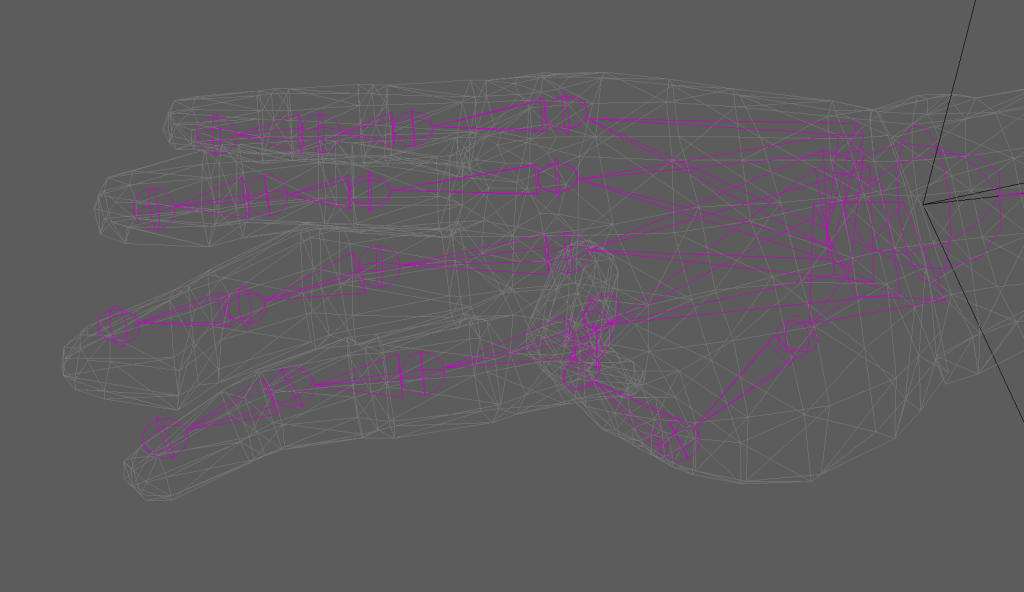
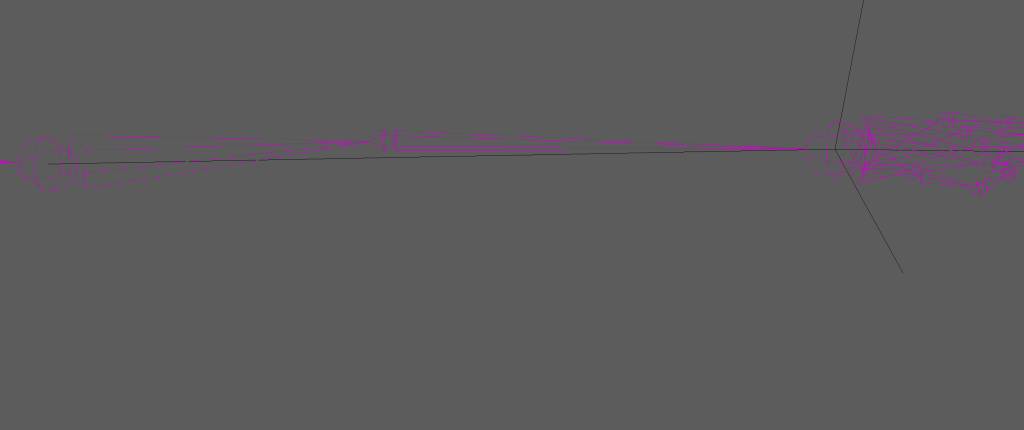
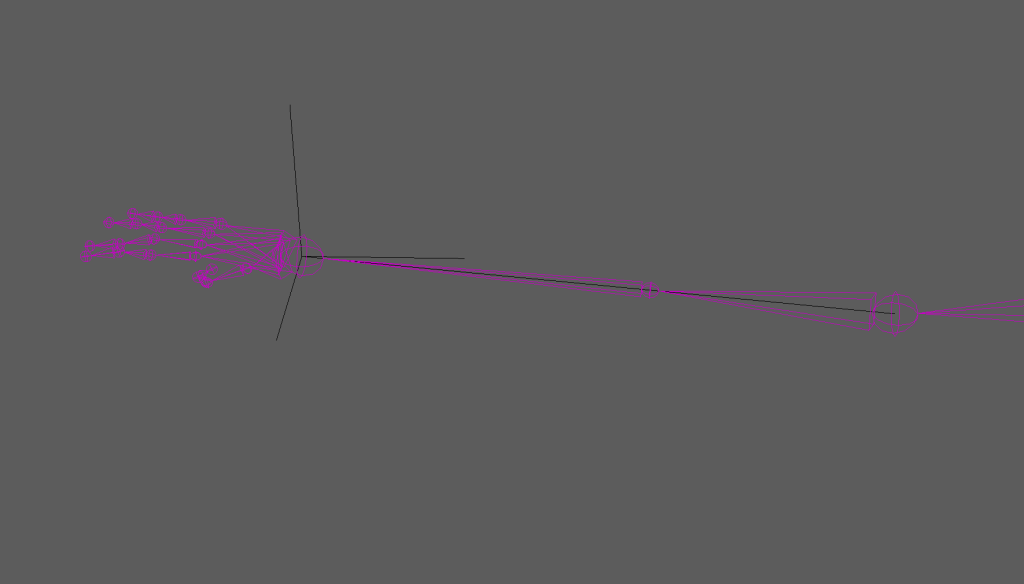
Her hands before they were fixed with weight painting. Unfortunately, each finger joint was deformed possibly due to the lack of spacing from the model’s fingers / joints.
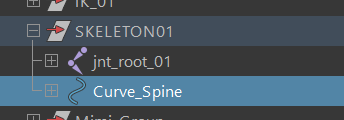
I started working on the spine by adding a spine curve and a Spline IK handle.
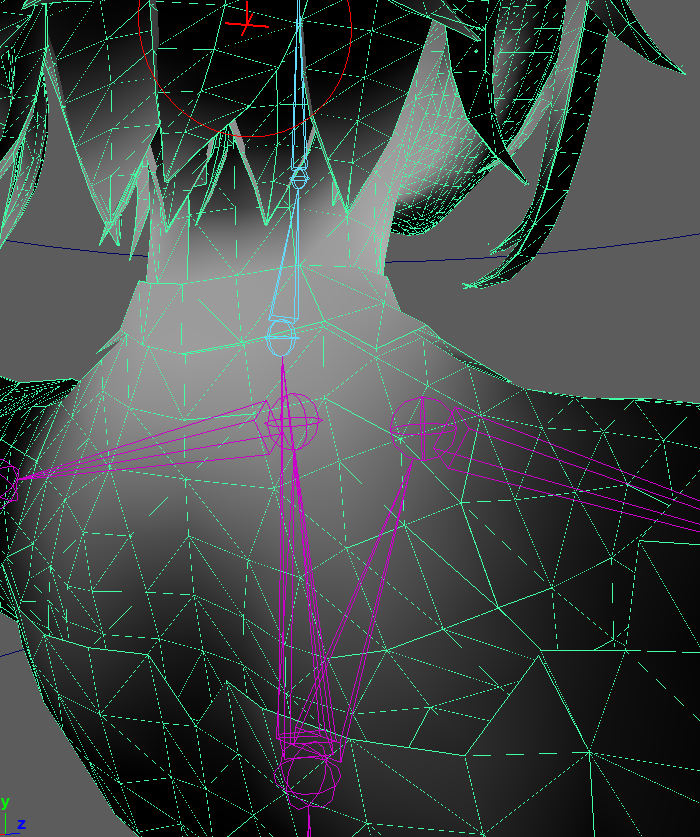
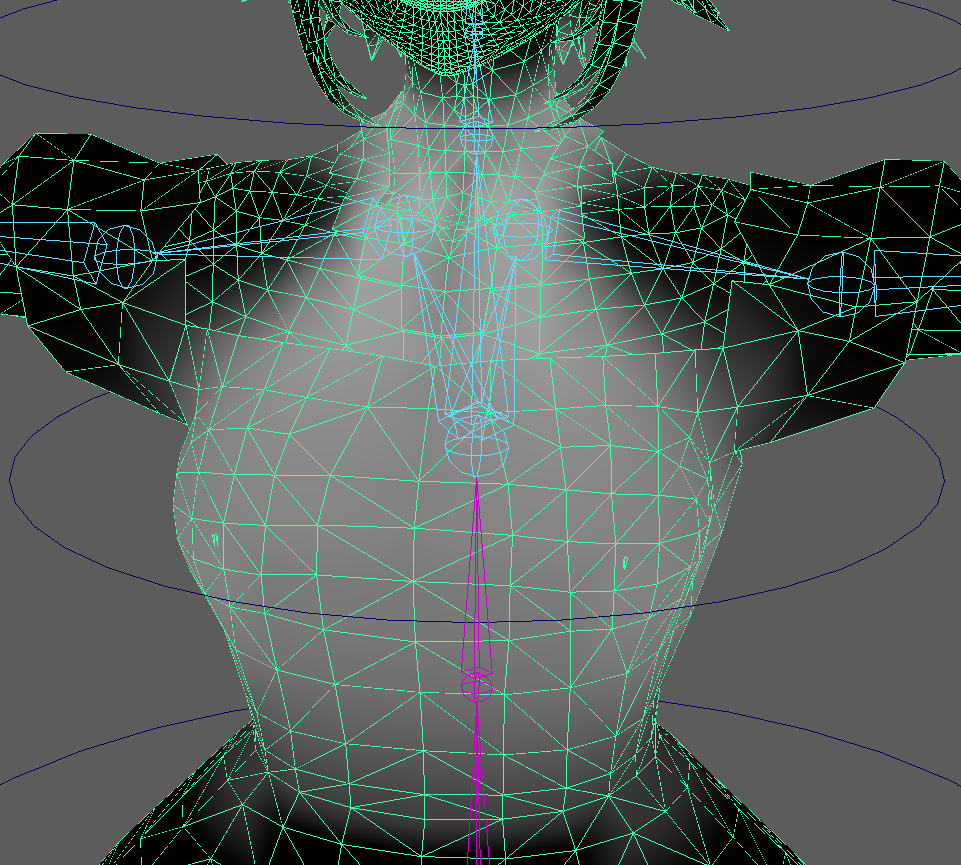
Here is the spine curve, placed at the root joint.Added Hip Controls to the root. For the Hip Controls I added Point and Orient Constraints as well as an ability where the hips could only twist
After adding the Hip Controls, I made some chest and neck controls to priorities full control of the spine in several areas. I added an ability where the chest would only be able to roll when rotated. Whereas with the Neck, I added some parent constraints to create a connection between the control and the head joints themselves.
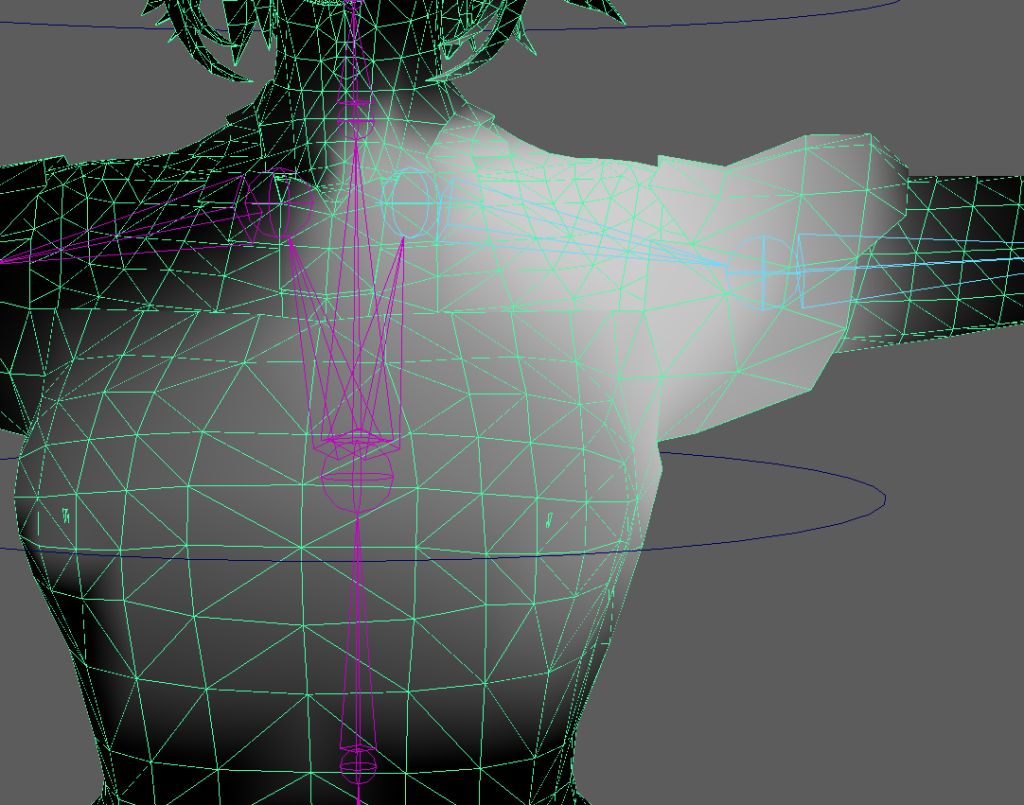
I found it incredibly difficult to work with the chest and hip controls because ,at the time, the neck was the only control that was able to work once implemented.
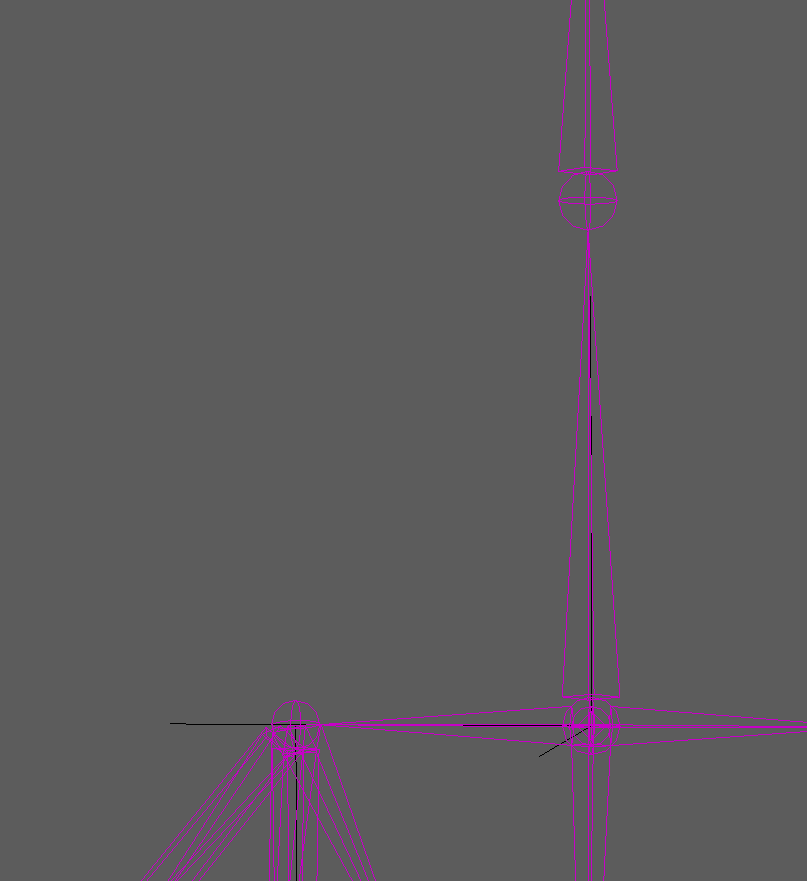
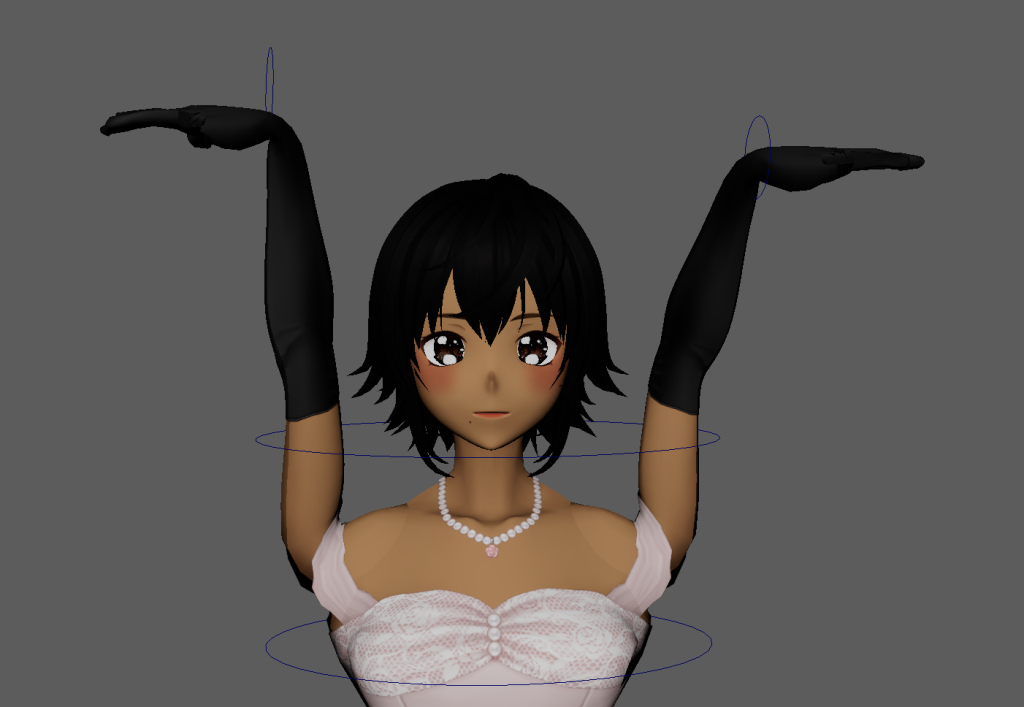
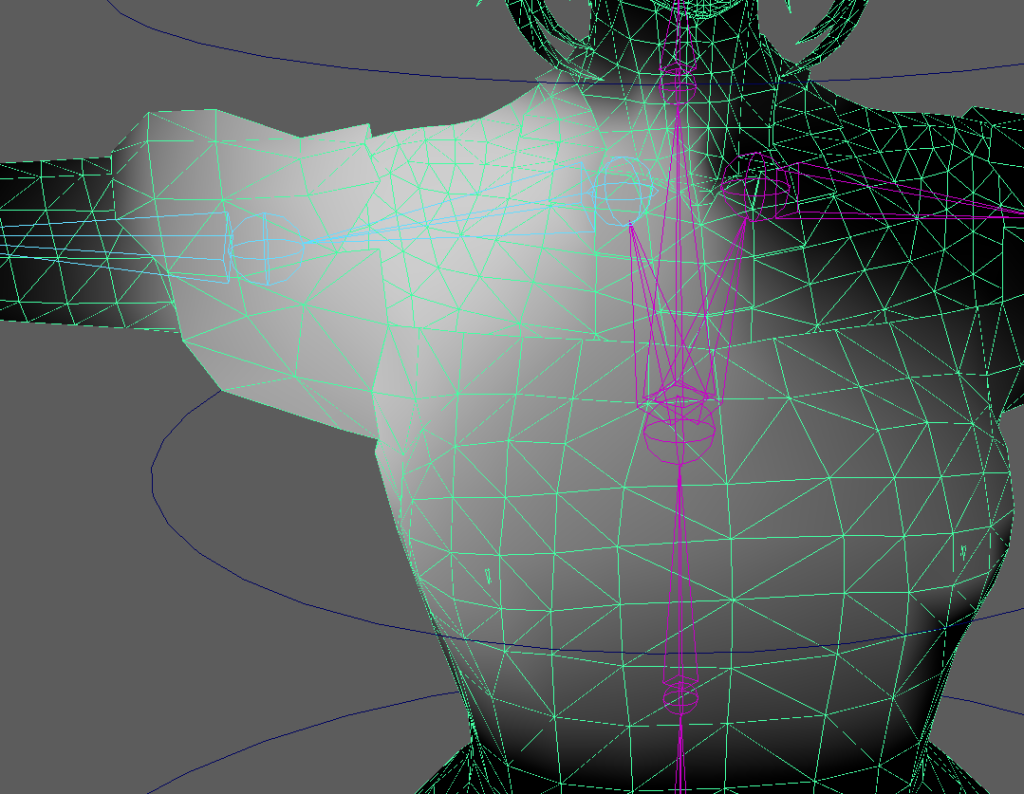
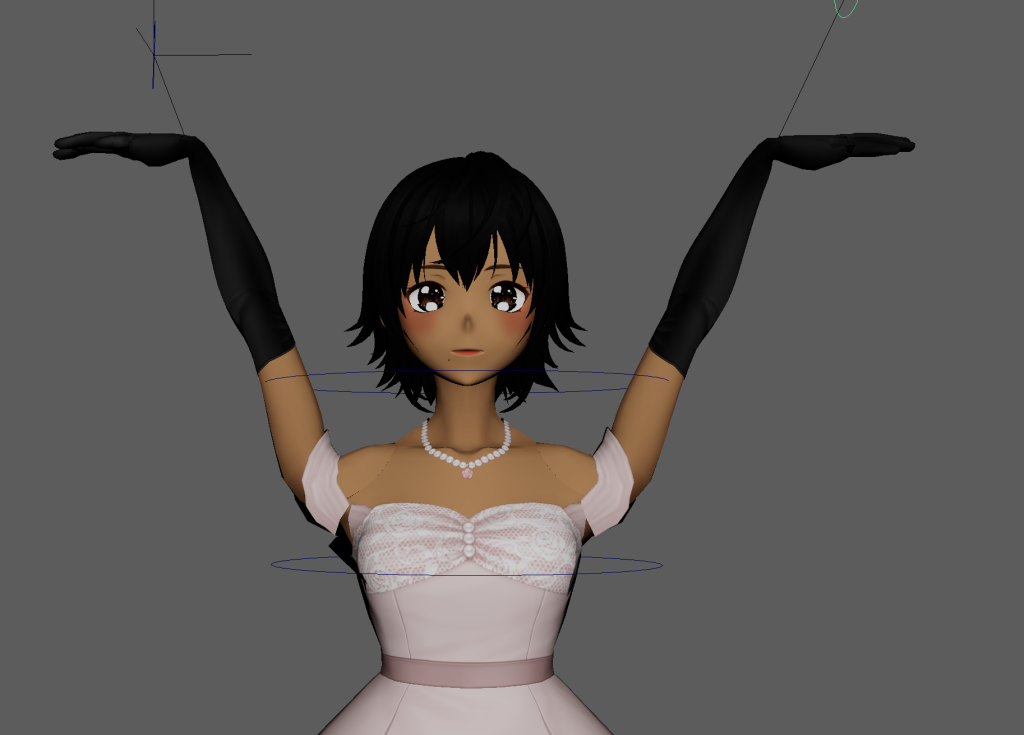
The hips and chest would never move her body properly with no twists or rolls as well as the spline IK only affecting her chest upwards. I tried to solve this issue by adding extra point constraints however it only caused the arms to be further influenced by the spine (as shown here).
The only control that was working was the neck joints. All of this would be fixed later on during the implementation of the FK handles.
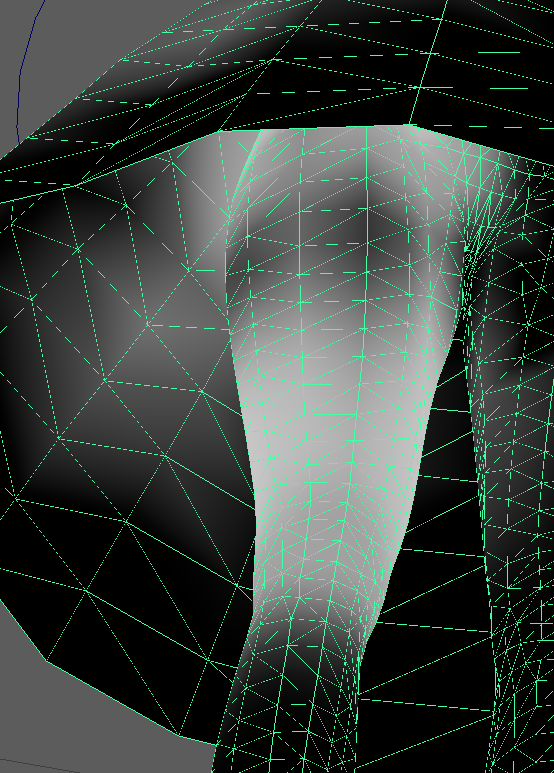
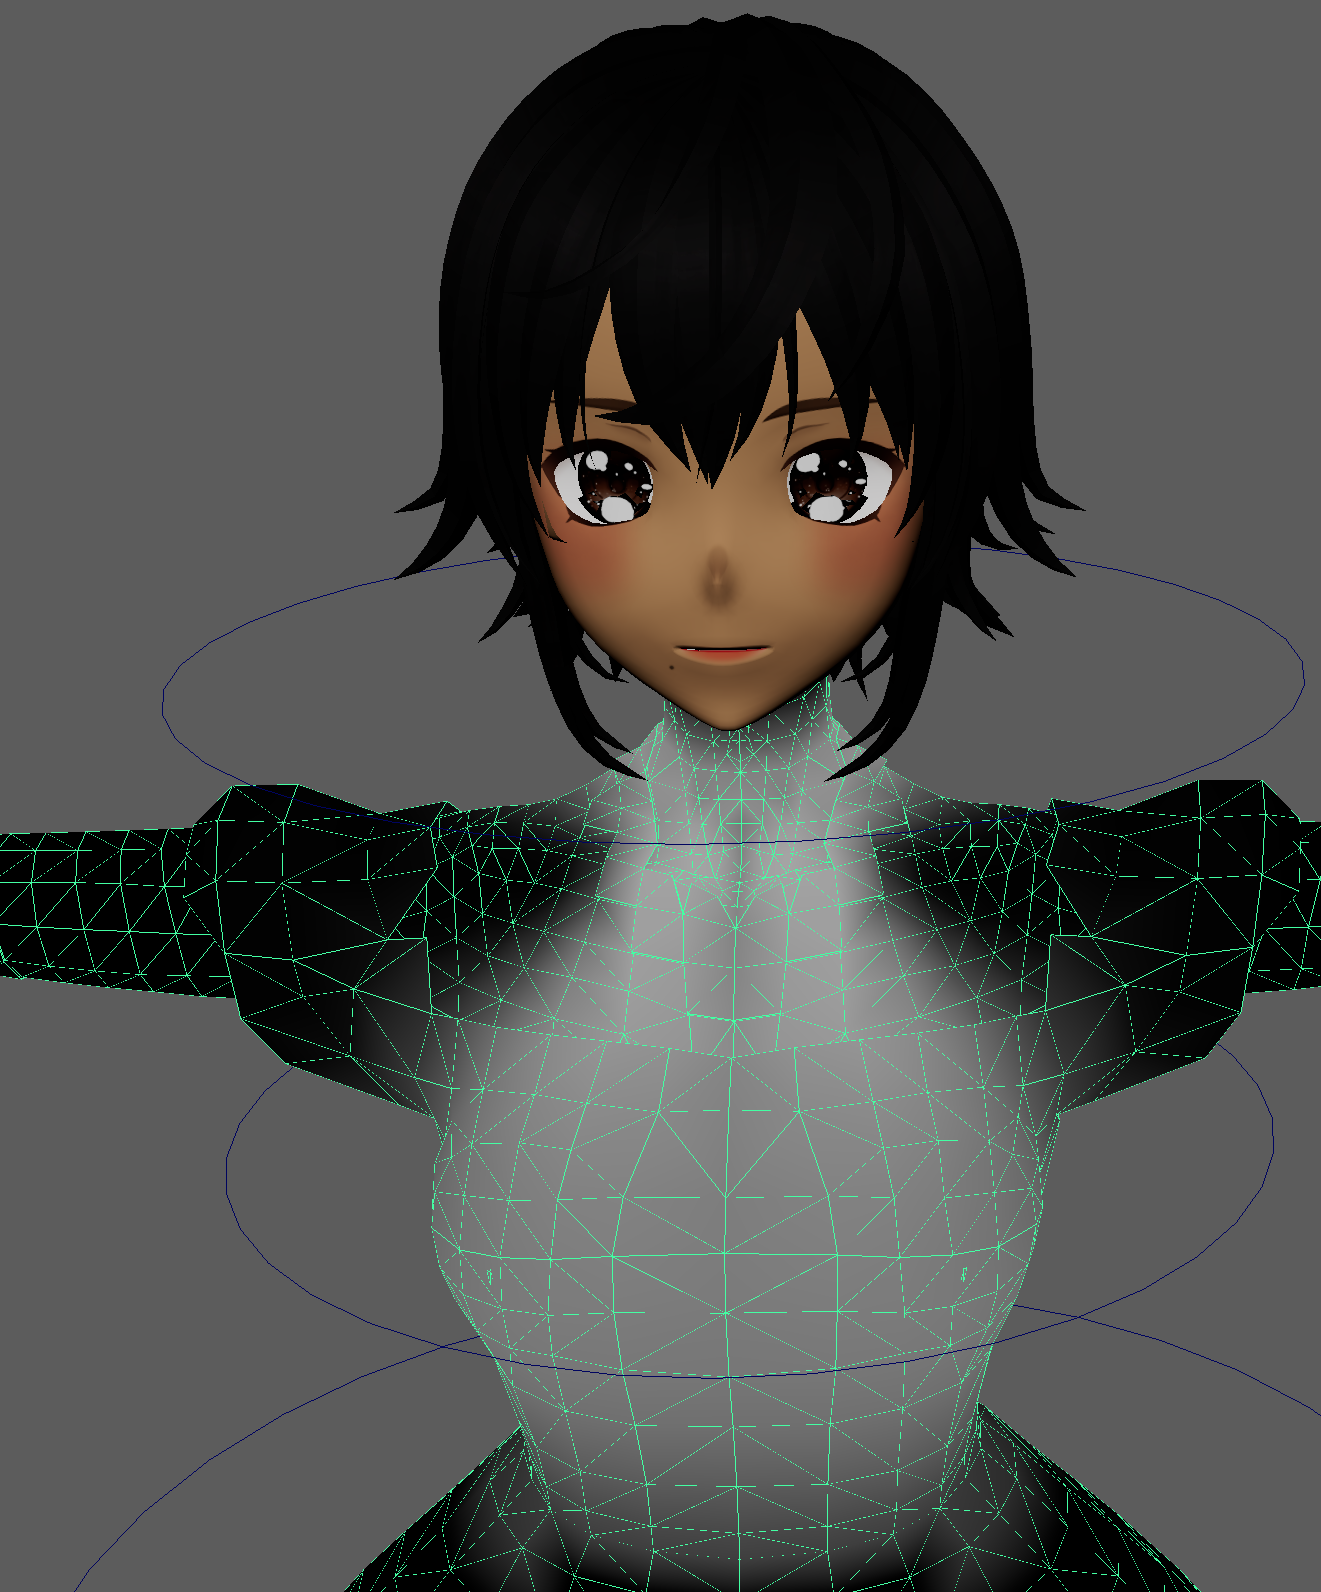
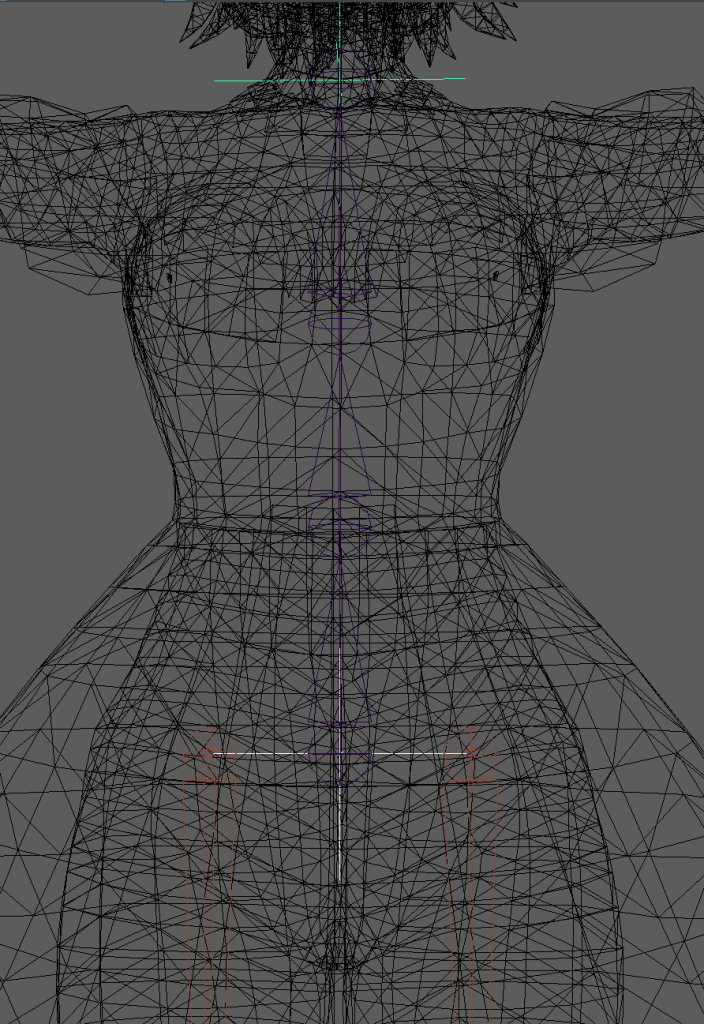
Weight Painting
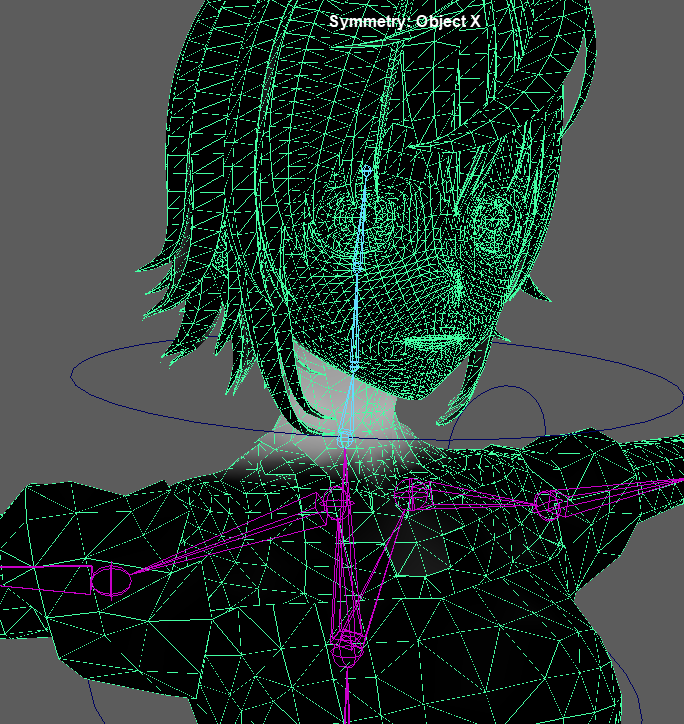
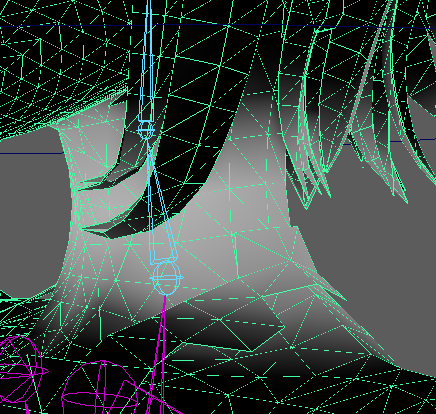
These are the automatic weight painting before the main changes that I added to the neck joint. This was so I could test the head movements.
Before shots of the neck jointBefore shots of the arm joints
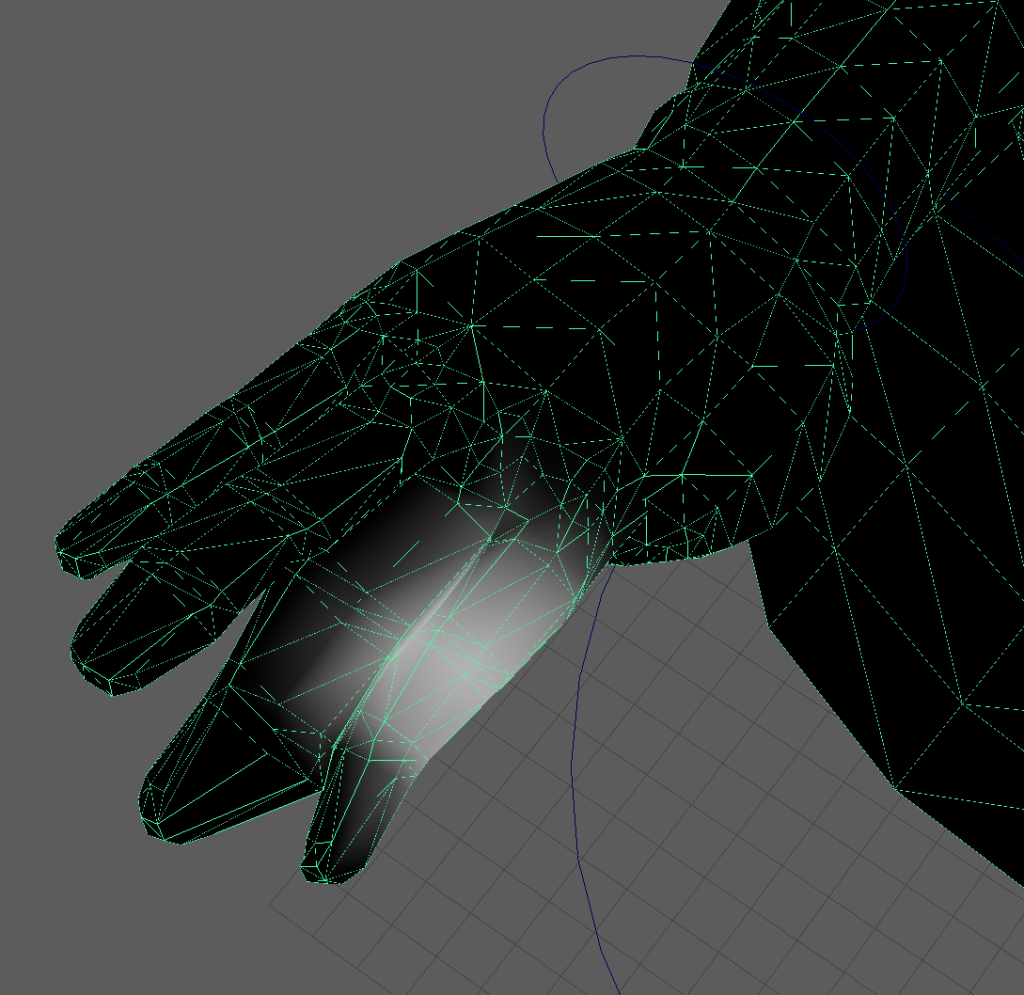
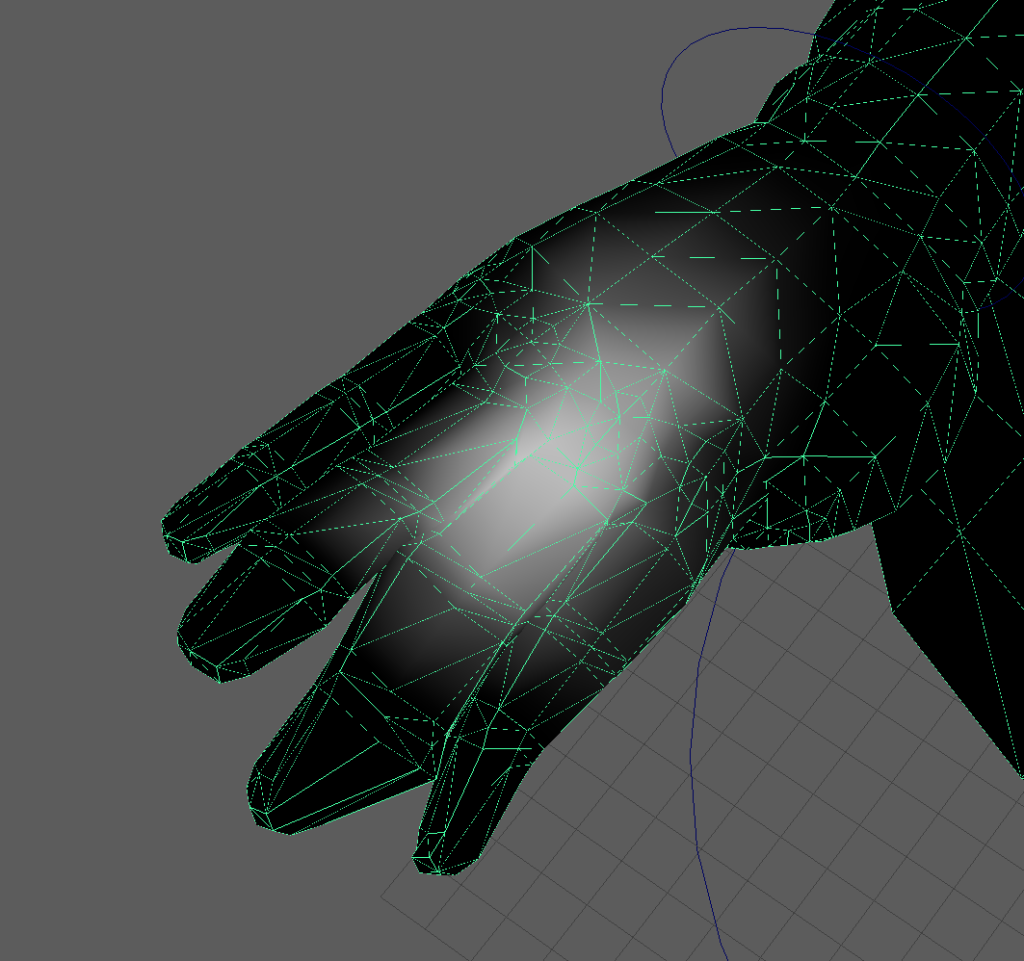
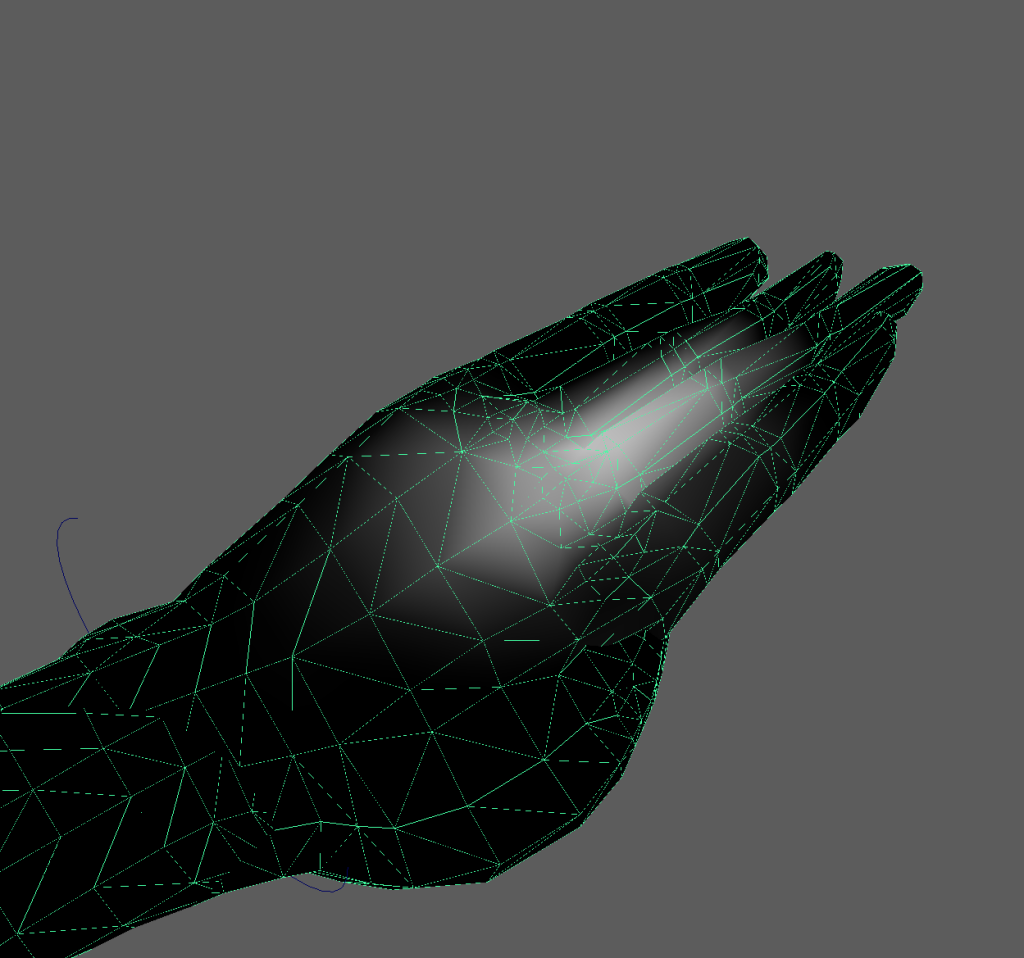
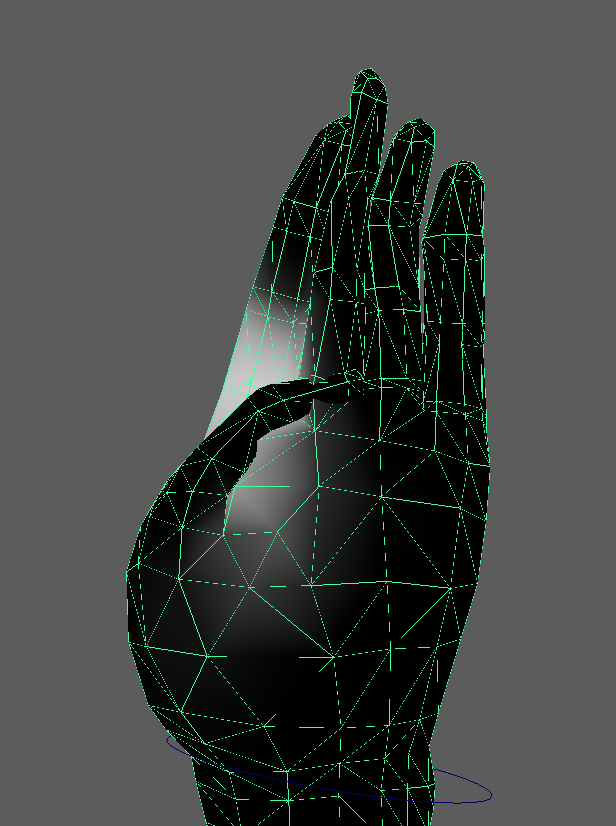
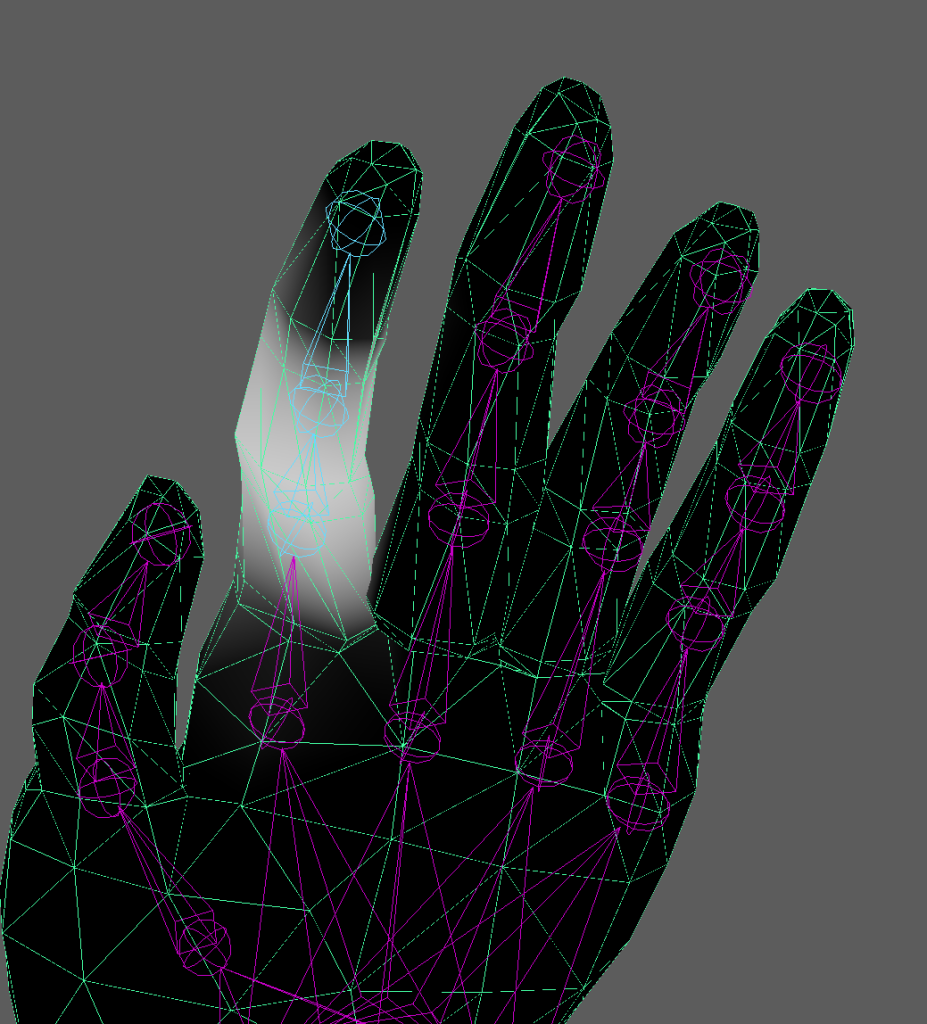
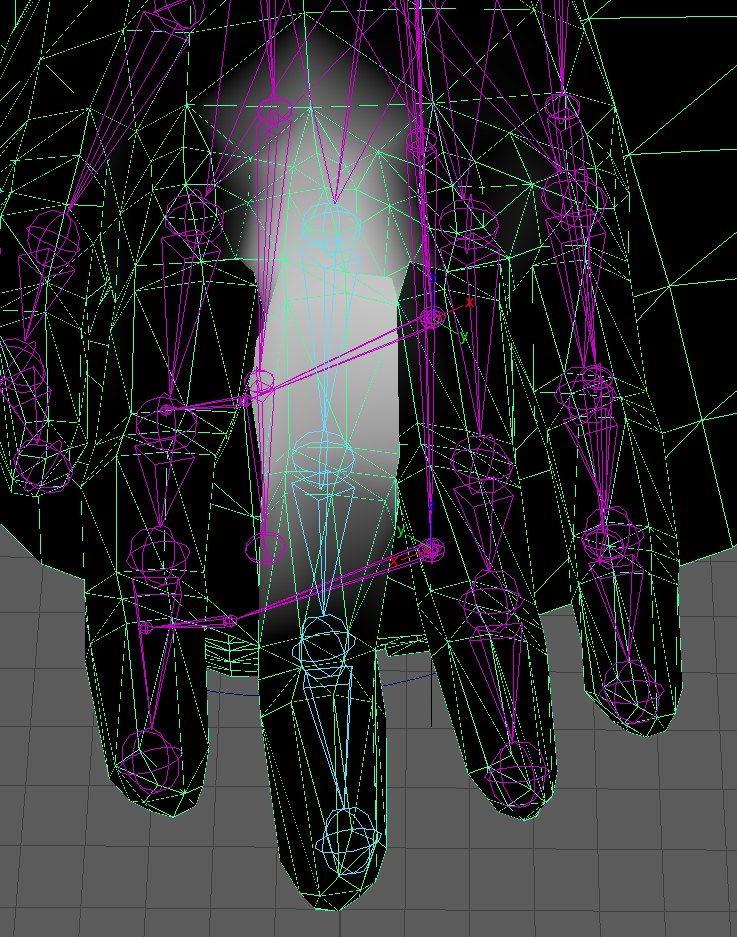
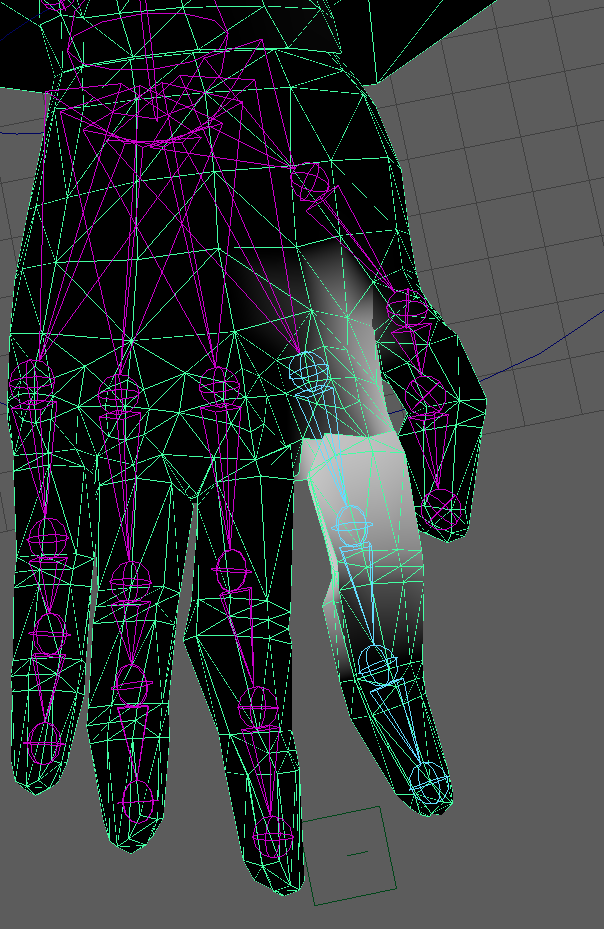
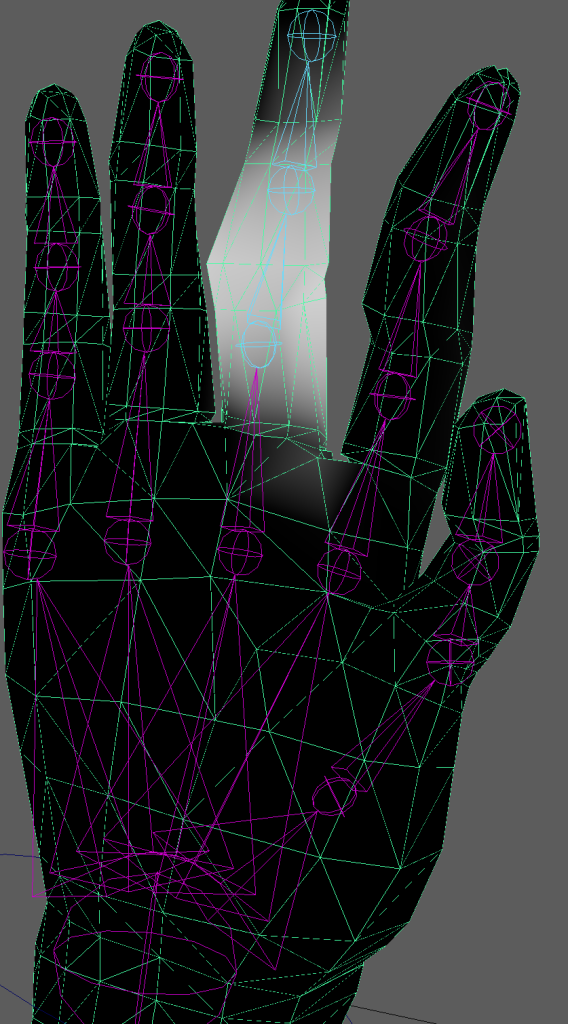
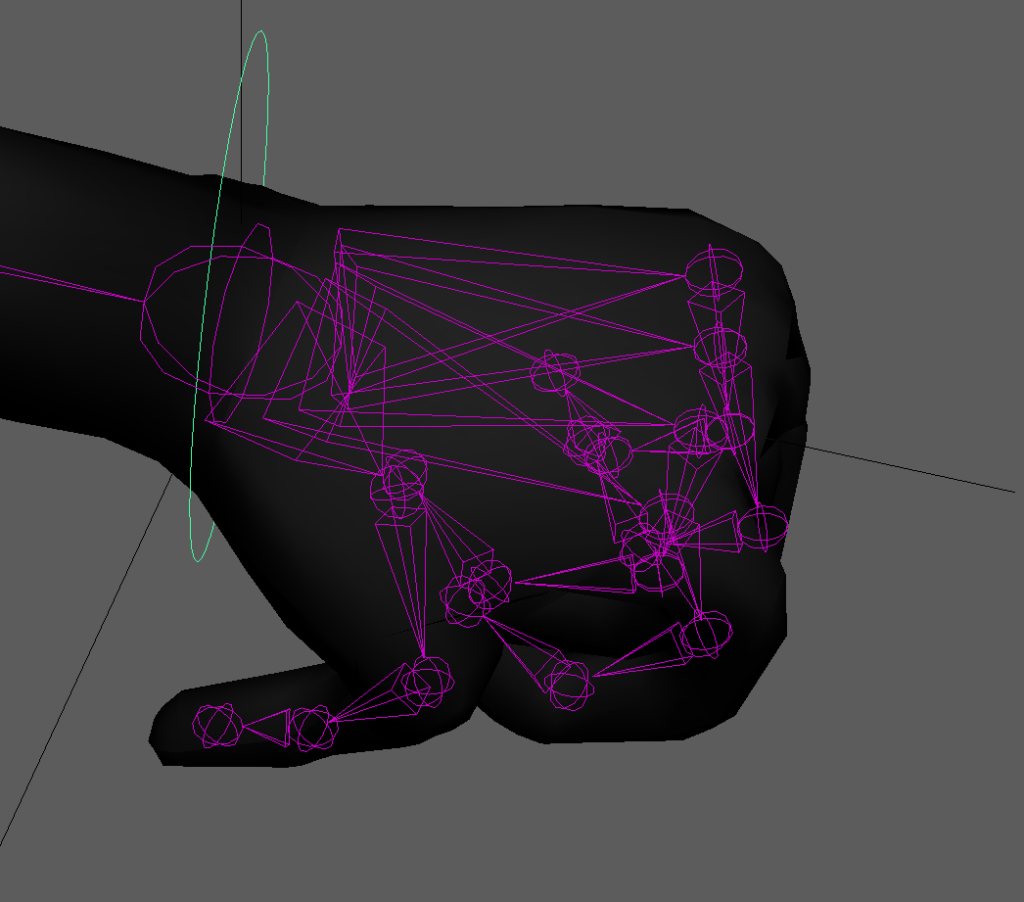
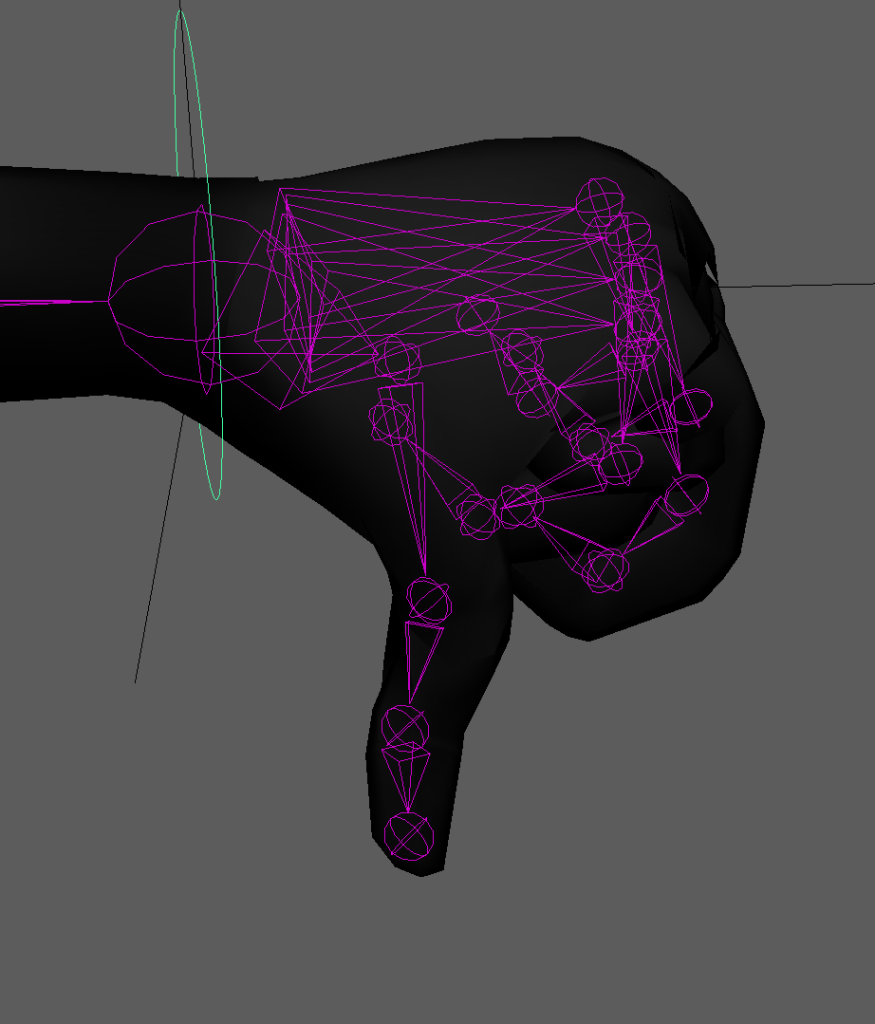
Before – Fingers and Hands Weight Painting
Here are a collection of before shots of the finger’s weight painting. The finger’s weight paintng created distortion for the hands and they were all clumped up together with different joints having influence over the other.
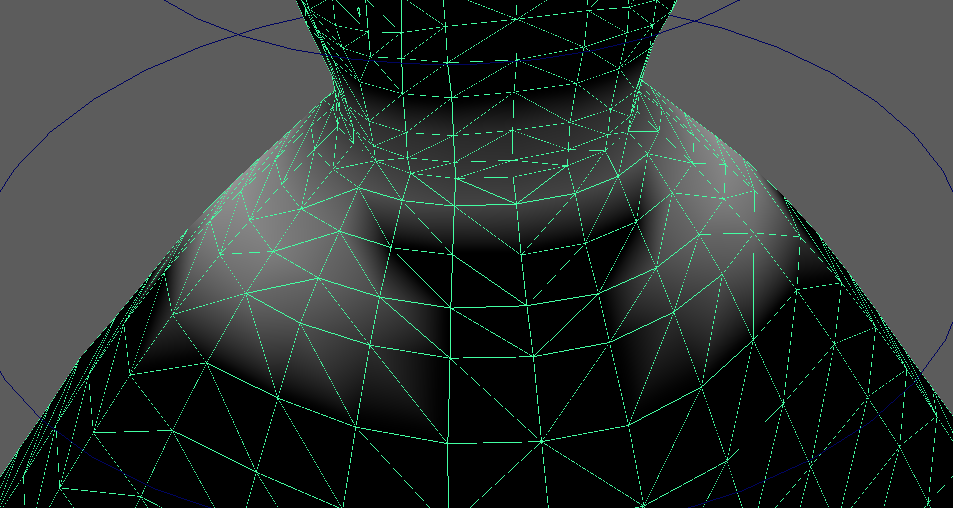
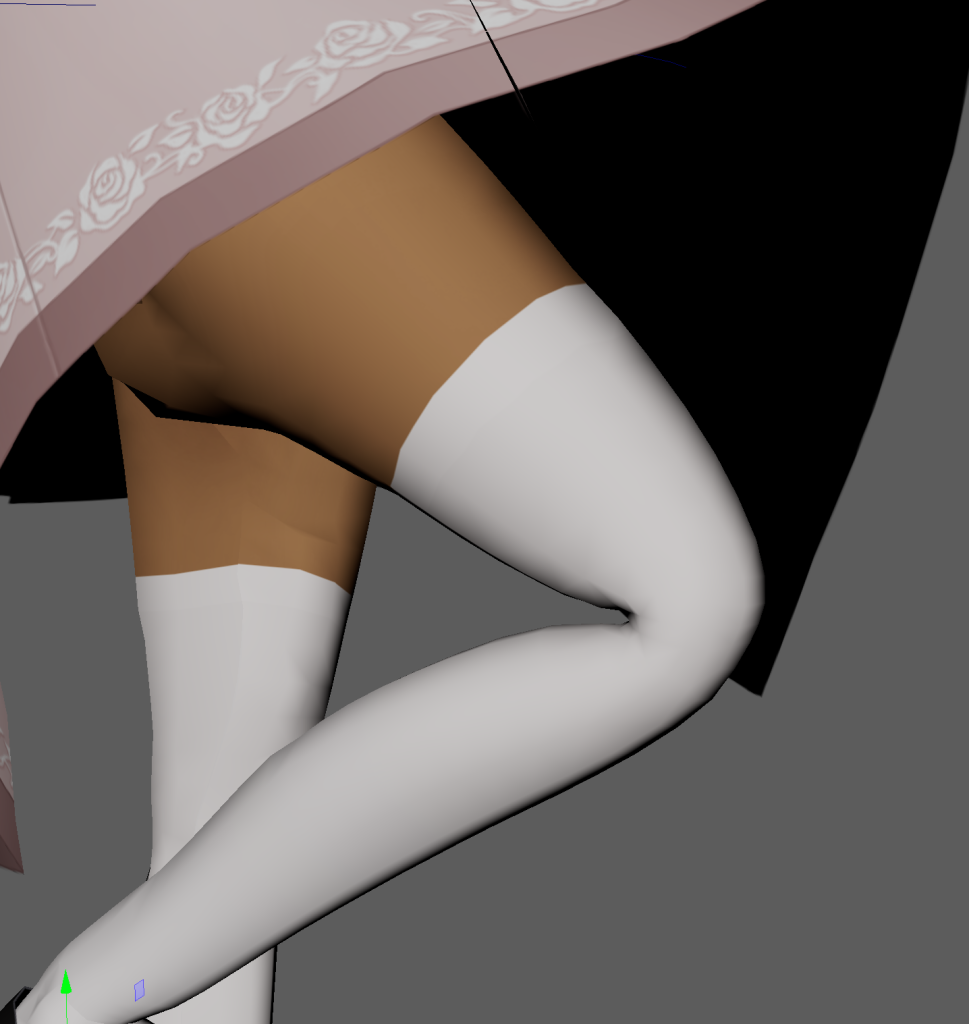
Before – Dress, legs and Clavicles Weight Painting
Above are the before shots of the influence on Mimi’s legs, dress joints. The influence connects directly to the pelvis. Certain areas would lack in influence causing more deformations in the limbs and fabric.
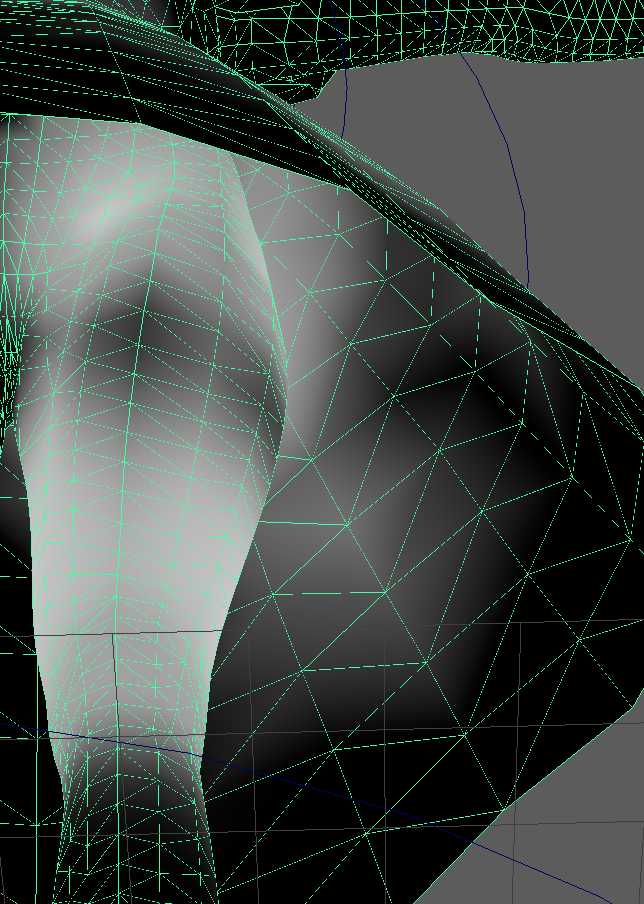
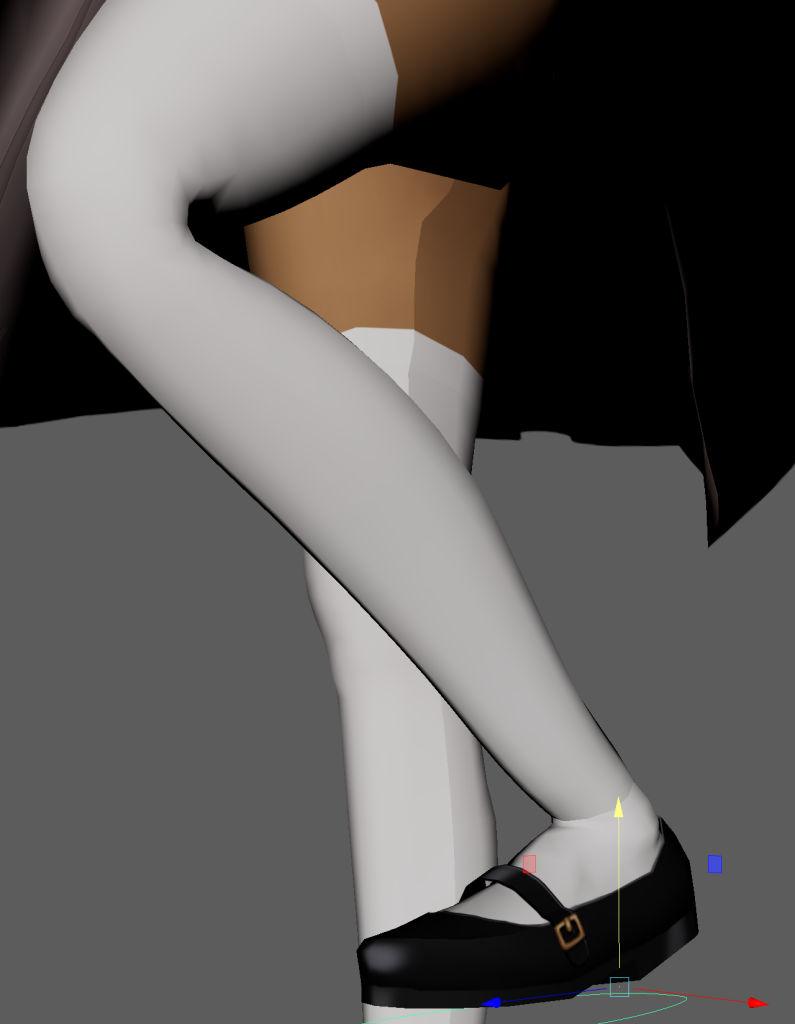
Before – Results of Deformation
I needed to create folds in the joints of her knees and elbows in order to create a proper bend in her limbs.
The wrist would also deform and the influence of her chest in the arms would cause her dress to clip through.
Weight painting results
After working with the weight painting, I was able to come up with fixed results.
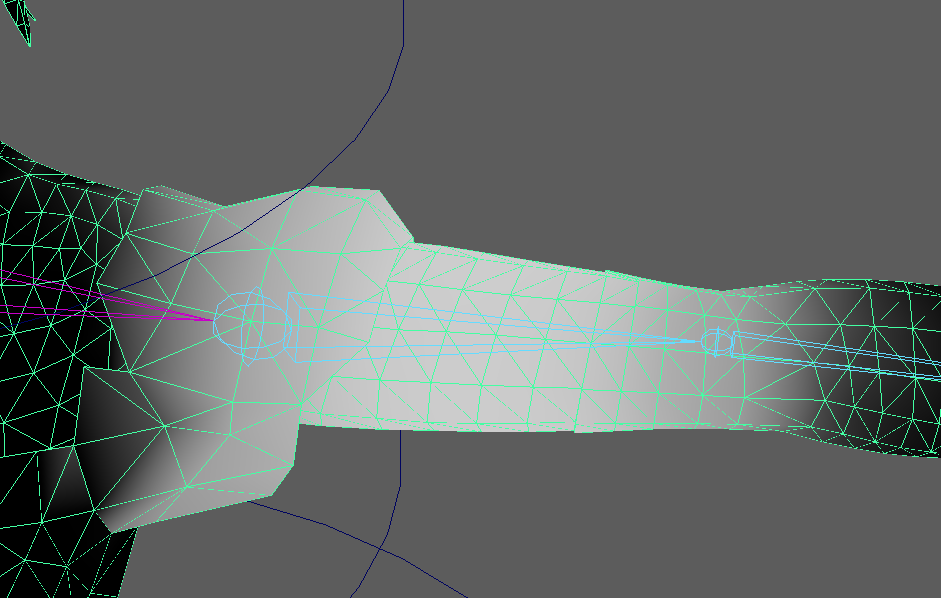
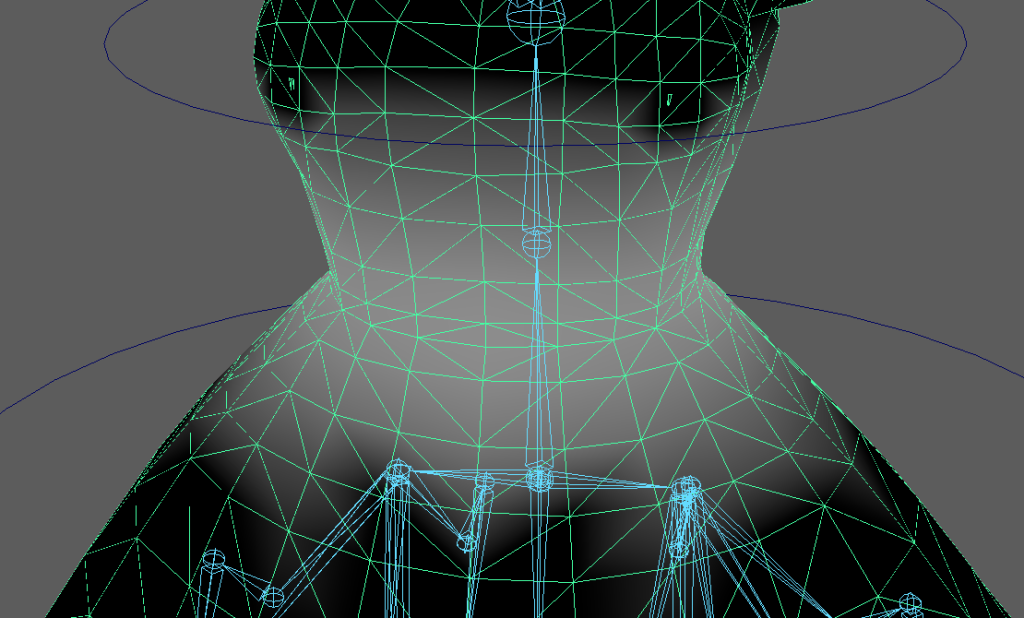
Weight painting results on her neck. I also added some weight painting behind her back in order for her neck to bend further.Left ClavicleLeft arm Right ClavicleChest / Root With the arms, I took away the influence from the shoulders – now adding it to the Clavicles. I smoothed out the knees influence and added more weight painting to create a shallow depression, creating that bending illusion. In the process, the fingers became disjointed. This was fixed with the finger controls later on.
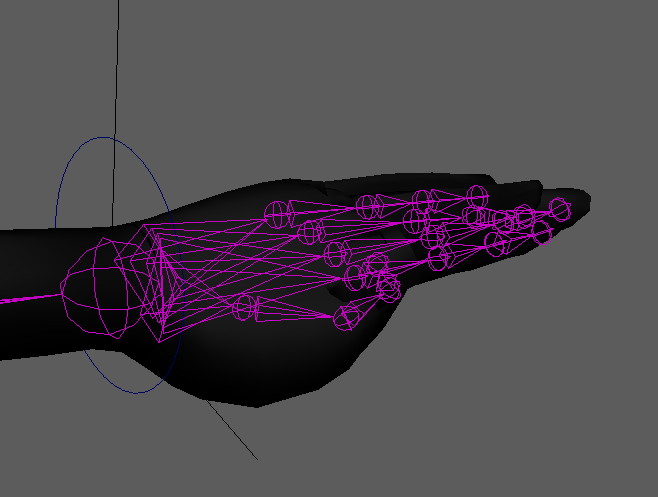
Adding Set Keys to Fingers
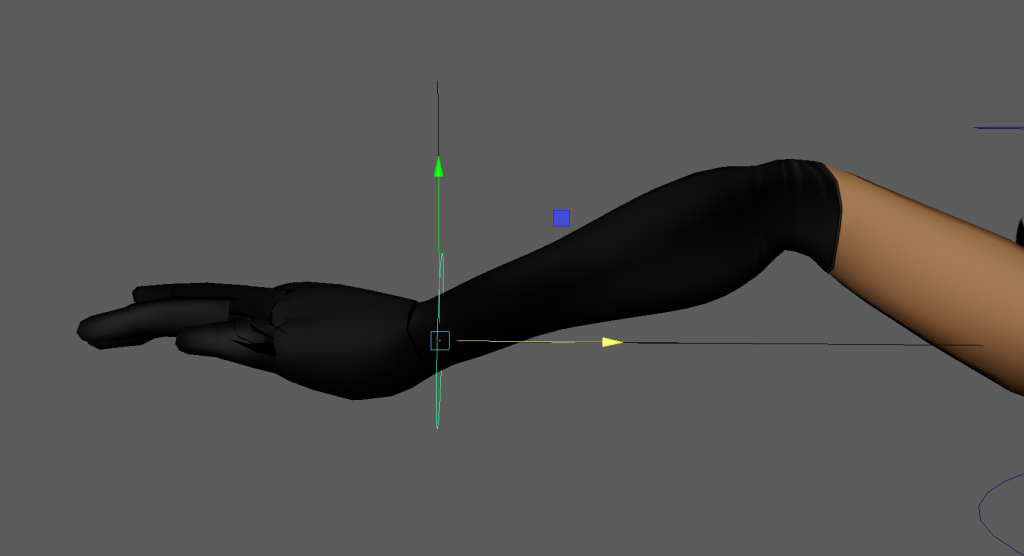
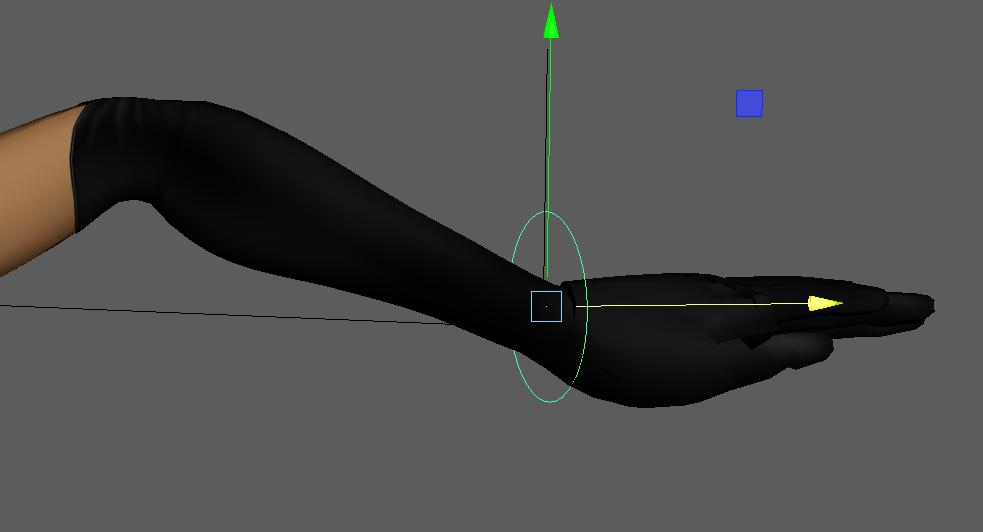
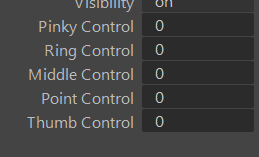
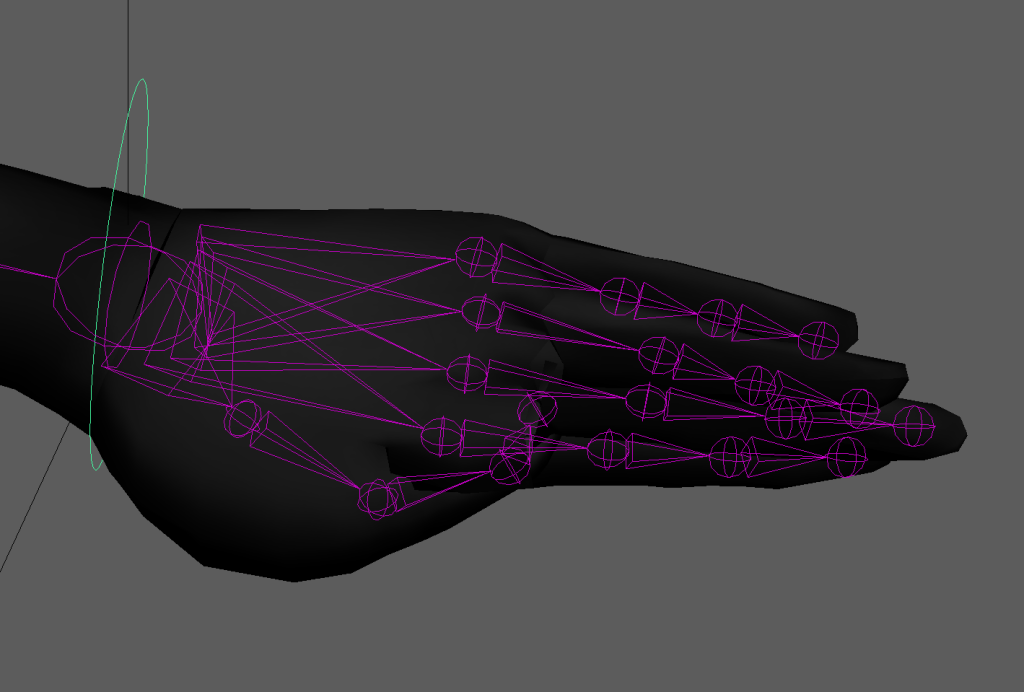
I worked on finishing the set keys for the fingers. Here, this was to not only experiment with animating with set keys rather than controls but this allowed flexibility when animating the fingers as I was able to adjust the finger joints and their movement. I decided to demonstrate flexing the finger joints by curling the fingers into a fist.
The Finger controls set from 0The Finger controls set from 1
As a temporary fix I discovered that I could limit the set key for the thumb in order for the joint to bend fully. This added some limitations with the use of set keys for the fingers, but was able to work fairly well.
Thumb set key set at 0.5Finished Rig with Controls and IK handles
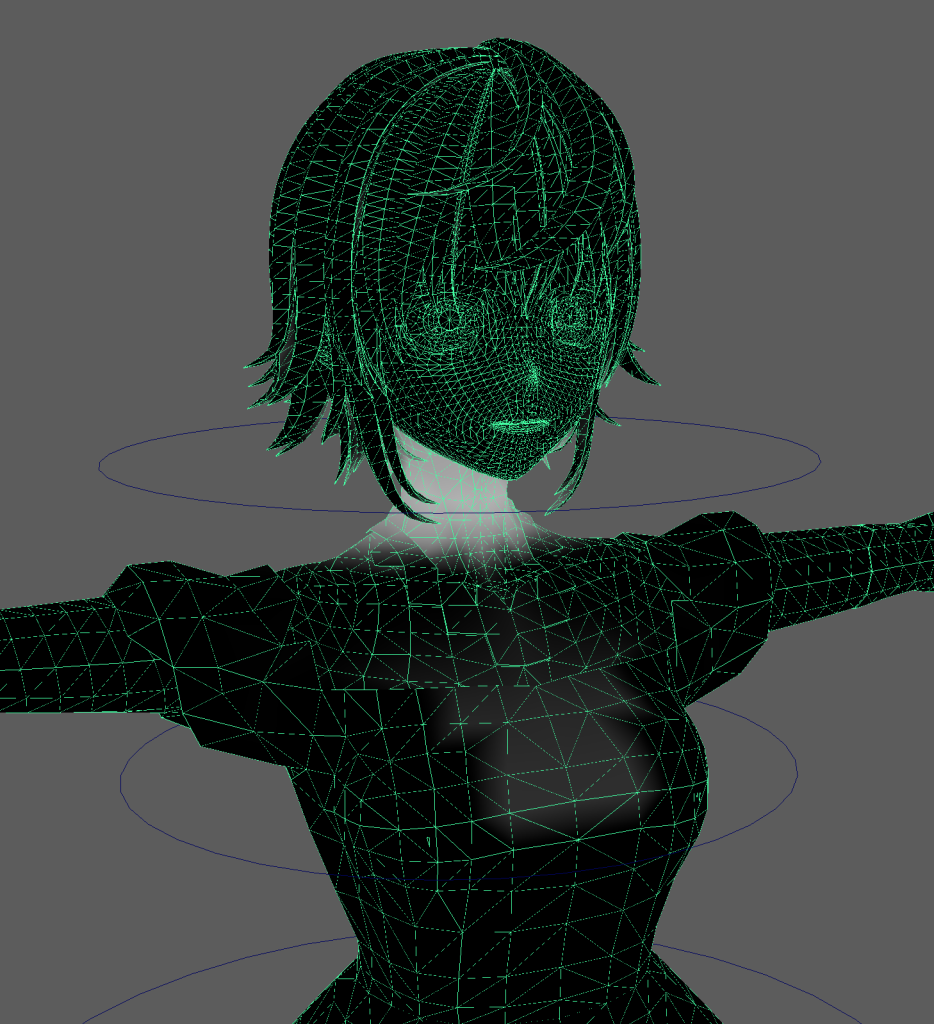
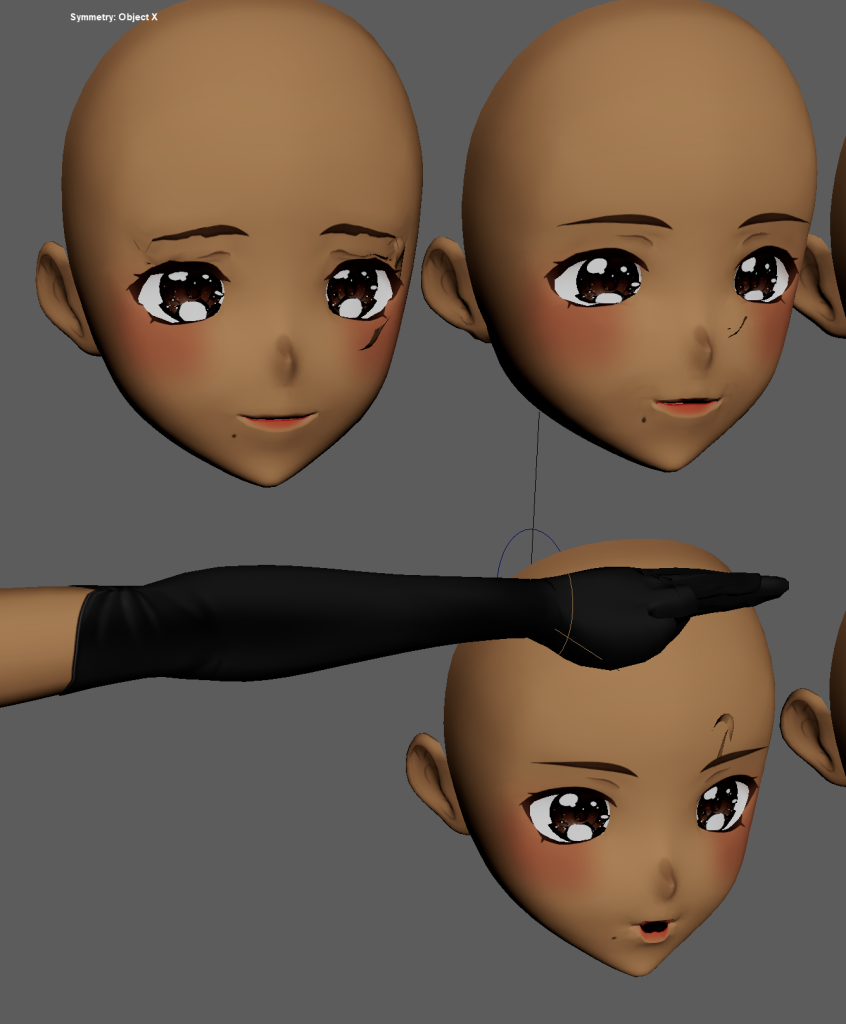
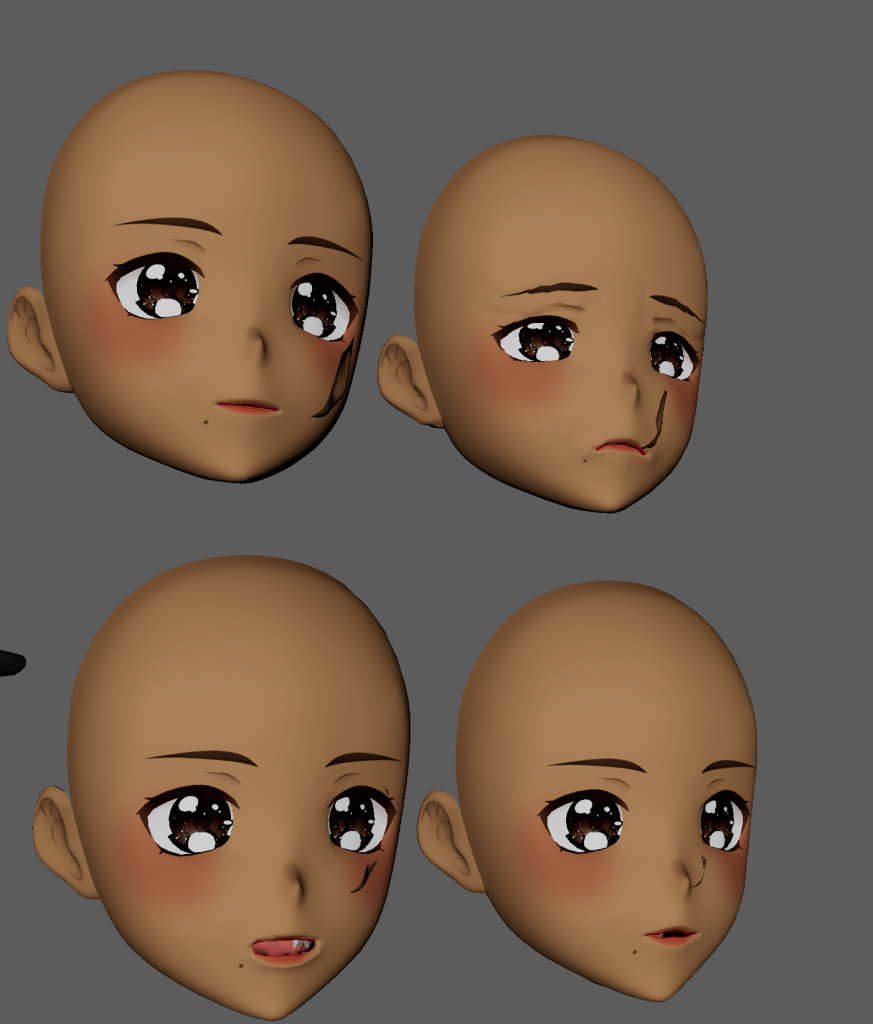
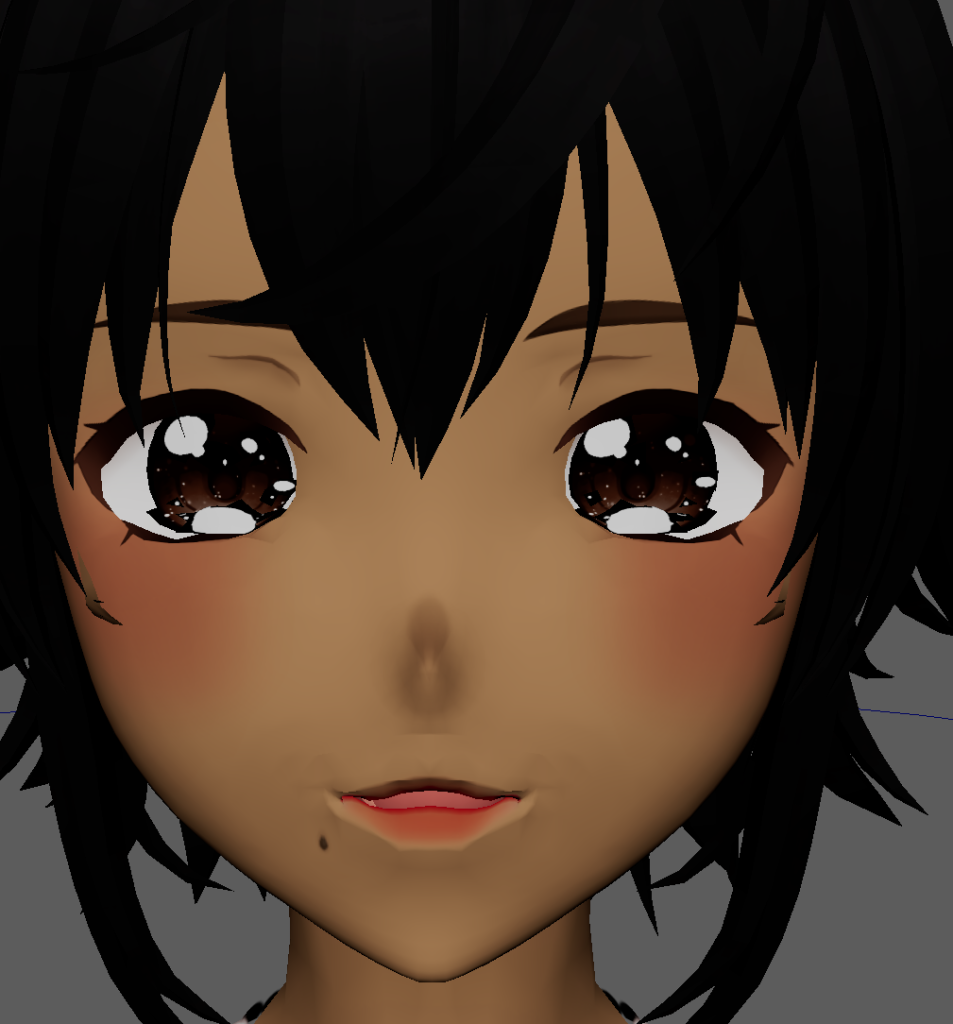
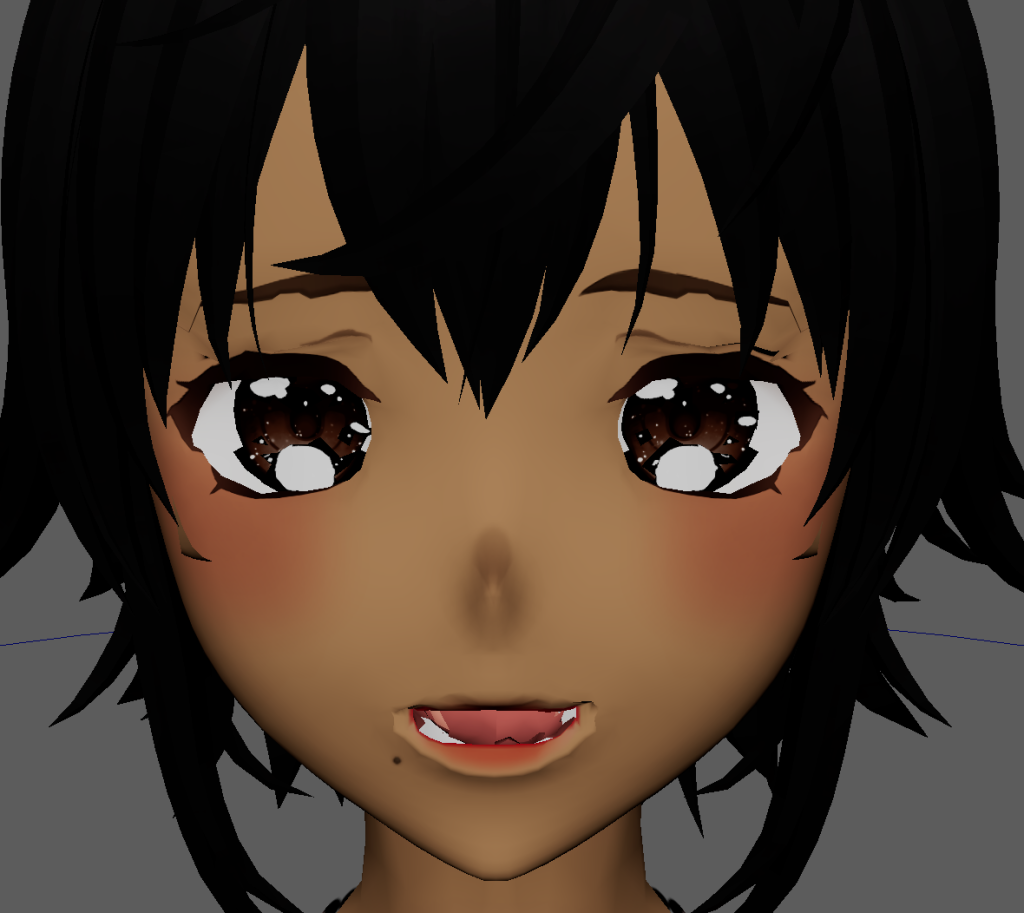
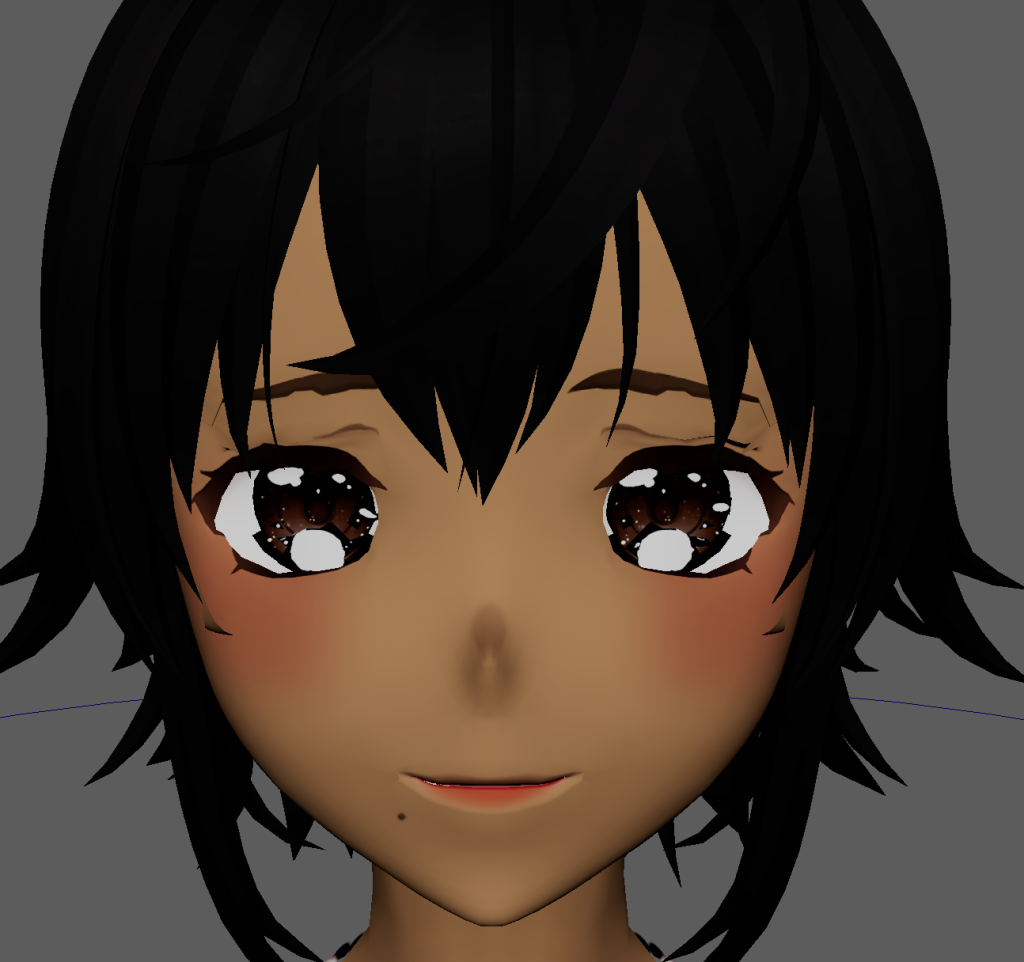
Blendshapes
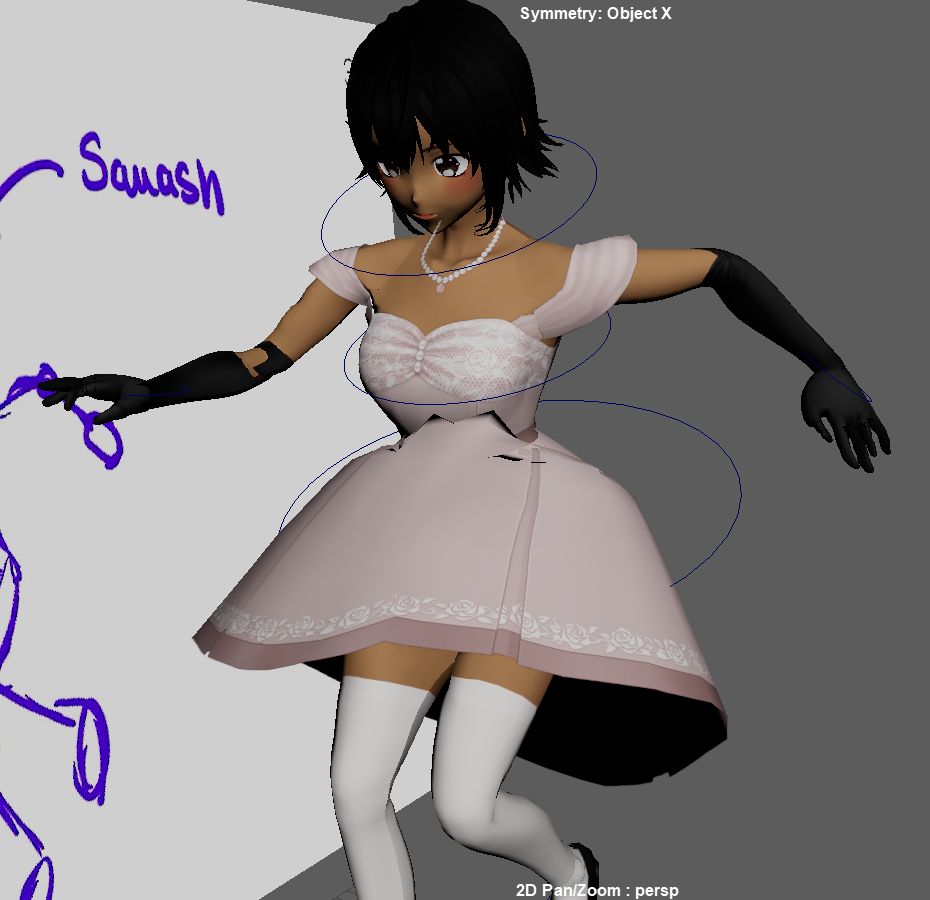
I started to experiment with Blendshapes as I wanted her to express different emotions through speech and movements. The blendshapes were limited to speech, however, realising the importance of having these different expressions I created different expressions using the soft select tool.
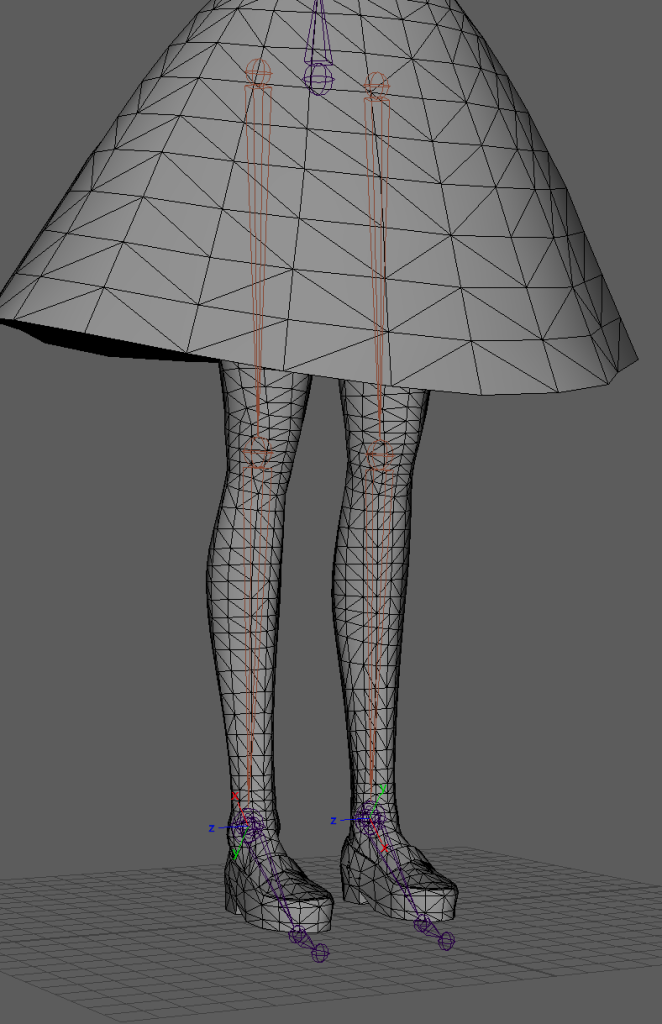
To begin the rigging process, I started off by working from the bottom and adding joints to the legs with each bone having center orientation. Once I made one leg however, I was able to duplicate the joints onto the opposite side. This helped incredibly to keep joints consistent with one another and this was the same method I used for the arms.
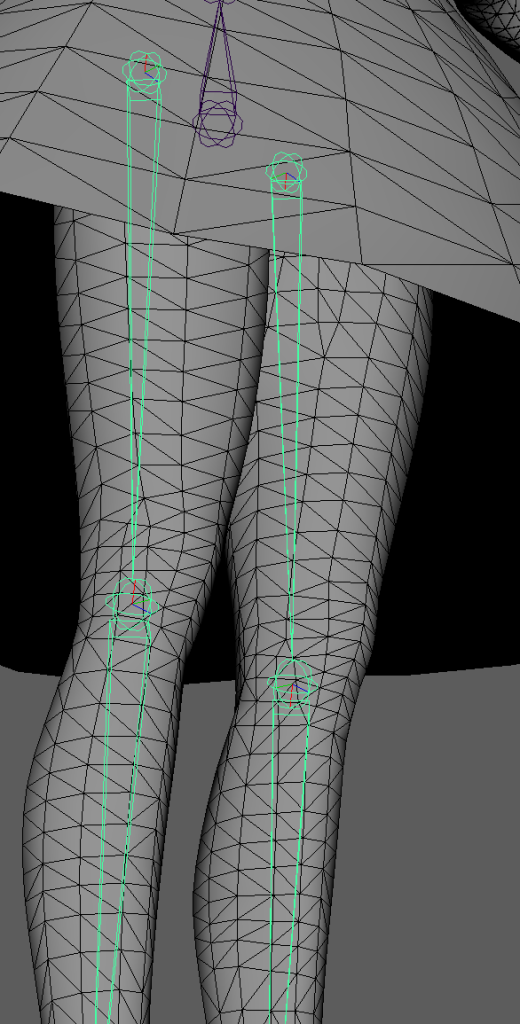
After finishing the legs, however I experimented with the IK handles by adding them to the leg joints. This was to mainly learn more about IK’s and their function within the skeleton. I learnt that with these handles, they allow the joint chain to move in one fluid action. This meant that, in the future, this would make posing the character much easier to accomplish.
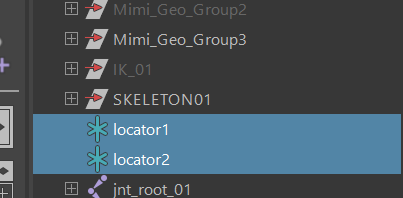
Started placing joints and IK handles into seperate groups.
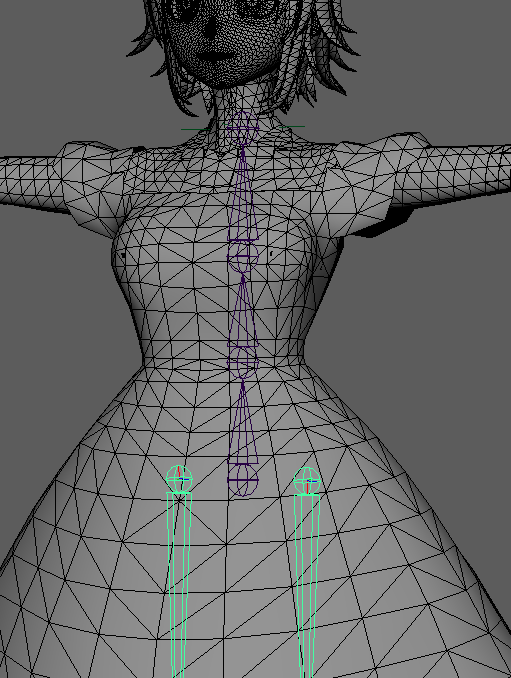
Afterwards, I worked on adding the spine joints by using locators and creating three seperate joints for the back, chest and neck.
After adding in the root and spine, I added in the pelvic joints, connecting the root to the legs. Once the pelvis was created, I started making different dress bones, separated in different areas of the dress. This allowed the dress to move along with the legs and pelvis.
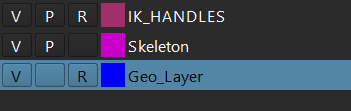
Started using the Layers in order to better differeniate and edit different parts of rigAdded in Skirt joints and parented them into the pelvis.Testing if IK handles worked properlySkirt Side ViewSkirt Back View – Has to be symmetrical in order for the skirt to have equal movement on each side.At this point, I started to seperate the different rig areas into groups, making it easy to perform additional adjustments just in case
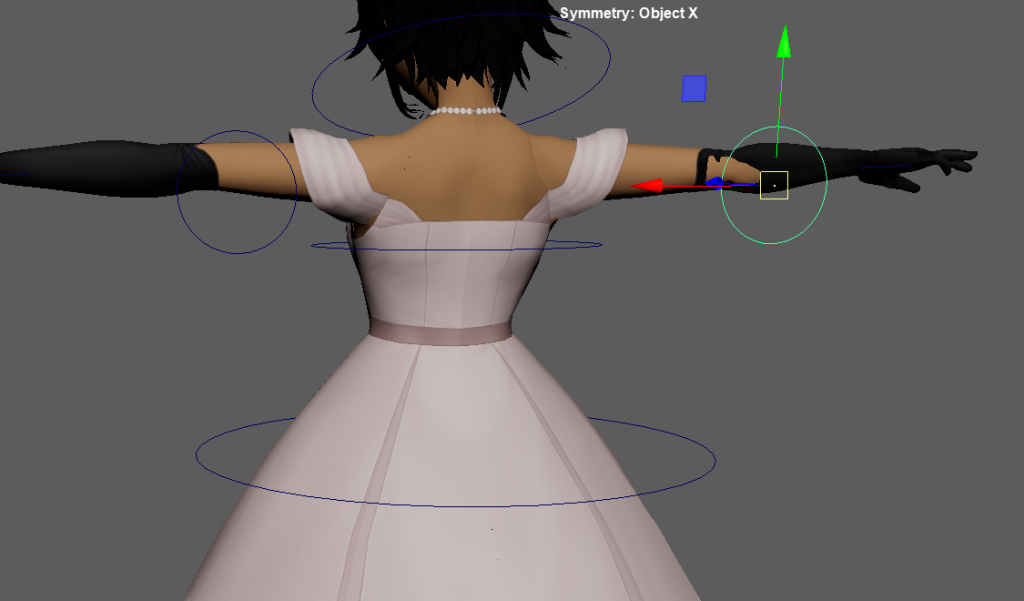
Once I finished working with the legs and dress, I moved onto the Clavicle area, slowly making the arm joints along the way on each side. Due to the different positioning of the model’s fingers, I was able to replicate the arm joints onto the other-side but each finger had to be done separately to avoid any rig breaks. Afterwards, with a similar process to the legs, I made the IK handles for the arms. In this case, the arm’s IK’s allowed the elbows to bend.
Clavicle – Seperated into two different sides and is connected to the chest joint Made arm and wrist joints Added IK handles from the shoulder to wrist then, similar to the legs, I mirrored the joints over to the right hand side
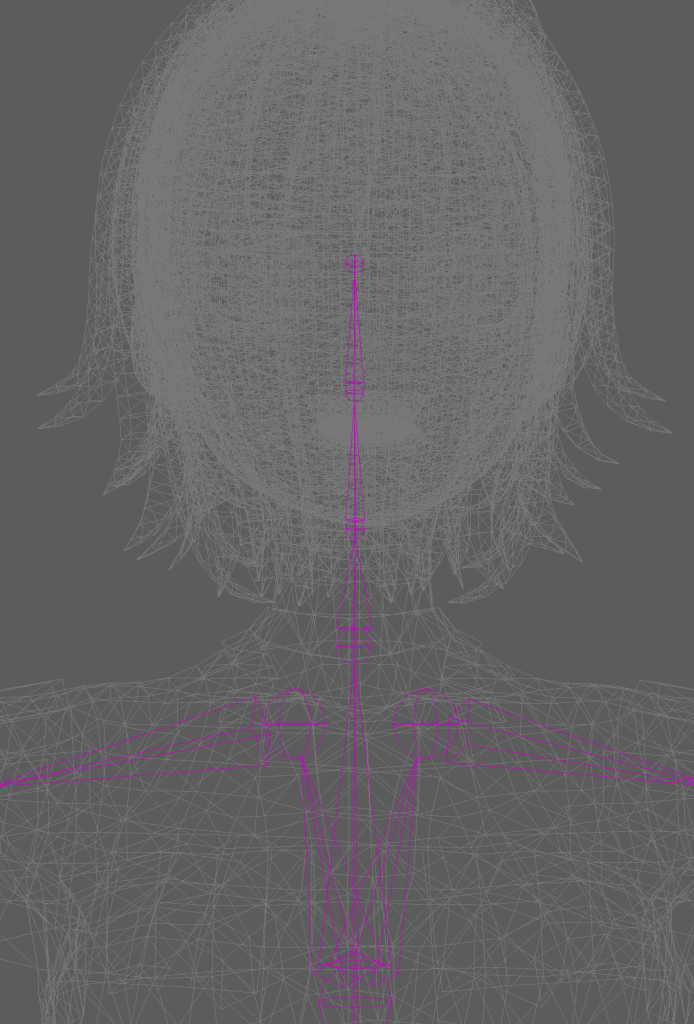
Finally I adjusted some spinal and neck placements within the rig since I learnt that, in the skinning process, placement and orientation for the joints could potentially break the model and it’s weight painting if done incorrectly.
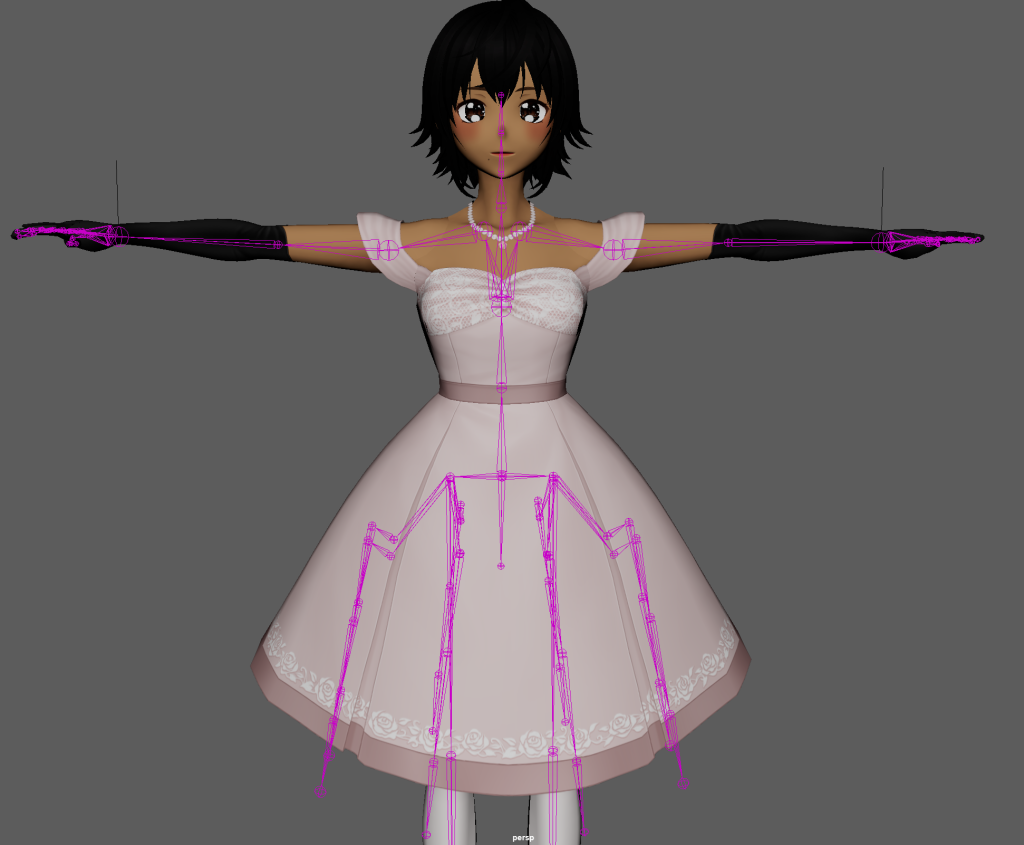
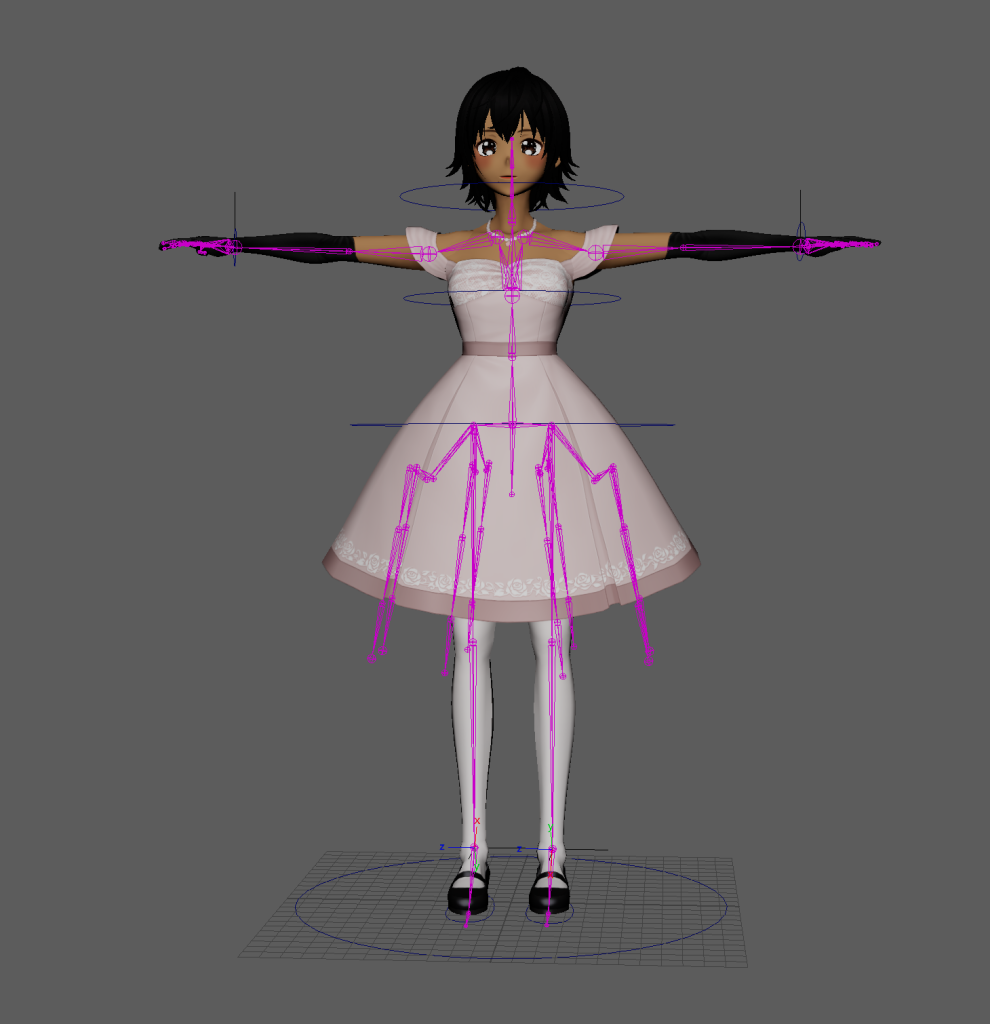
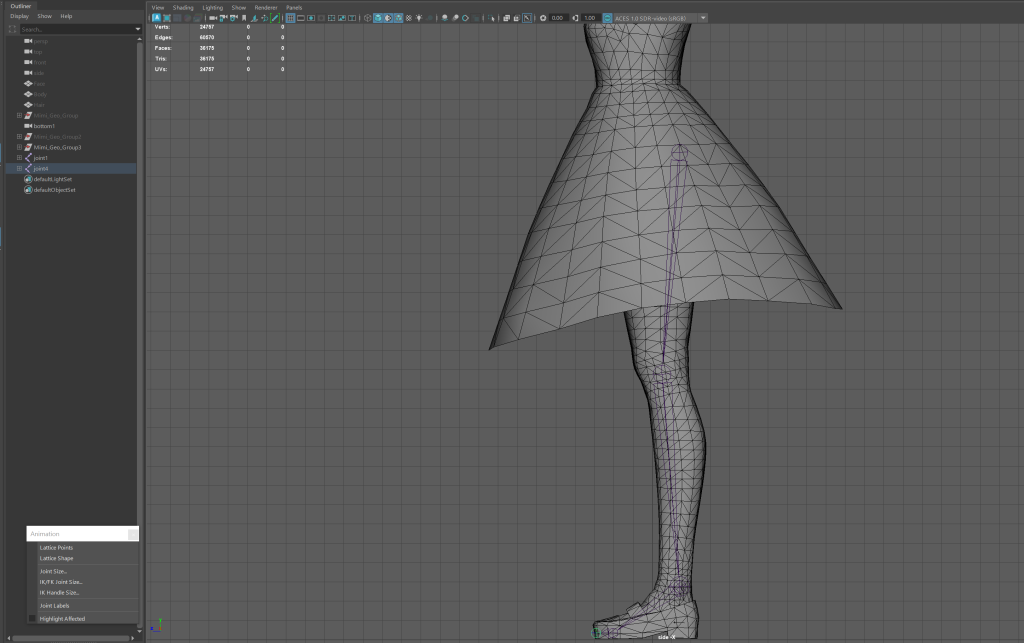
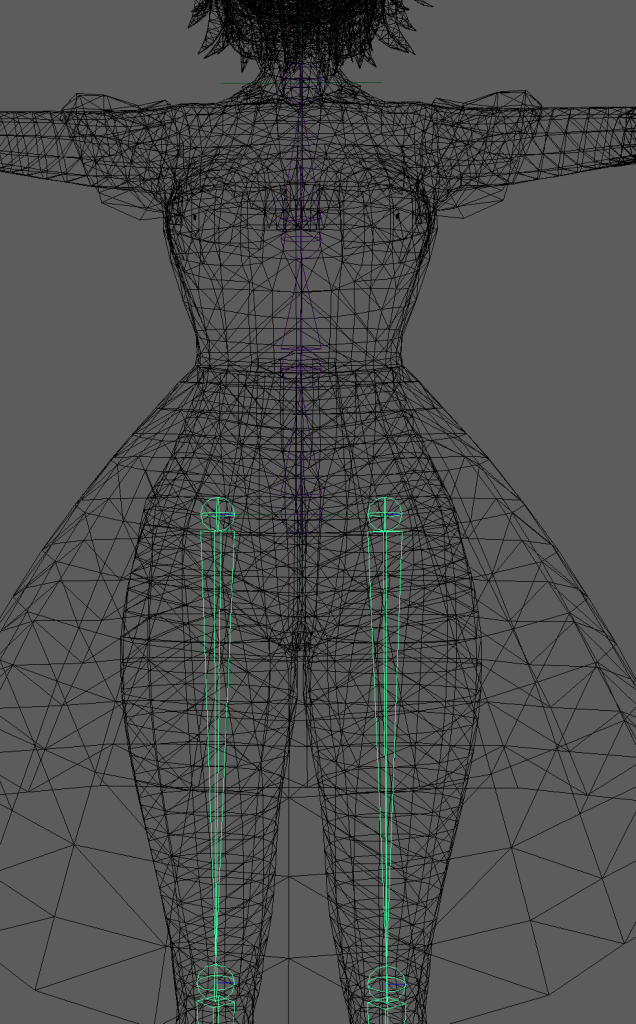
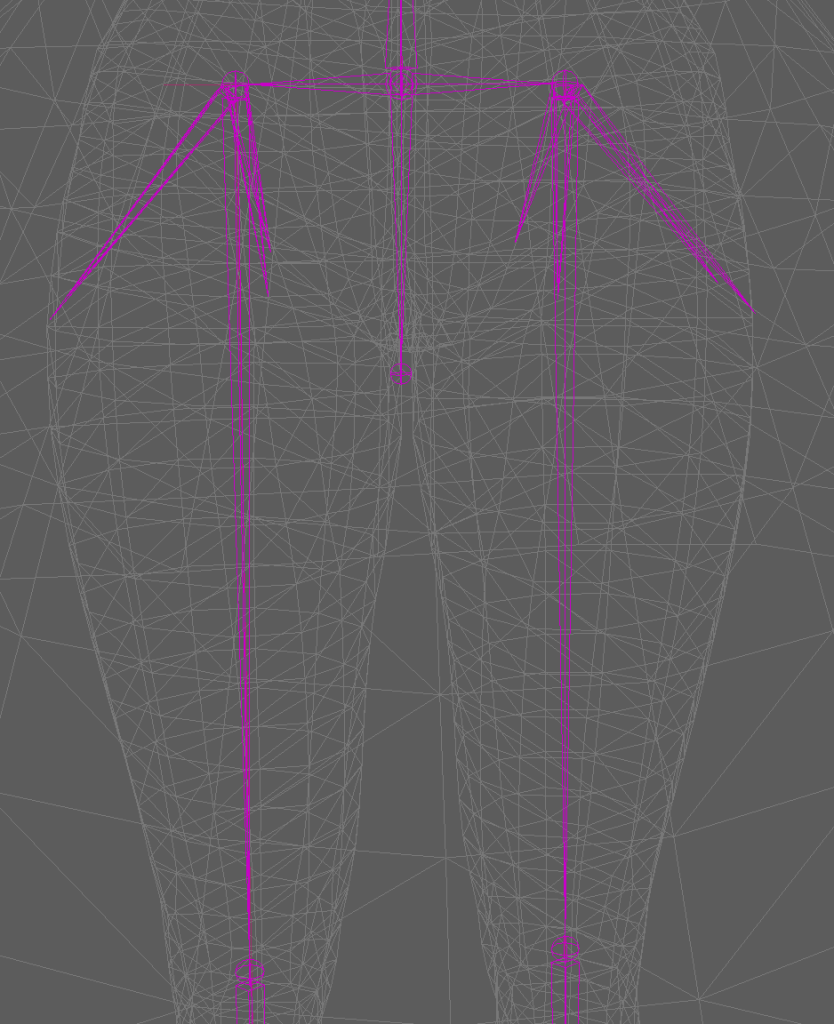
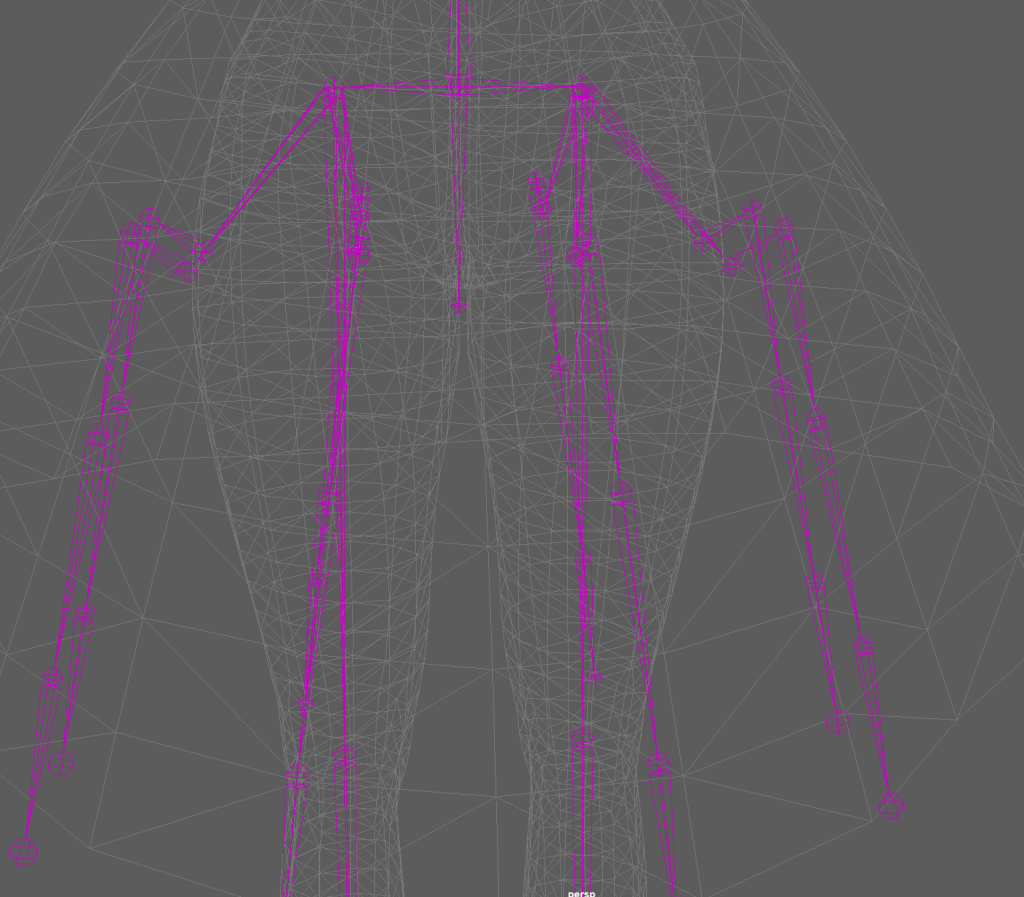
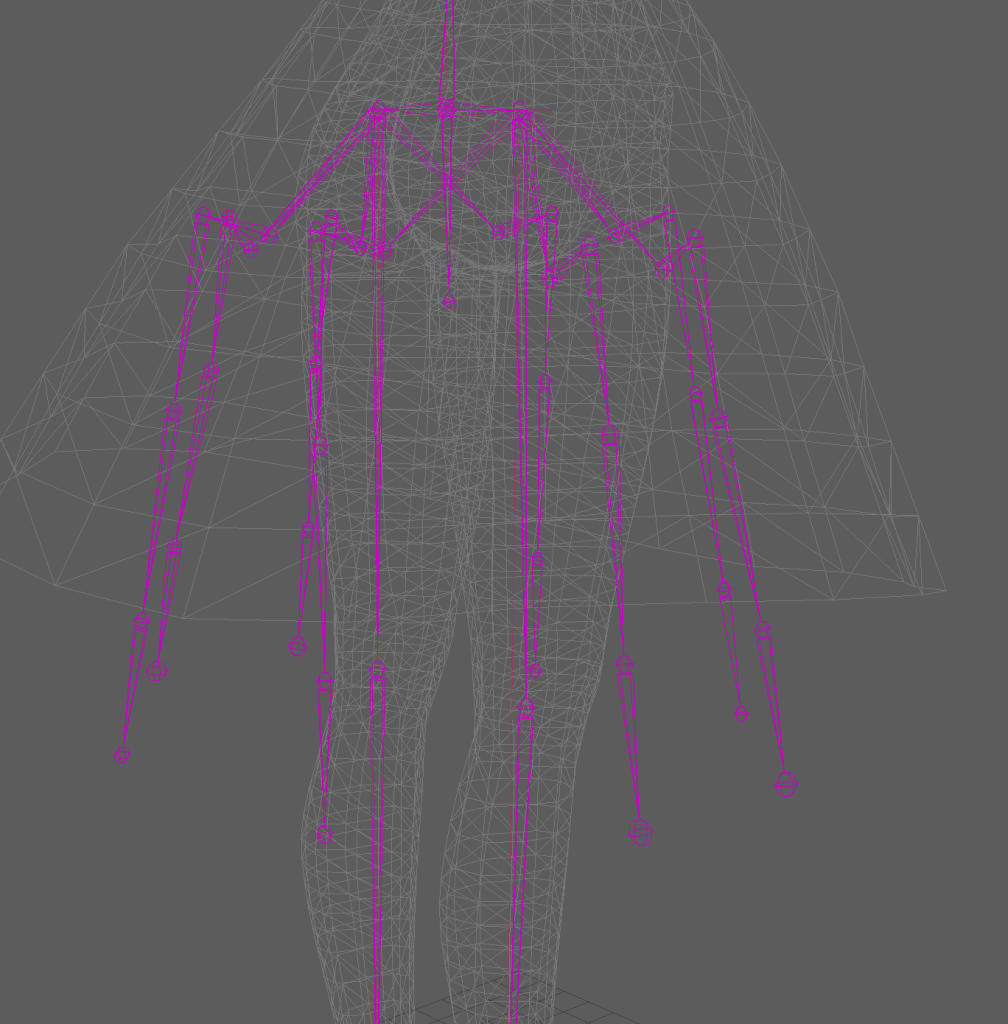
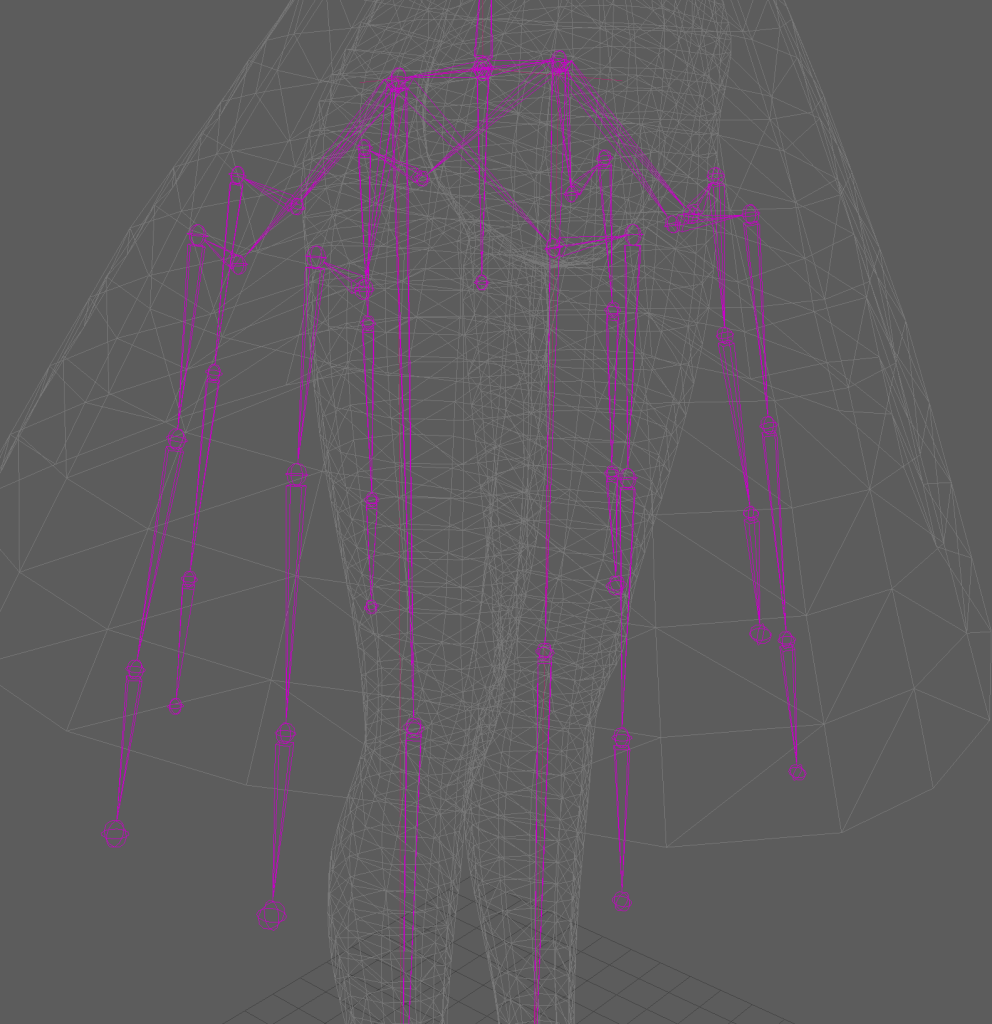
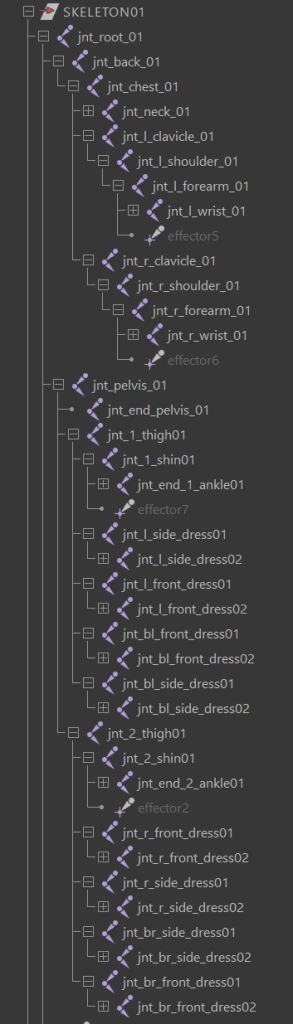
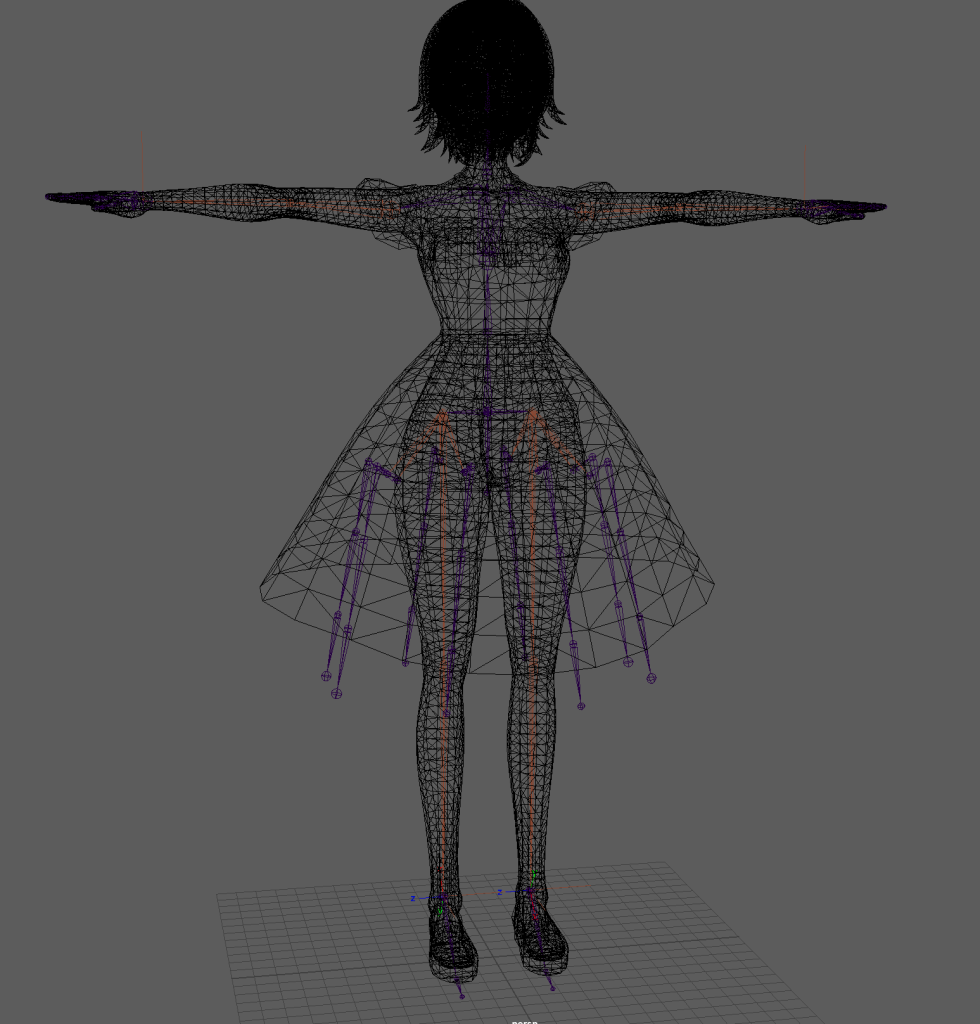
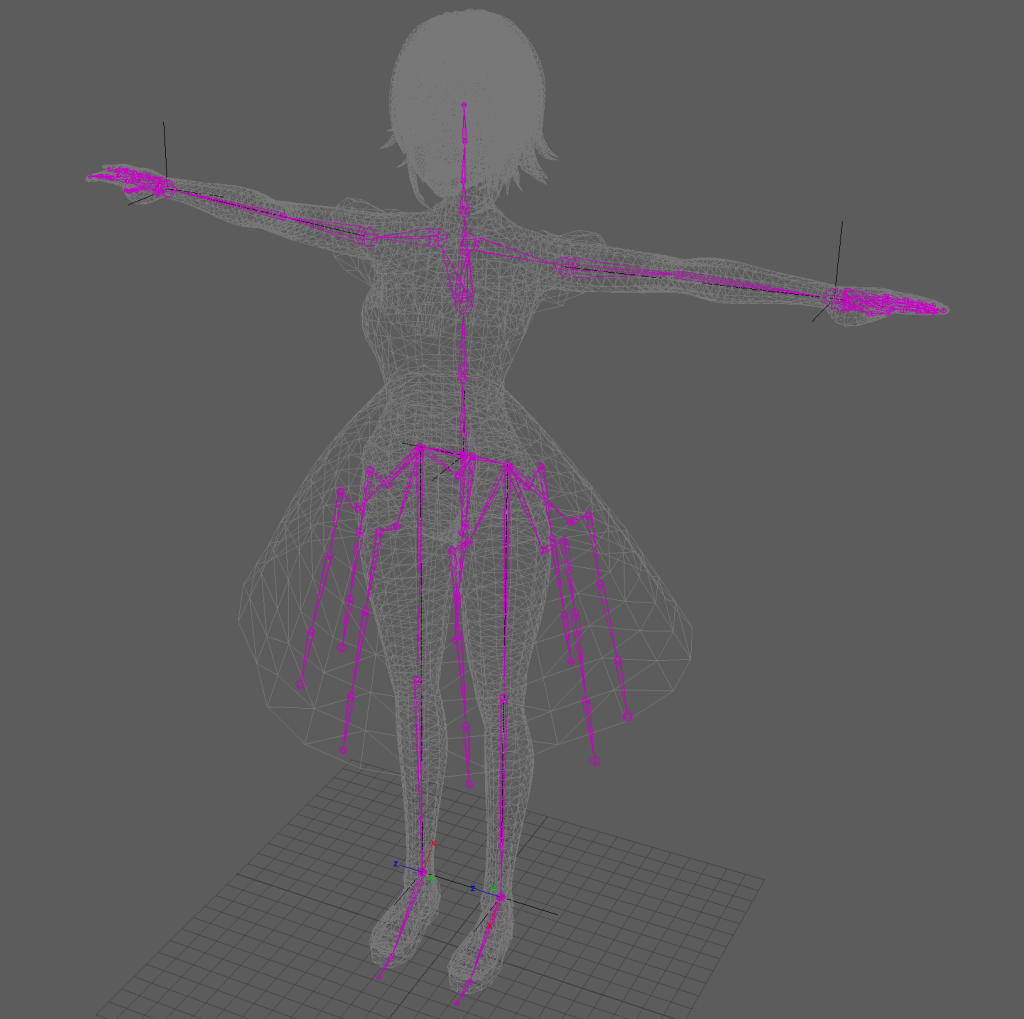
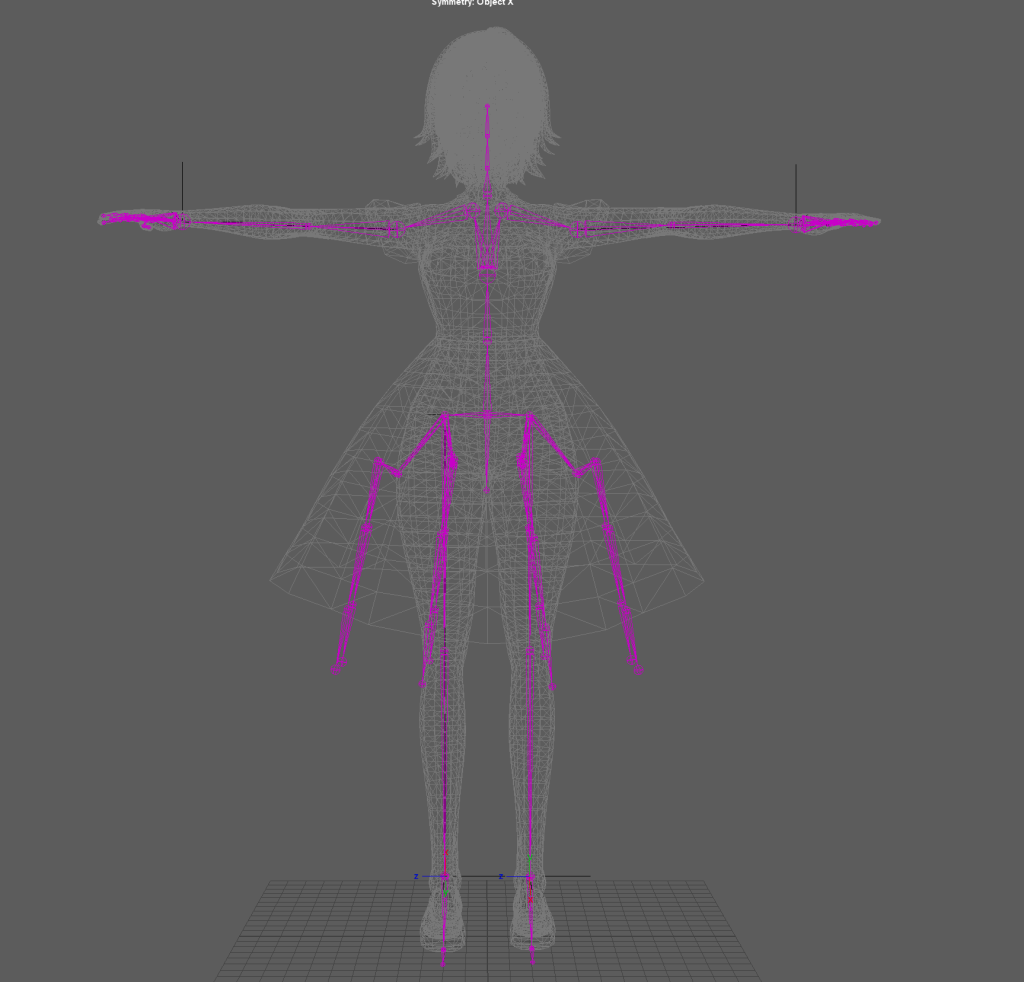
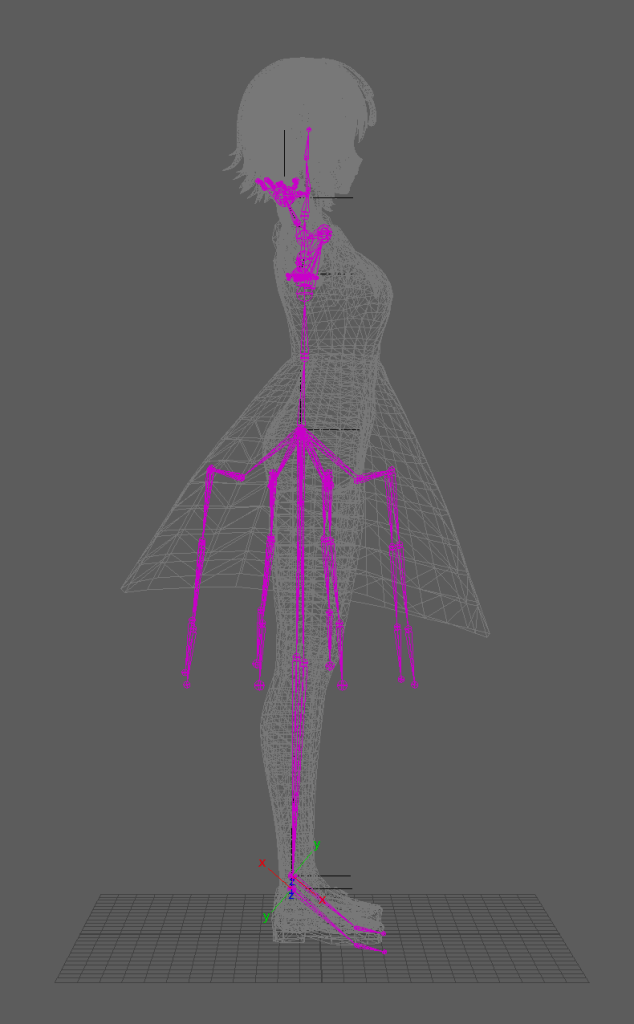
Here is a full collection of the skeleton shown in Maya Outliner.
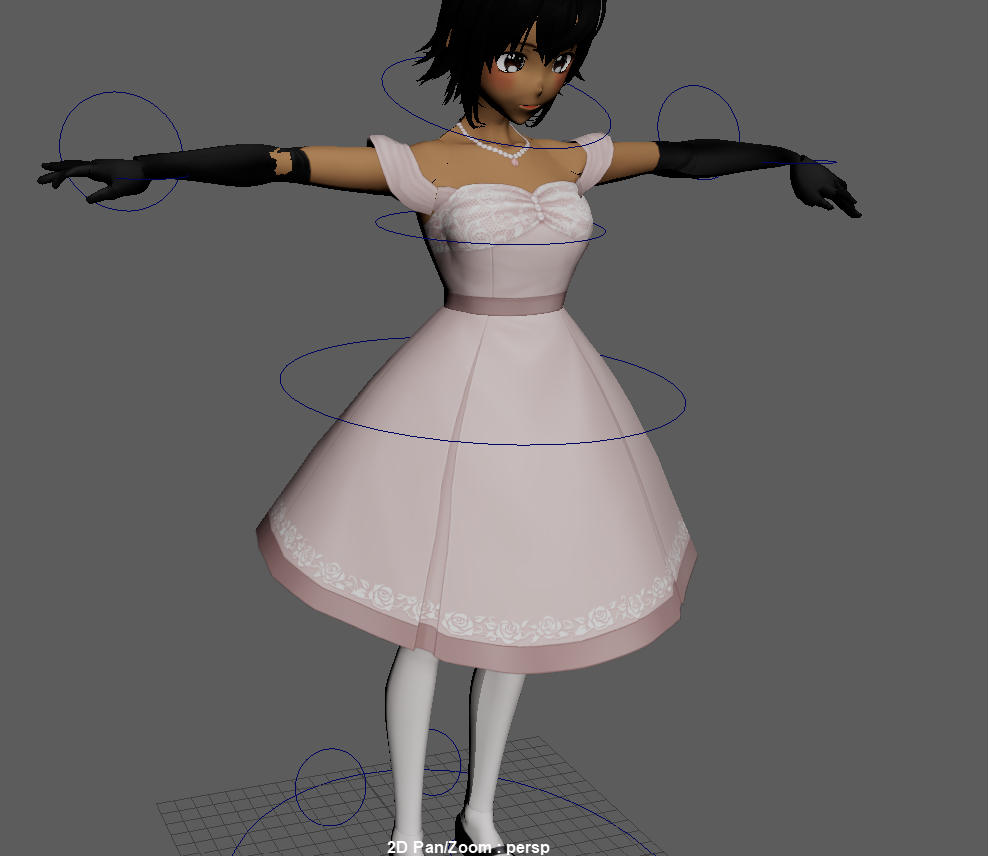
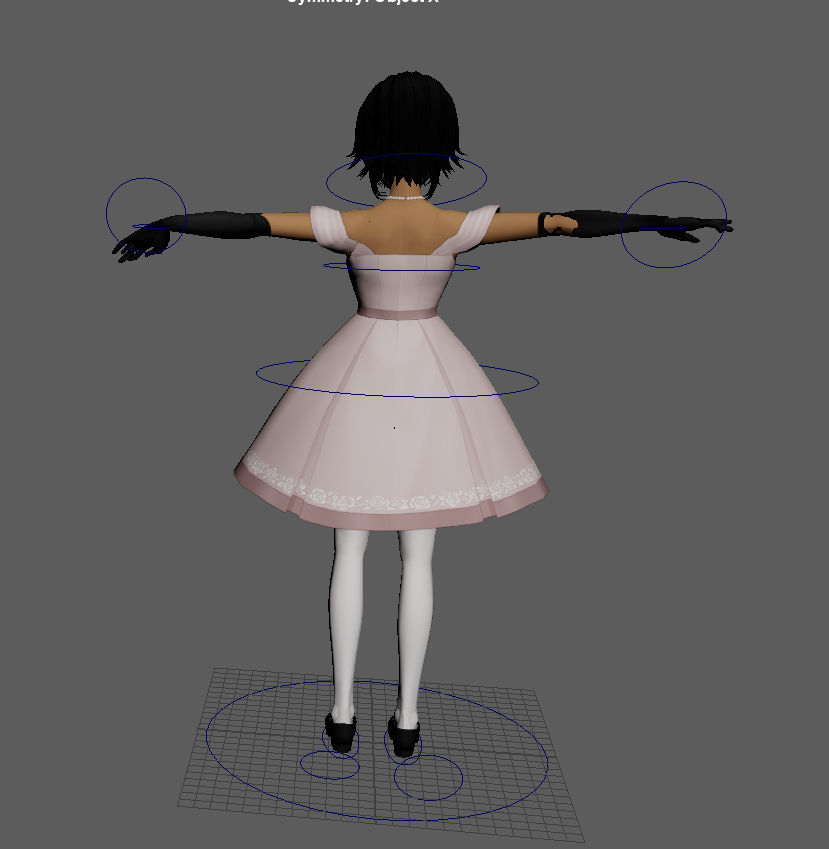
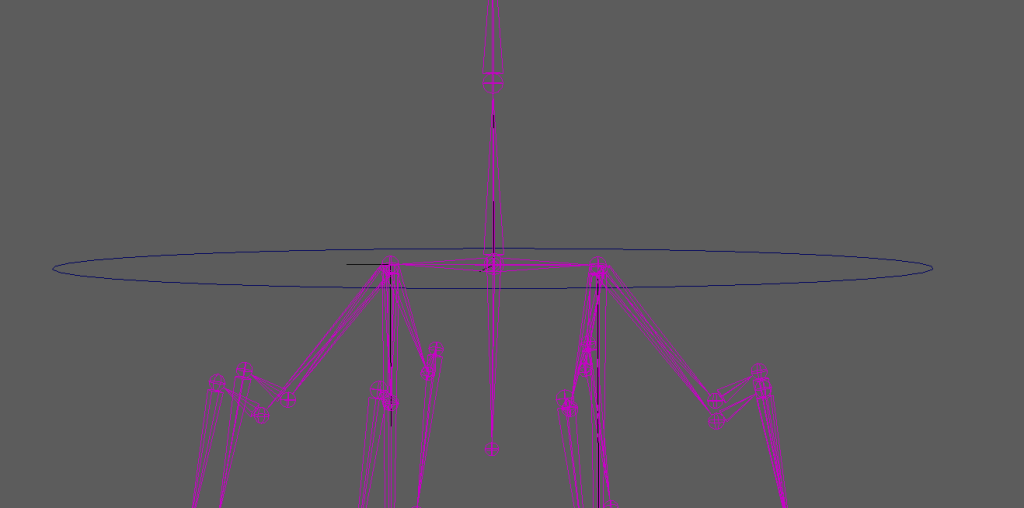
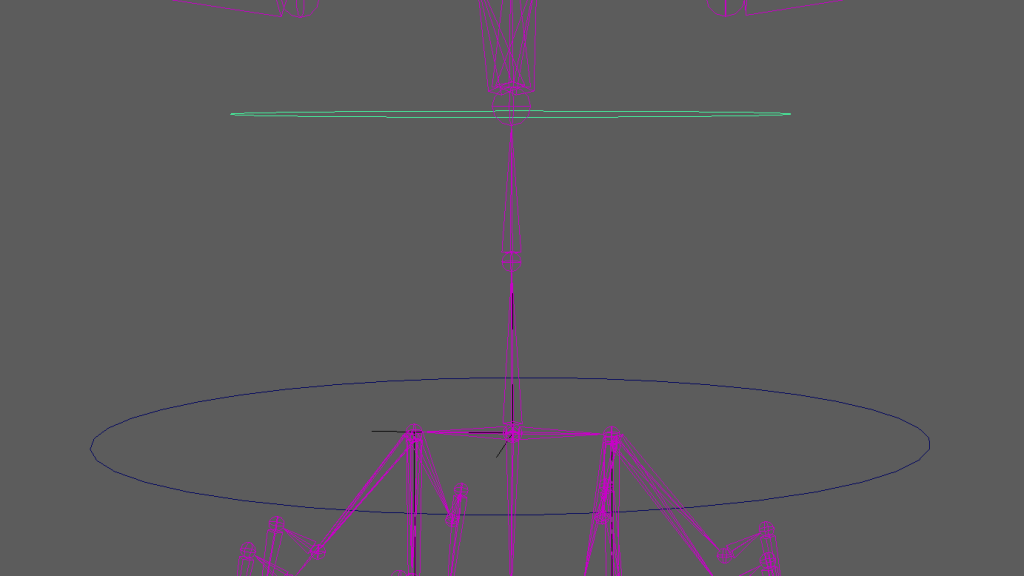
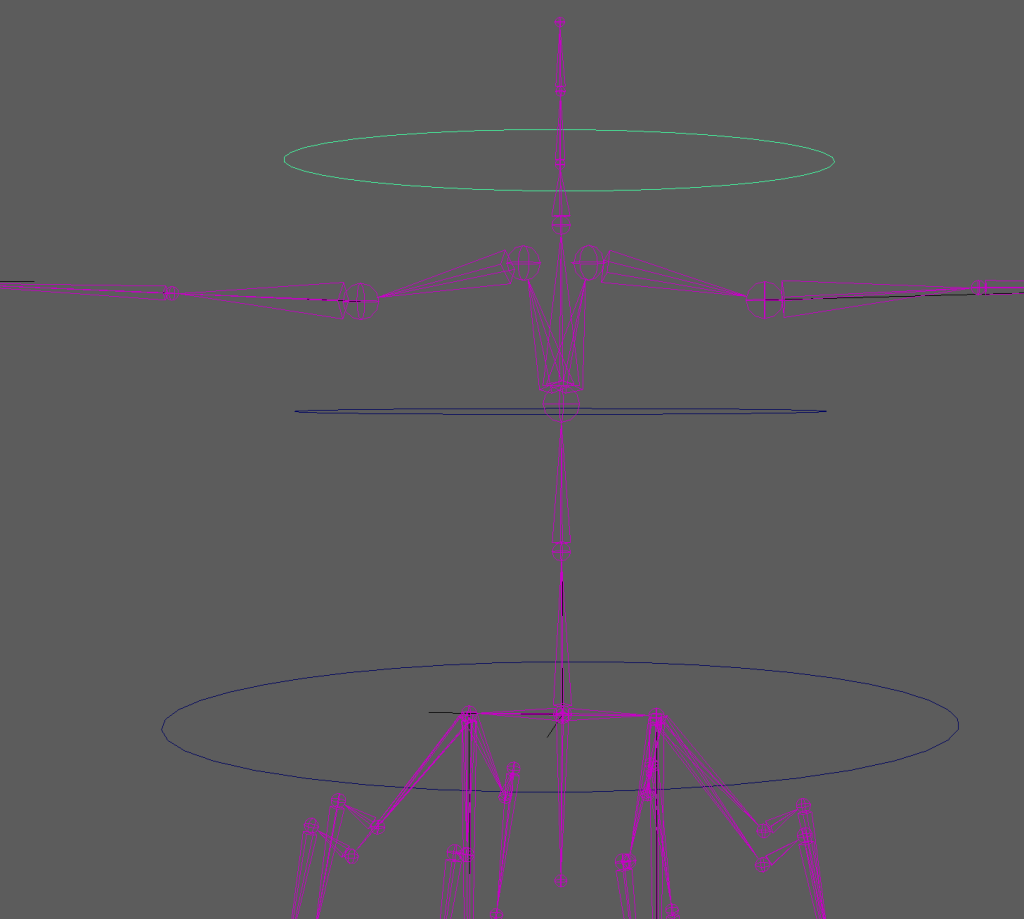
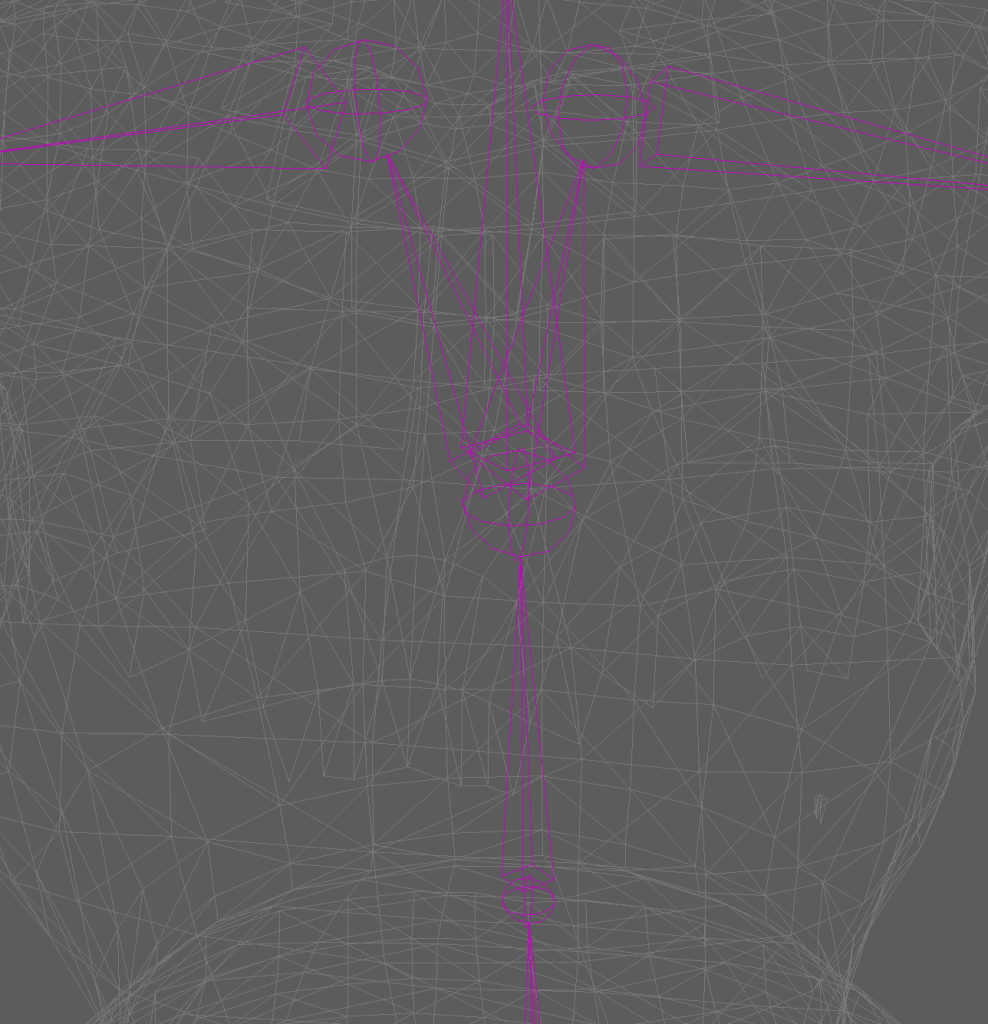
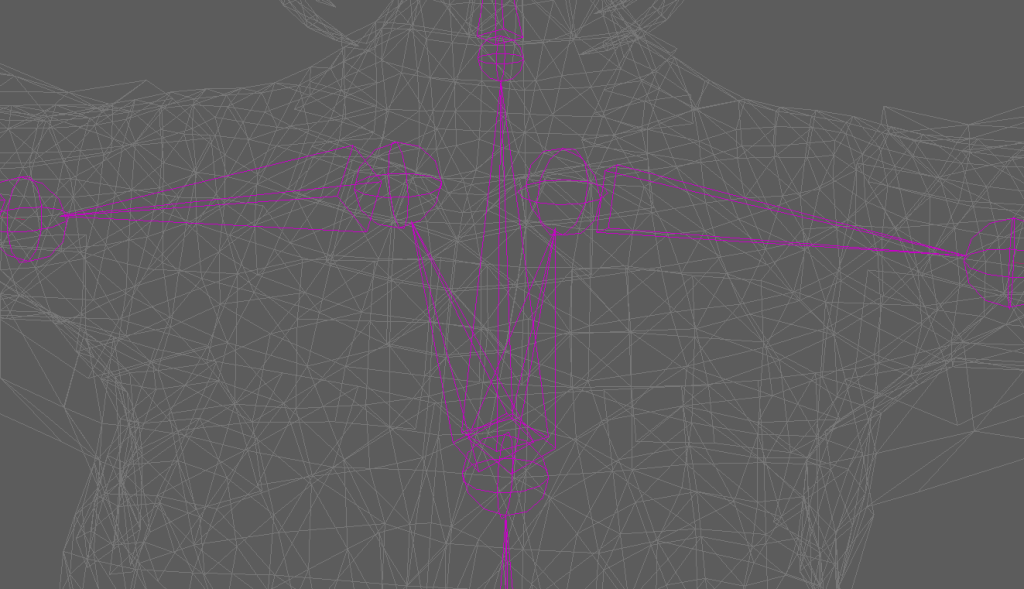
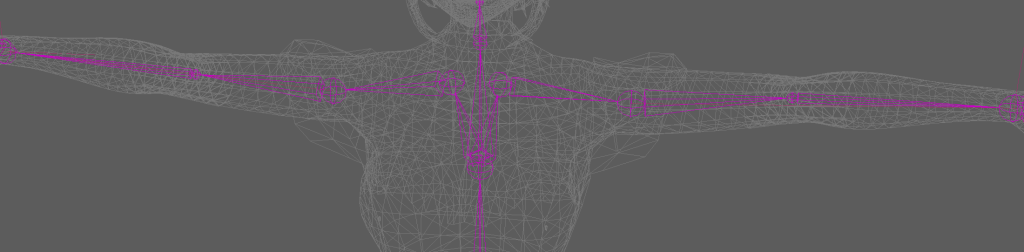
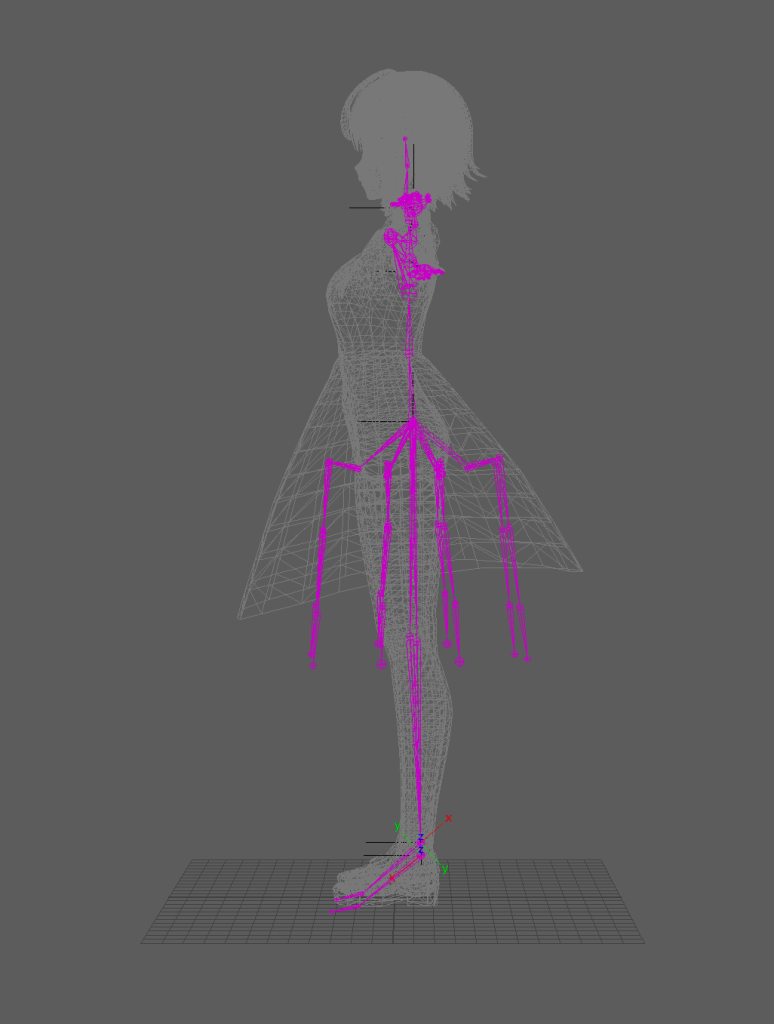
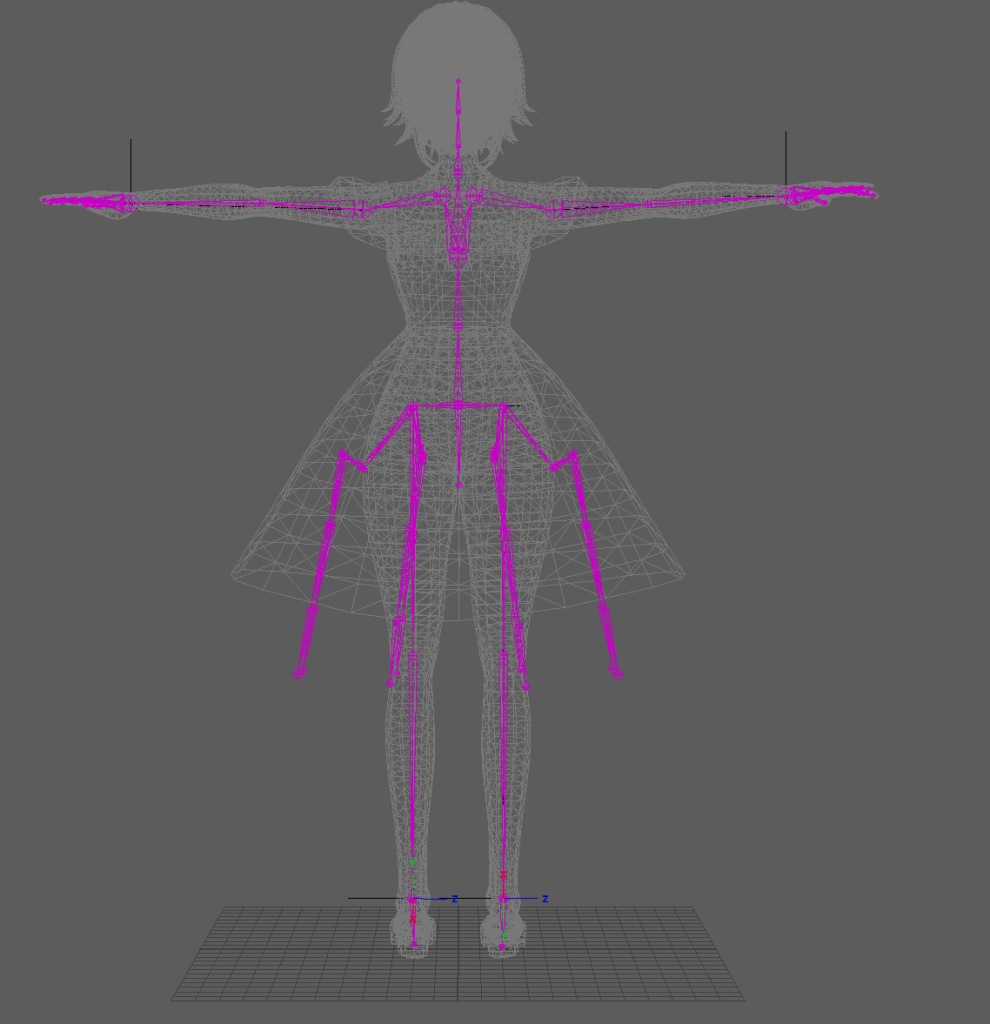
Full Orthagraphic View of Rig
After adjusting the skeleton and IK handles, I went to plan ahead for the next steps being the controls. Here is a showcase of the skeleton in orthographic view.
I set out two options at the planning stage. For the first option, I tried to animate my model made for character design based around her carefree but curious personality and her life as a ghost. Or I could make a model based on Mimi during her idol career and animate her dynamic motions.
I decided to go for Mimi as an idol because Makis’ model Retapology and UV would have caused a lot of problems in the animation pipeline.
I’ve never had any experience in 3D animation but I wanted to learn and practice the fundamentals to my full potential. So I took on the challenge of making dynamic animations such as lip syncing or stylized movement like running or walking . This contrasts Maki’s vulnerable and careful character traits. As a ghost, her movements and interactions would also be limited so I was unsure how to translate this into 3D animation.
So, I chose Mimi because her character would fit the challenges and goals I set up at the beginning of the project. As she is an idol, I’m not restricted in actions or movements. She is able to express a lot more and I had some basic ideas for her animations.
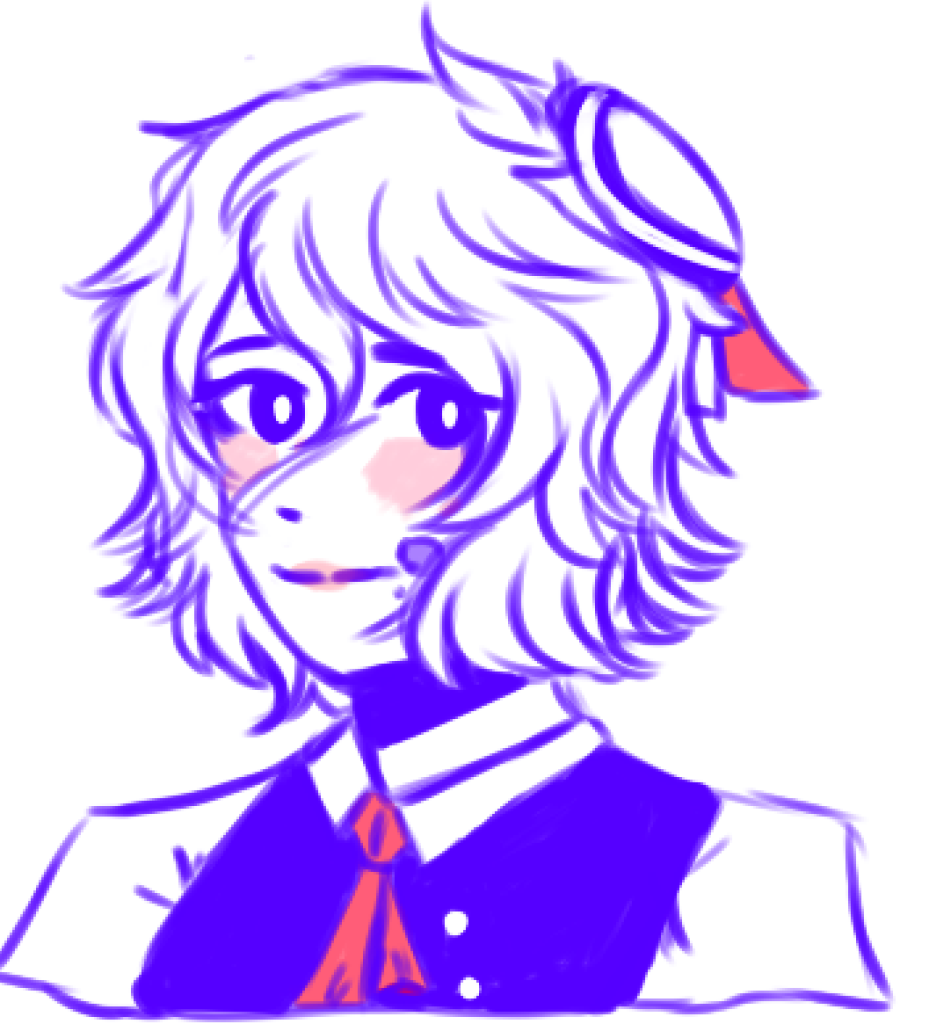
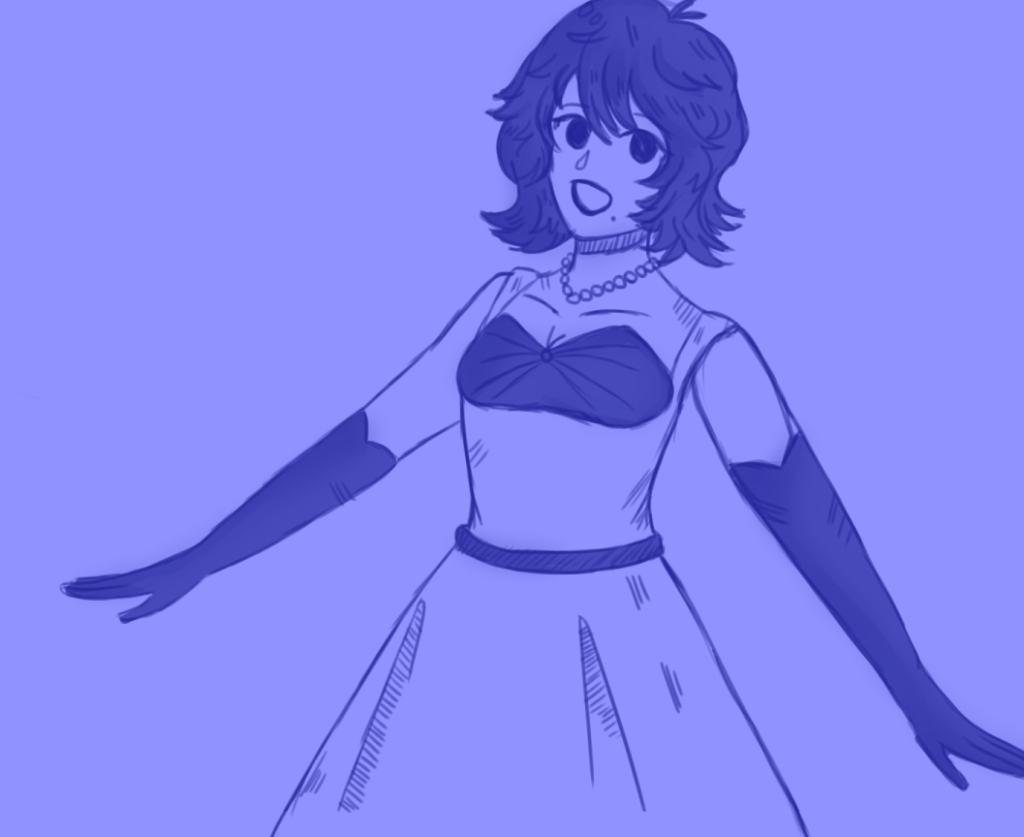
Character Introduction
I will provide context to Mimi’s character – to give more understanding to the meaning behind my ideas.
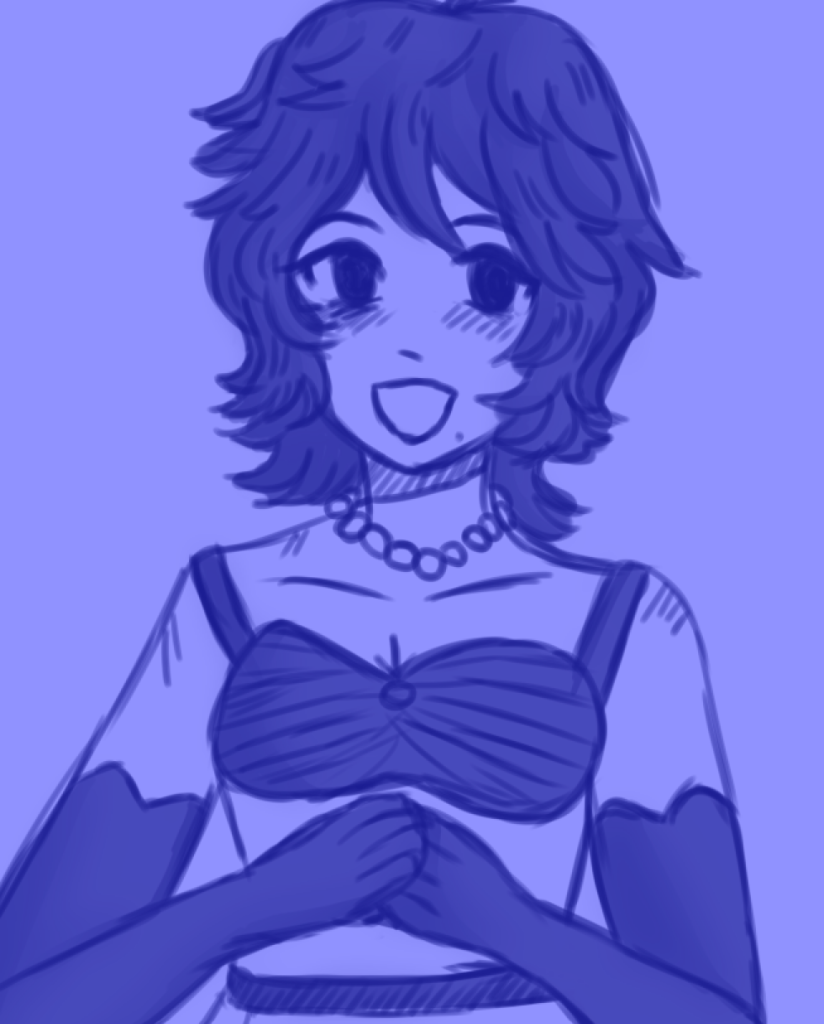
Mimi is an Idol – a Japanese singer from the late 80’s known for her singing and her performances. She also serves as Maki’s counterpart and is known to be elegant in her movements and speech.
earlier concept designs of Mimi as an idol
Her character was inspired by an anime idol character called Haruka Kiritani (Hatsune Miku: Project Sekai). Both are professional and perfect singers and their interaction with the audience – they’re incredibly melancholic characters as they realize that being an idol isn’t what they thought it’d be.
I wanted to reflect those two sides in my sequences – the part where Mimi shows her professional side that’s energetic and fun. Whilst her real feelings are solemn and quiet.
Research and Planning
I began to research different idol performances, from various mediums. Here are a couple of examples.
The first two examples come from two games. One shows a virtual performance with a fixed camera whilst the other is a mini game with dynamic poses and varying camera movements. These sequences were motion captured (mo-capped) by real performers, allowing for these movements to be as life like as possible.
As these movements were realistic they served as strong stepping stones for using the rotoscoping method – this method requires tracing over key poses to simulate smooth movements. This animation technique is primarily used for 2D animation however for the references, this will be a strong starting point.
My final reference comes from an live idol performance. I mainly used this example to study different poses and movements.
Voice lines was the main focus of the third animation as I was interested to see how 3D mouth movements differentiated from 2D.
My main inspiration and the reference I will be using comes from Bee and Puppycat, a show about growing up whilst leaving that idealistic view on life to become an adult which suits Mimi’s themes of isolation but acceptance of reality as well.
Japanese Version of the Scene – At first I planned to have the voice line animation be dubbed in Japanese but due to my limited experience in mouth animation. I decided to go for the English Dub.
Two Clown Noses (2022) Bee and Puppycat: Lazy In Space, Season 1, Episode 12. Directed by Hisaya Takabayashi. Written by Jack Pendarvis [TV Programme]. Netflix. September 06, 2022.English Version of this scene
Two Clown Noses (2022) Bee and Puppycat: Lazy In Space, Season 1, Episode 12. Directed by Hisaya Takabayashi. Written by Jack Pendarvis [TV Programme]. Netflix. September 06, 2022.
Mimi has to pretend to be elegant and professional in front of the camera to please her fans, although in reality she’s tired, homesick and alone. Therefore, she’s left wondering… what am I feeling? It’s a mix of confusion and sadness that reflects her character.
For the final reference, I had some different ideas for what I wanted to do. One of them, being a run cycle or potentially an introduction scene for Mimi.
I chose the run cycle from the first reference since I was also interested in experimenting with stepped animation, similar to Spiderman: Into the Spiderverse’s style. This would also be a great opportunity to experiment framing and Maya’s graphing system later on.
I decided to test out the roto-scoping method to collect key poses using Sync Sketch – a website that allowed me to trace over videos so that I could have these poses prepared for the animation.
The full reference video for the Dance AnimationRun Cycle Animation Reference – this was animated in 30fps and is in twos (meaning each pose is held for two frames)
For the final reference video I decided to make a short video demonstrating the mouth shapes.
Two Clown Noses (2022) Bee and Puppycat: Lazy In Space, Season 1, Episode 12. Directed by Hisaya Takabayashi. Written by Jack Pendarvis [TV Programme]. Netflix. September 06, 2022.
Academic Phoenix Plus (2019). Rigging for Beginners: Face Expressions/Blend Shapes in Maya. [Video] Available at: https://www.youtube.com/watch?v=2Ce-spSV0r8 [Accessed 17/02/2023].