In the final step of the project, the model was imported into Marmoset Toolbag 4, a rendering software that allowed the model to be rendered using raytracing in different mediums (video and images). With raytracing it helped make Maki look more realistic, since it helps better reflect lights and shades in her model. This also helped emulate what her model would look like in an immersive game engine.
Lighting Experimentation
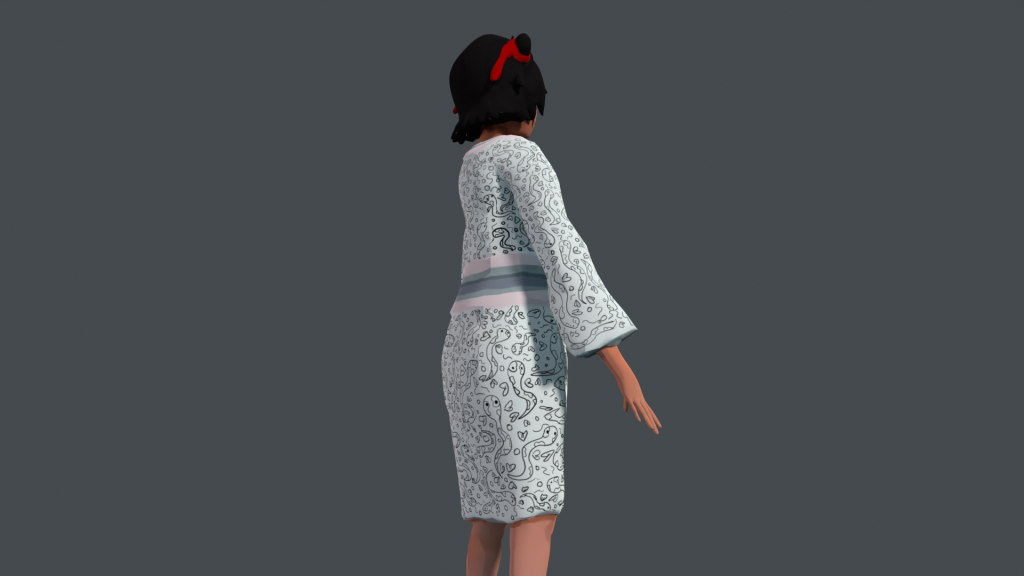
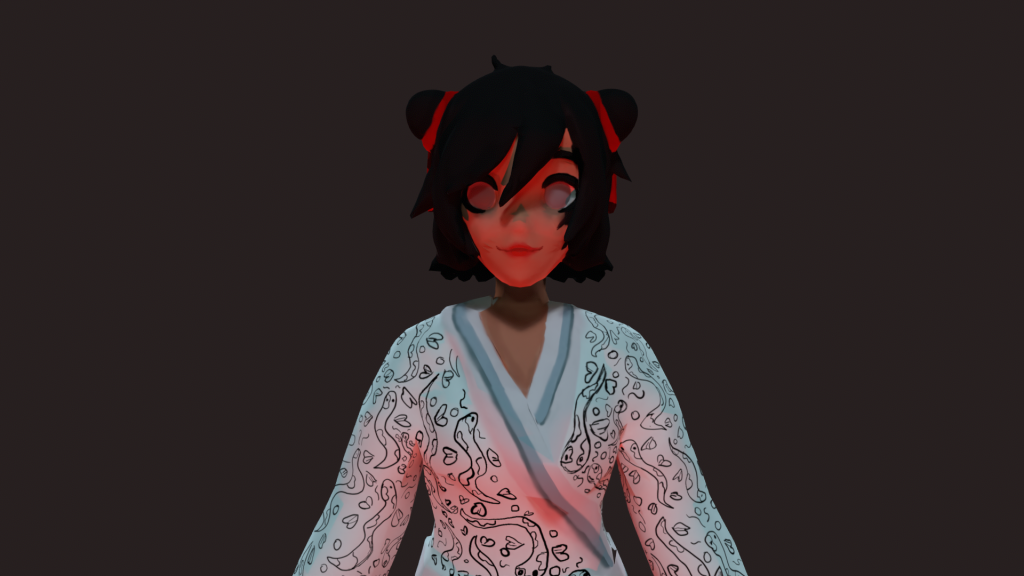
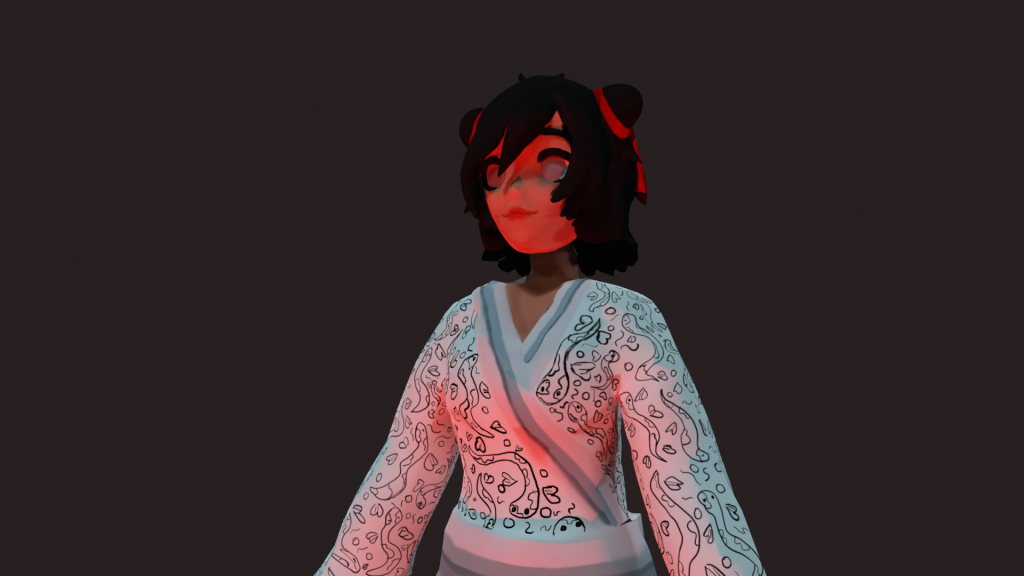
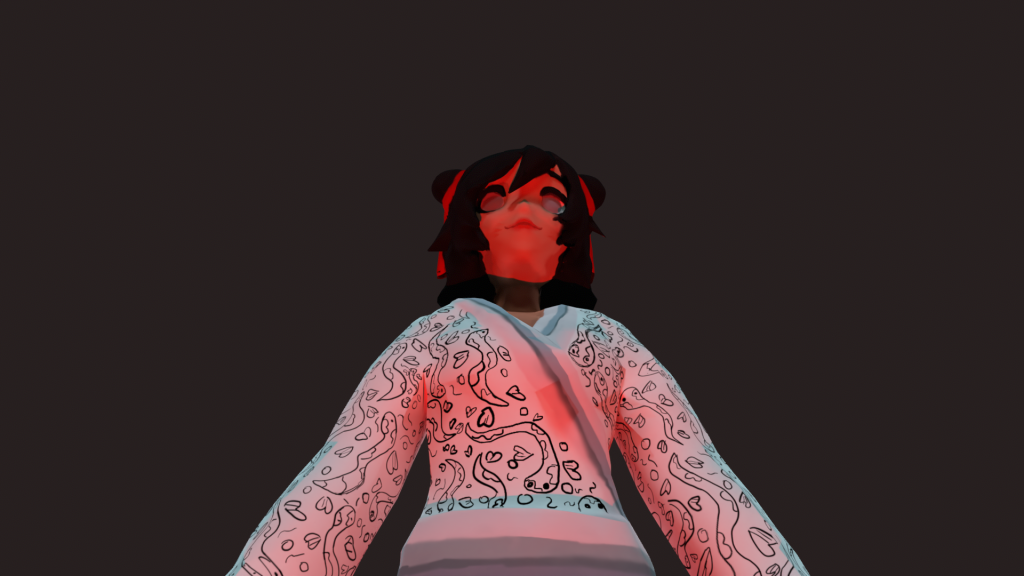
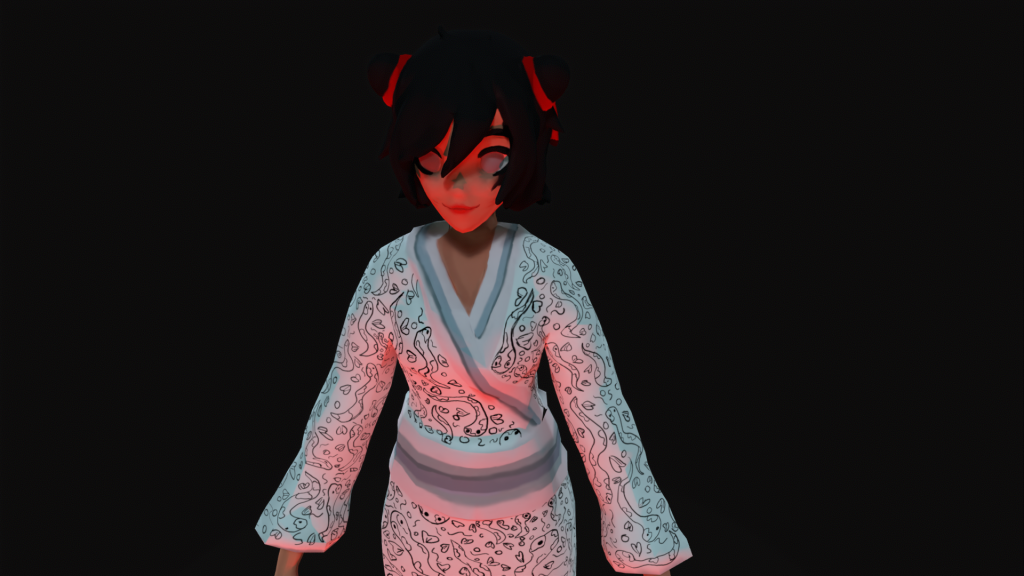
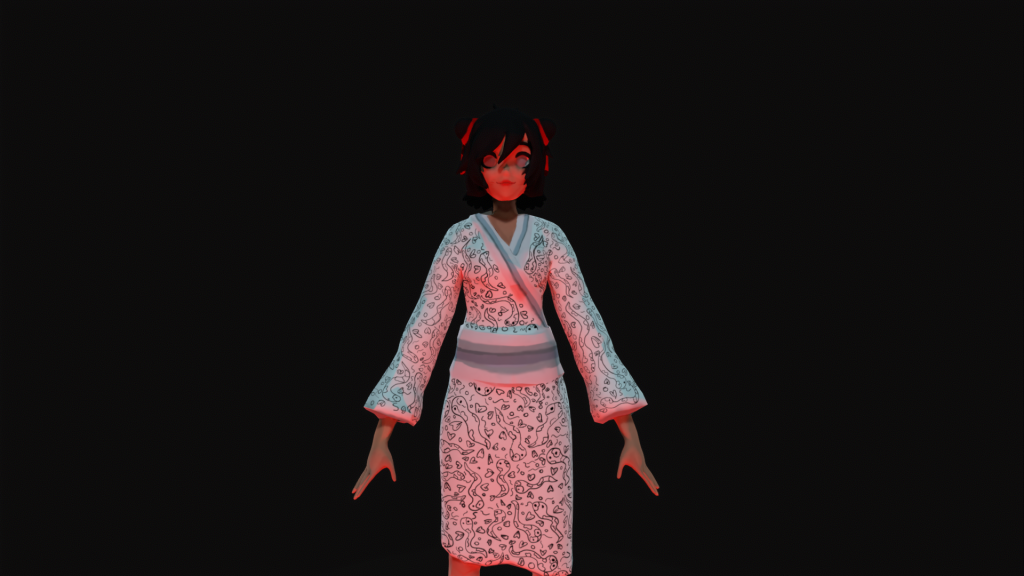
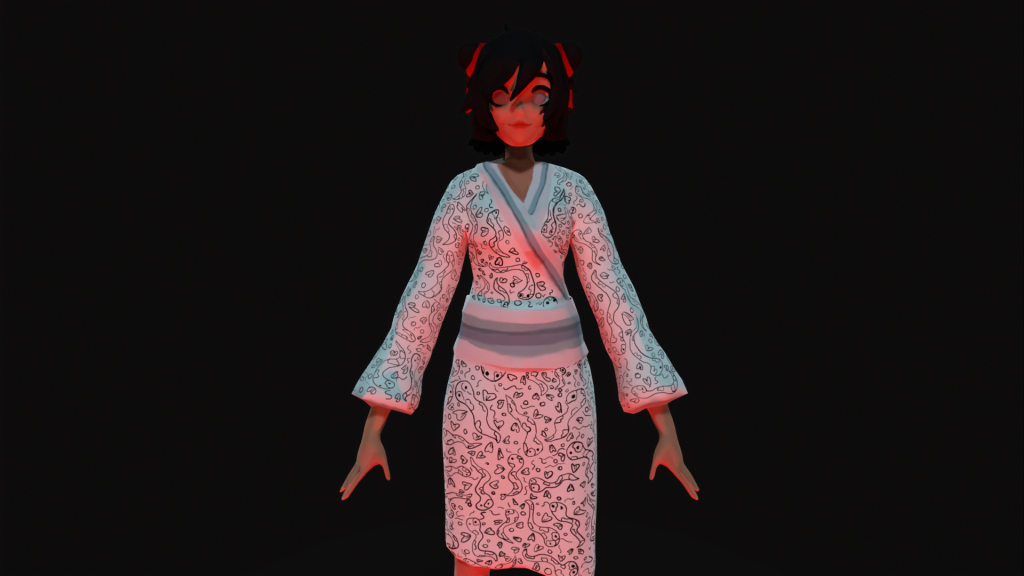
Similar to the shots in Substance Painter and later on the exploratory beauty shots, with these pieces: I experimented with vibrant lighting in order to reflect the models tone and how she’d be percieved in different lighting engines.
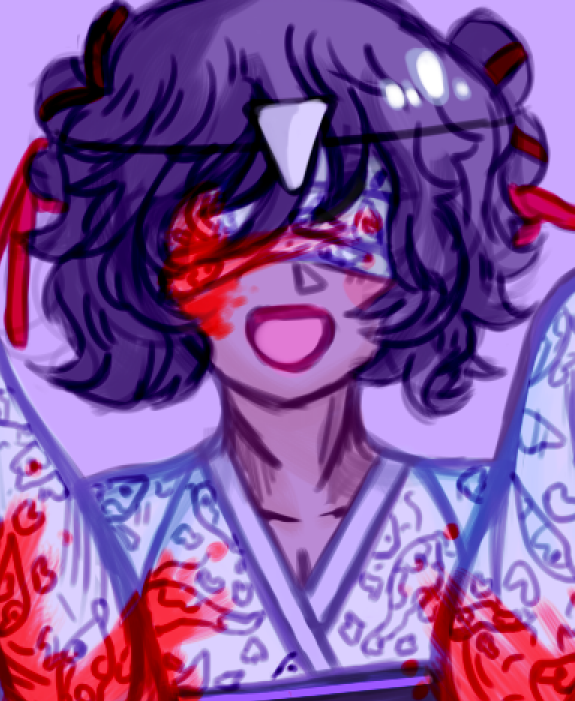
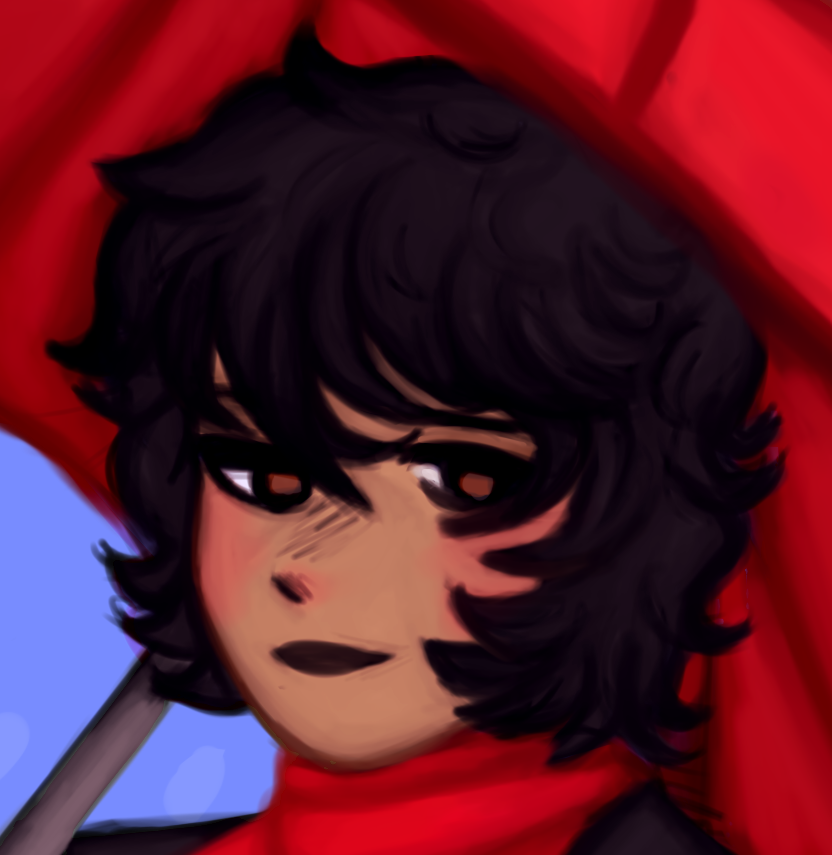
Blue and Red – two colours that differentiate one another with one indicating coldness and the other indicating warmth – visually showing the two sides of her personality.
The dark red lighting however, perfectly captures the eerie and dark tone to her character. Rather than adding blood to her model – the lights subtly indicate to the player that the character holds dark secrets / intents. It also helps create an even stronger contrast to the originally pale colour scheme.
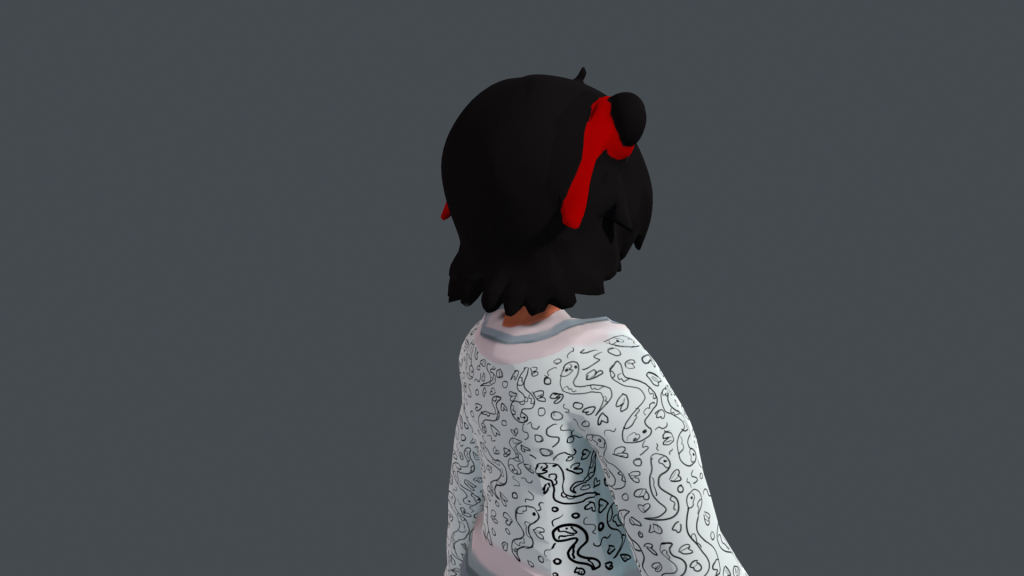
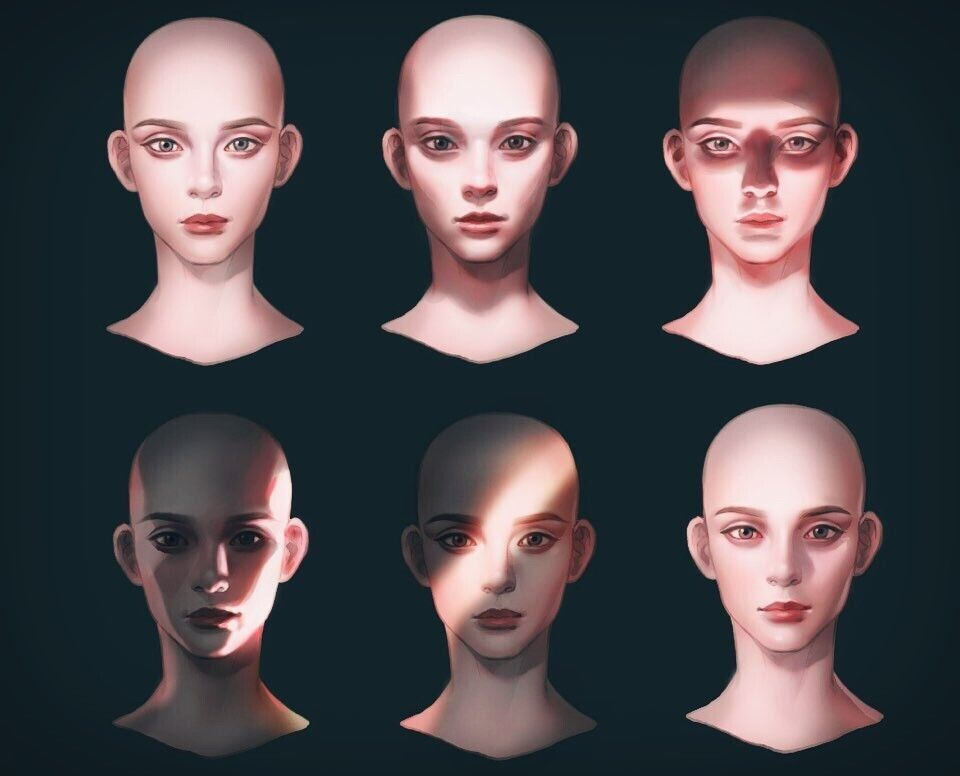
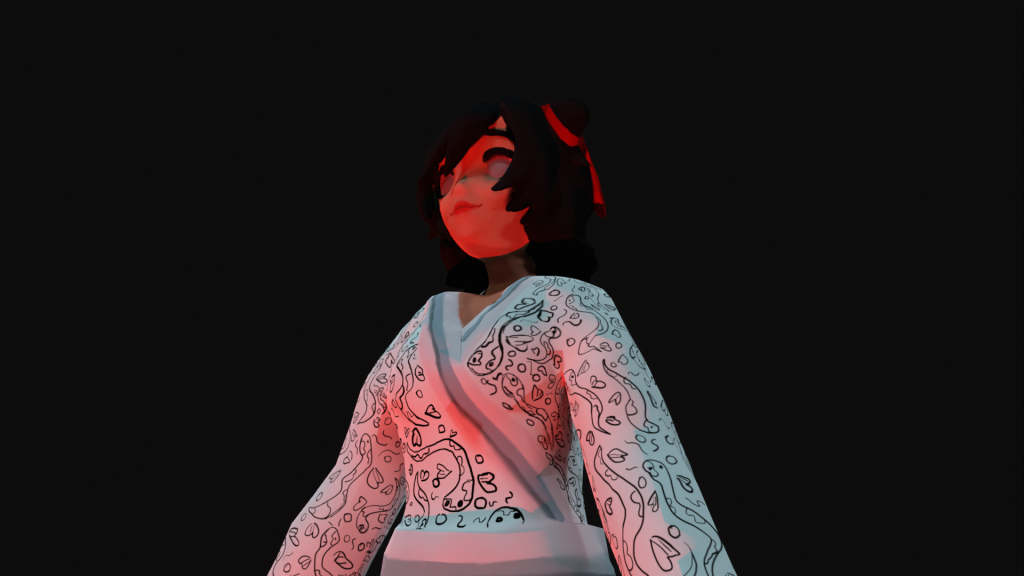
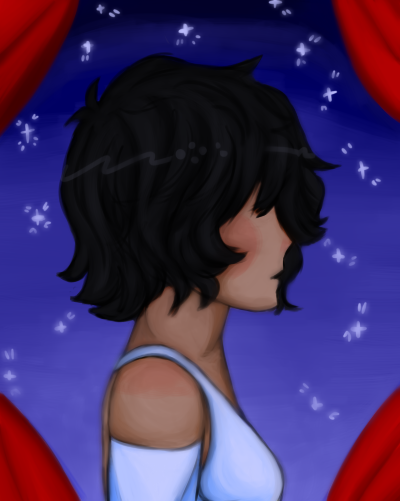
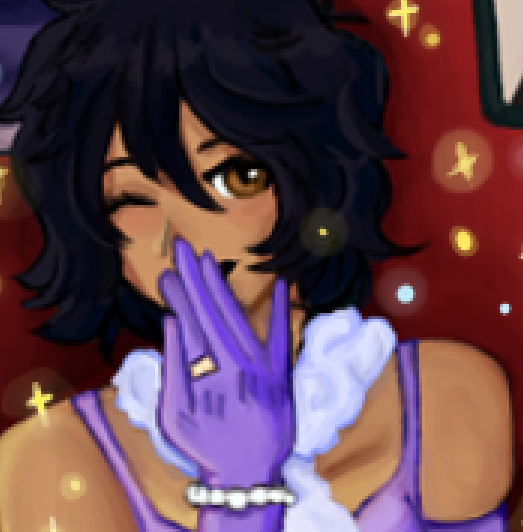
Finally with these beauty shots, I changed the lightings position so it faced directly below her chin.
For this lighting technique – I used this lighting reference sheet to help change the tone of the character.
With this, I created more beauty shots for the model – Along with her glassy look, the lighting really helped shift the aura for her character, creating a sinsiter and dark look to her personality and possibly how the player percieves her as a spirit of the vengeful Akimoto shrine.
Gives her model a different look aesthetically – She is presented with a sinsiter aura.
Conclusion
3D modelling for characters has been a difficult process to work through. However, it does not mean it didn’t come with it’s benefits. Learning Zbrush and it’s tools allowed me to not only improve my anatomy but to understand how to translate 2D art into 3D, which in experience, is a learning curve that has been achieved.
Retapology and UV unwrapping, however, are both the weakest points of the model as it came with baking and UV errors – to improve, it would be beneficial to clean up the retapology and redo areas that have disconnected edge loops / quads. This also could’ve made UV unwrapping a lot easier.
In terms of her design however, especially when texturing, the 2D patterns and understanding lighting and shading really furthered my understanding in 3D character art. This project, overall, had both it’s strengths and weak points but has been an innovative learning experience when creating and designing models and characters.
The longest part in this project was forming the retapology in Maya. This part of the workflow consisted of trial and error as the process would require experiencing several learning curves. By doing Retapology, as mentioned prior, not only does this create a “game ready” model but it also allows the model to be UV unwrapped and later on textured.
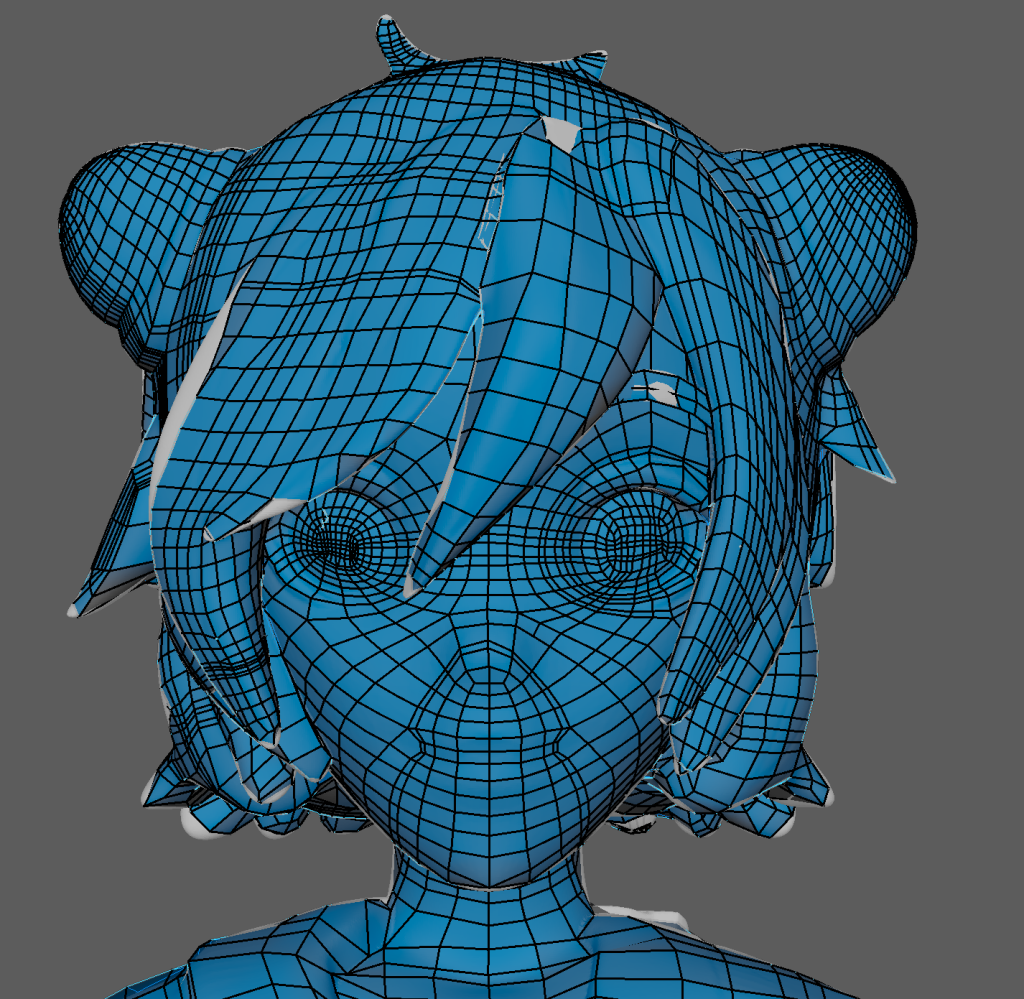
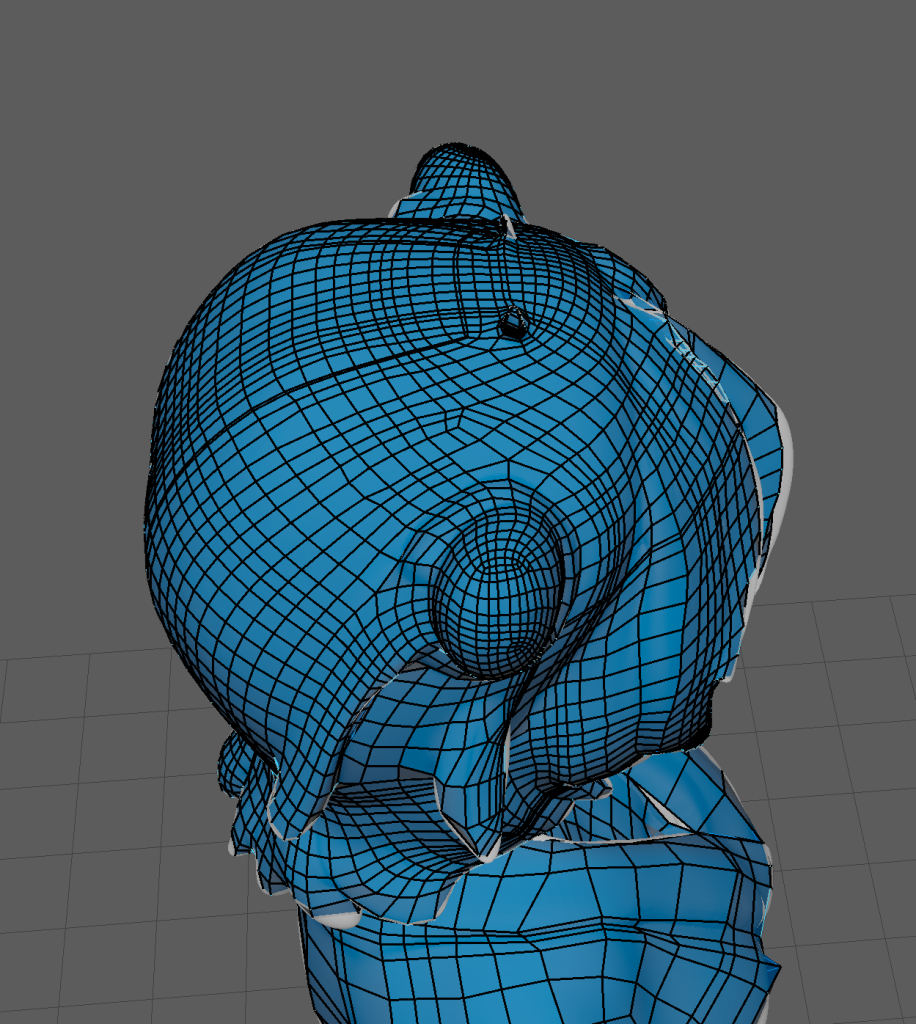
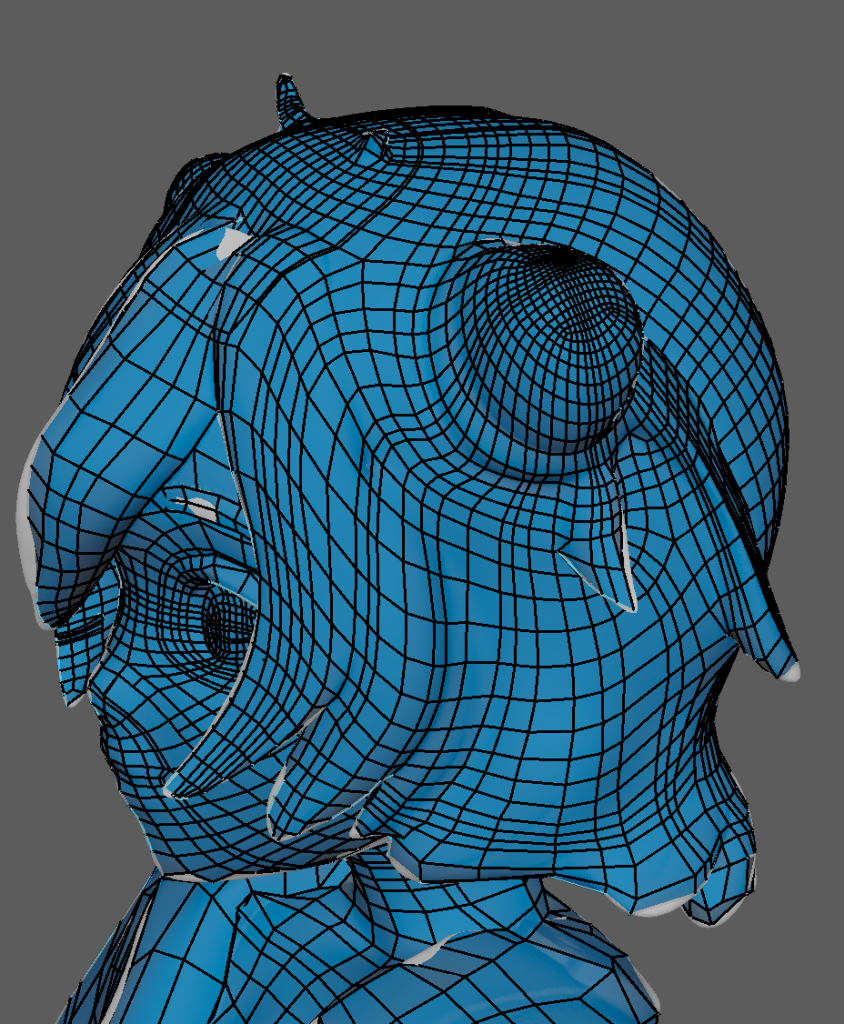
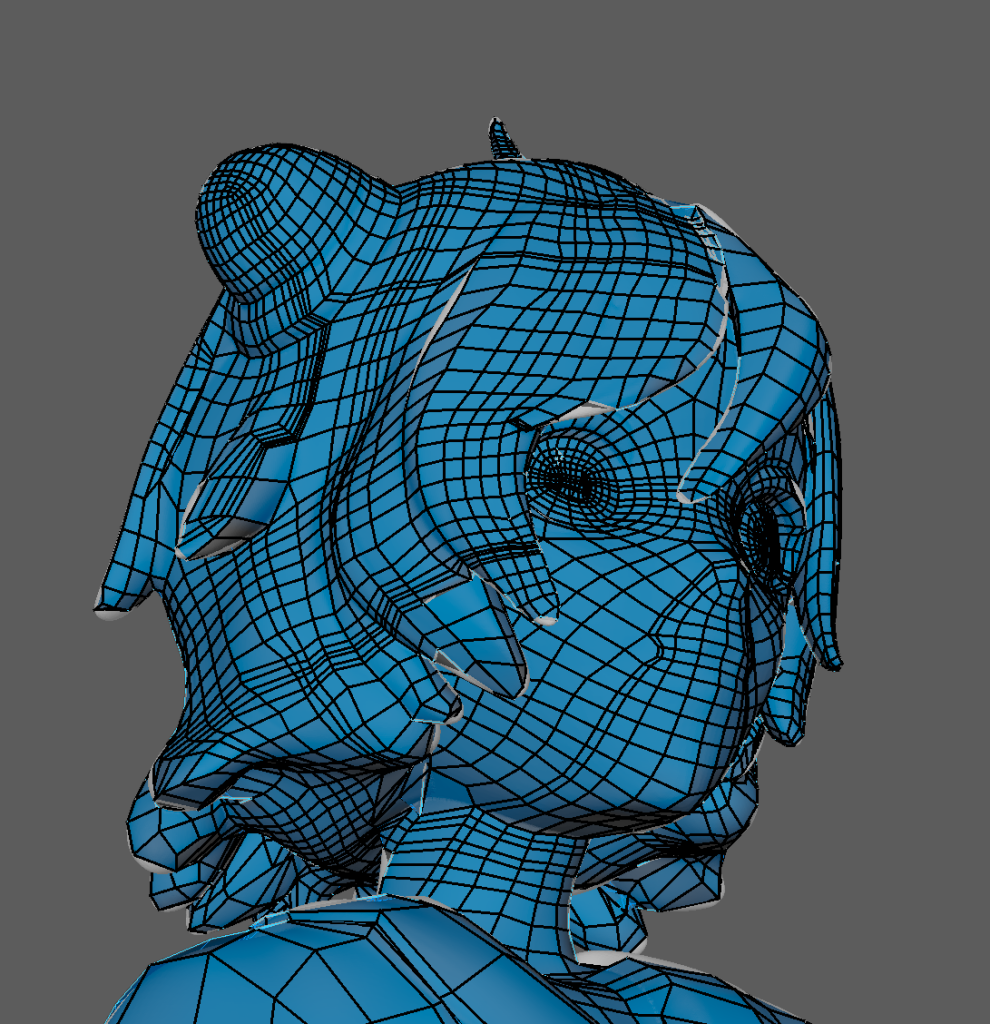
So for the start of the retapology, I began with working on the head and hair, working my way down the body. Working on the head, especially the areas that were covered by strands of hair or tight corners were incredibly difficult to retapologise as more often than not, it can lead to hidden faces which can create issues when UV unwrapping. These, however, were cleaned out during the final stage.
Here are a collection of screenshots detaling the retapology of the upper part of the model.
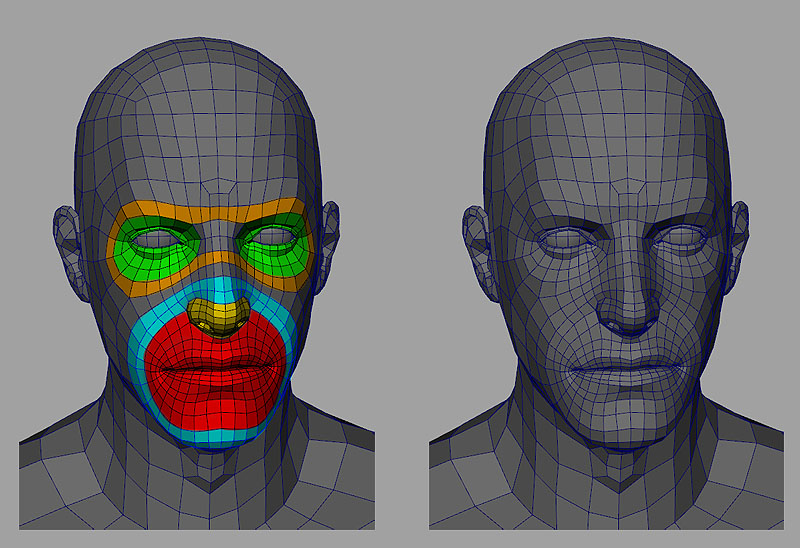
Face retapology was done using a reference
The high amount of edge loops around the eyes, nose and mouth areas are used in preparation for animation. (This is due to these features being deformed when animating. So it protects the model’s polys from breaking.)
Looking back on the head’s retapology (and a reflective criticsm that can be said for the whole model) There are a lot of unneeded edgeloops which causes the quads to become tightly bound together – when trying to solve this issue using the relax brushes, however, the quads would become either disjointed or uneven to the face. So in the future, I want to be able to dedicate the time to further redoing / cleaning up the retapology and it’s edgeloops.
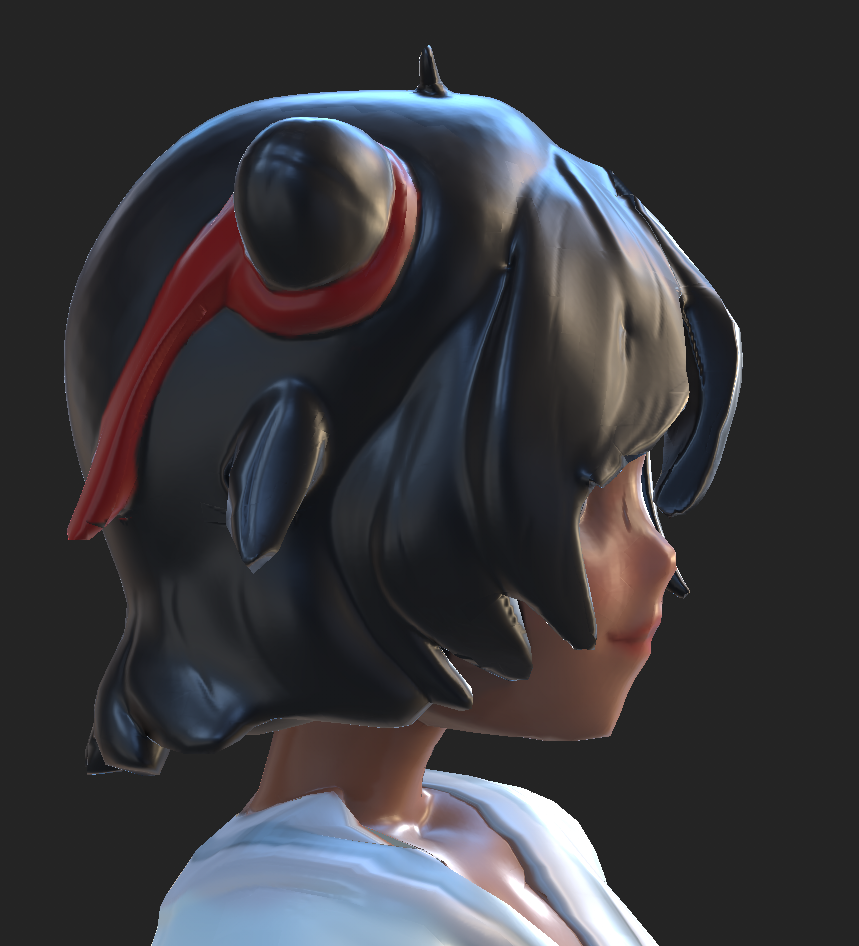
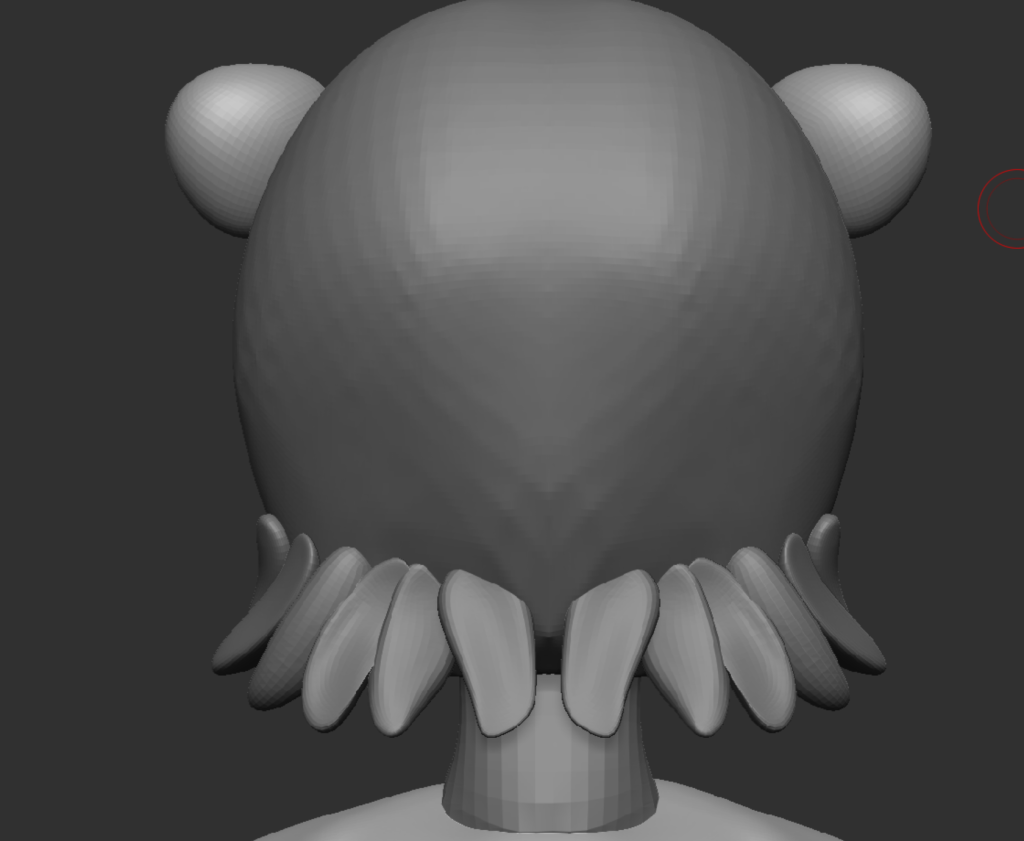
Added edge loops to the hair buns – each of the buns retapologies were done seperately so they may look different on each side. By adding edge loops, it allows more detail to be given to the low poly model. This also applies to the eyes and ribbons.a lot of edge loops in certain aprts of the hair strands. To improve – the model would either need to less edge loops or attempt to use the relax tool.Full image of the upper-body in development. Worked from the eyes all the way down to the upper part of the kimono. Also added in edge loops around the neck as this will also deform in animation.
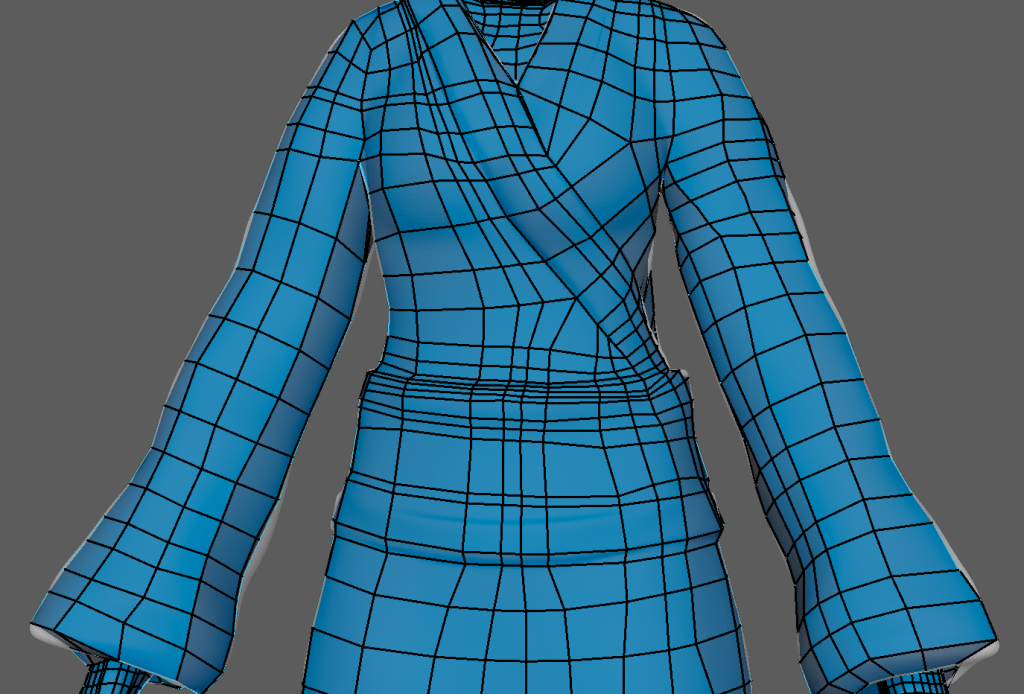
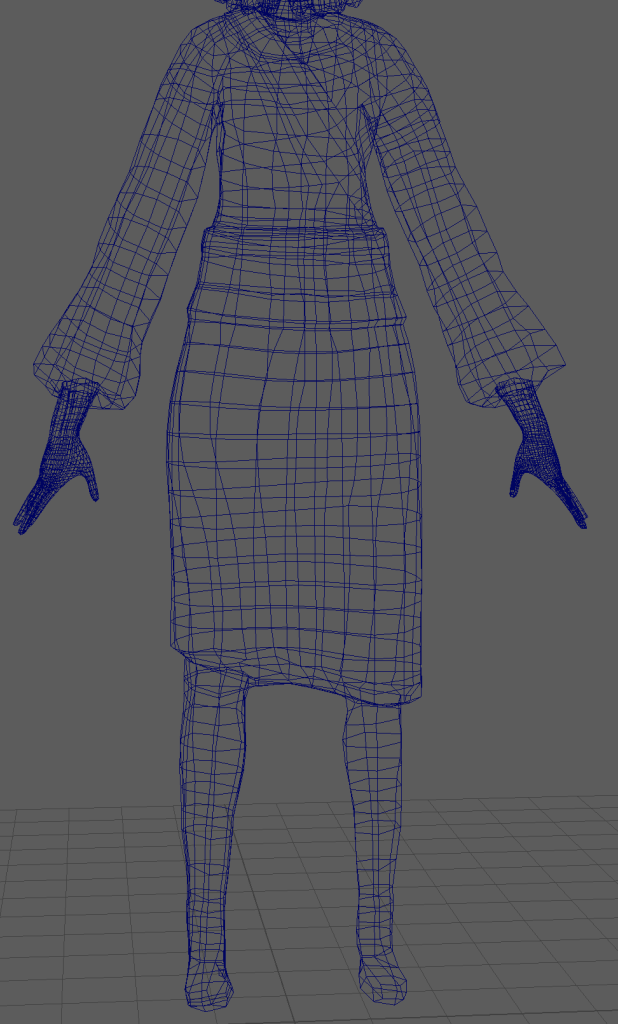
Body Retapology (Kimono)
When working on the Kimono, I focused on adding larger quads rather than continously adding edge loops. This is due to the body having less details. The main focus here was to add edge loops to the sash wrapping around her stomach (the Obi) as well as the folds and the collar. This also applies to the arms because certain parts of the clothes this helps seperate the torso and limbs from parts of the clothes when UV unwrapping.
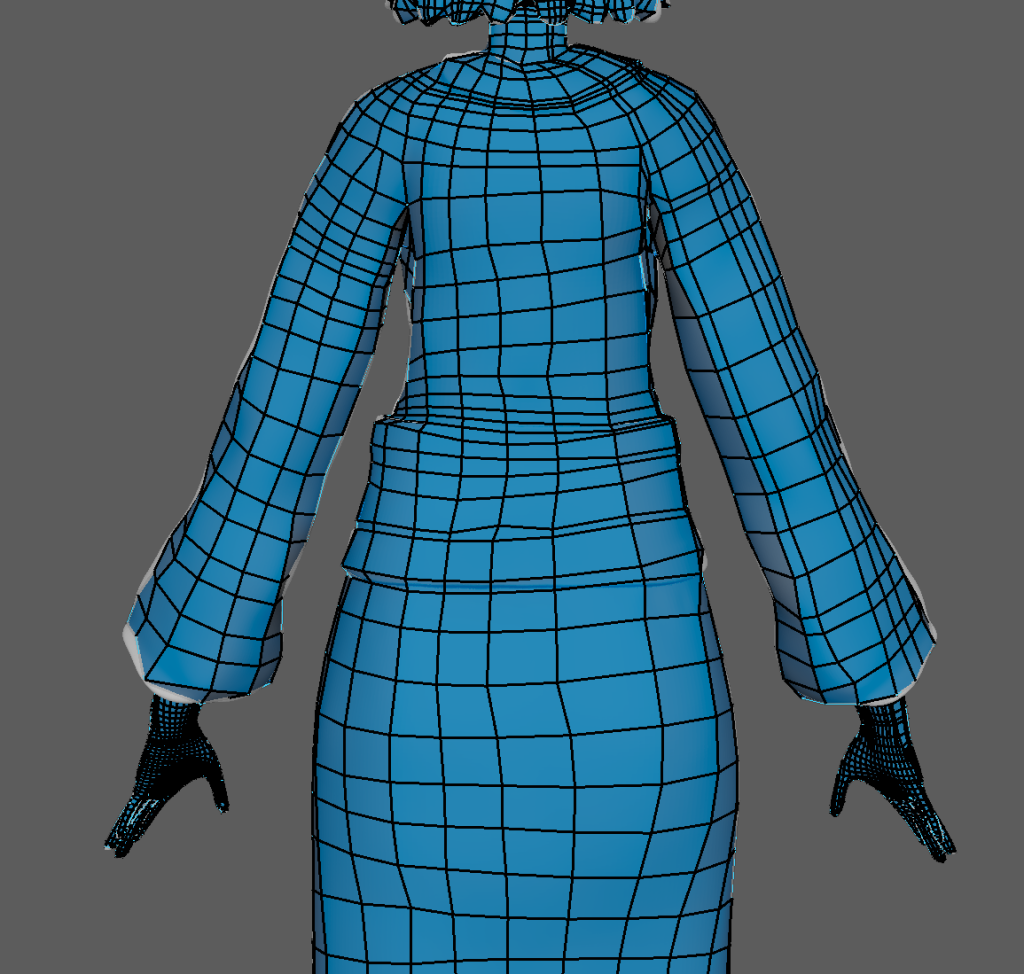
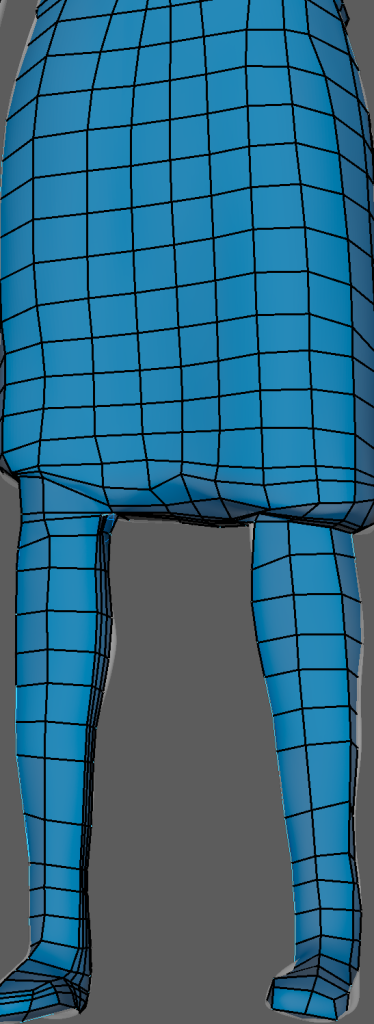
Here are various close ups of the body retapology – a lot more broader as the kimono has less details that need to be translated in it’s low poly counterpart.
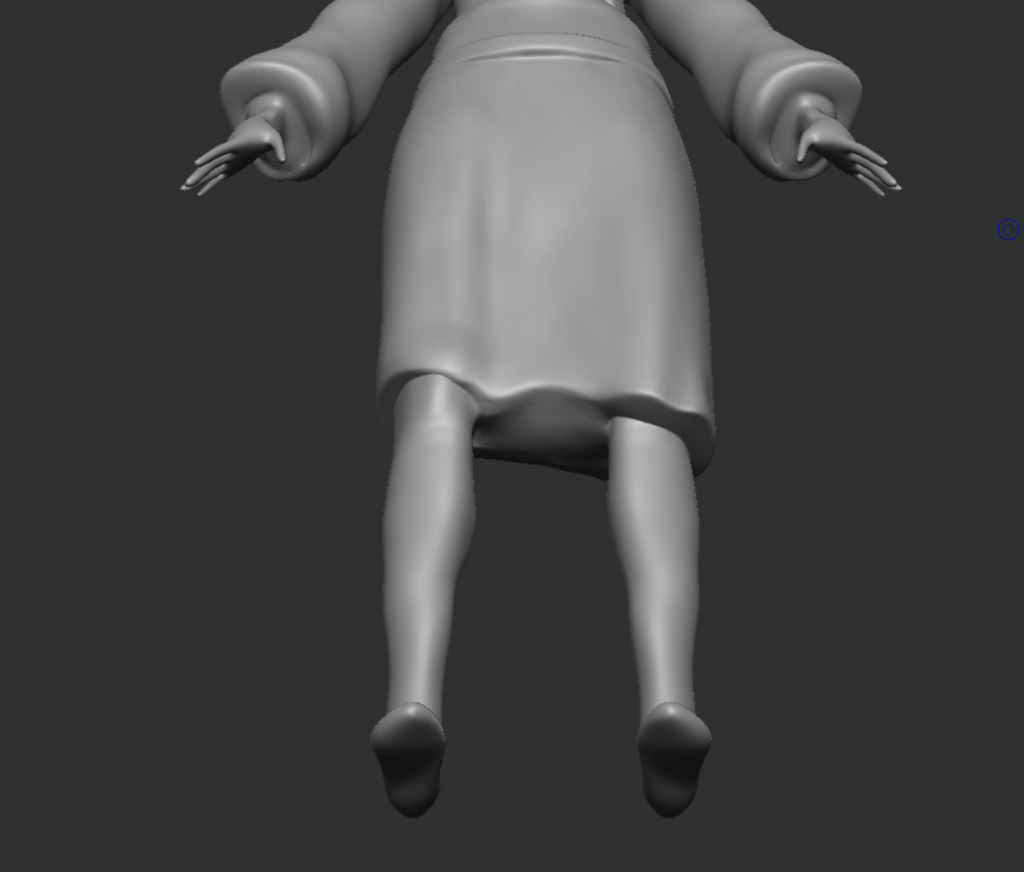
In certain areas – there were struggles in keeping the retapology clean and simplified (for instance the feet and bottom of the Kimono) but I managed to keep the retapology fairly simple by adding edge loops around the lower section to replicate the fabric’s tightness in the high poly version.
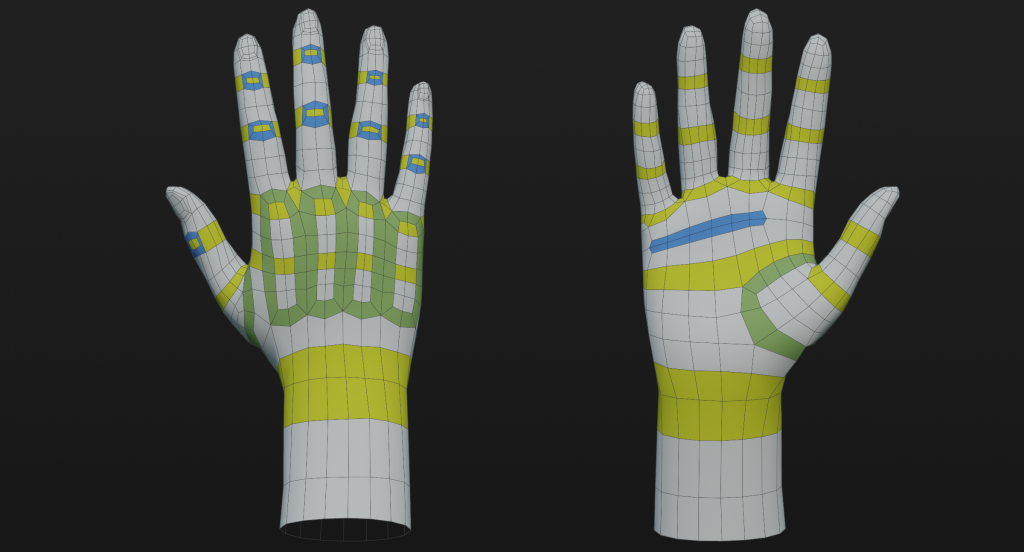
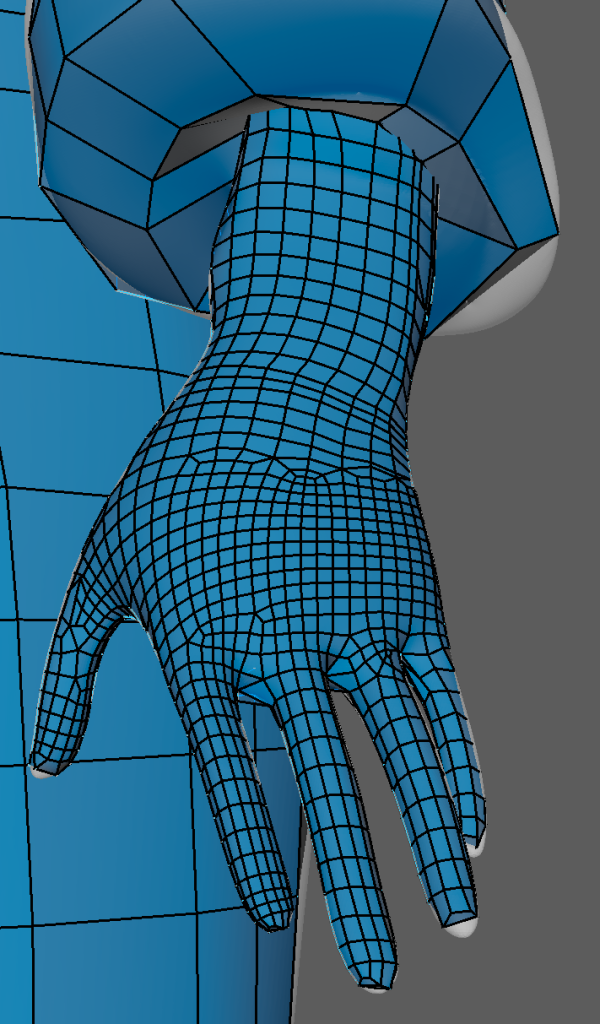
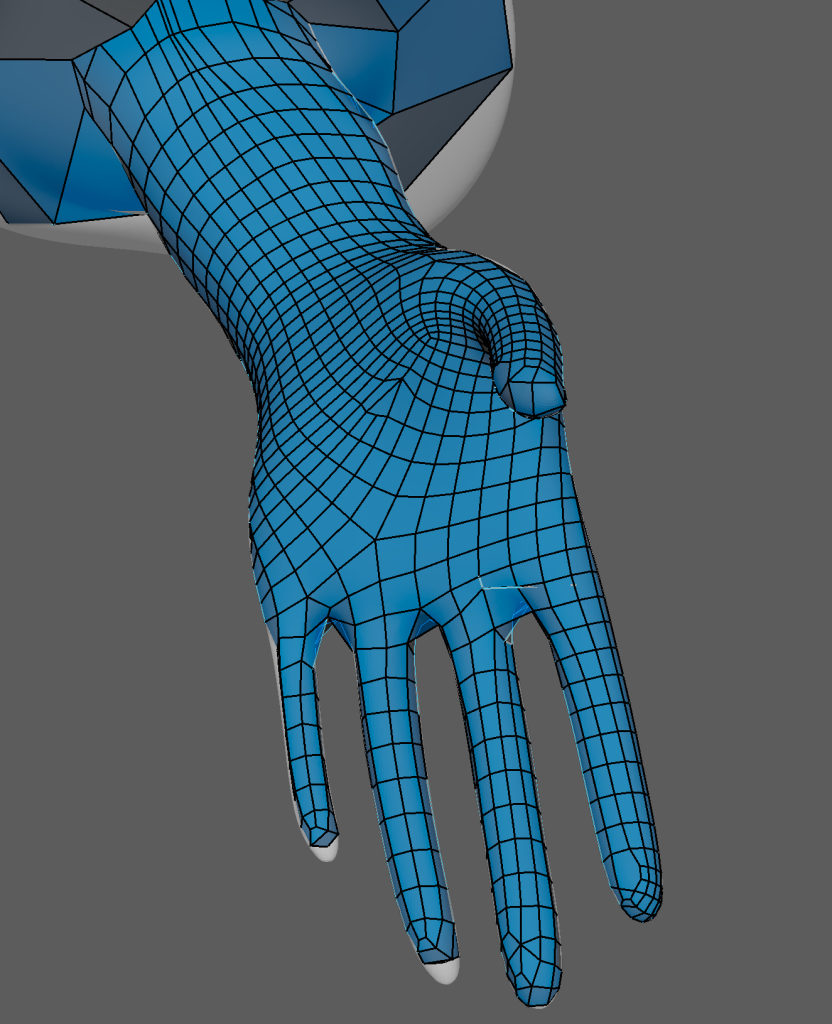
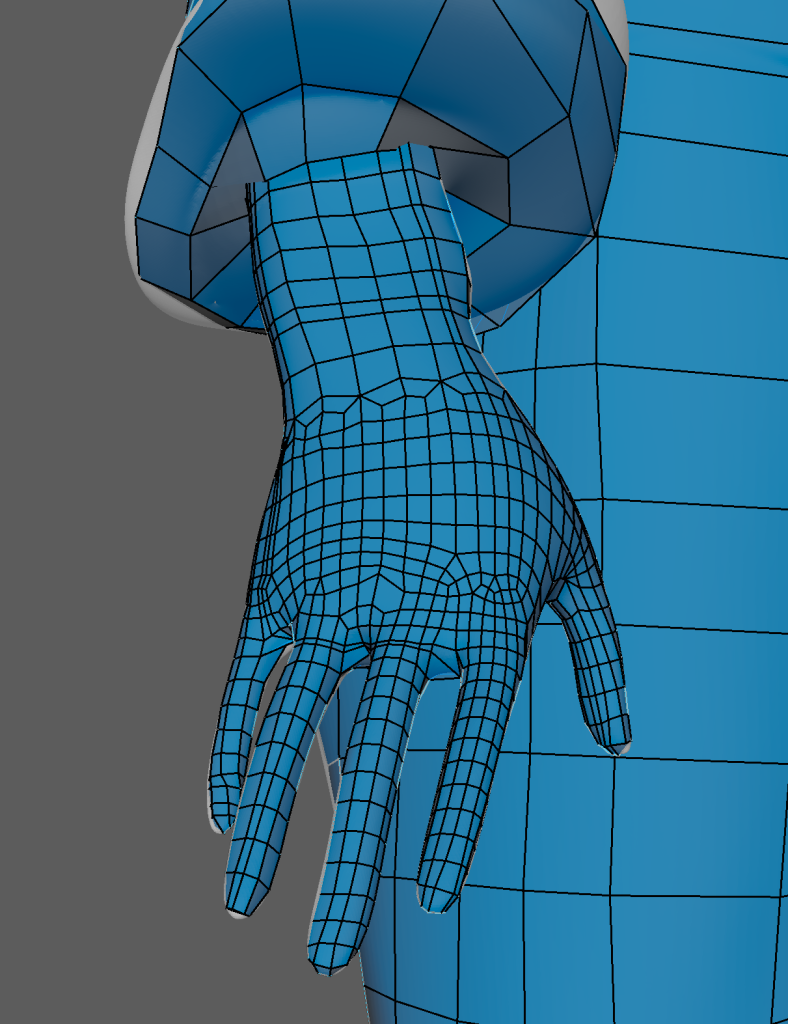
Hand Retapology
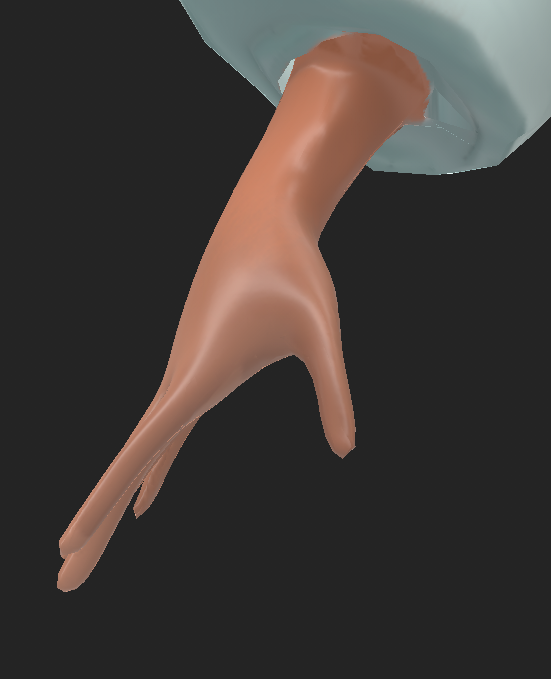
For the hands, since they will deform during animation and rigging – they had to be retapologised in a similar way to the face. I added quads in a certain pattern around the joints and fingers. This way – when they move, the texture and the mesh won’t deform. For the pattern, I had to work around the previous arm retapology I started making.
Reference used for the hand’s retapology.
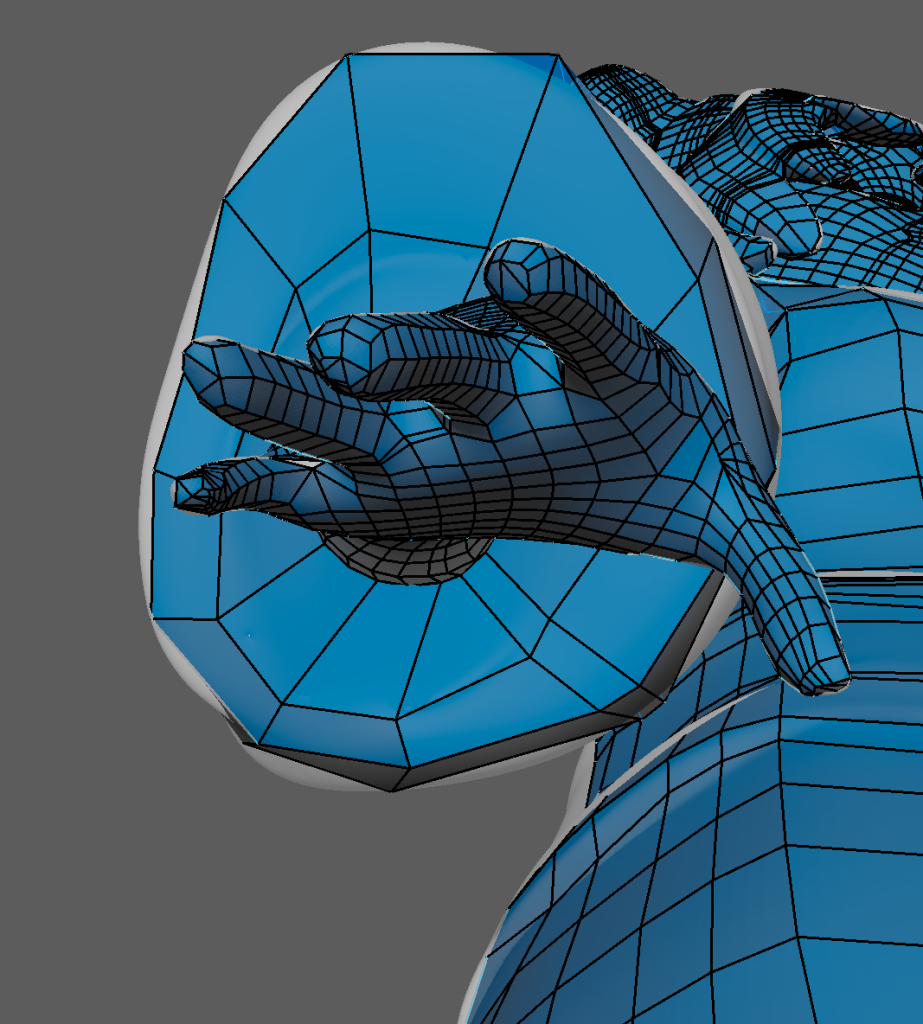
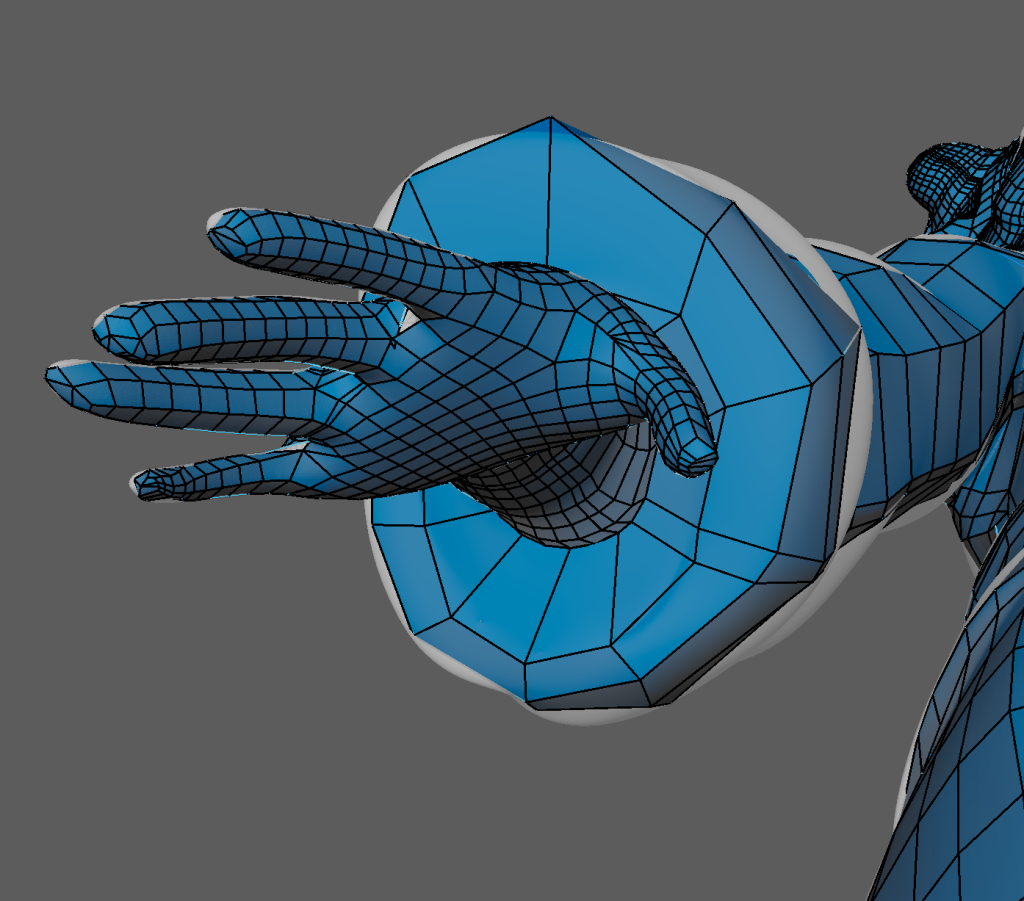
Retapology Showcase
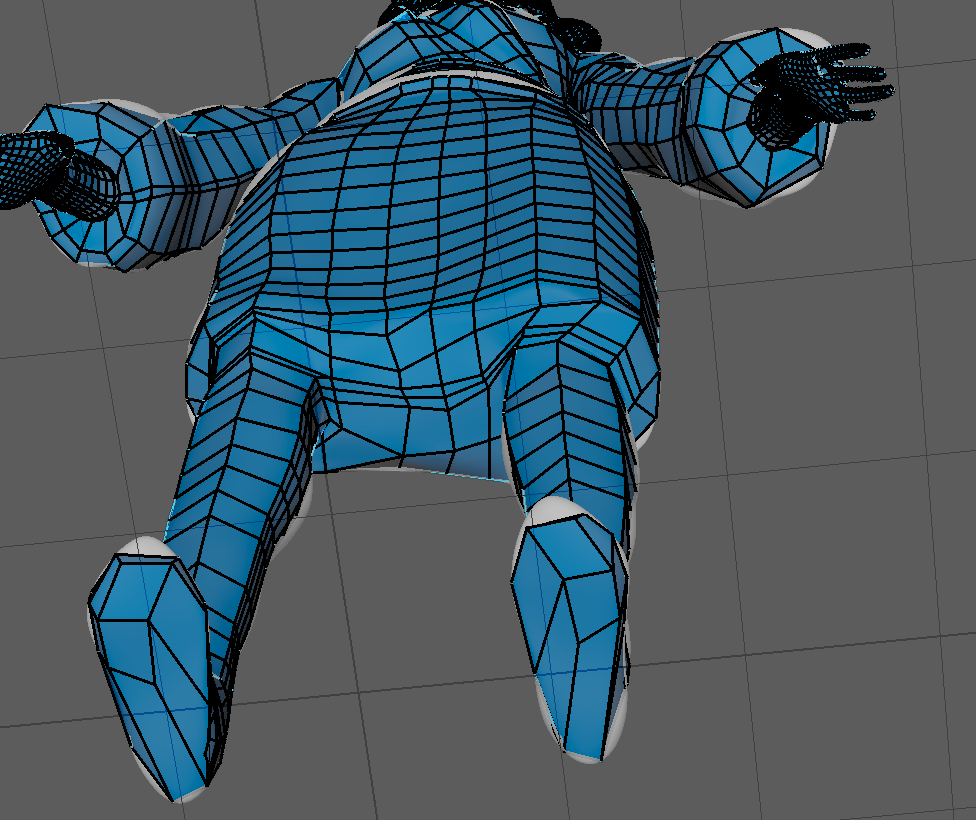
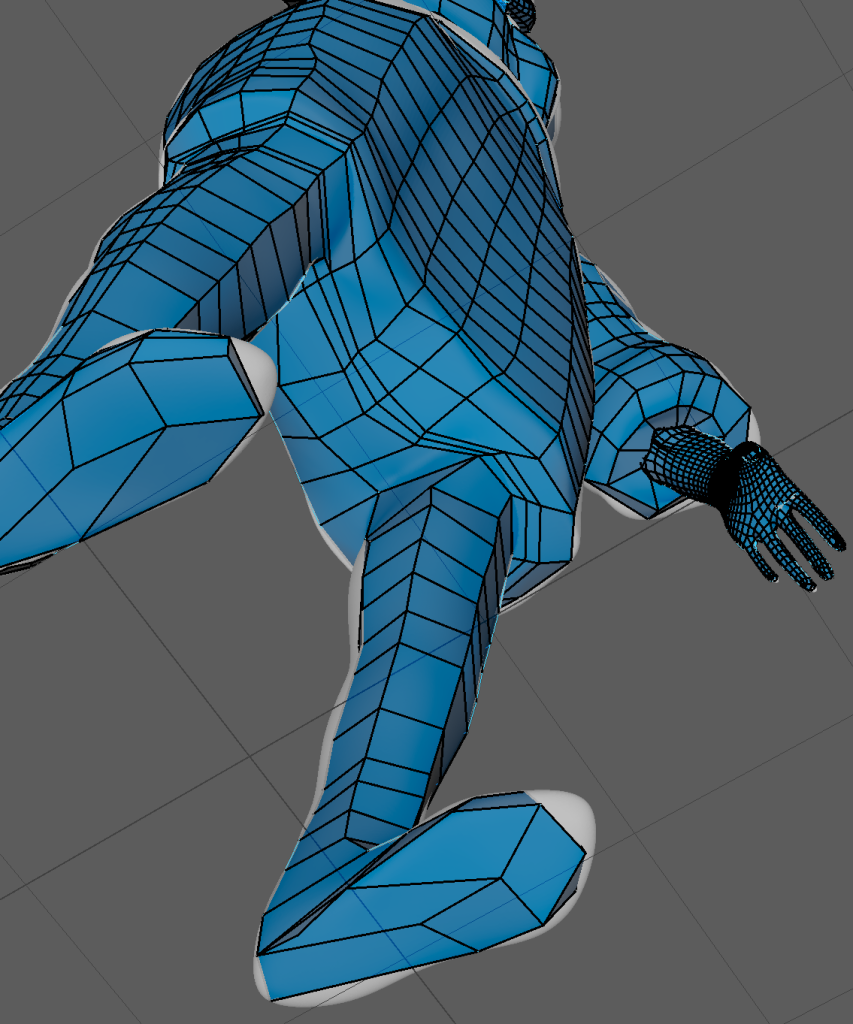
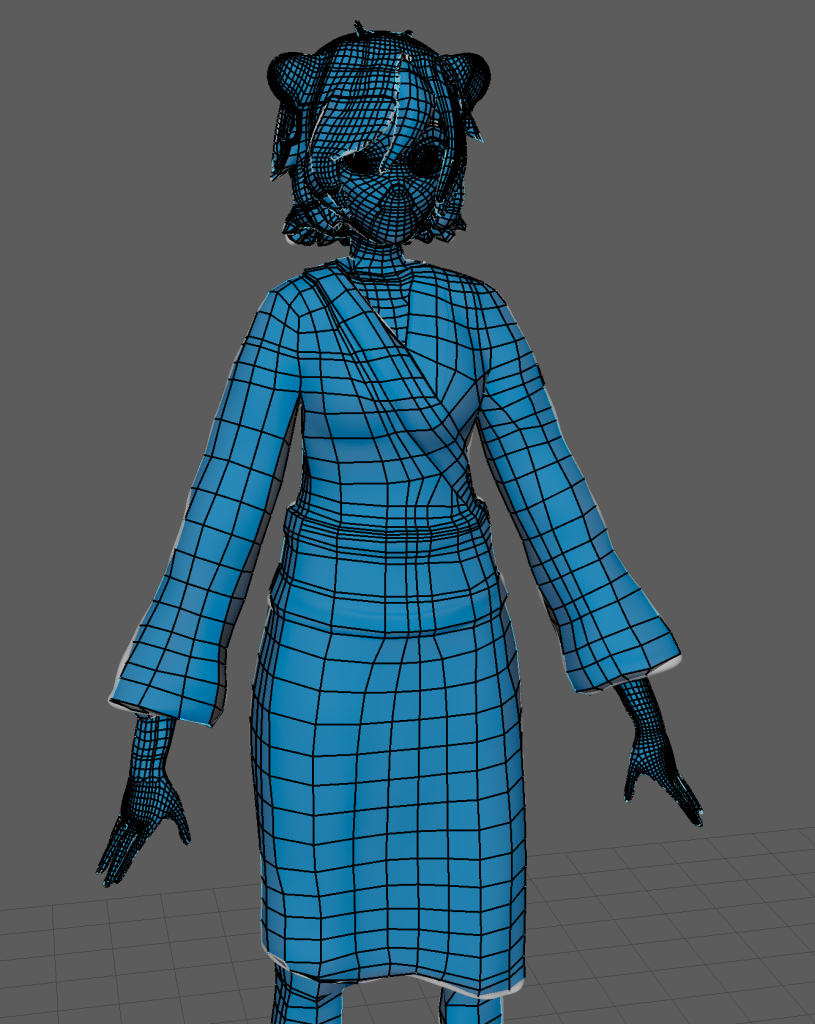
Finally, after the Retapology of the body was complete is a full showcase of the retapology. I cleaned up the model’s detatched quads and made sure that the retapology was relatively clean before UV unwrapping.
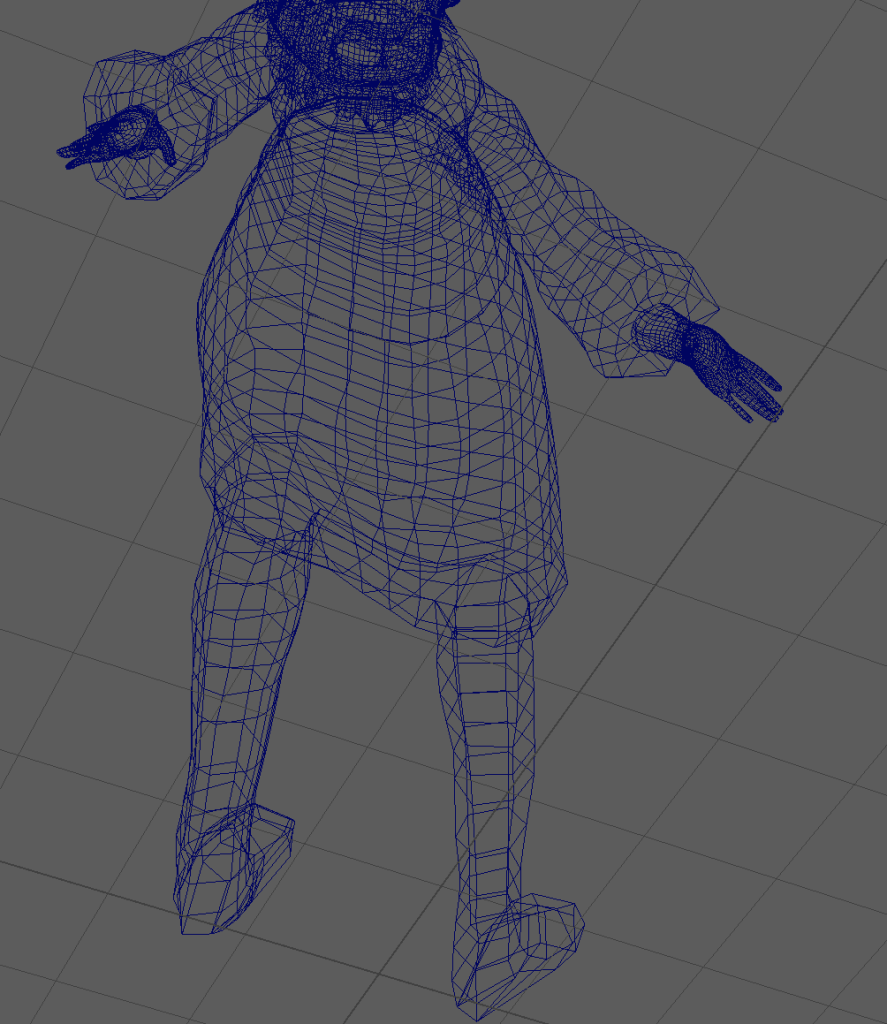
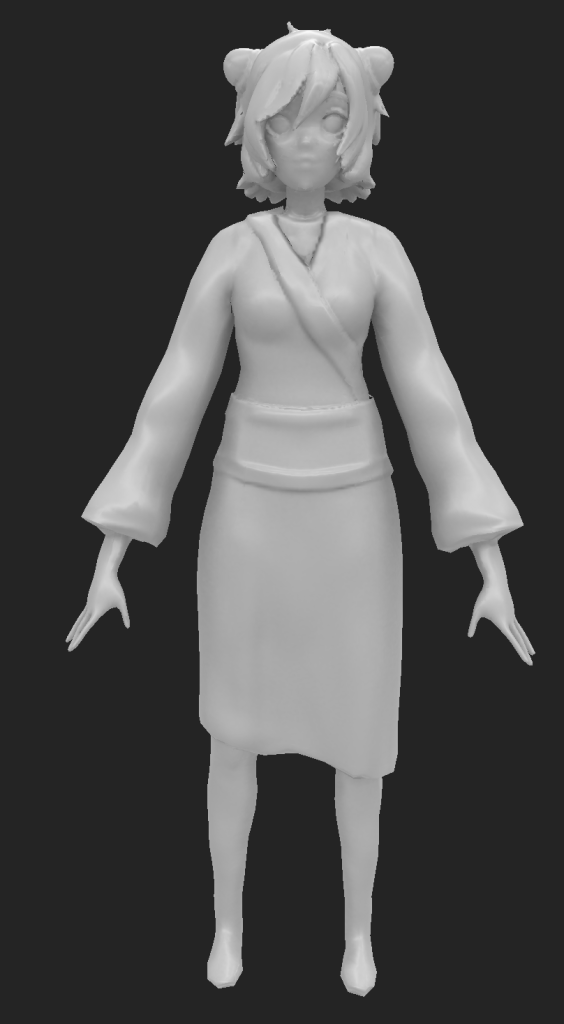
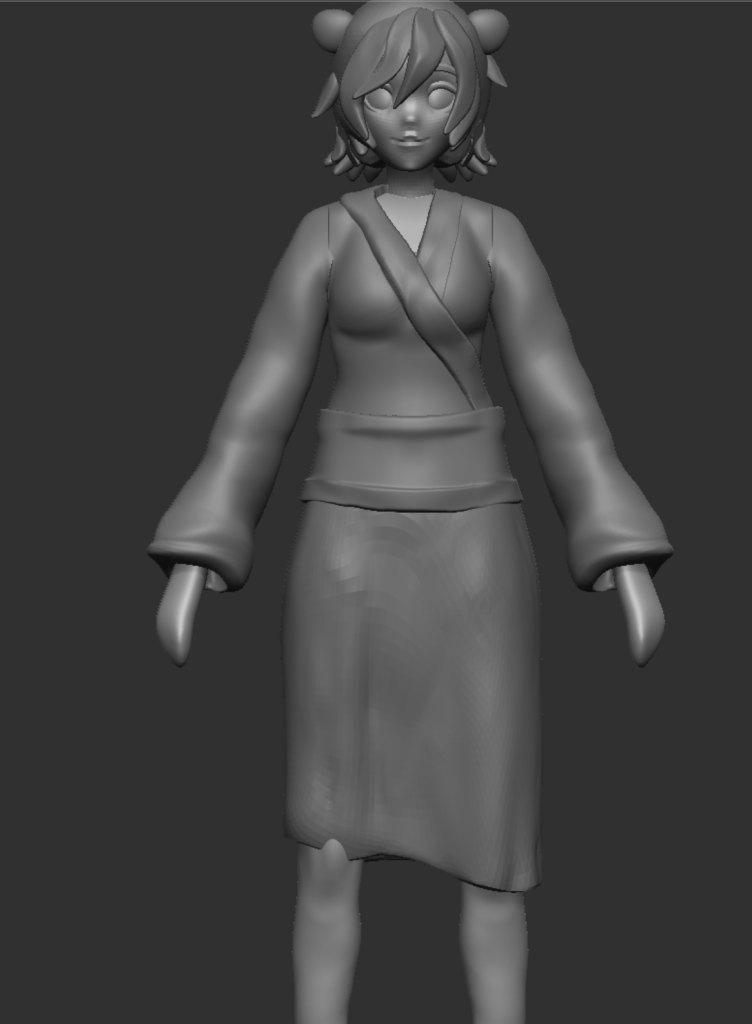
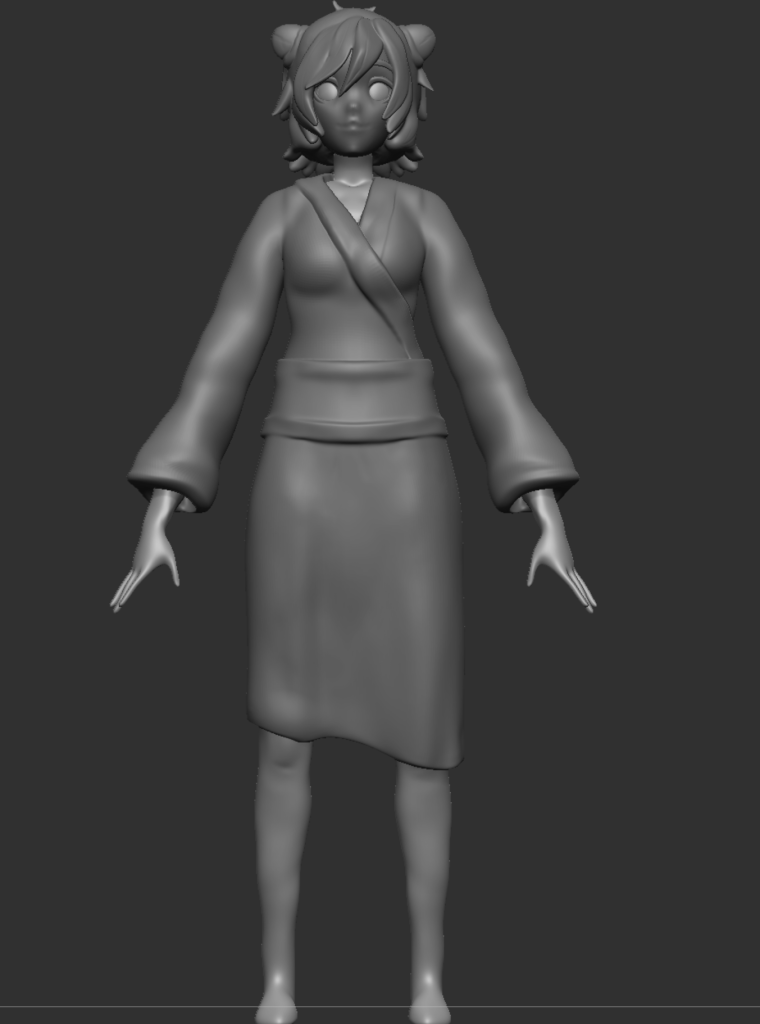
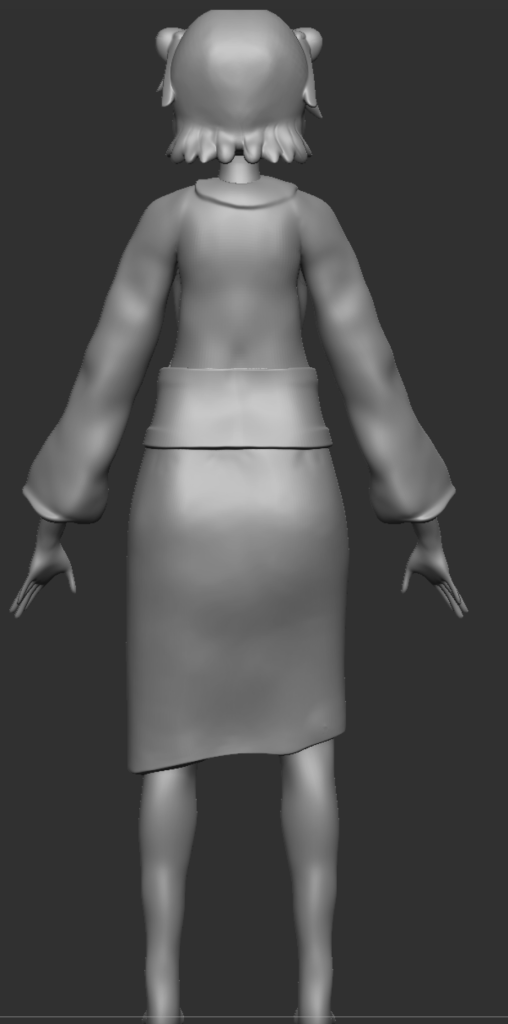
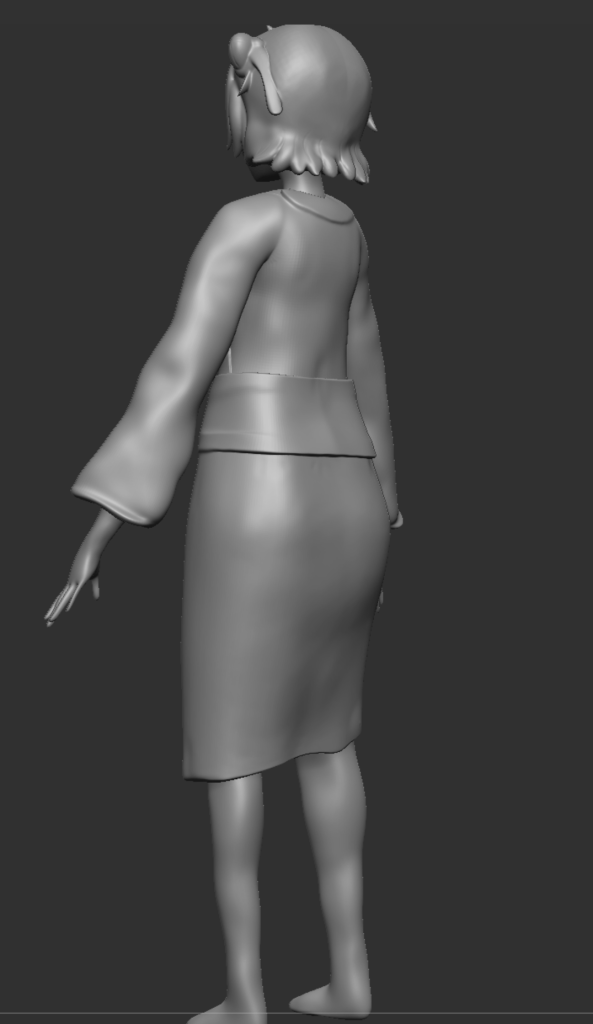
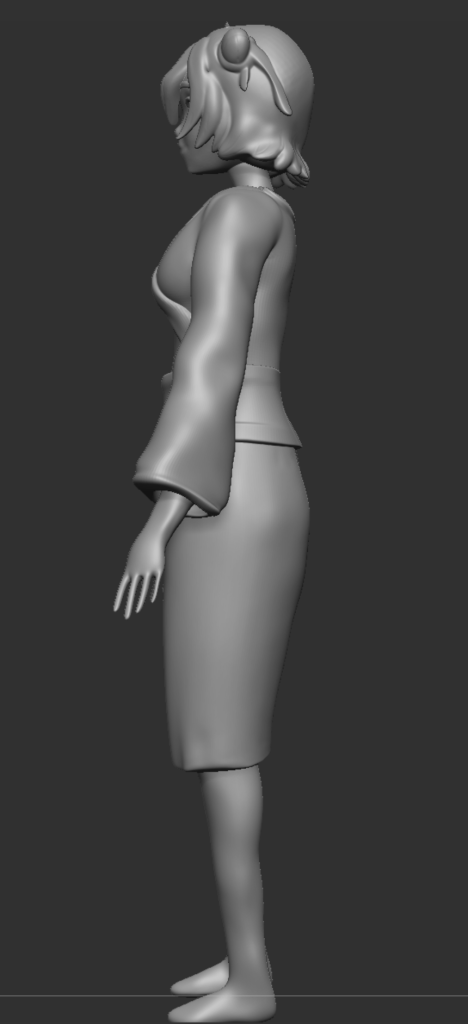
Retapologised version – Full Body
For comparison, here are the low poly and high poly versions of the model. This comparison, for the project, was especially helpful during baking.
Left: Low poly version of model – Right: High poly version of model
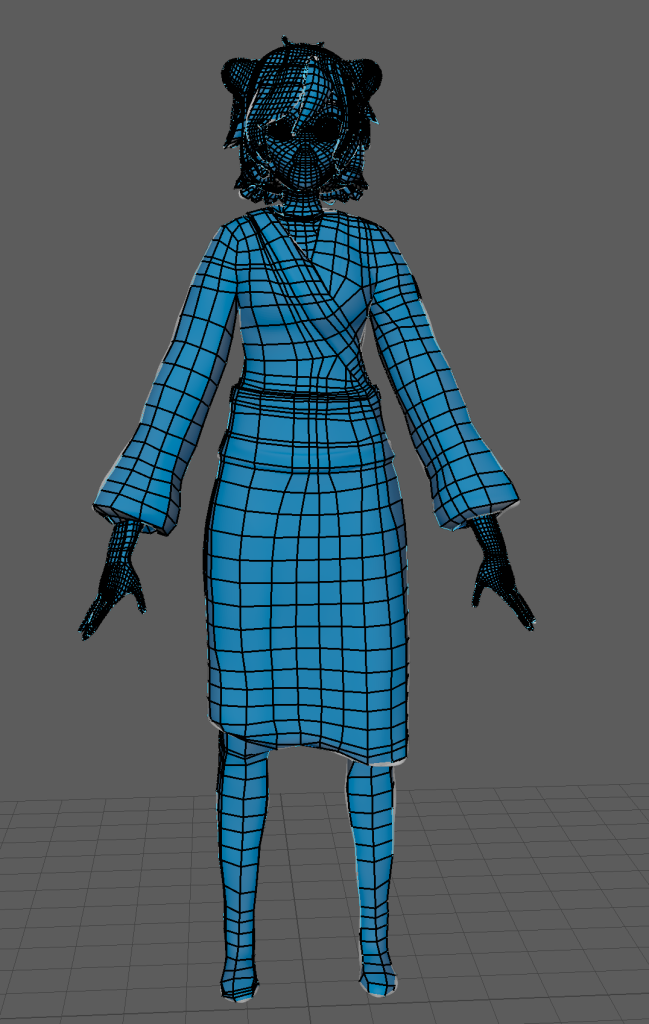
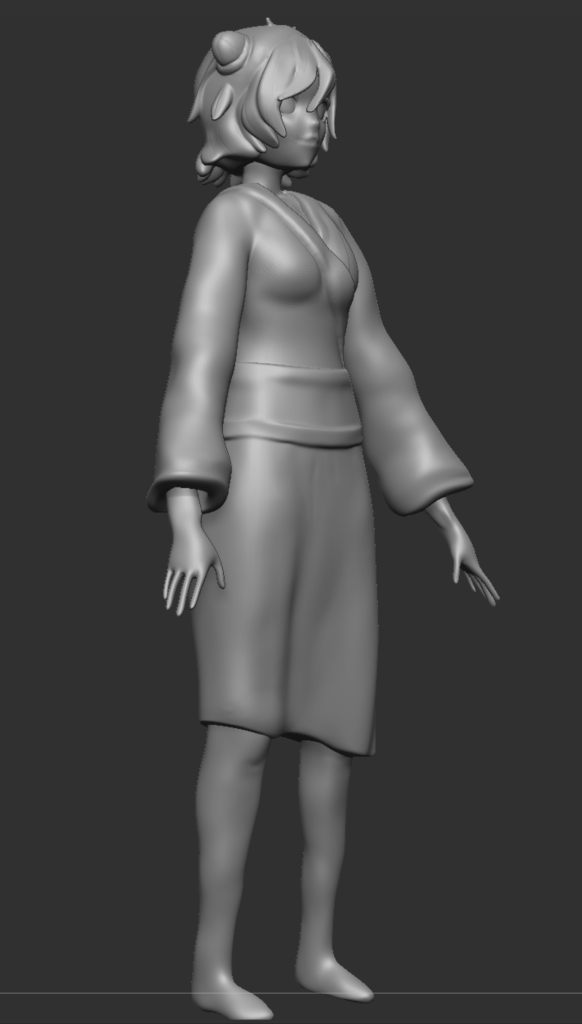
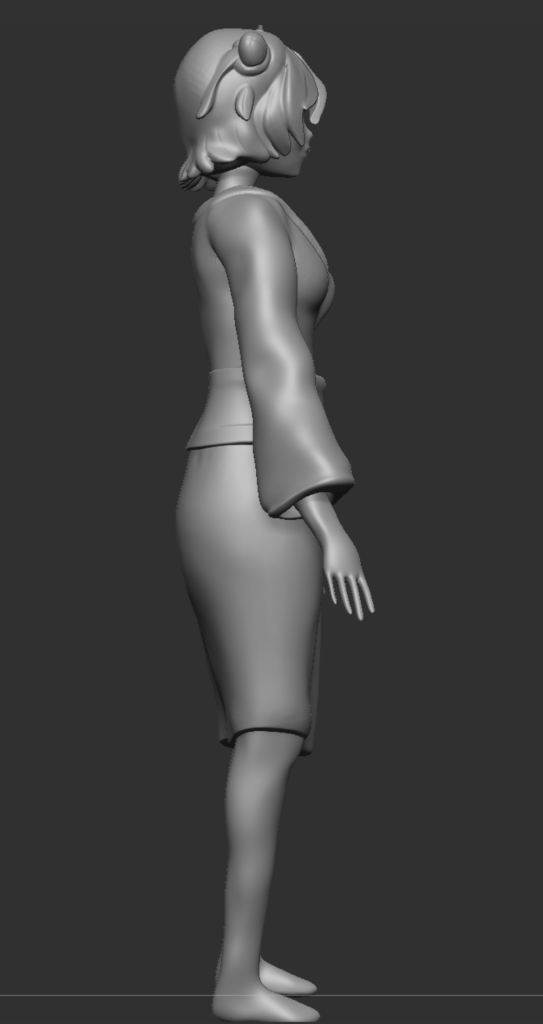
Orthagraphic view of Retapology
As shown, more faces were created in areas that have the most detail whereas the kimono still forms a basic shape.
Further improvements
Looking back in retrospective, overall, there could’ve been a lot of improvements that would’ve made the retapology a lot more cleaner. For instance, as mentioned prior, there were a lot of unnecessary edge loops created in the retapology. This was due to quads not being properly connected or the quads producing a spiral rather than an edgeloop. Retapology has been a steep learning curve and in the future, I would like to redo certain parts of the retapology (such as the Obi) and create a cleaner mesh to work with as this would’ve helped with UV unwrapping.
UV Unwrapping
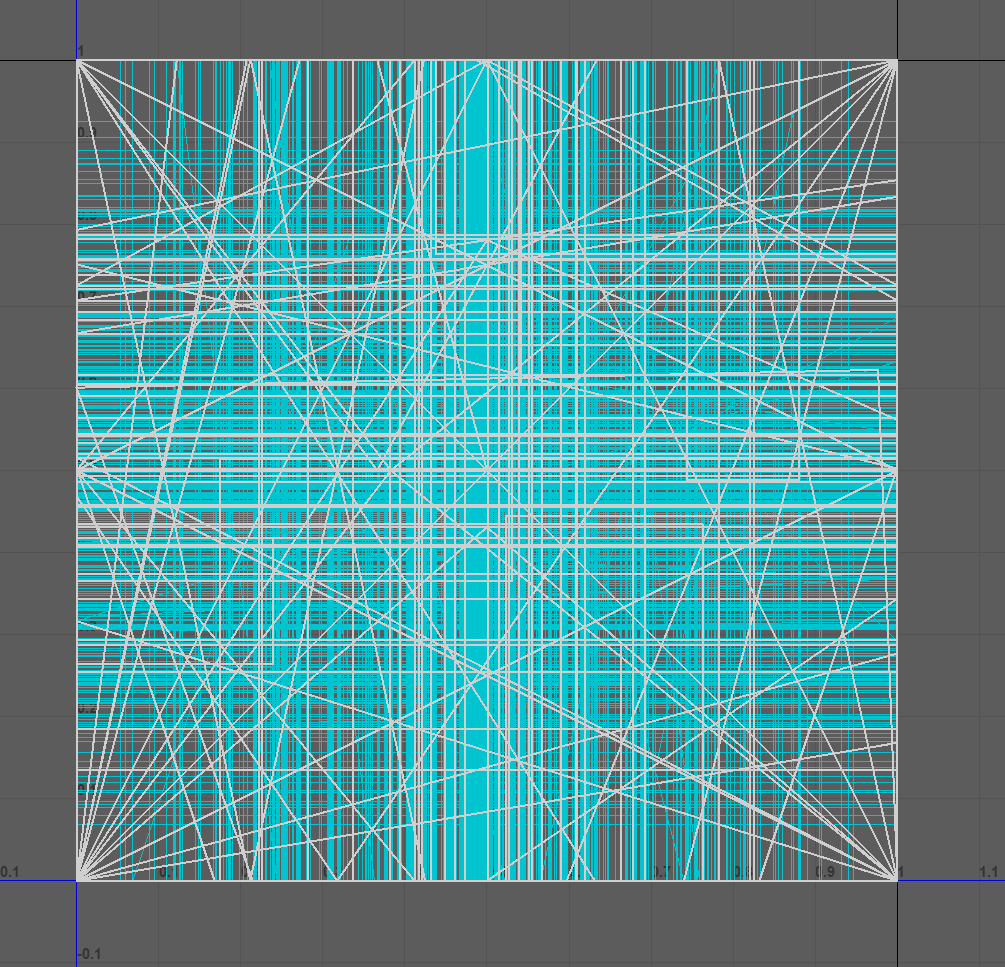
This was my weakest aspect of the project as the UV unwrapping as after finishing the retpology, I created the low poly’s UV maps using the automatic unwrapping tool. This seperated the mesh into seperate pieces. However, some of those pieces were hard to identify without texturing them. These pieces included areas of the face or hair which demonstrates the flaws of the retapology I made.
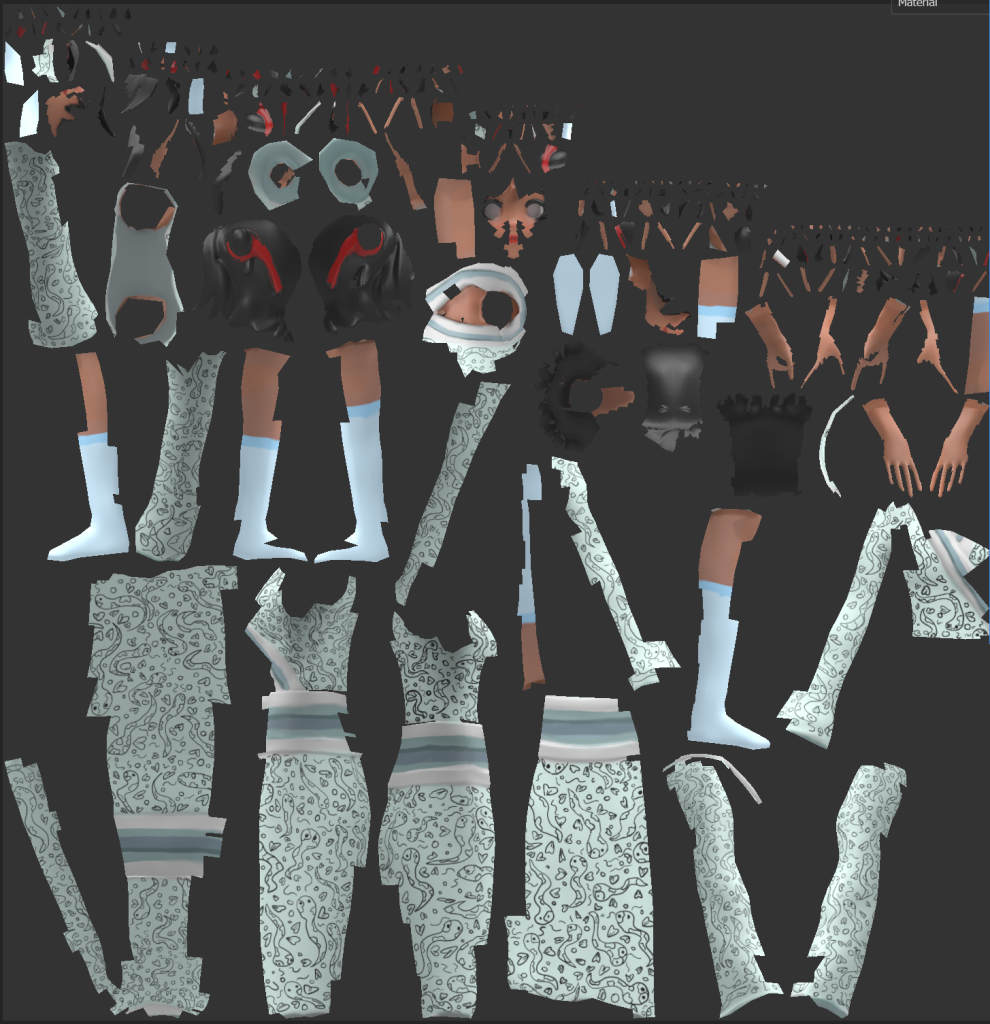
UV before the automatic unwrapUV after automatic unwrap – imported from Substance Painter
However, whilst it is not ideal to automatically unwrap the model – it was still neat and simple – This also helped me come to the realisation that the retapology needed more work. Despite this, the UV for the low poly model still came out relatively uniformed and organised and it allowed me to texture the model in an easy manner.
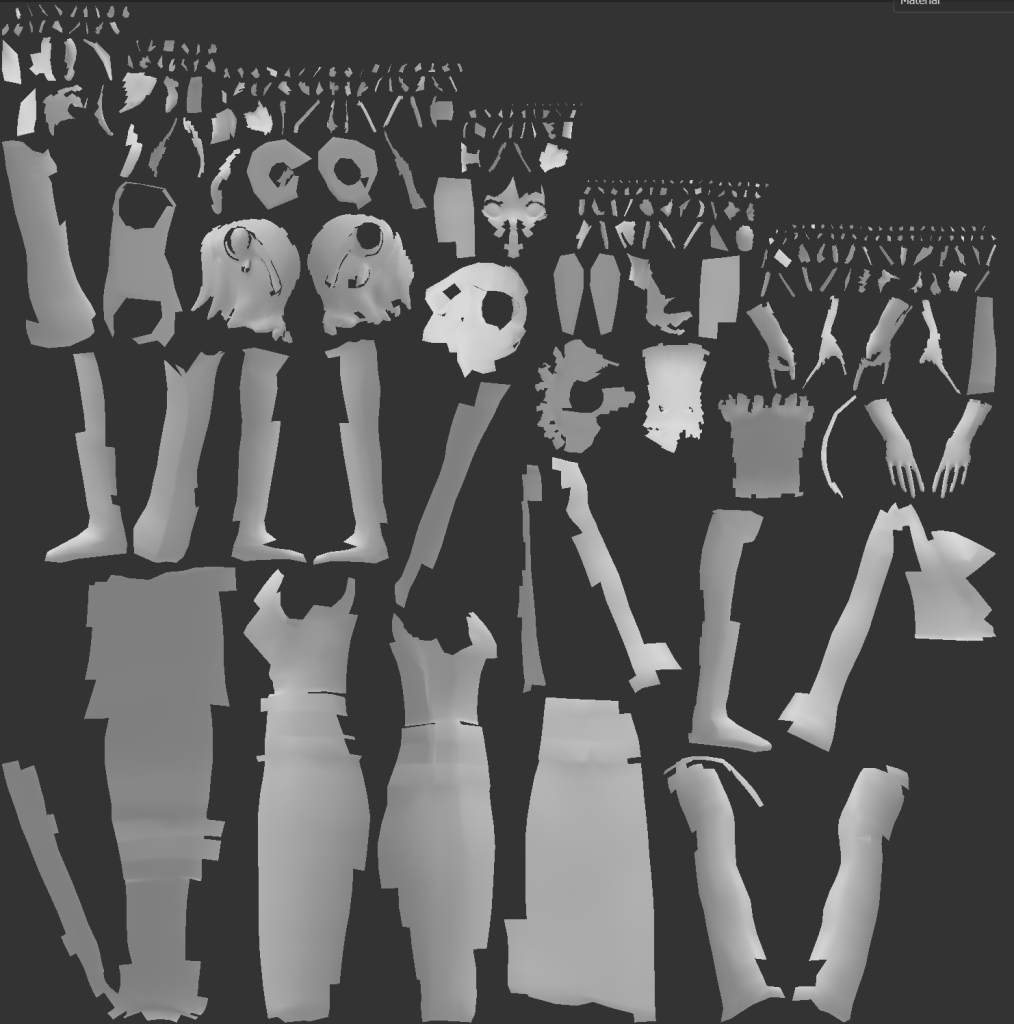
Textured version of the UV maps.
Baking
After importing the low poly version of Maki into substance painter, in order to bring back the details lost from the retapology – I baked the details onto the low poly using my high poly model. Whilst the bake came out relatively decent – there were were some issues when it came to the face (This was possibly due to the retapology). These were resolved by texturing the model.
Nevertheless, lots of the details came back into the model which helped began the texturing process.
Before baking (Low poly model) – After baking (High poly model baked onto low poly)
Texturing
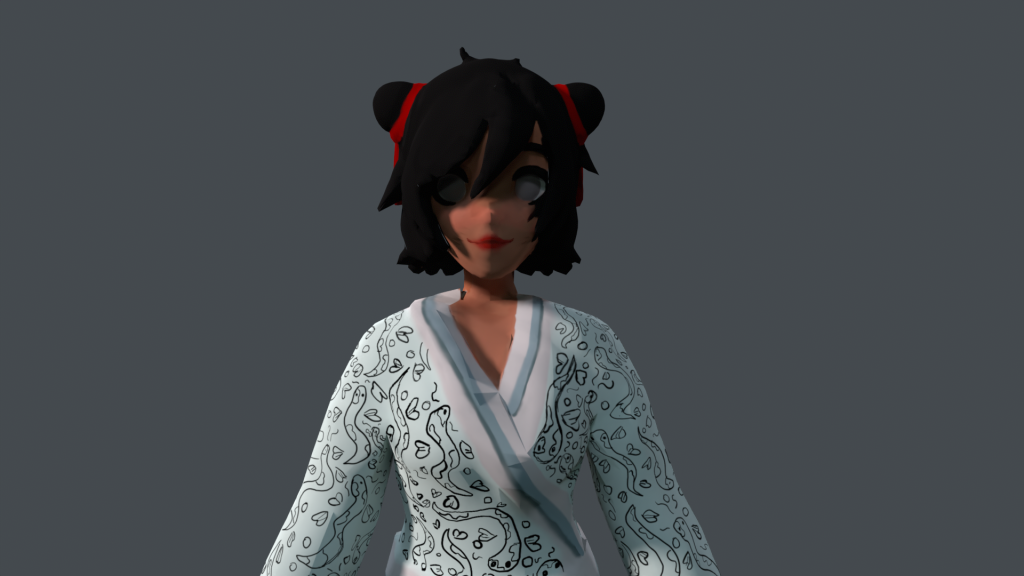
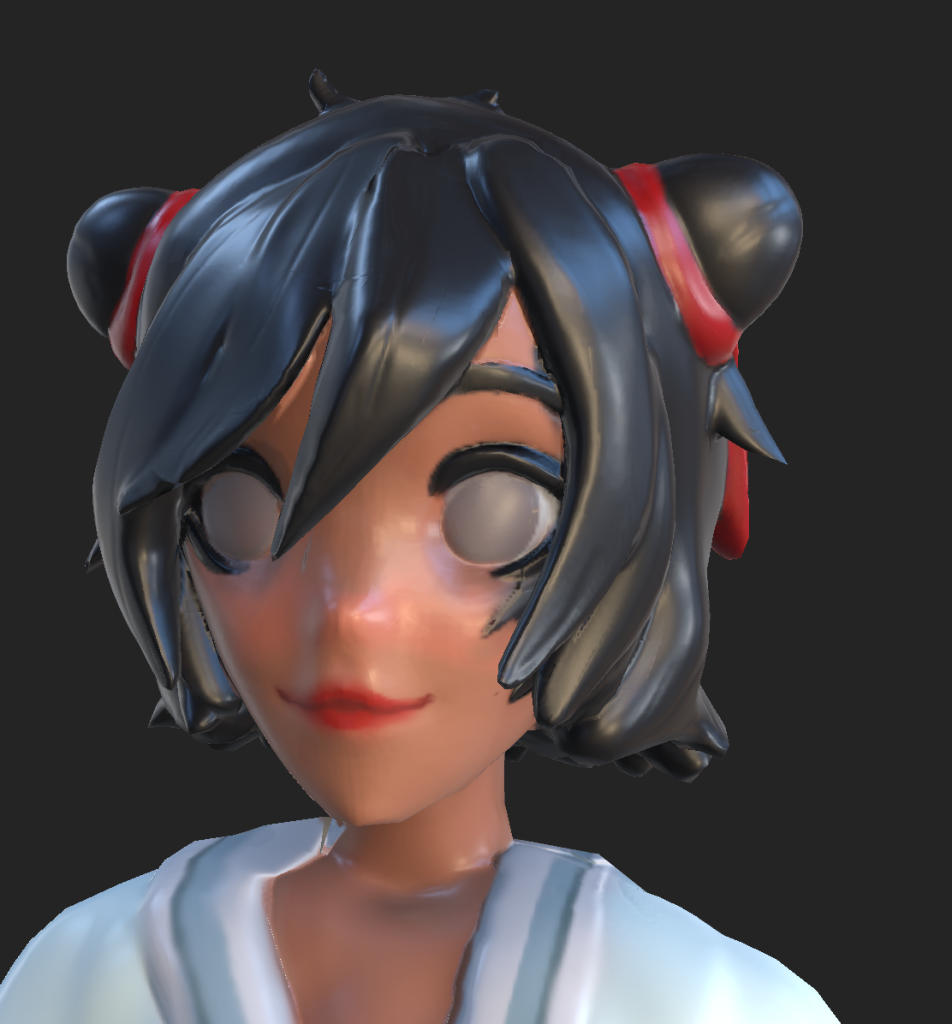
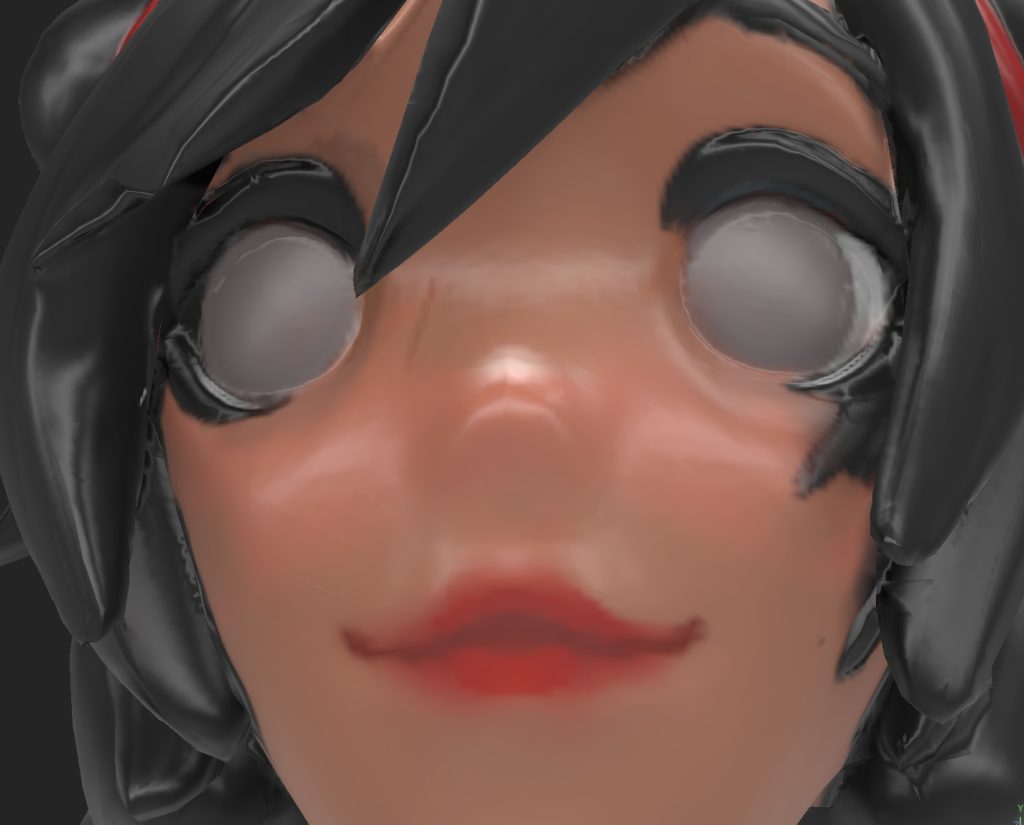
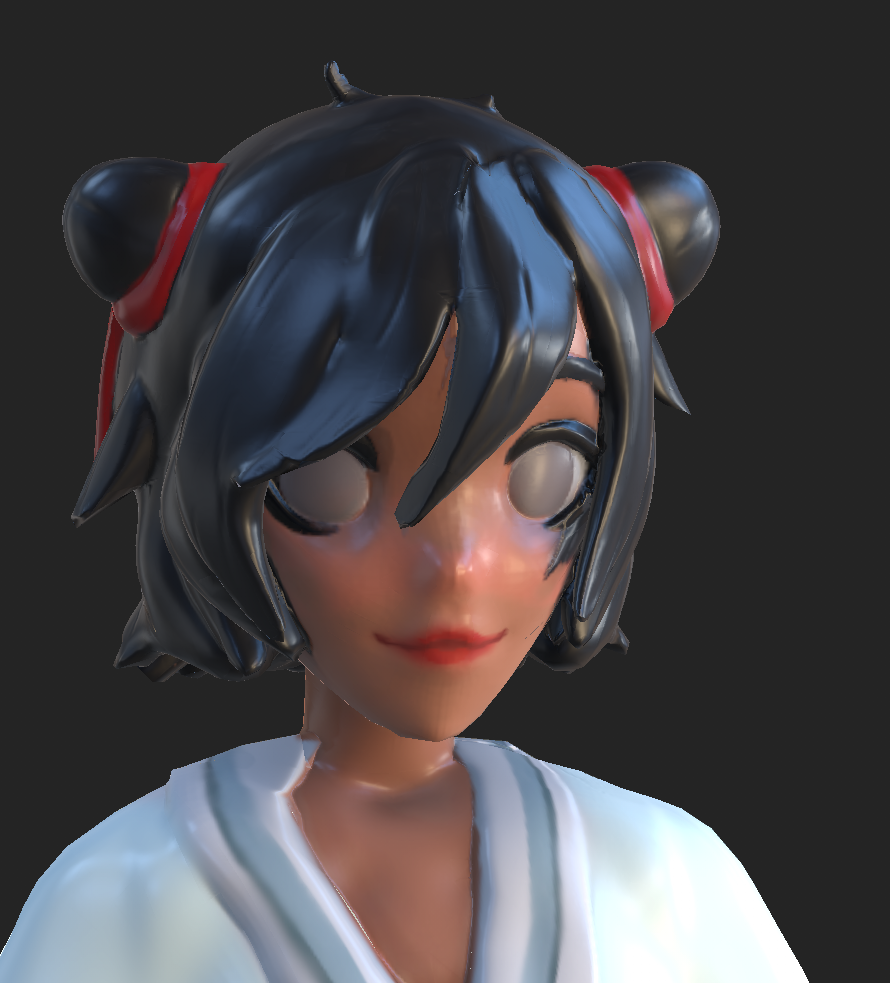
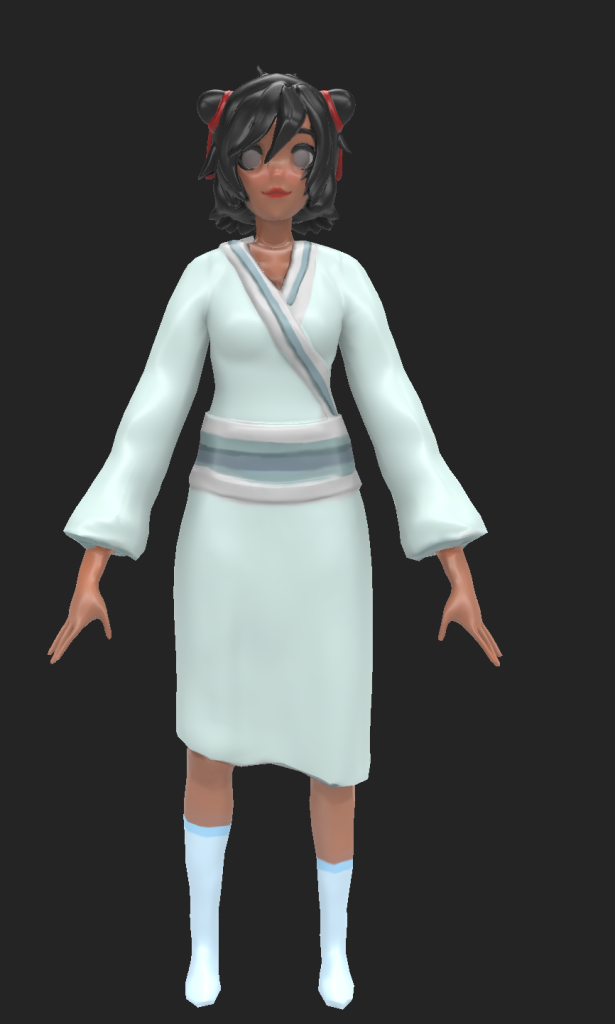
Looking back on the baking issues for the face – texturing the model helped alleviate the errors. When it came to working on Maki’s face – I experimented with different colours for her skin in order to add depth to her looks.
This was done by adding textured dark rings under eyes and adding a faint blush to her cheeks and nose. The contrast between the blush, the tired, faded look and the red lipstick, whilst textured on still exemplifies Maki’s sense of life, even if it’s not in a physical sense. The bright red motif is shown around the model – Red tends to signify danger but in Maki’s case – the red draws connotations to love and beauty.
With Maki’s eyes – as mentioned before, the idea was to go for a more glassy look in order for the player to visually understand that she’s blind.
Her hair, whilst textured in a stylised fashion, the colours give shade and movement to the hair especially when shown in a soft lighting. The details of the high poly model emphasises that simple wave and direction to the hair strands. This was also the case for the ribbons as they flowed neatly to the back of Maki’s head.
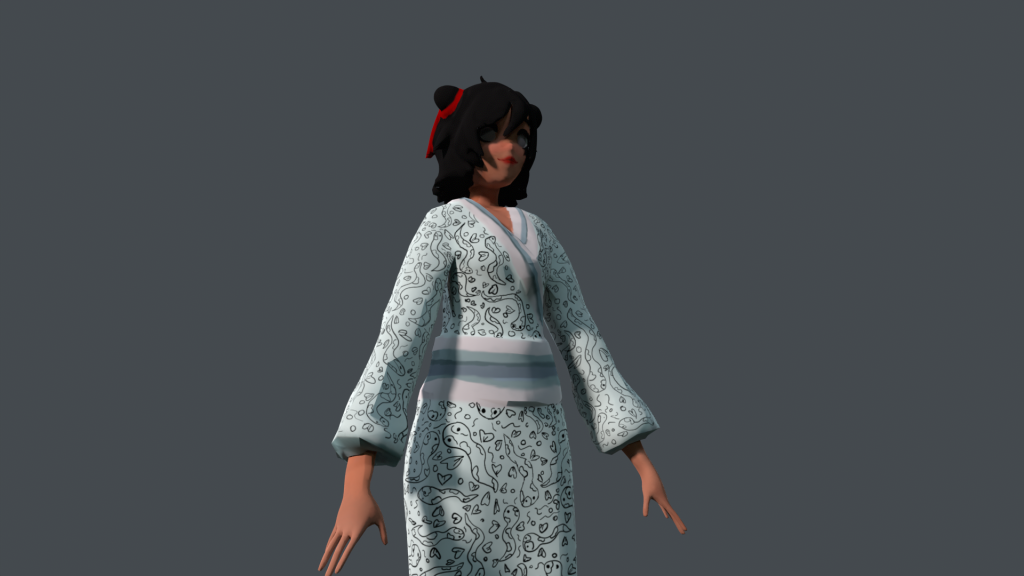
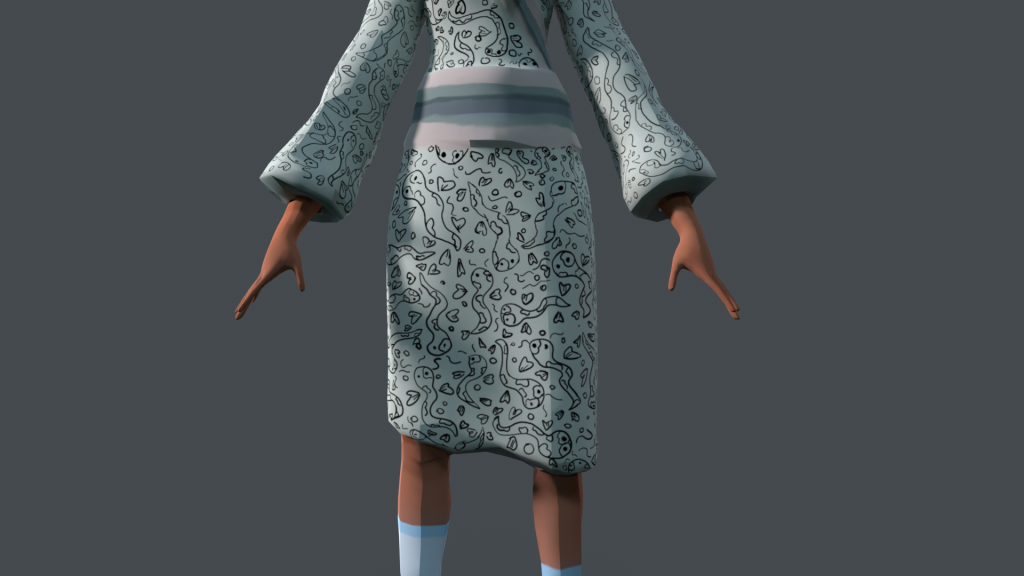
Kimono and Body texturing
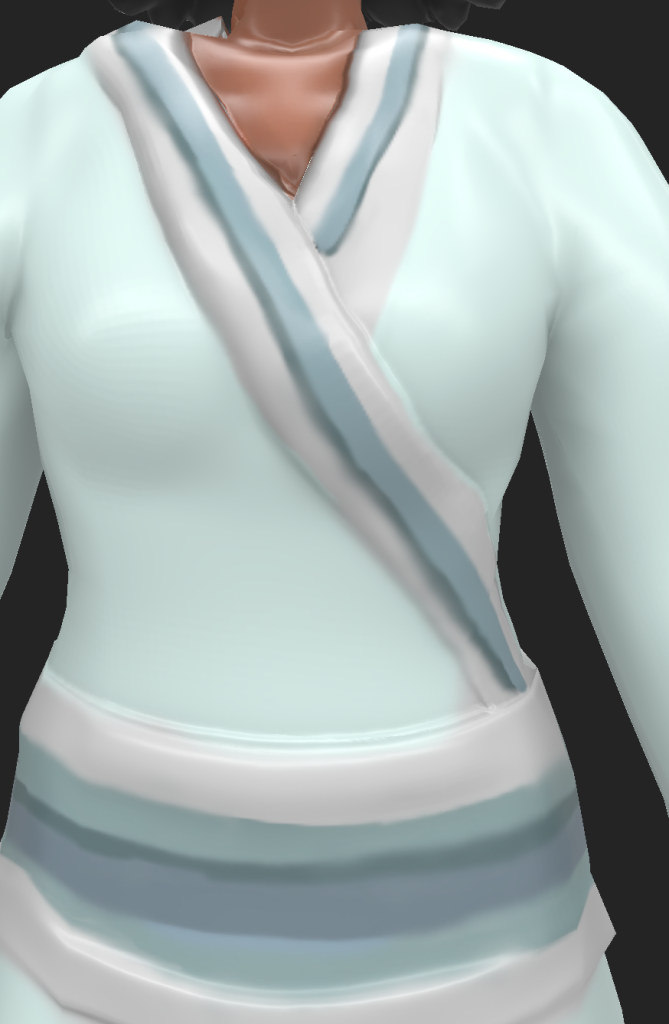
When making the kimono, originally I tried to experiment with block colours in hopes that shaders and different lighting would help make the cloth and the wrappings stand out. However, the lighting could only reflect certain parts of the shading, mainly in areas that have been modeled.
So to counteract this issue, I textured in some light shading to the model in order to make the wraps and fabrics stand out further. And for the insides of the arm sleeves and legs, it was to create the illusion that Maki’s hands are covered by the shadows. This also helped make the textures feel less flat and eye catching by creating two colour contrasts in the fabric. I also applied this technique to the hands and legs, giving them different shades of colours to help them pop out in the renders.
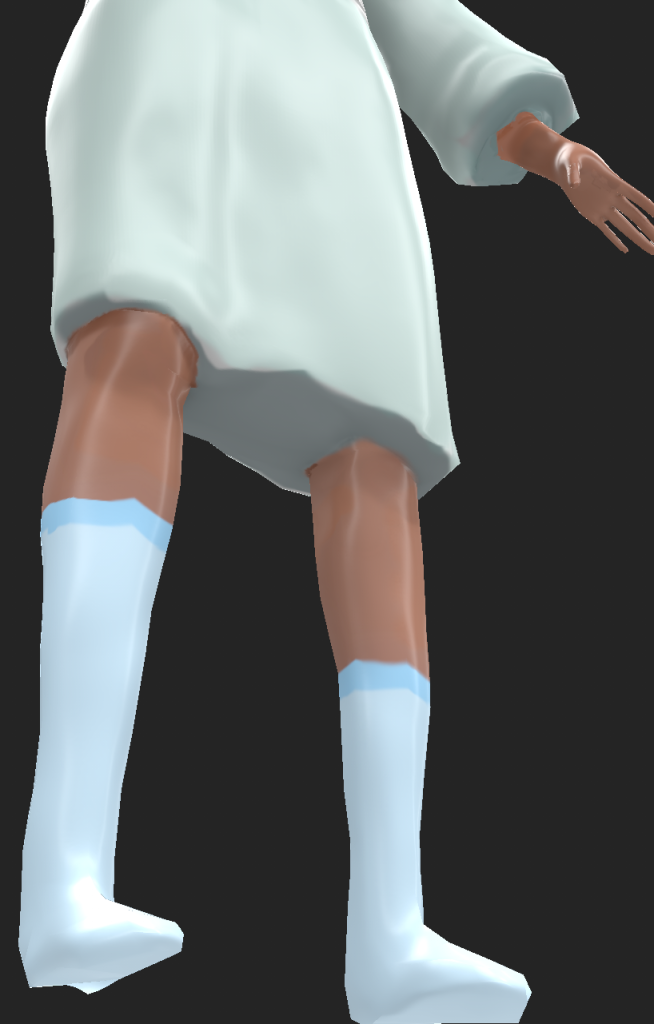
Finally, with the socks, these were simple textures that were added on – for these, I struggled to add shading to them instead prompting to add a more vibrant colours to the bands of the socks. The socks are also uneven which helps visually convey her messy nature.
Texturing the Kimono Fabric
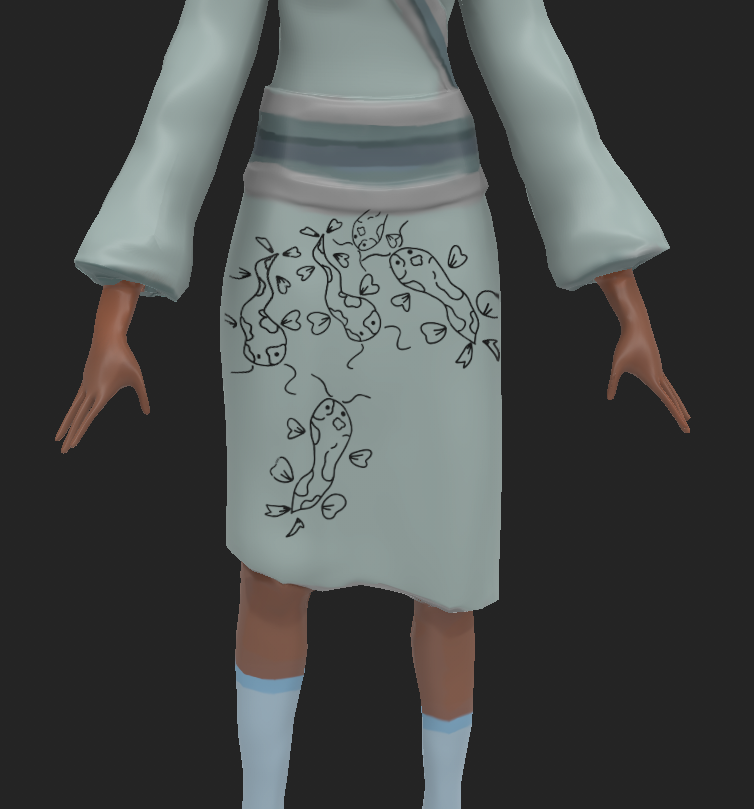
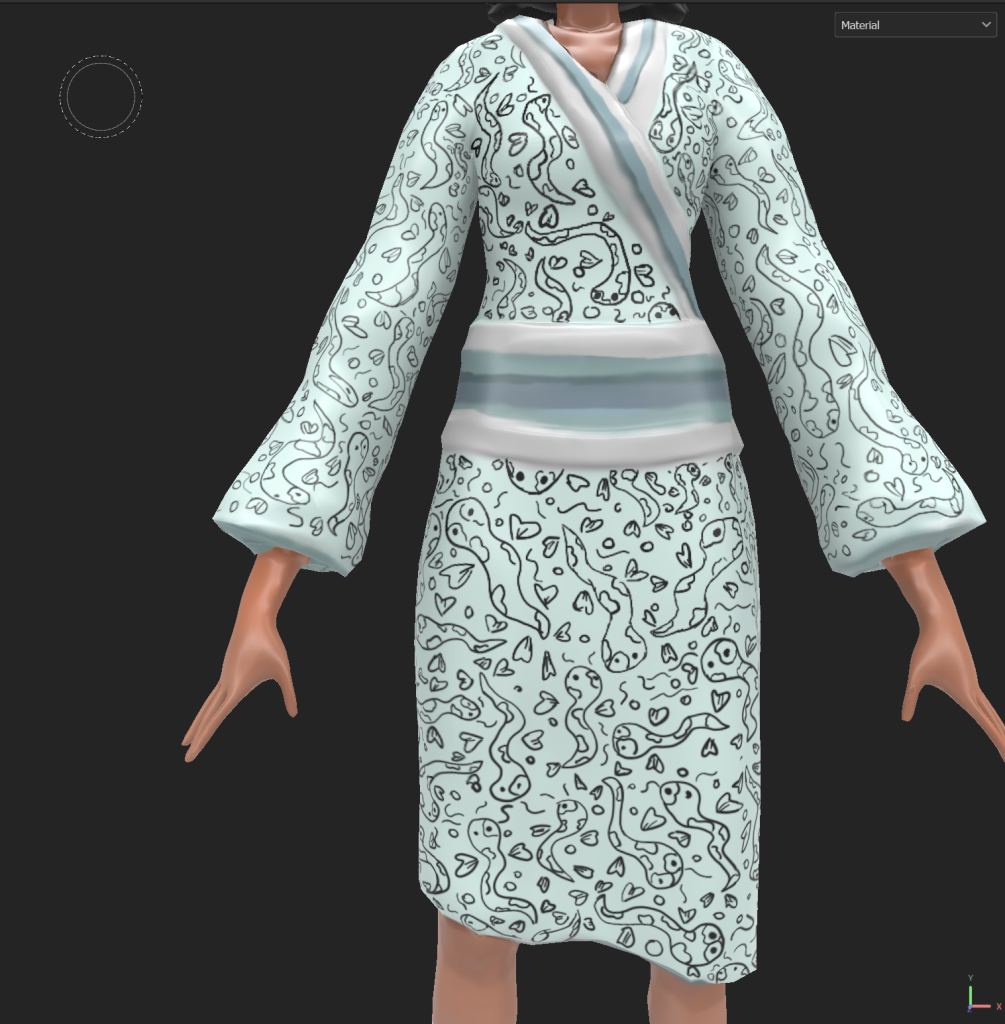
The final step to this project was to add the textures onto the Kimono. Originally, I tried to use a stencil by creating the design in photoshop and importing it into substance painter. The original design featured two Koi fish as shown here:
Initially this idea was to originally make sure that the kimono pattern stayed consistent. However, this method turned out to become incredibly tedious and time consuming as the stencils were suited for a more singular pattern or decal than a fabric pattern. The stencil method also make the Koi seem restrictive and it was difficult to create Koi in various sizes using this technique.
So instead, the pattern was painted on with the Koi moving around the fabric.
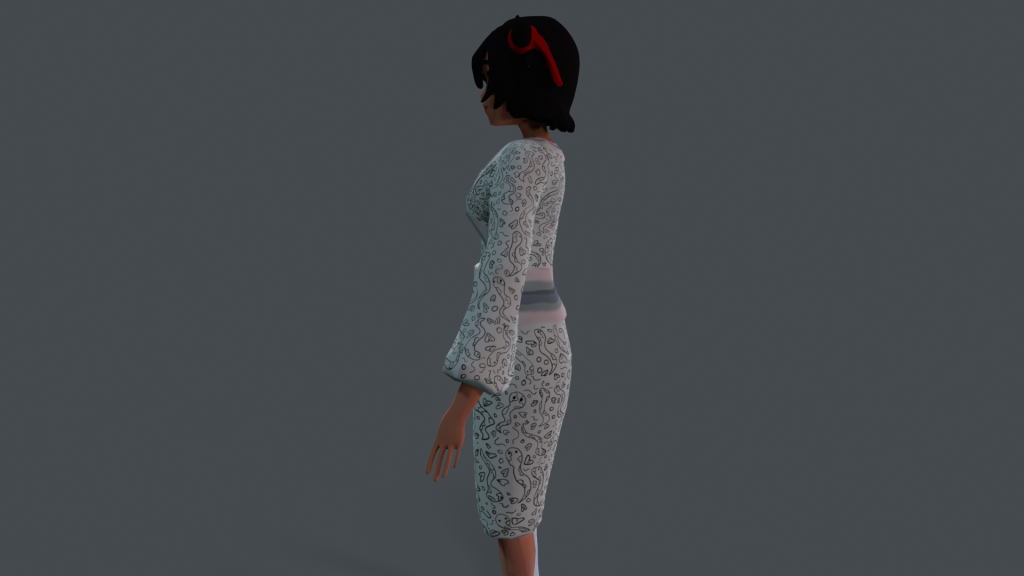
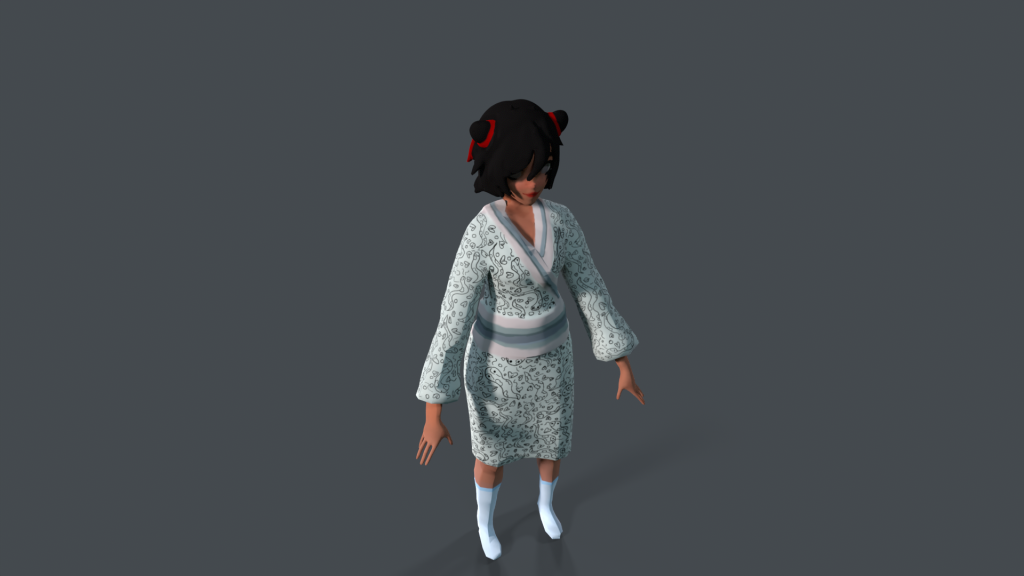
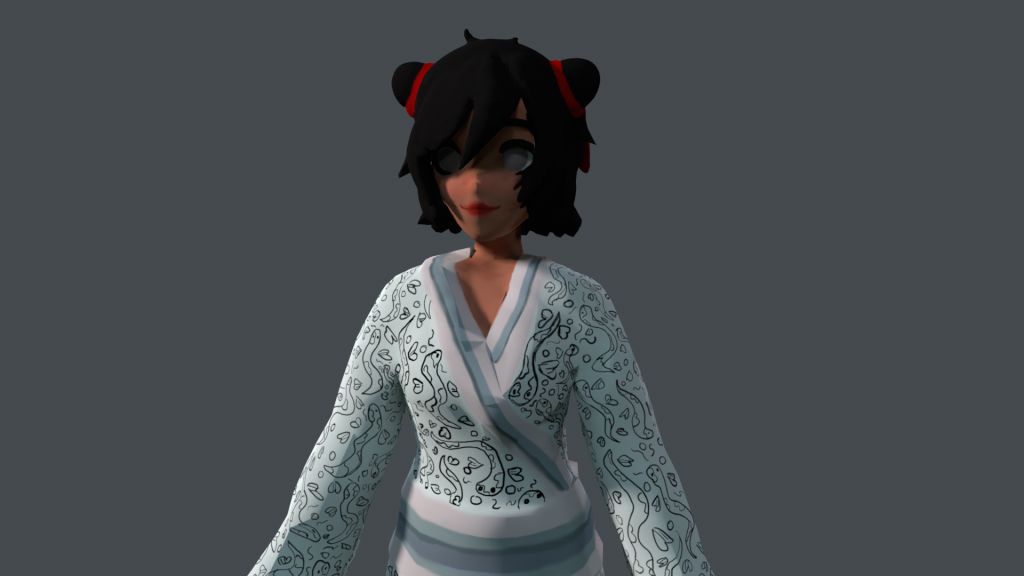
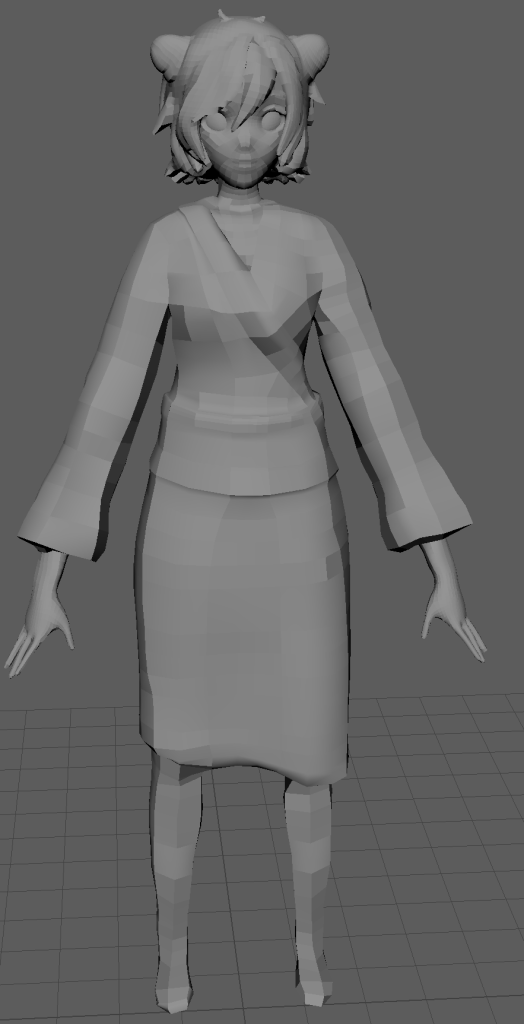
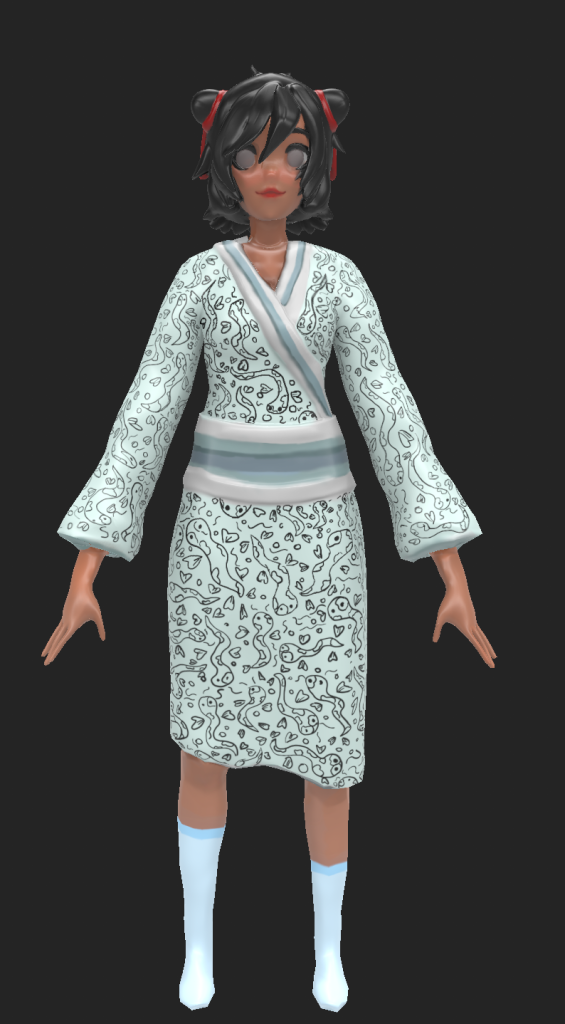
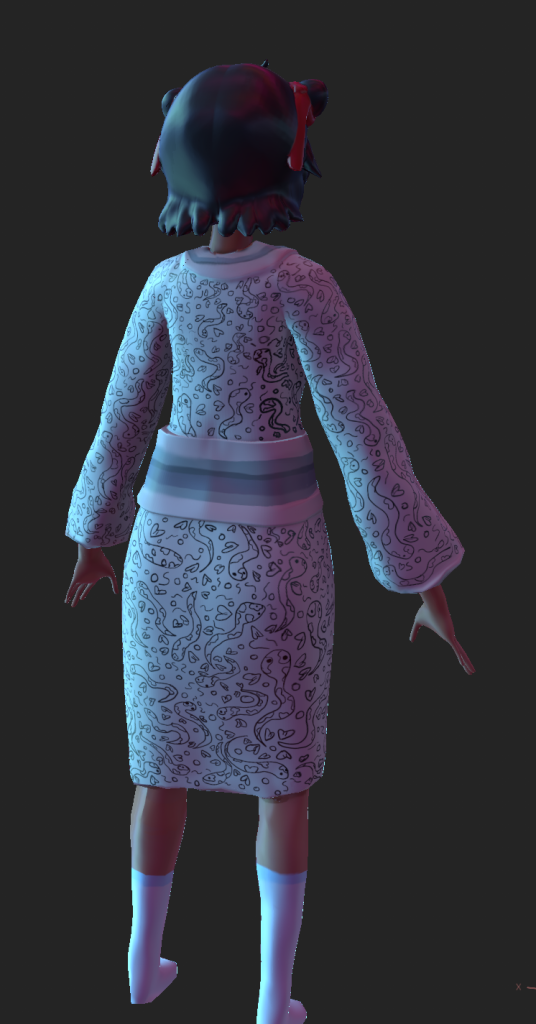
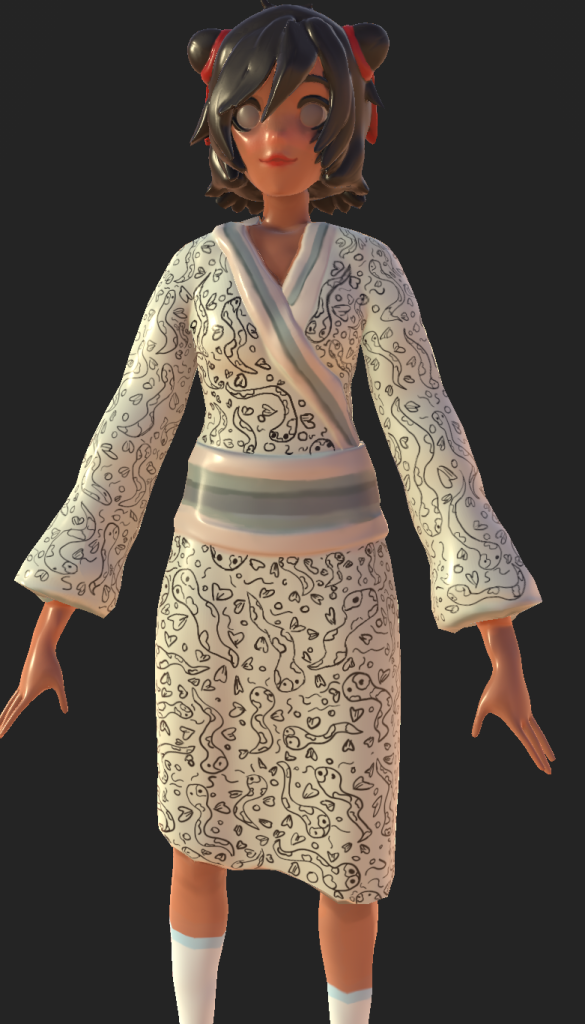
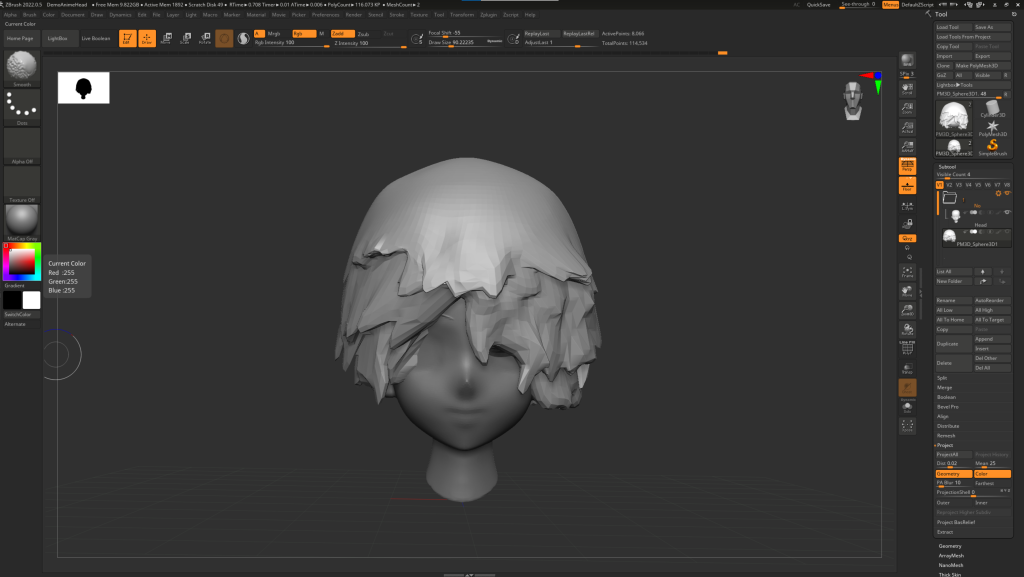
Finalised Maki model with normal lighting in Substance Painter.
This meant that the texture flowed better, adding vibrant movement to the texture and it makes the model stand out as an unique character. It also visually adds to her character by showing the care to try and keep the cloth maintained despite her siblings violent plans. It adds a level of innocence to the group despite her terrifying nature.
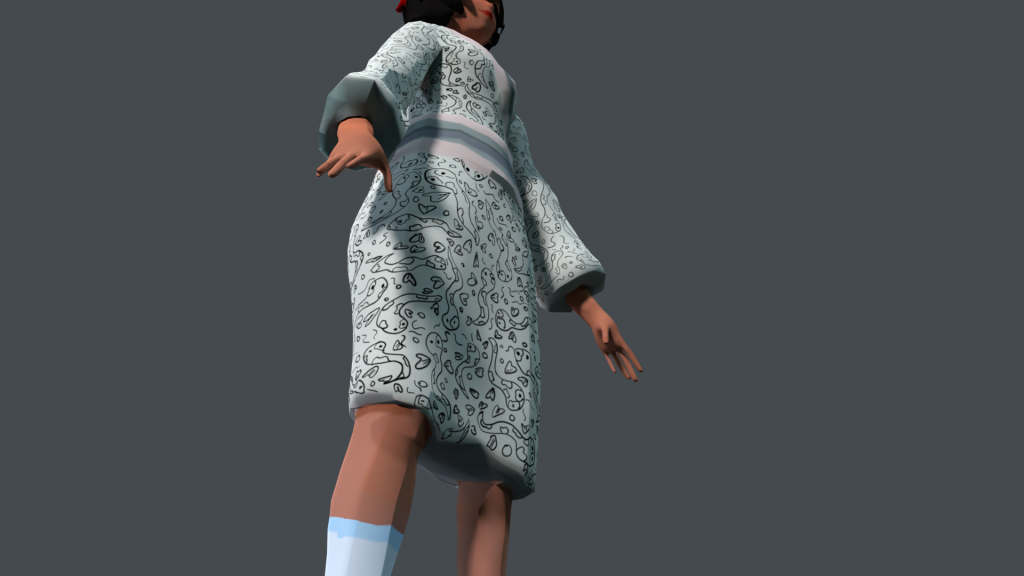
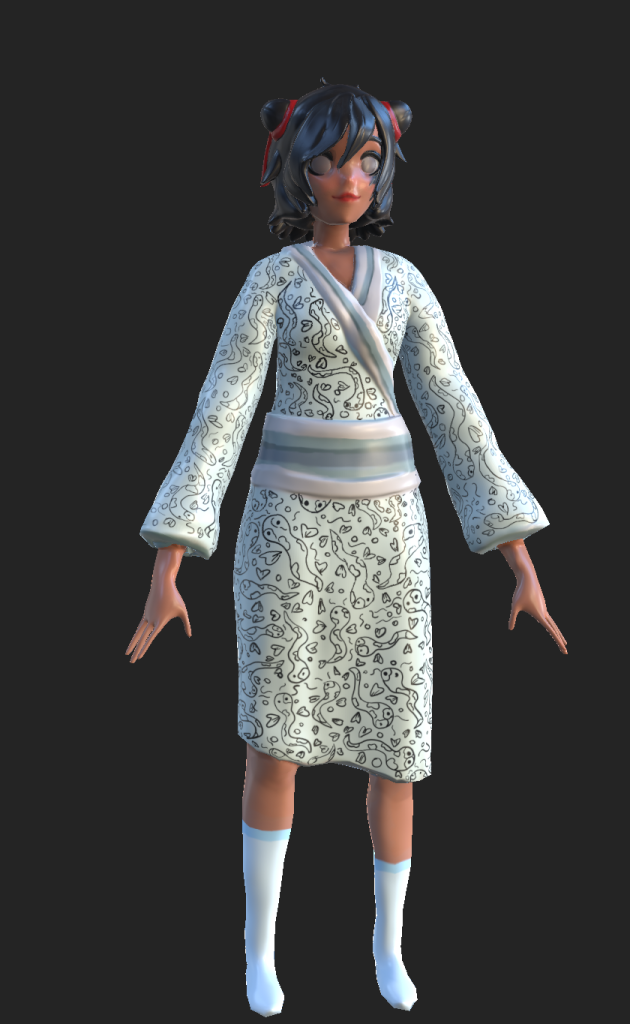
Final shots in Substance Painter
These are the final shots made in substance painter before exporting to Marmoset. This helped to see if there needed to be any final changes added to the shading or to help identify any texturing issues or colour mishaps.
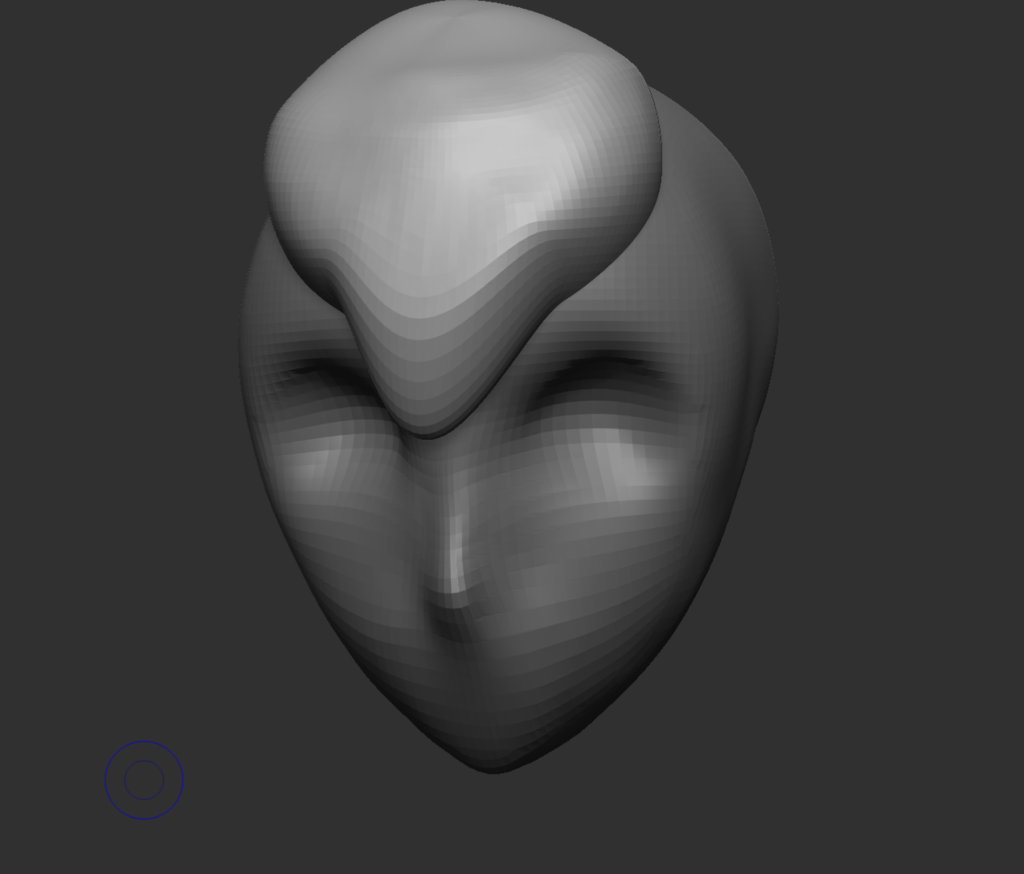
Before using ZBrush, I started off with experimenting some of the brushes to morph and sculpt meshes, in this example and as my first attempts, I started off by trying to mold the hair with only one sphere. It came out with a very gelatinous effect
As someone who’s never used Zbrush before, I decided to begin the project by experimenting different brushes in order to create the skull. Since the model was going to be stylised, I referenced Zbrush’s default anime head template in order to understand the dimensions for the head and it’s facial features. I started off with a sphere and used the move, clay build up and the smooth brushes in order to get a basic shape of the head and a general idea of the facial features.
Once again, I tried to model the hair but then I shifted focus onto the facial features.
This took several attempts to try out and eventually, as I was falling behind the schedule I decided to settle with a rough but general idea of the skull and started working on the body until I could figure out how to implement details to the face and the eyes. However, because I wasn’t satisfied with the facial features, I scrapped the face and only kept a simple head shape until later in the project.
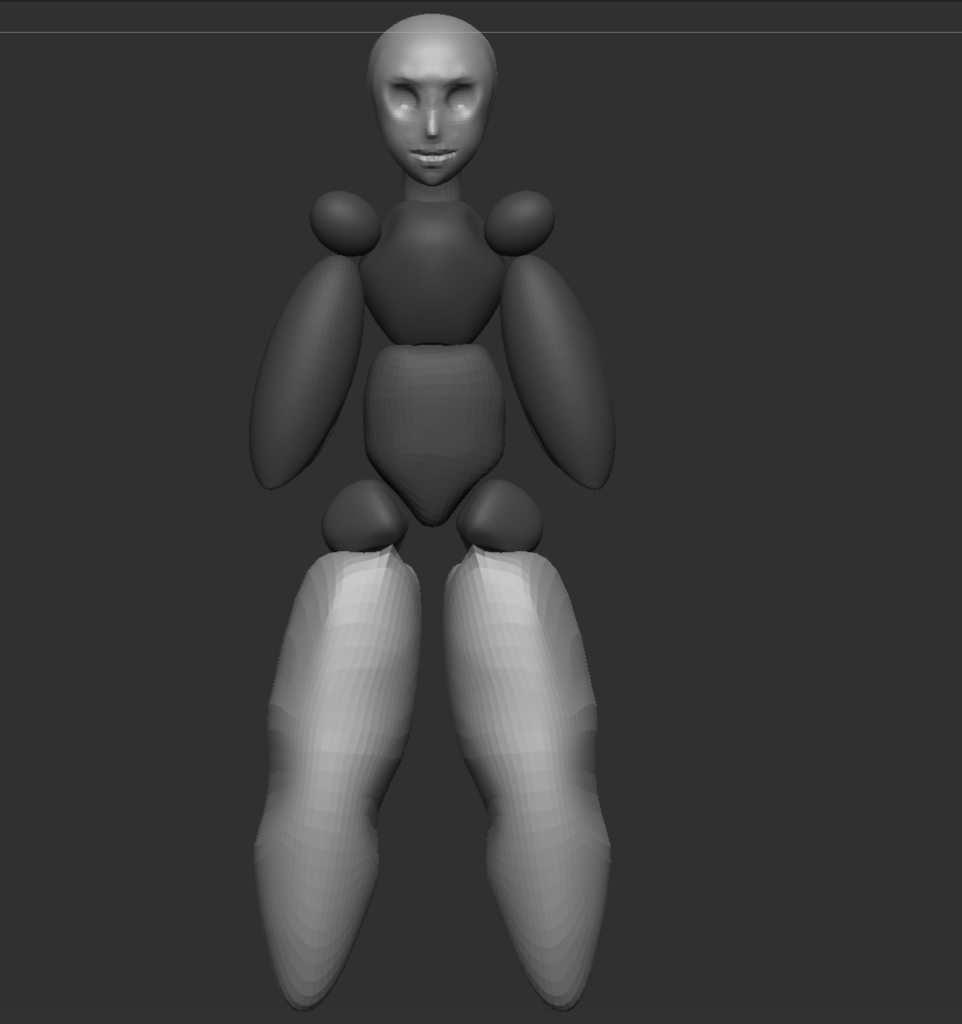
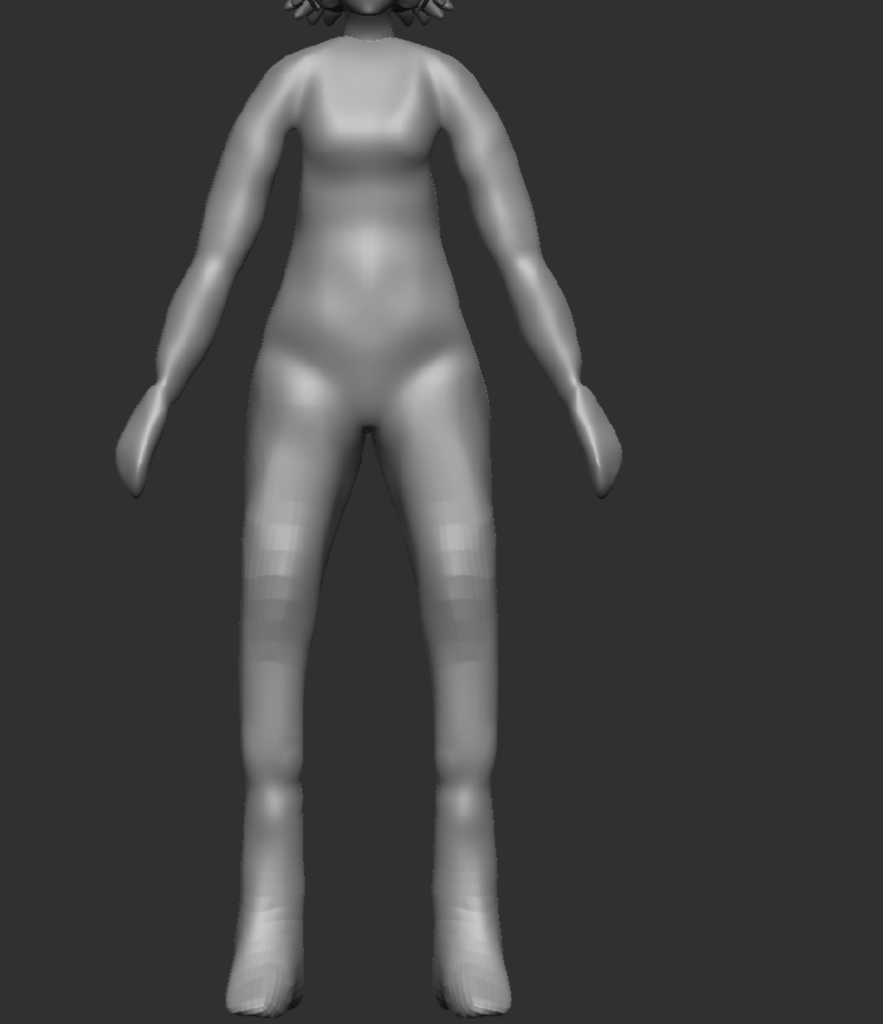
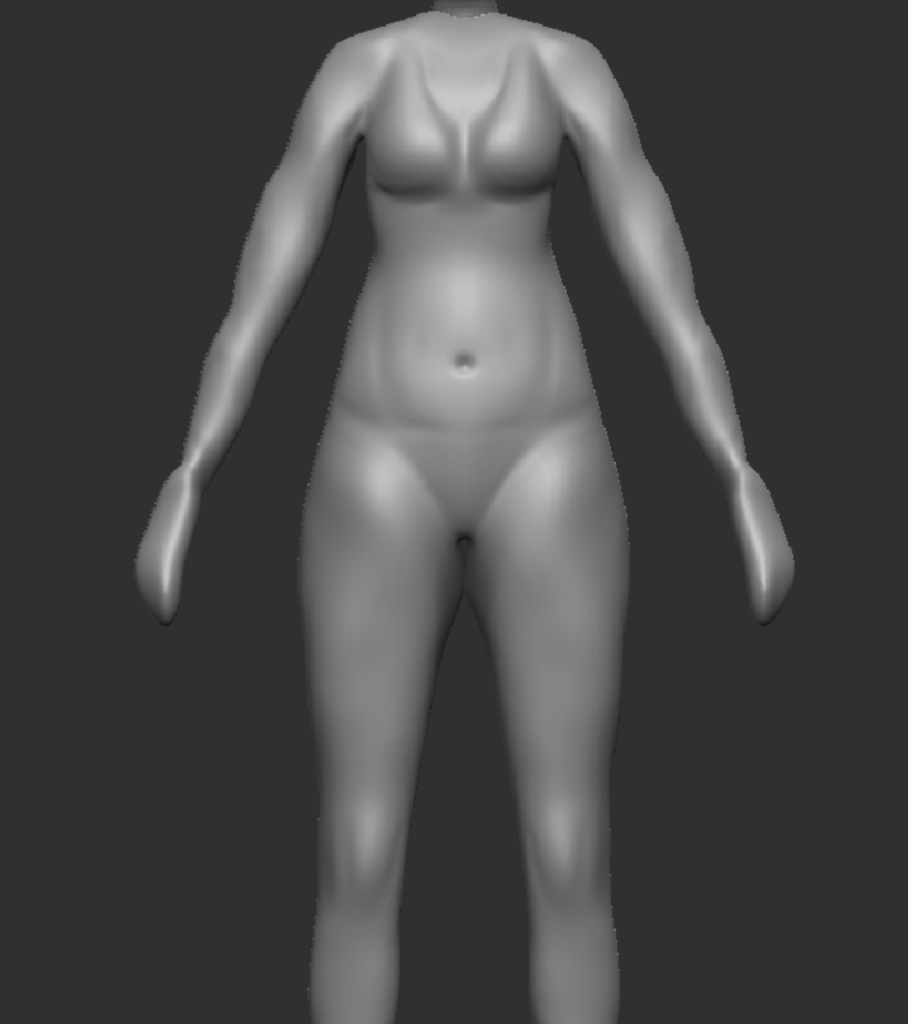
Modelling the body
For the body, I created the limbs and chest using the imperatives brush. At this point, the head, neck and body were separate in order to not disrupt the workflow. The shapes I used here were mainly spheres and once again, I used the general move and the move topology tool to morph the body into shape.
This was the hardest and longest part of the workflow as I had to pay close attention to the anatomy, even if it’s stylised Maki still needs to a hold a humanoid shape and if there were any mistakes in her anatomy, her form would look strange and unrealistic, especially when it comes to animating her.
So I continued to build her body up, using the dam standard and clay build up brush to add details and muscle to her limbs. Maki’s body has an hourglass form so I continued to adjusted Maki’s hips and waist size using the move topology tool. The feet were originally a concern as I wanted to give Maki some socks. however, with feedback, I was able to easily texture in some long socks later in the project and that I didn’t have to model out the feet outline if socks were going to be used. This is how I created a stable blockout for Maki’s model.
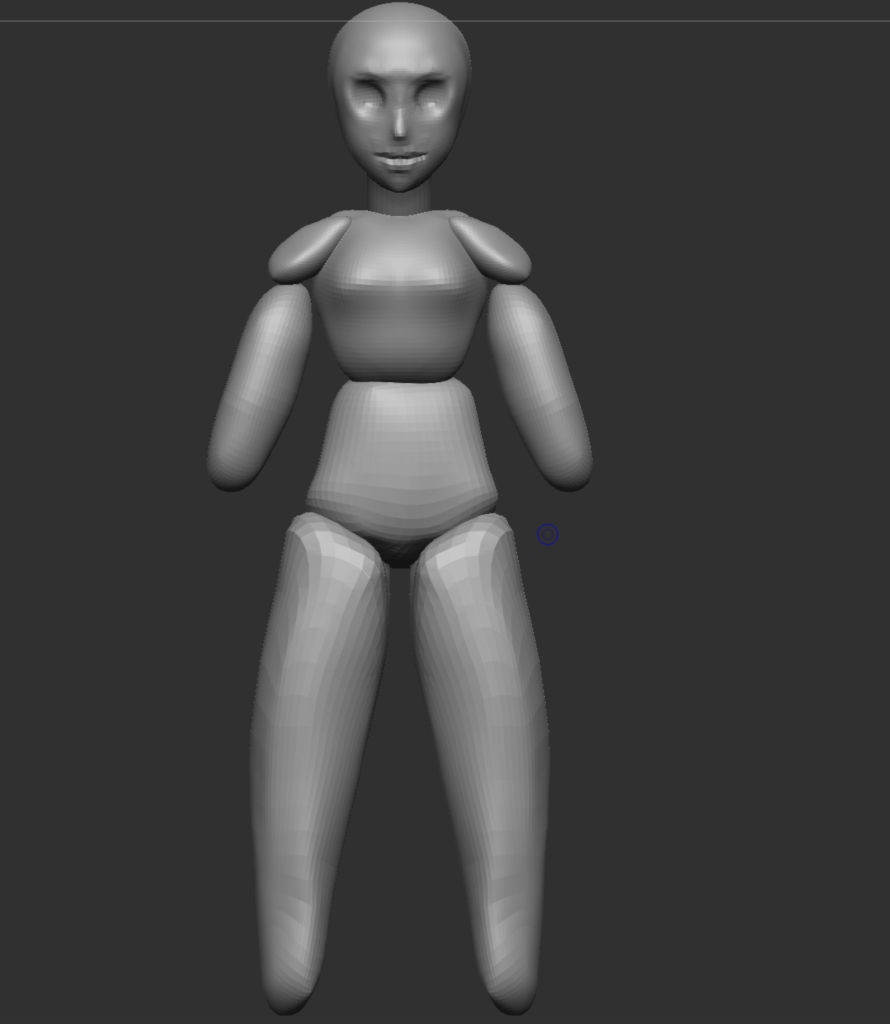
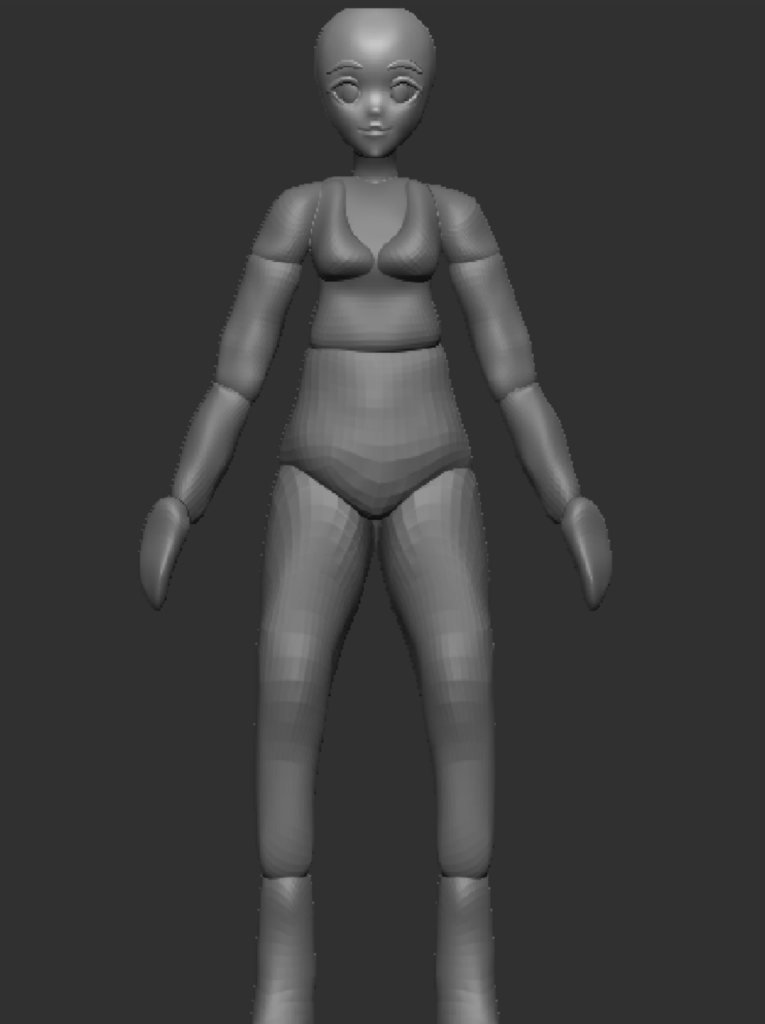
Very basic blockout of body – Finished
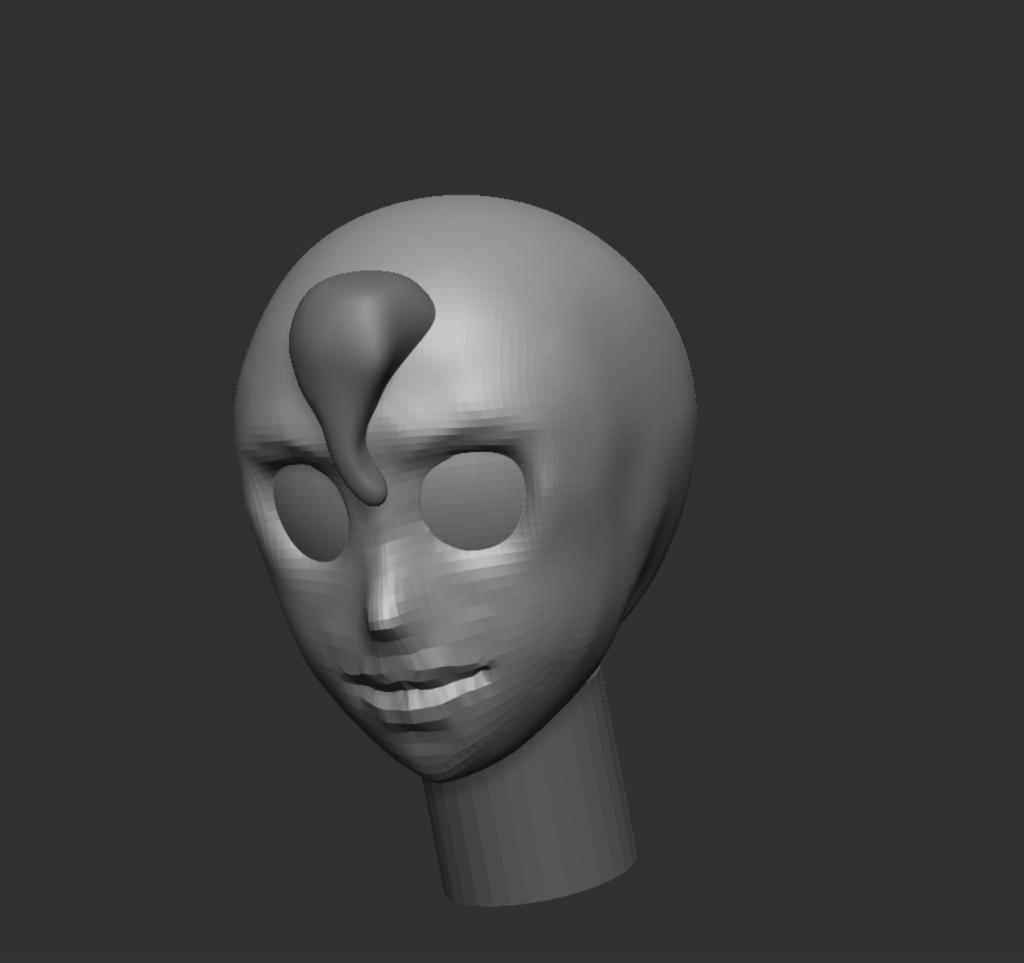
Remodelling Maki’s Face
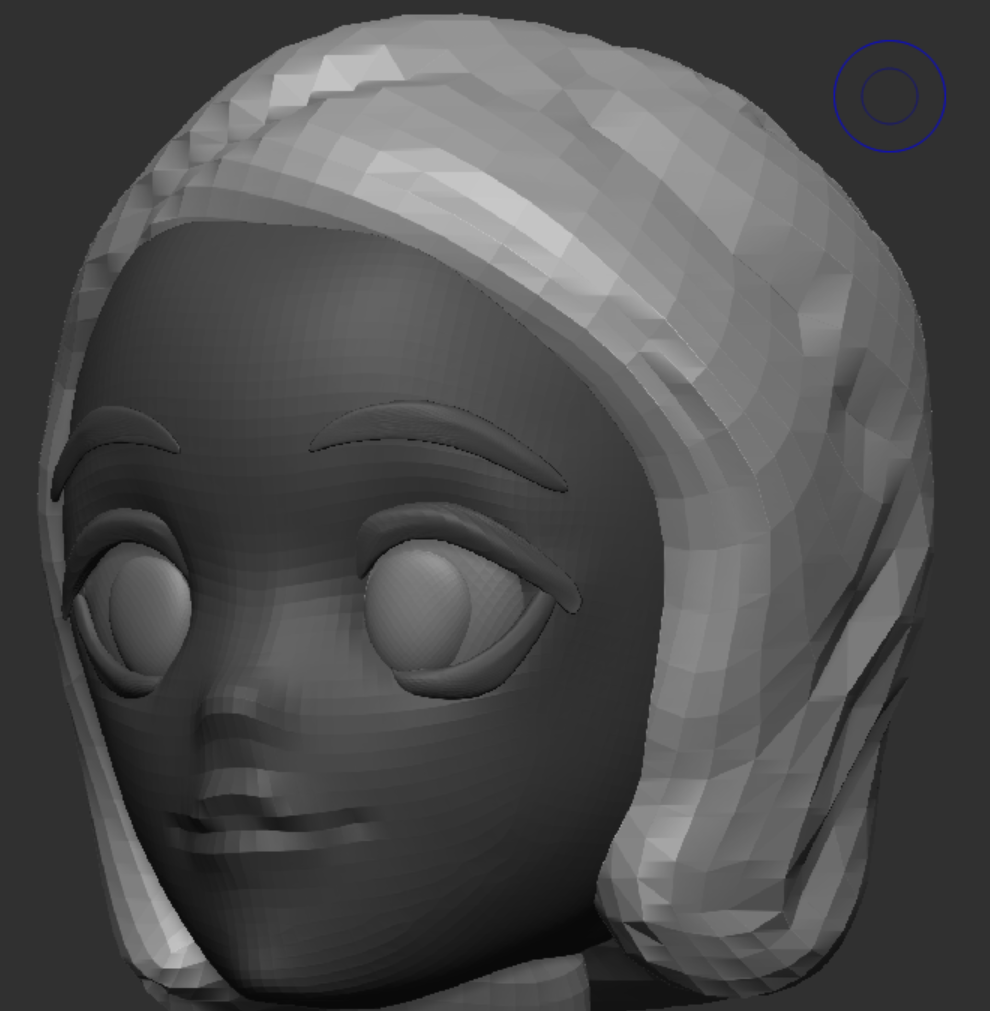
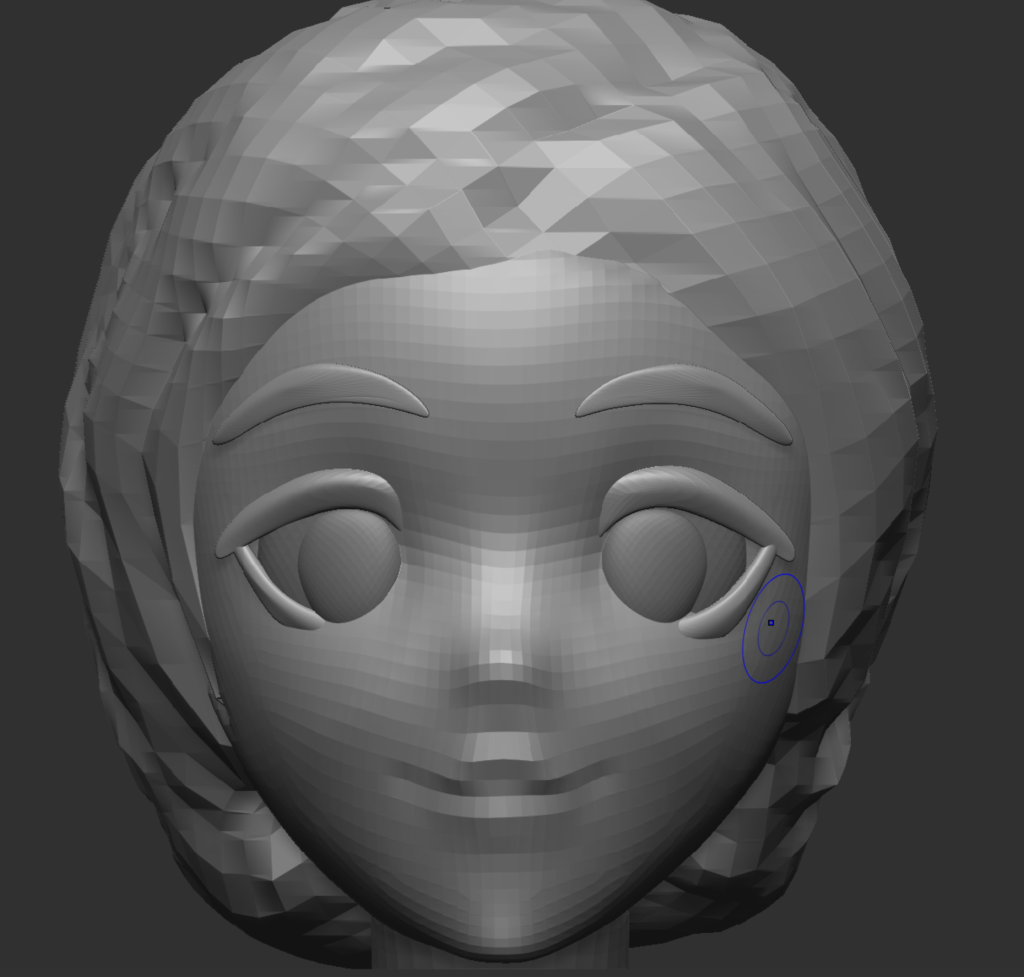
Going back to Maki’s face, after learning more of Zbrush’s interface and it’s brushes, I came back to redo parts of the face. To start off, I sculpted out a more detailed shape for Mimi’s head and then finished off by carving the facial features into the skull.
I used the imperative brush to add in the eyes then sculpted around the eyes so that the face would form around the irises. Then I created the stylised eye lids using the imperatives tool, using the move tool to form the thin layers. Eventually, I also learnt how to adjust the amount of detail on the model by increasing the subdivision levels. This helped incredibly when it came to sculpting the mouth and the nose shape.
As mentioned before, I decided to give Maki an anime look to her style – this was implemented through her face and overall simplistic appearance. A lot of detail would be implemented through the texturing process.
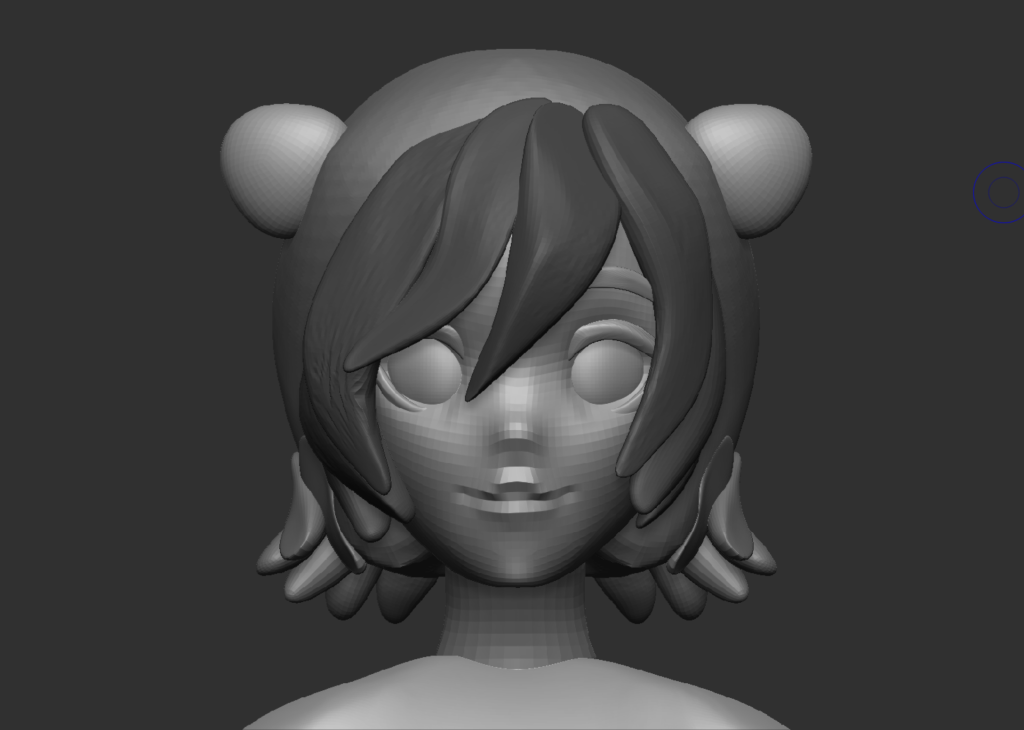
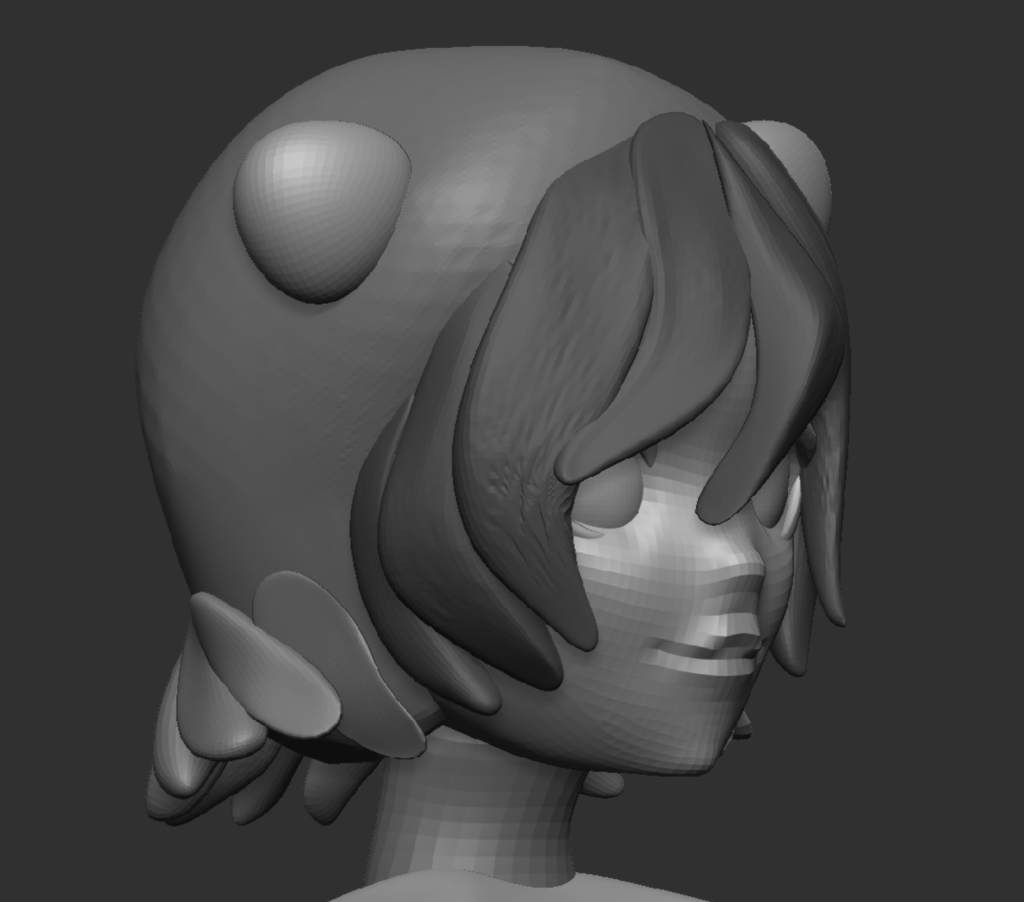
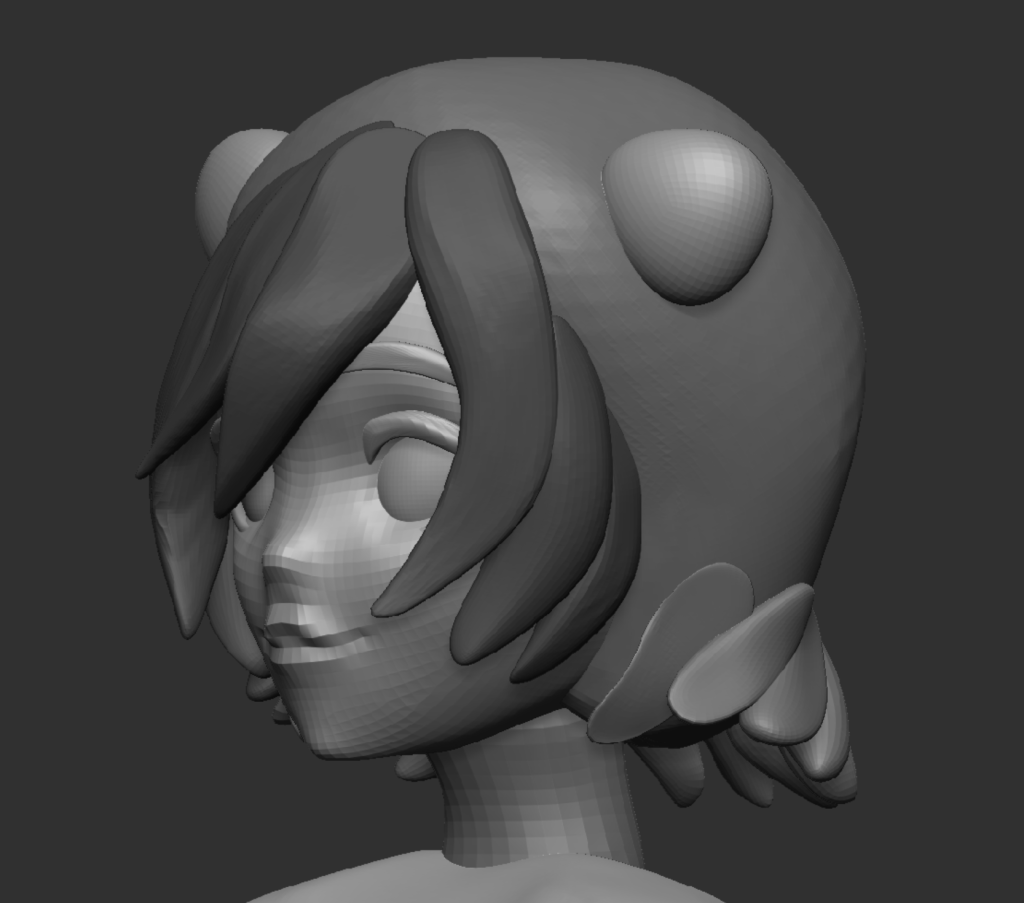
Modelling Maki’s Hair
After finishing the face, I started Maki’s hair. This process required a lot of trial and error as shown from the previous screenshots.
Originally made with one sphere mesh, the texture looked too smooth and circular which goes against her design.
However, after experimenting with the imperatives brush, the opportunity arose to continue pursuing a more stylised approach; As modelling each hair strand would not only disrupt the stylisation but also take too long, especially when it came to retapology later on.
The stylised hair also helped fix the issues when it came to shaping her cheeks.
I created the scalp using a separate sphere and sculpted the hair around the head, using the move tool to morph the meshes shape. This is the same technique I implemented for the buns. As for her hair strands and her fringe, I’d bring in different spheres and continue to shape them around the head and the hair blockout.
Final touches to the body
Once I was finished with the model, I dyna meshed the parts together. This essentially merges all the imperative meshes together and allows me to continue adding more detail to help get a better understanding on the model’s anatomy. This was the part where I also made final changes to the models form by using the damn standard tool to further etch out the muscles and bone structure.
sculpted out the knees and muscle lines in the stomach, chest and arms
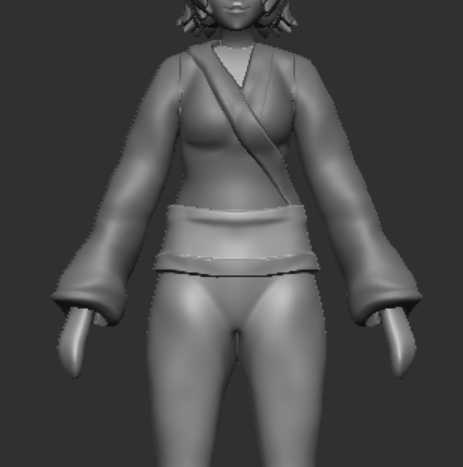
Making Clothes
After making the final changes to the model’s anatomy, I started creating the clothes using the masking and extract tools. Since I was making a kimono, however, I decided to keep the Hanari (the fabric that connects to the collar) separate from the kimono part itself. This way, I can adjust the fabric of the kimono whilst not disrupting the collar. For the sleeves, I extended them out and adjusted them by adding more clay to make the fabric loose and thicker, implying through her design that shes still unmarried as long sleeved kimonos are worn by unmarried young women or girls. The obi (belt around the kimono) was made once again by using the extract method and adjusted so that it tightly wrapped around Maki’s stomach.
Finally, the skirt. This was the hardest part of the kimono as I couldn’t use the extract technique since the skirt is so loose and rounded. So what I did here was that I used a sphere mesh and modelled out the skirt, creating a tube by essentially using the sculpting tool to cut out the insides of the mesh.
Lastly, using peer feedback, I continued to model around the legs and hips in order for the mesh to simulate cloth without being too thick. Here I added some finishing touches by adding cuts into the fabric using the sculpting tool whilst was also adding some final adjustments to the skirt by making sure that the skirt clung against her knees.
After finishing the clothes, I decided to work on the hands. At first, I was trying to use imperatives to model the fingers one by one, however, they always turned out anatomically incorrect by being too thick or the hands not be in proportion with the fingers. So instead, I used a preset Zbrush model to replace the blockouts – this helped save a lot of time on the project and it means that when animating them, the movements will look natural.
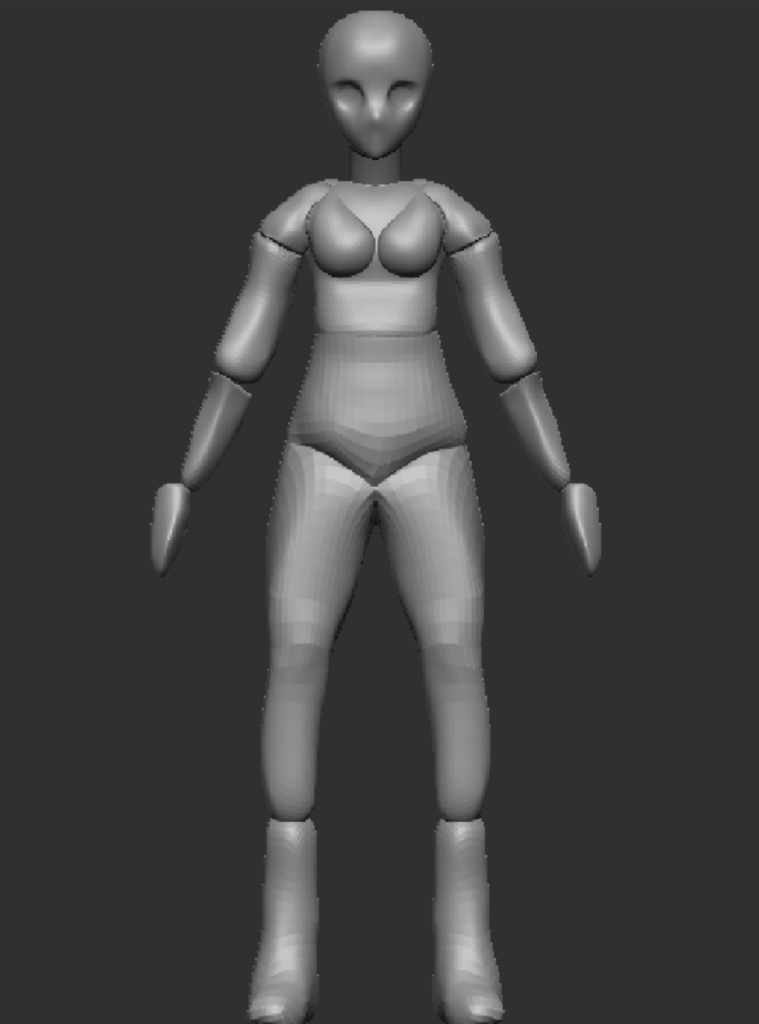
The reason why I cut the eye cloth from the final model was mainly because it would interfere with the hair, especially during the retopology process. Whilst in the future, I would like to add a cloth to her model in further iterations for now, the focus was to keep the time management consistent with the schedule. To still imply that she’s blind, her eye textures will have a painted fog effect to them.
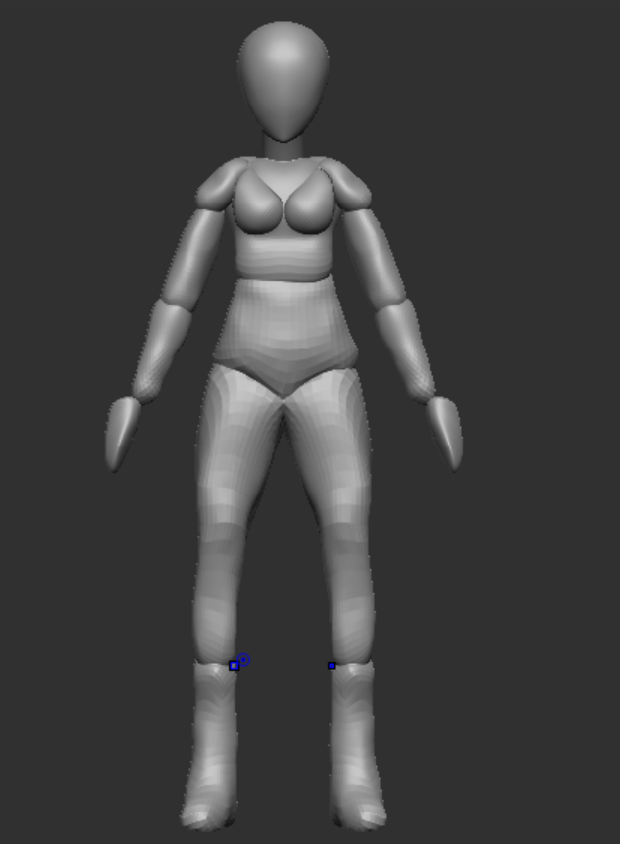
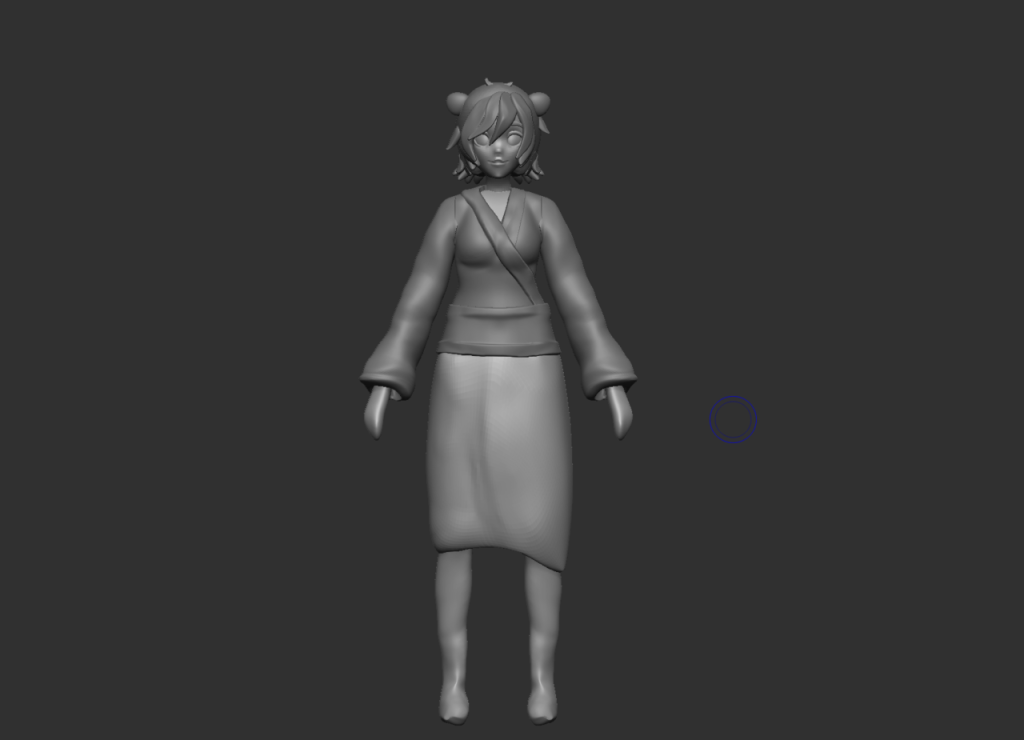
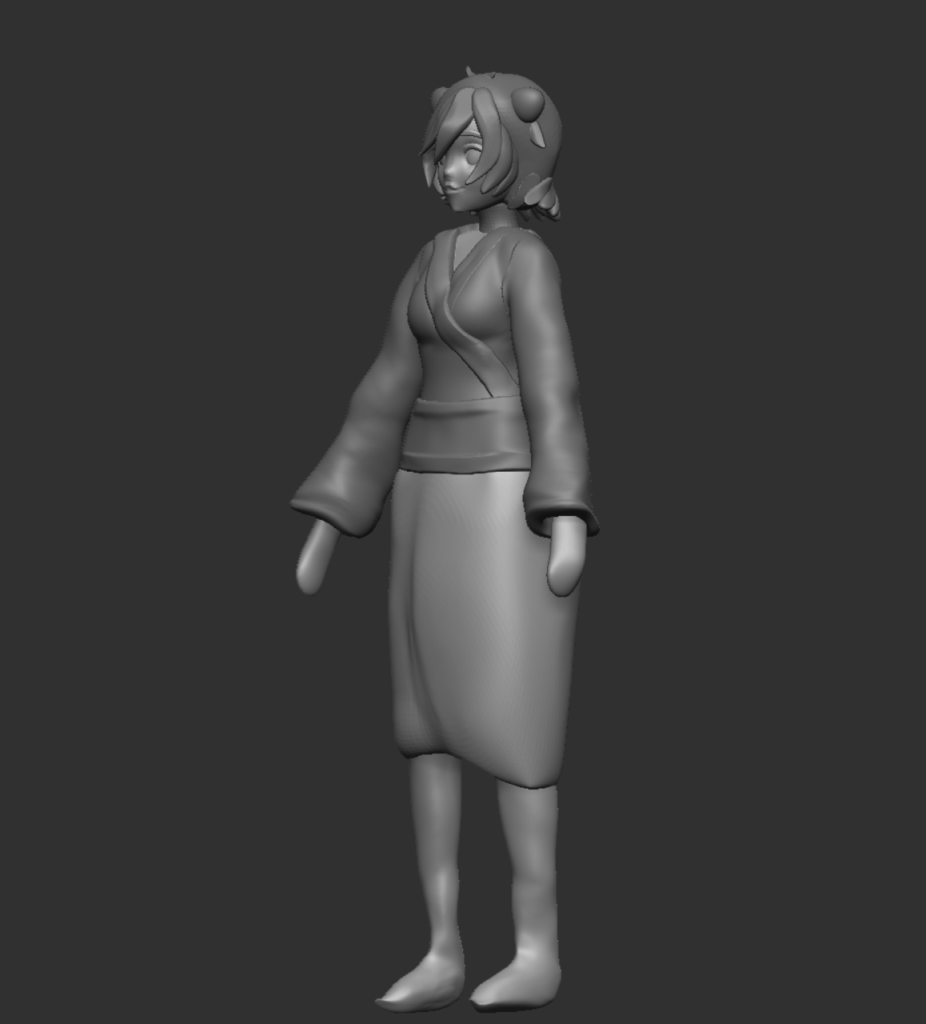
High Poly showcase
Covered up any fabric holes in order to not disrupt the flow of retapologising the cloth later on.
After adding the final touches to the model and the clothes, I used the zremesher to merge all the parts together into one singular mesh. It’s also useful in reducing the polycount as well as generating new toplogy for the entire model, cleaning up the mesh for decimation process.
Decimating the model was the final step of the workflow. The process meant reducing the polygon count to a suitable level for Maya which meant the first step in making the model “game ready”.
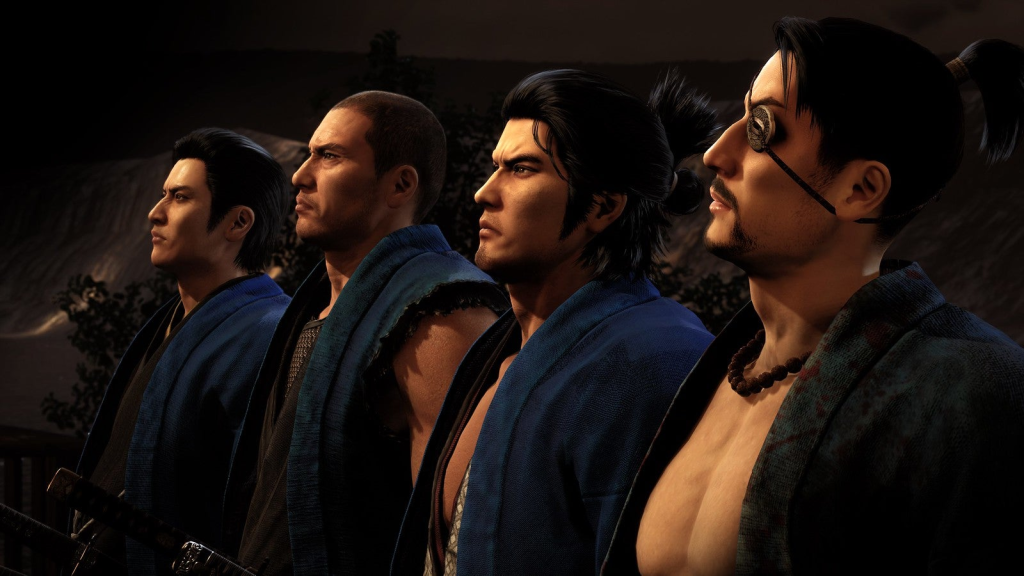
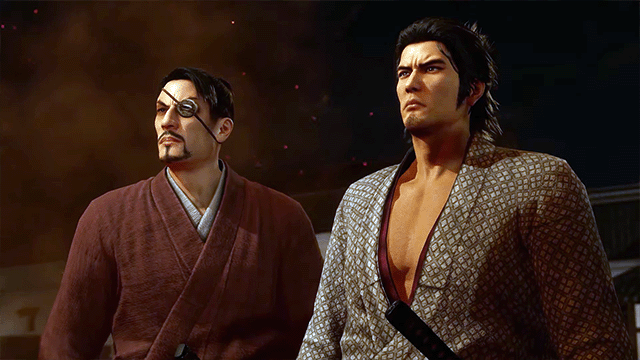
2D character design was one of the main skills I developed through research, finding sources of inspirations, sketching out different designs and finally developing a detailed backstory for them. In this project, I decided to create a character based in the Edo period and Japan’s culture surrounding Yurei, a supernatural phenomenon documented in different stories during that time. The main source of inspiration for this character design comes from the video game: Like A Dragon Ishin, a Yakuza JRPG spinoff set in the Bakamatsu period (The late years of Edo). The character designs in the game reflect their counterparts from the franchise but in terms of personalities they kept the original personalities of the real life people the characters are based off of.
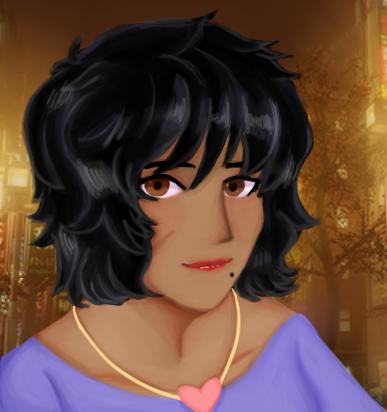
Since I’ve already made a non-cannon character for the Yakuza franchise, Mimi, I wanted to try and redesign her in order for her to fit with the Ishin universe.
Example art of Mimi
Originally, her character was going to be a housekeeper or a shrine maiden but after researching superstition culture at the time, Mimi’s design went for a more darker horror approach. So I changed her personality, character backstory and name from her counterpart: naming her Maki Akimoto.
Historically in the Bakamatsu period, society became turbulent as there was a social, political and economic debate about whether to open the boarders to foreigners. The country was split in half and assassinations between the two political sides weren’t uncommon. This also meant that people were much more paranoid and skeptical which plays a large part in Maki’s backstory.
Maki’s family owned an Inari shrine near the Tosa region. Their shrine was often known for bringing good luck and protection to the town, often providing exorcism or cleansing services for those who need it.
They also sold good luck charms and would hold ceremonies / funerals for the townsfolk. Maki’s the youngest of three older siblings and doesn’t know too much about the outside world as she was never allowed to go outside for her own safety.
One day, she fell in love with one of the patrons who happened to be secretly part of the Tosa loyalist party. Eventually the two agreed to marry each other and travel around the country however, those dreams quickly fell short.
After her partner left for the week, several bodies were discovered in different areas in Tosa. Whilst people would normally suspect these murders to be part of the long list of political assassinations, their bodies were disfigured beyond repair and the victims were long time investors of the Akimoto shrine. And so out of sheer paranoia and panic, the townfolk burned down the shrine, trapping the family members along with it. No survivors came out of the fire and Maki died at the age of 25, just days before she was supposed to get married.
Out of revenge, grief and anger , her eldest sister came back as a vengeful spirit along with her younger sibling. The shrine was eventually rebuilt by the spirits as a safe haven for other Yokai and Yurei and since then they lure in victims to sacrifice for the kitsune.
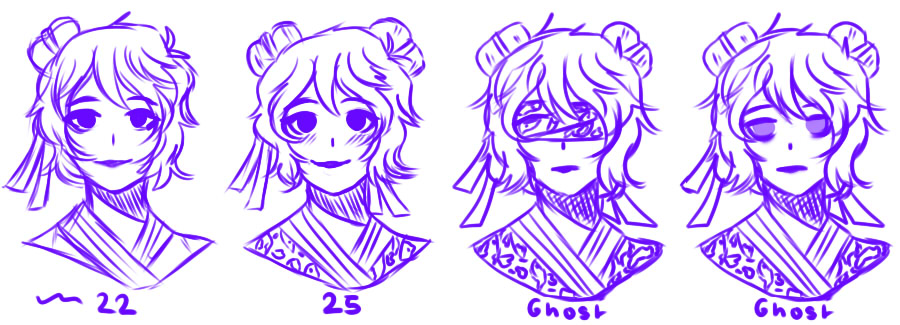
Maki over the years – Alt versions of her ghost form. First sketch shown was before she met her partner.
As a Yurei, Maki is the least dangerous one out of the shrine family, tricking her victims by scaring them into submission. Due to the circumstances of her death, she covers her eyes with a beautiful silk cloth and she gets upset if anyone were to try and remove it. The only way for her to move on is for her to be reunited with her lost love. She doesn’t have a cognitive awareness of the things her eldest sister actually does.
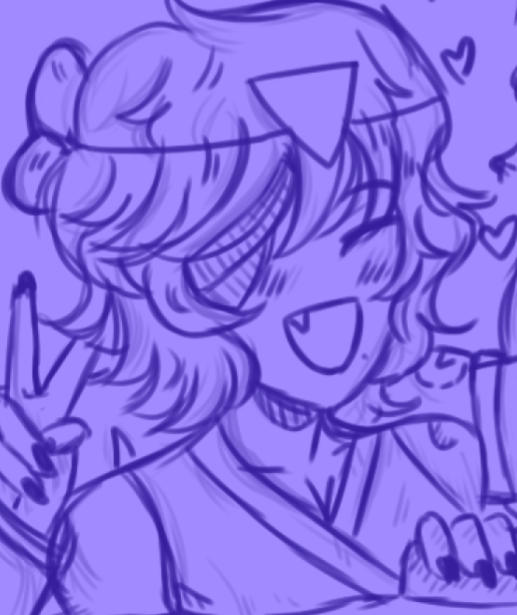
With this knowledge, several design sketches were created:
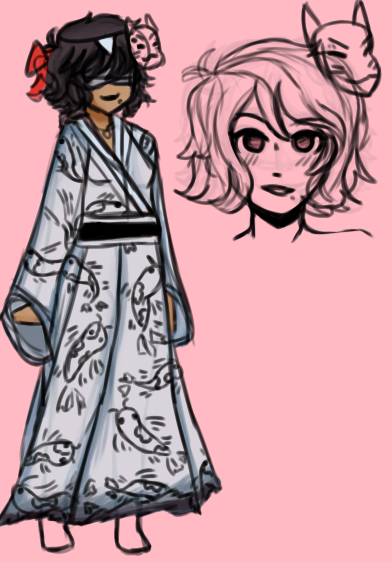
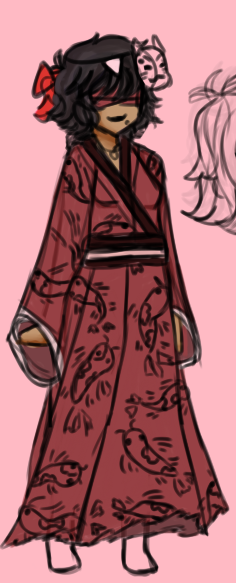
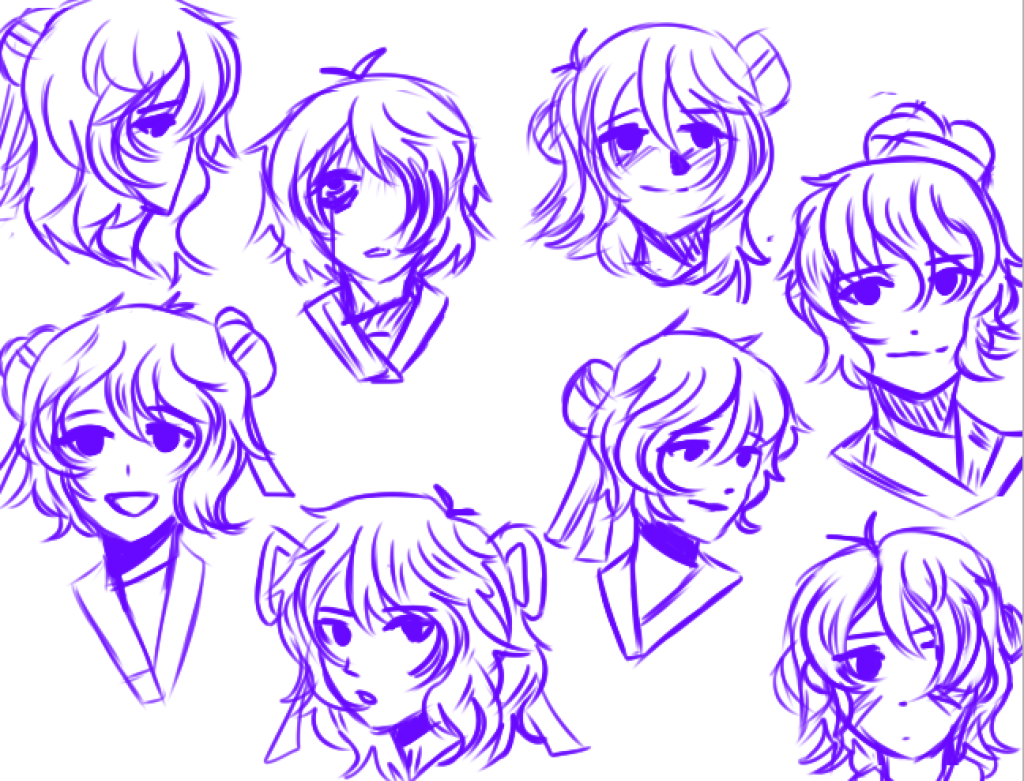
Two varient colour schemes for the same characterOriginal concept art – I wanted to experiment and see which style (face and hair) would suit her best given her personality and backstory. The experimentations included what type of eyes to give her and various hair styles.
Maki’s hair, whilst messy, is still kept up neatly in buns in order to prevent her hair from brushing against her face. Her kimono is loose and ragged, emphasizing her ghostly appearance.
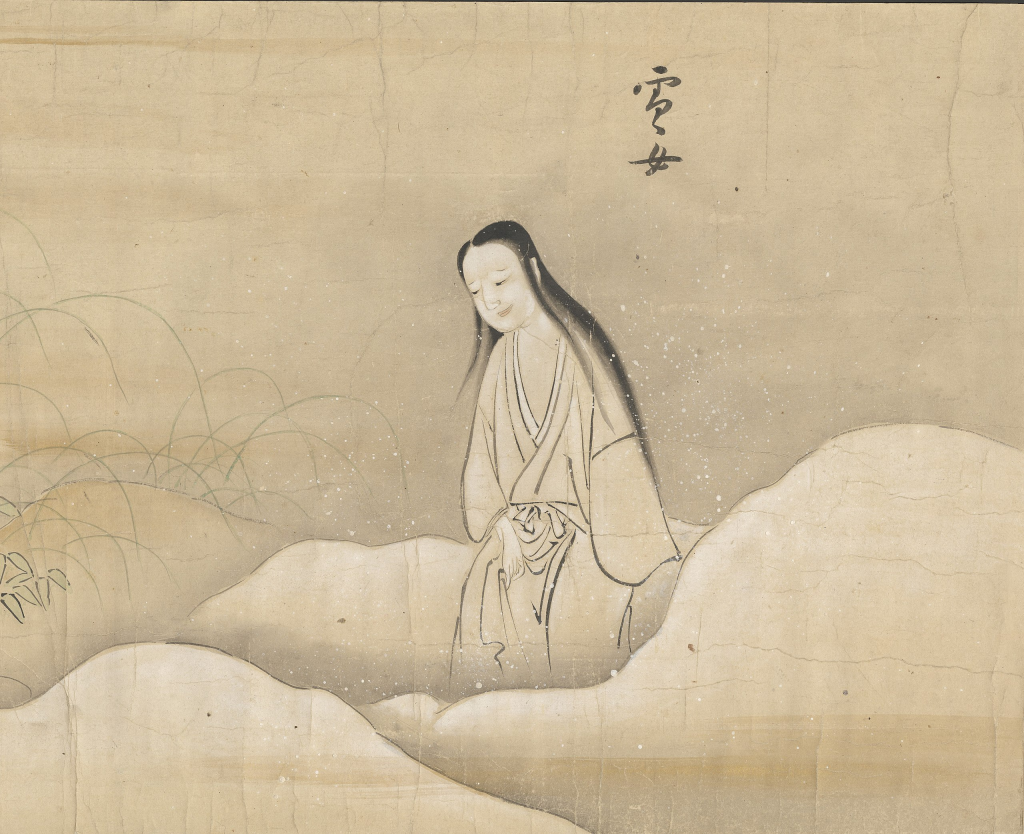
Using lighter colours in her clothes gives Maki a ghostly complexion as well as symbolising purity, life and elegance. Her appearance is based off of the Yuki-Onna also known as the snow woman, whos seen as motherly but dangerous, fitting with with Maki’s personality.
Portrait of Yuki-Onna
By white to the colour scheme, this would help contrast with any blood stains that could get onto her clothes. It creates a perfect difference in her purity and her family’s violent nature.
The base 2D design used for the character model – although when translating into 3D the eyes were more softer and the Kimono patterns changed slightly.
The Kimono also has a continuous Koi pattern that occasionally moves depending on her mood. The Koi pattern was chosen in remembrance of her partner’s love for Koi fish. And finally, her makeshift eye cover that was ripped from the ends of her kimono as protection.
A moodboard was also made in order to get a better understanding on where her design ideas came from.
However, here I will go more in depth on why I picked a particular stylised option.
With my 2D art, a lot of it is based off the anime art style:
This style was developed from consuming anime and playing video games, my main inspiration also including Vocaloid due to their use of various models and characters over the years.
So I thought, by giving this character a stylised design and as someone who hasn’t had much experience in 3D sculpting, that this meant that I could to understand and develop my 3D modelling skills with a style I was most familiar with. In addition to this, having that contrast between a cute style and a dark backstory gives the character much more intrigue by going against the conventional but slightly overused realistic horror style; instead choosing a cute, innocent look.
From a games design perspective, giving her the cute but bold anime style means that she’s not a threat to the player but rather a guide or a helpful NPC, maybe even an protagonist to her own side story. In a game, her story could revolve around trying to find her lost loved one in order to pass on and as a reward the player gets her eye cover to boost their defense etc.
And with these designs, I started to translate her 2D design into 3D.
Kreuter, D. (2020). [#01] Anime Character 3D Modeling Tutorial 2020 – Collecting Reference. YouTube. Available at: https://www.youtube.com/watch?v=i2KXwzzkZX0. [Accessed 06/10/2022].
GameSpot. (2022.). Like a Dragon: Ishin! Official Announcement Trailer | State of Play September 2022. [Video] Available at: https://www.youtube.com/watch?v=nYhk9YMgsyM [Accessed 07/10/2022]


