Part 1: Setting the environment layout
At the beginning of the project, I started to set up the outside area using Unreal Engine’s environment and foliage plug ins. The template I originally used is the empty map so I was able to have a blank slate and experiment with the environment block-out much more easily.
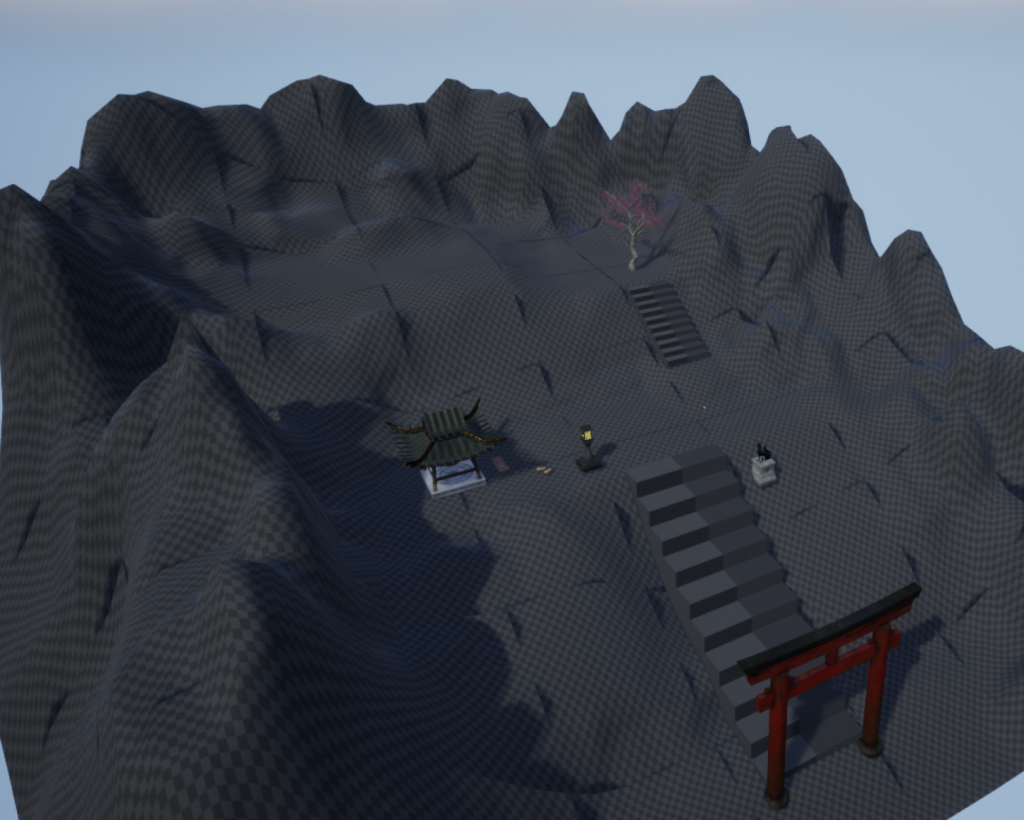
Here, I was experimenting with the different tools that the landscape mode provided, messing with the brush radius for the sculpting, smoothing and noise mechanics. These tools were used to create the mountains surrounding the area as well as the hill structures.
This was one of the more difficult areas to work with as the lack of shaders and lighting made it difficult to understand the heights of the different areas in the map.
However, when I added the objects into the blockout, I was able to understand how to edit the layout even more as I was able to build around some of the assets I also placed these items into the blockout to get a better understanding on the areas and how much space I could work with.
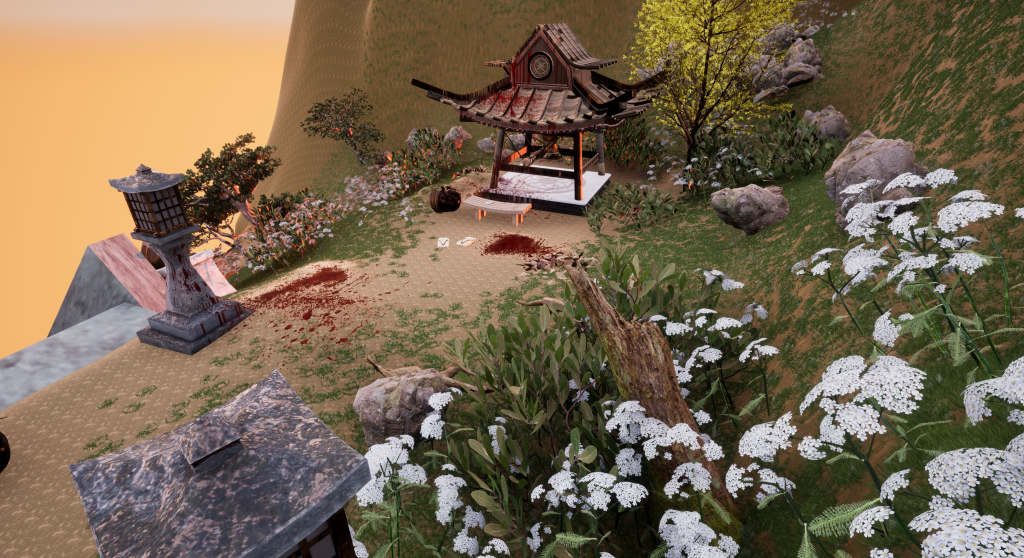
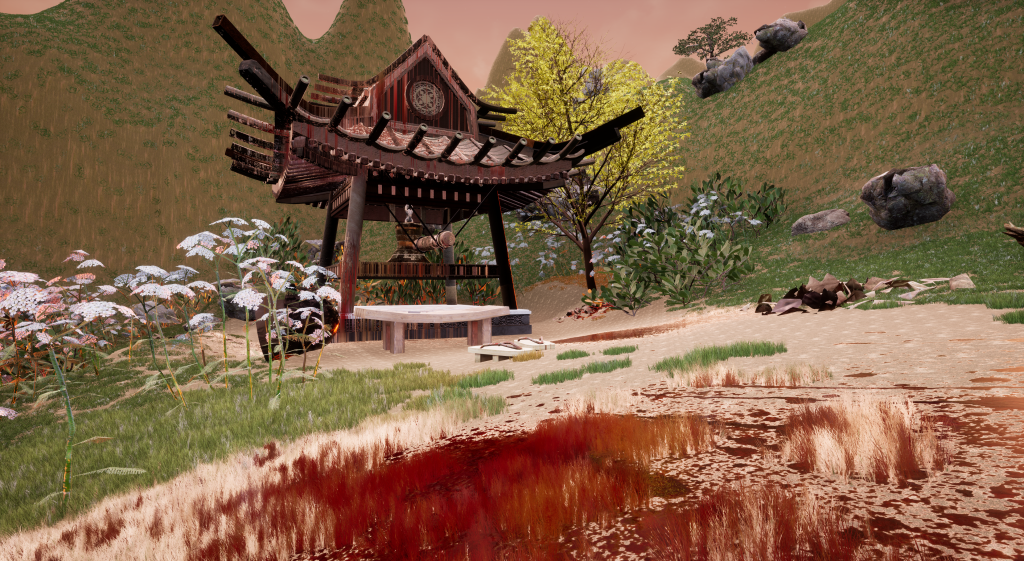
The large area near the Sakura tree area is where the blacksmith building would be placed. The blacksmith building will be created by one of the team members in the group.
I’ve then added two layers in the landscape mode: The grass and dirt path layers. The grass layer includes the grass foliage which I used from the Open World Demo ( https://samsudeen-2021.hulldesign.co.uk/2022/04/20/model-references/ ).
I used this tutorial ( https://docs.unrealengine.com/4.27/en-US/BuildingWorlds/OpenWorldTools/Grass/QuickStart/ ) to help set up the grass material tool which would help allow me to edit the grass density and randomise the grass’s size, location and rotation in the environment, adding more variety in it’s implementation. The layer also included a grass texture which the grass helped from preventing any noticeable repeating patterns.
Afterwards, I added another layer known as the dirt path. This made navigating through the environment narratively more noticeable as the initial intention was to provide a linear story to the area.
In this screenshot, you’re able to see the difficulties that I intially faced as the grass layer was overlapping the dirt. To rectify this, I left some areas of the grass untouched but took away most of the noticeable parts using the smoothing and erase tool.
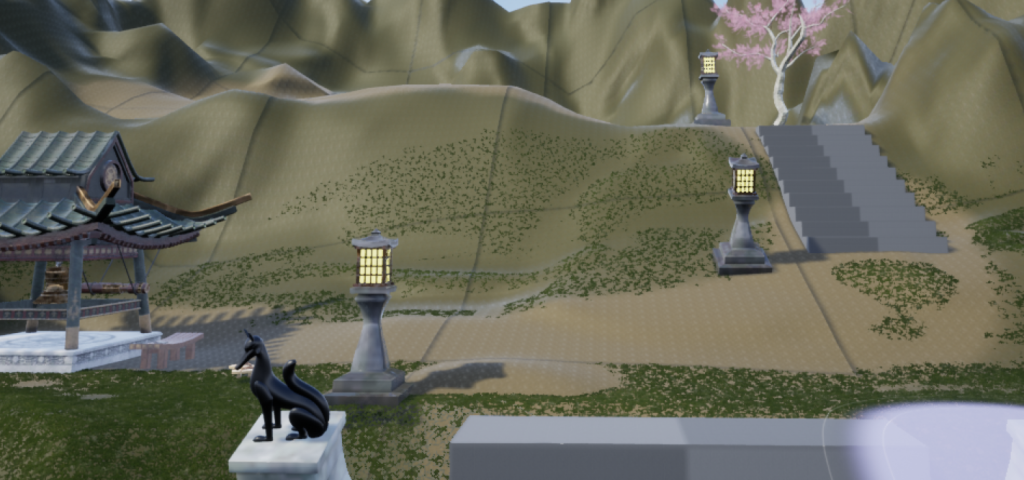
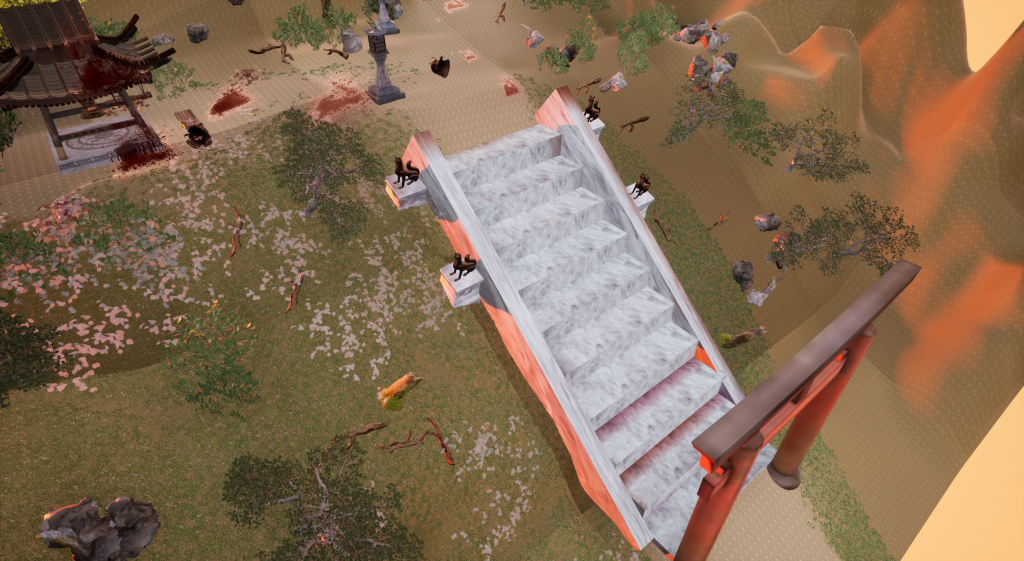
At this time, I started adding more objects around the environment such as the stone lanterns, a way to understand the scale of the landscape. The main difficulty I had with this process was finding a suitable size for the stone lanterns and the fox statues as I didn’t want them to set an unrealistic proportion so I tried to make them slightly bigger than the statues, this way the lanterns would feel physically intimidating despite emitting a warm glow.
Part 2: Populating the landscape – Composition work
After adding in the textures for the ground, I started adding in foliage such as rocks, dead leaves, flowers and bushes around the landscape. The main idea for this composition was to visually show the chaos and the flora taking over an isolated but beautiful landscape.
Originally, I scattered lots of different debris across the map, especially in the first area but it became too cluttered and disorientating. So instead I just added trees around the landscape and reduced the amount of debris. This also allowed more subtlety to the destruction of the land narrative-wise.
In the environment, I added lots of flowers to the area because I was having difficulty with grass length and so the ground still felt flat. However, the flowers helped with this issue by adding some more volume and variety to the grass layers. The shrubs and bushes help elevate that.
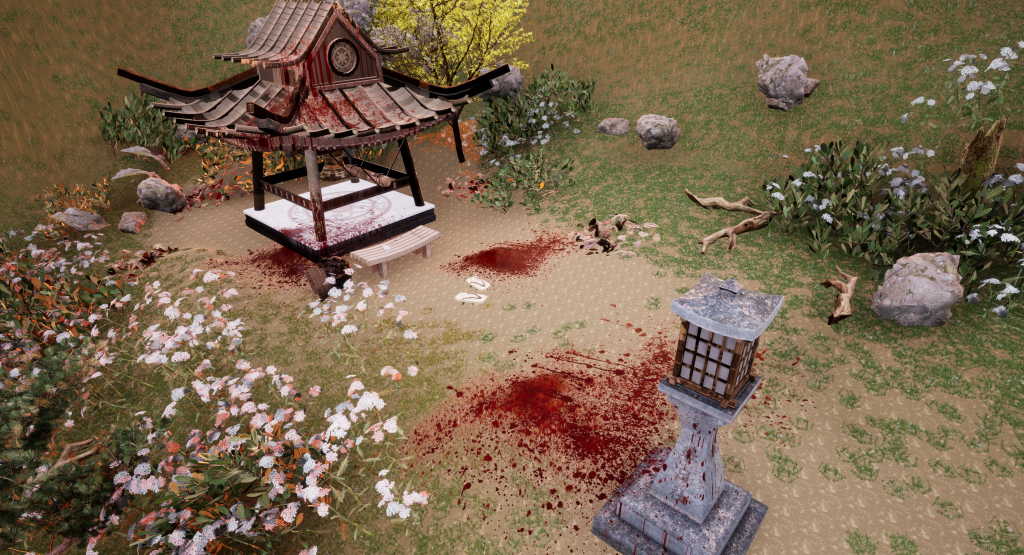
Afterwards, I added some blood splatter decals to the ground and some of the objects and structures. This was the finally add the horror element to the environment as well as to emphasis the chaos and juxtaposition between the beauty of the flora and the horror behind the oni’s attack.
For this, I used different decals and overlapped them on certain spots and objects to create a more vibrant effect. However, much like the debris, I tried to limit the amount of blood in order to not lose it’s visual effect.
Afterwards, I added some extra props to the scene because I wanted to shift the focus of the project back to the blacksmith theme.
Assets such as the helmets, statues and tower bell are part of the main theme due to their importance in their narrative. That narrative being the generational destruction of the blacksmith’s livelihood and family as well as the decay surrounding the blacksmith’s work.
Once I adjusted the extra props, I added them into the environment, the helmets being in different parts of the map.
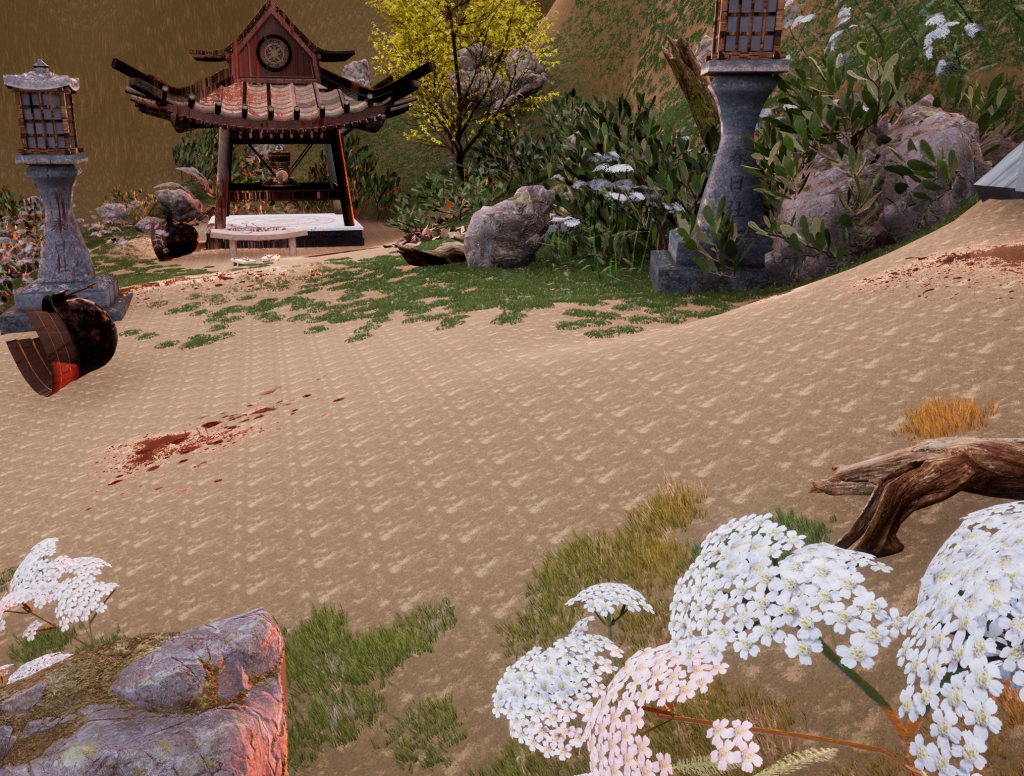
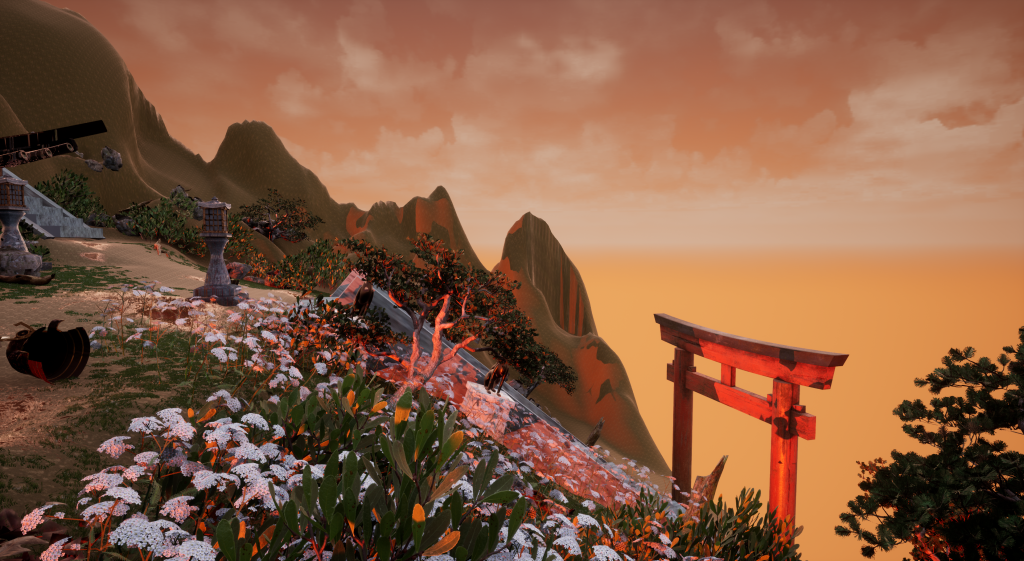
Here are a couple examples of beauty shots of the finished arrangement.
Part 3: Feedback and Improvements
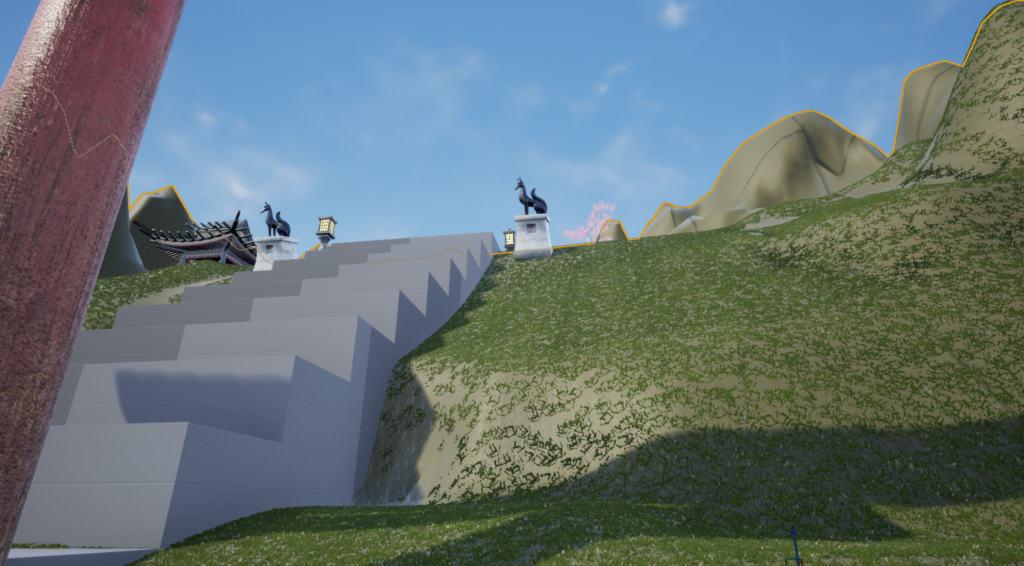
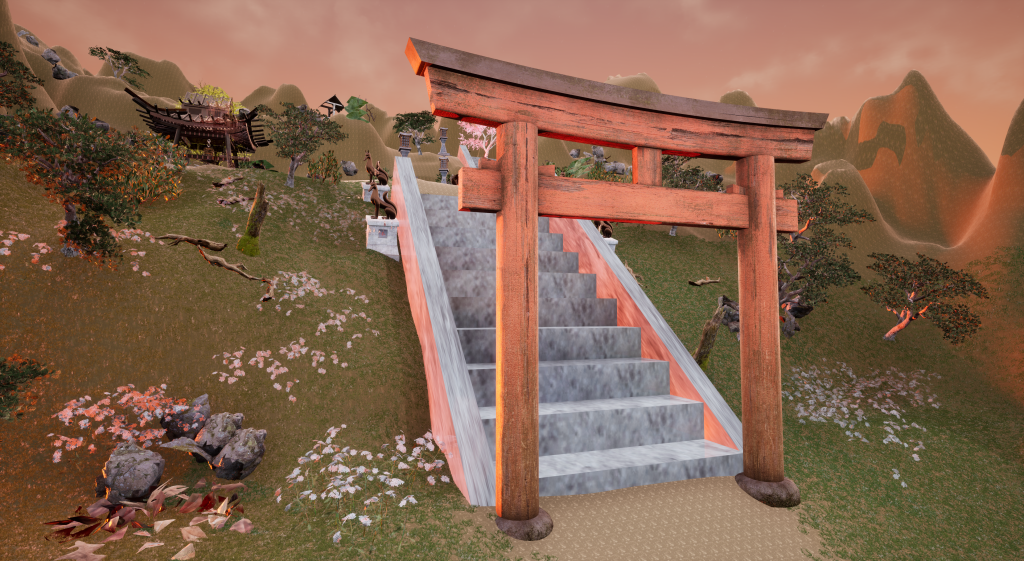
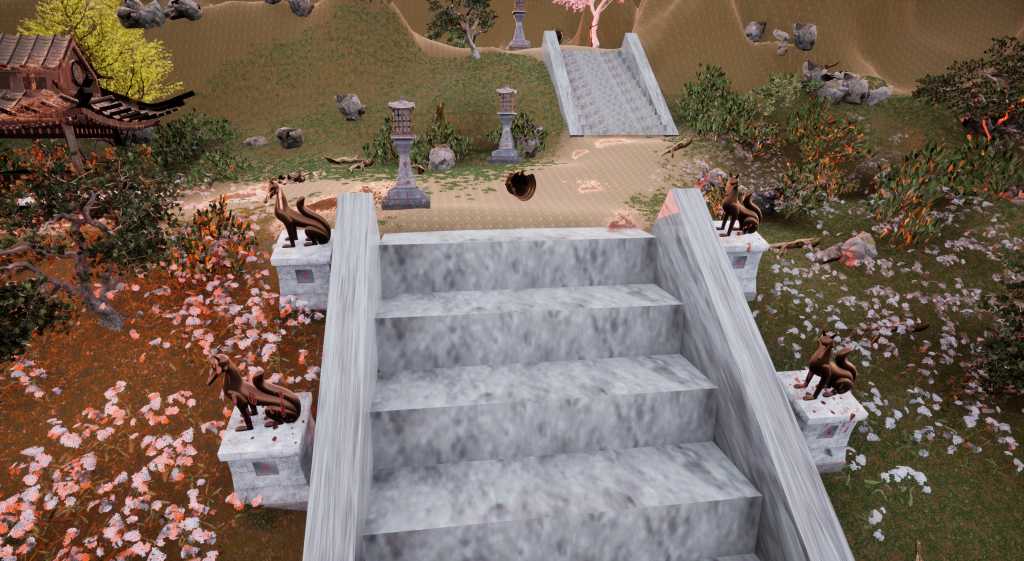
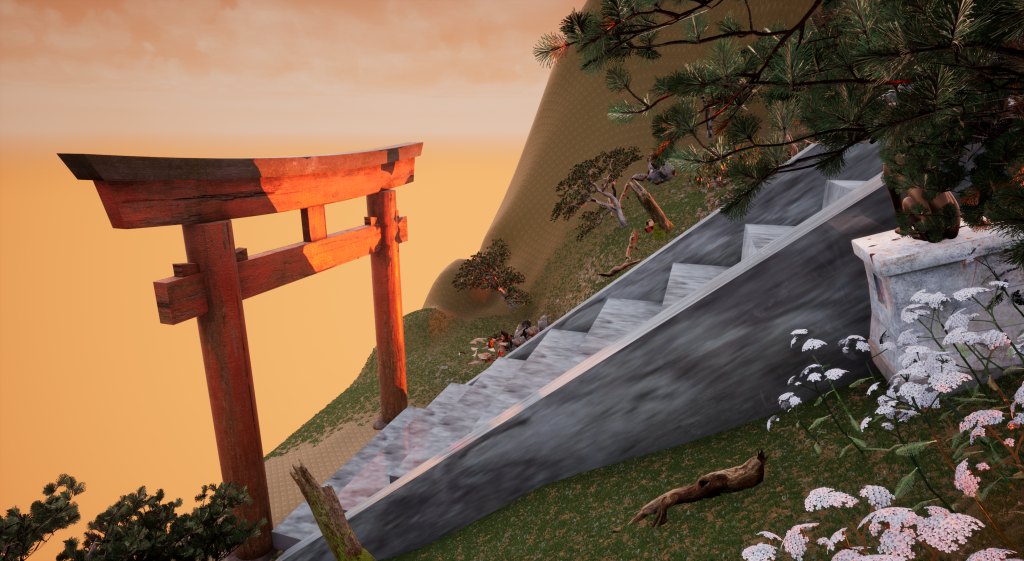
When I got some verbal feedback for the environment, the main concern were the steps from the first area as the scale for the stairs were seen as too large in comparison to the second set of stairs in the next area.
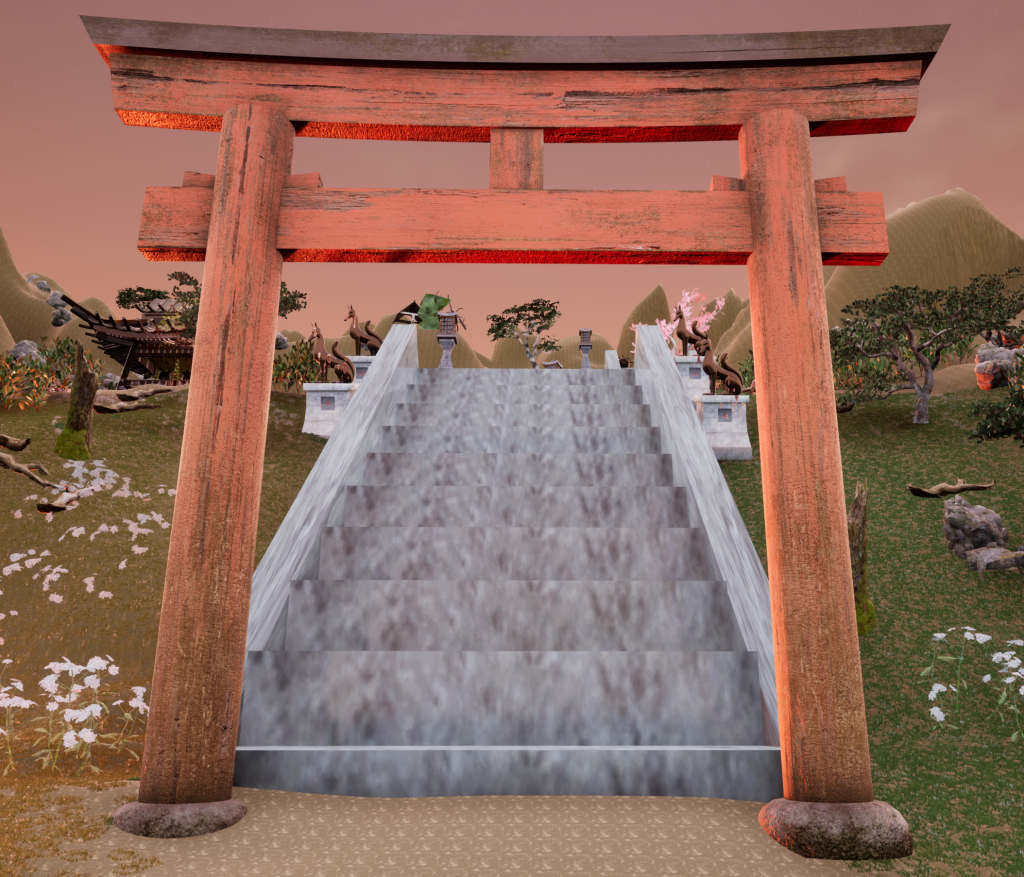
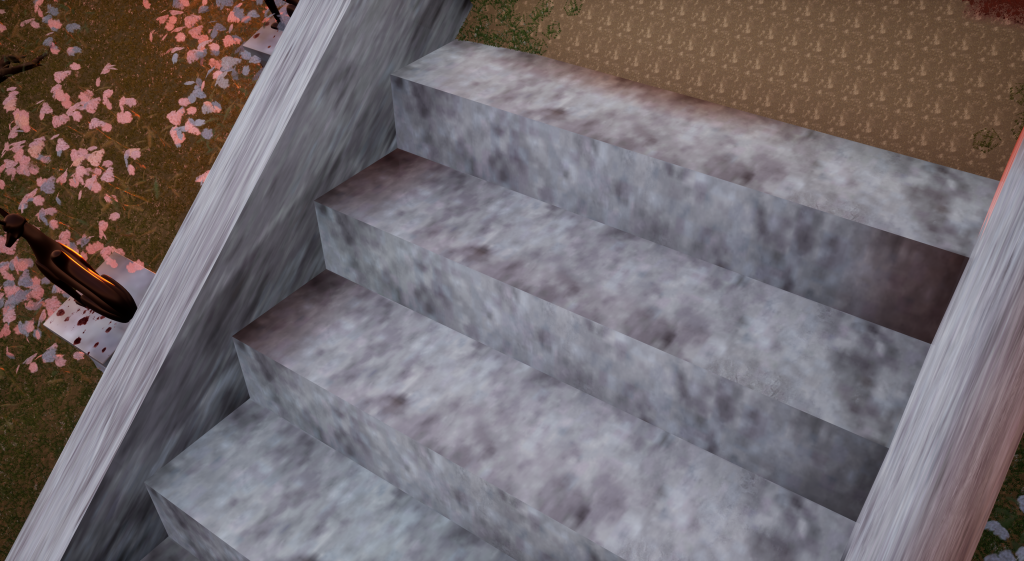
So as a simple fix, I was able to reduce the size of the stairs as well as the railings. This, however, also meant I had to create a steep area near the top of the stairs. This was due to the clipping issues I faced when creating a gradual slope.
There were also some lighting issues I faced with my assets, before rebuilding the lighting the first time. My peers had pointed out the error message as well as the ‘preview’ text affecting the lighting. So I had to rebuild the lighting every time I wanted to add any new objects or if I edited them and restart Unreal Engine to get the full effect.
Ontop of this, once I built in the lighting, I ran into the issue of the stone lanterns not being lit up anymore, however I left this in as contextually this area is set in the early morning. Perhaps they were snuffed out during the attack?

Part 4: Implementing the 3D asset into the environment.
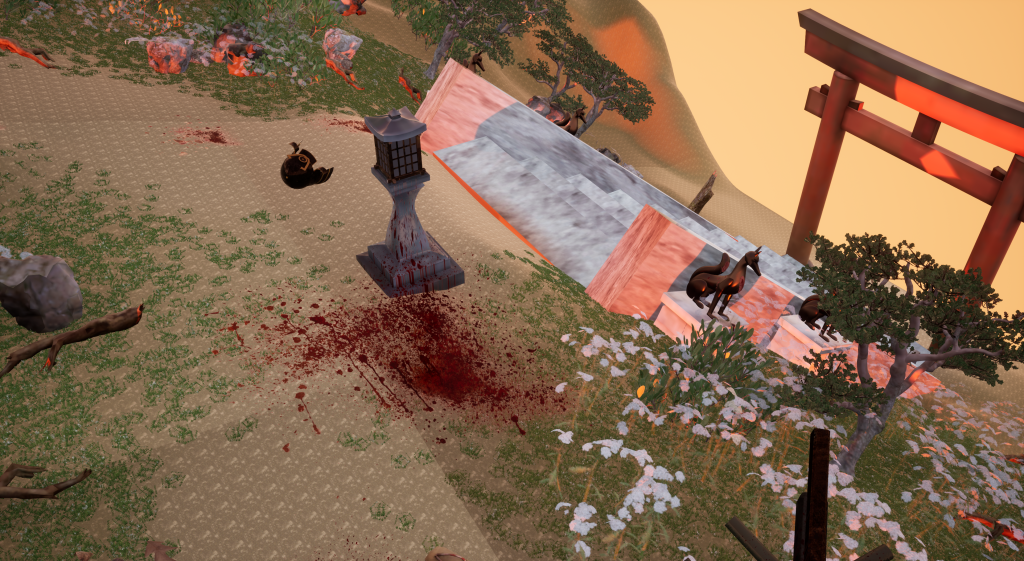
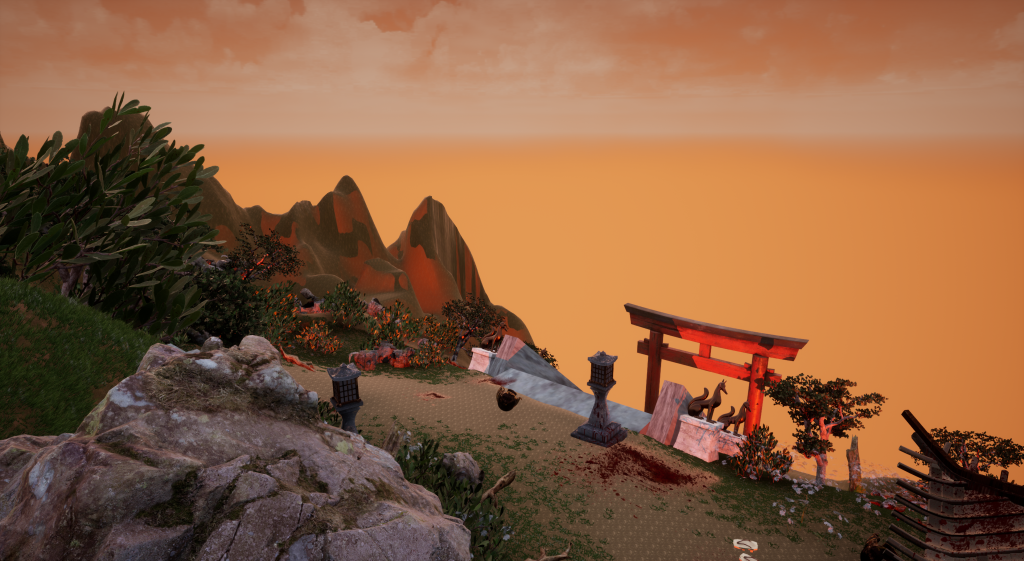
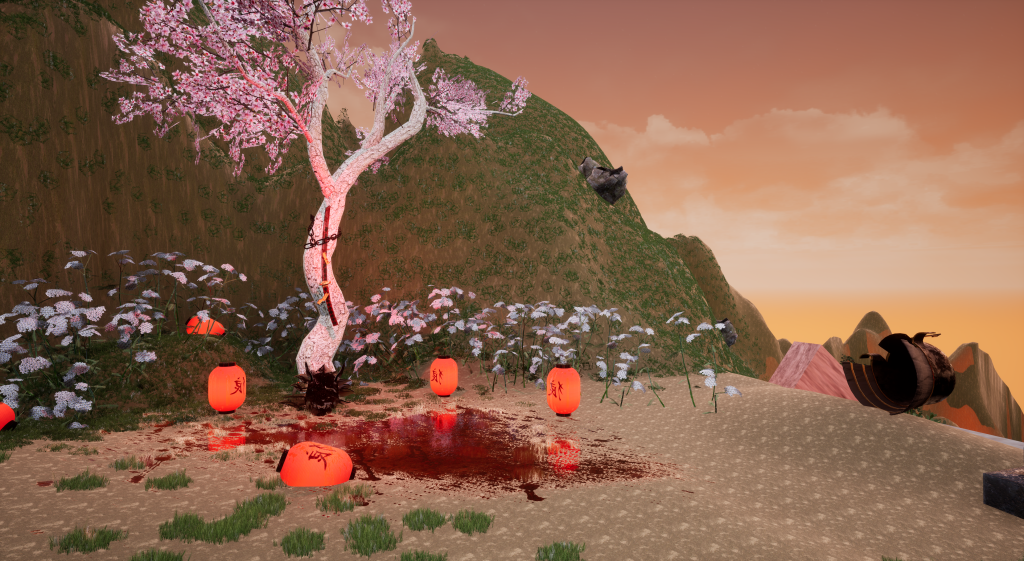
Following the intial plan from my 3D asset Design (https://samsudeen-2021.hulldesign.co.uk/2022/04/27/research-and-design-exploration/), I wanted to create a dramatic and forboding area to perfectly capture the katana’s presence and importance in the environment by dedicating an entire area to it.
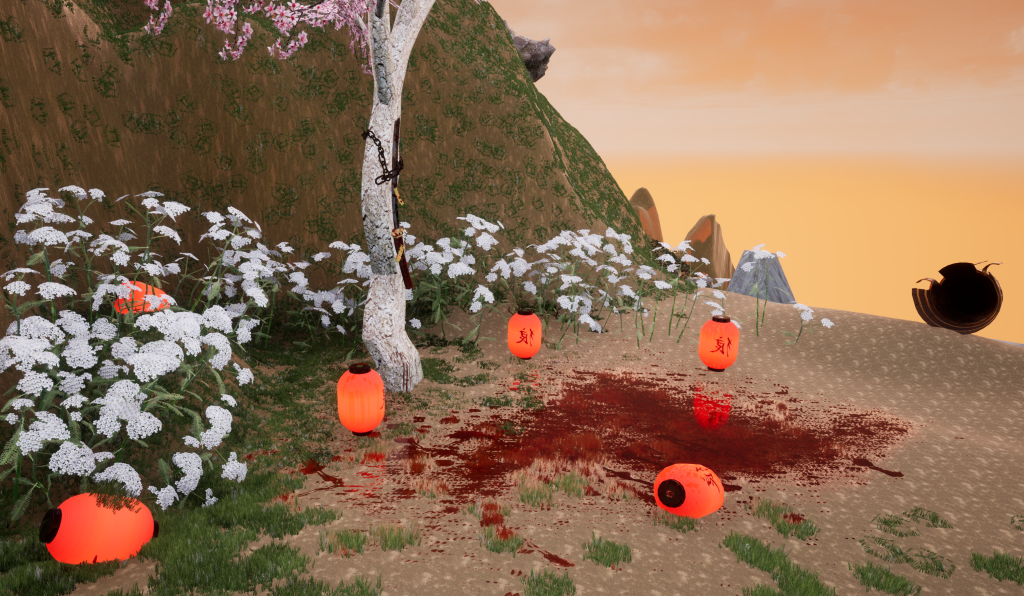
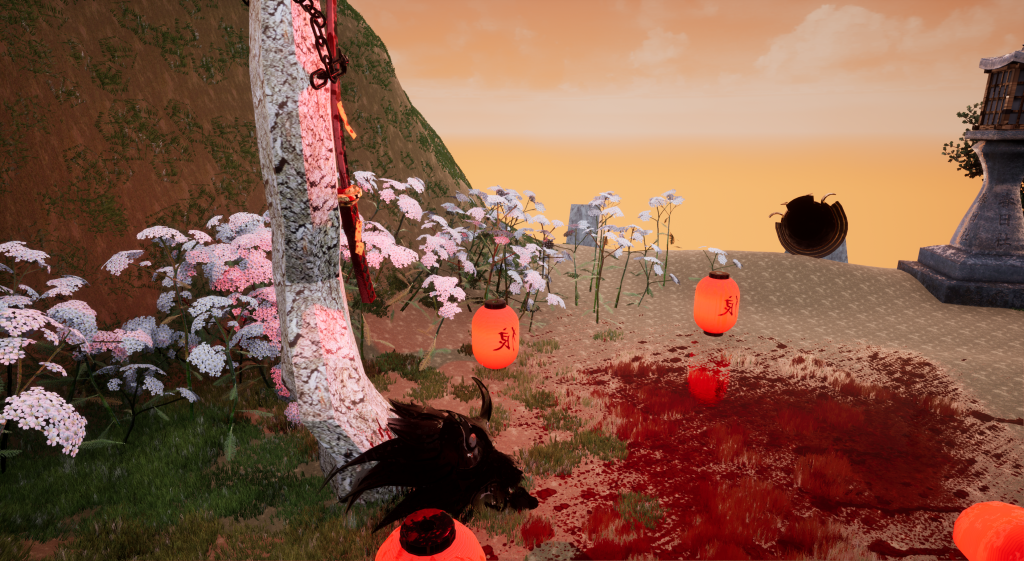
I added lanterns and a large pool of blood along with a helmet near the stairs and the mask in front of the tree to indicate the powerful supernatural horror that surrounds the katana.
Unreal Engine had some trouble importing the katana’s textures. After troubleshooting, we’ve discovered that the gradient for the blood (in the base colour texture map) potentially wasn’t recognised by unreal properly so the textures looked choppy.
I’ll leave a link for the renders of the katana so there’s an upclose and better look on the model itself: https://samsudeen-2021.hulldesign.co.uk/2022/04/28/rendering-and-lighting/
The chains on the tree were individually placed around the trunk as I couldn’t find an chain asset that would perfectly wrap around the tree trunk. So instead I made a custom chain link using a chain asset I found. The custom chains were one of the hardest parts to assemble as the chain’s would either clip through the trunk or become too lose to hold the katana together, however after experimenting with the chain linking, I was able to build around the katana.
For the lighting, I added a small red spotlight to the tree mainly for dramatic effect as the lanterns weren’t emitting enough light to make the katana stand out.
Part 5: Beauty Shots
These screenshots were created using Unreal Engine’s High Res Screenshot function. These shots show off the final product of the landscape I worked on. ( Some of these screenshots may have been included earlier as examples in the post )


Part 6: Video
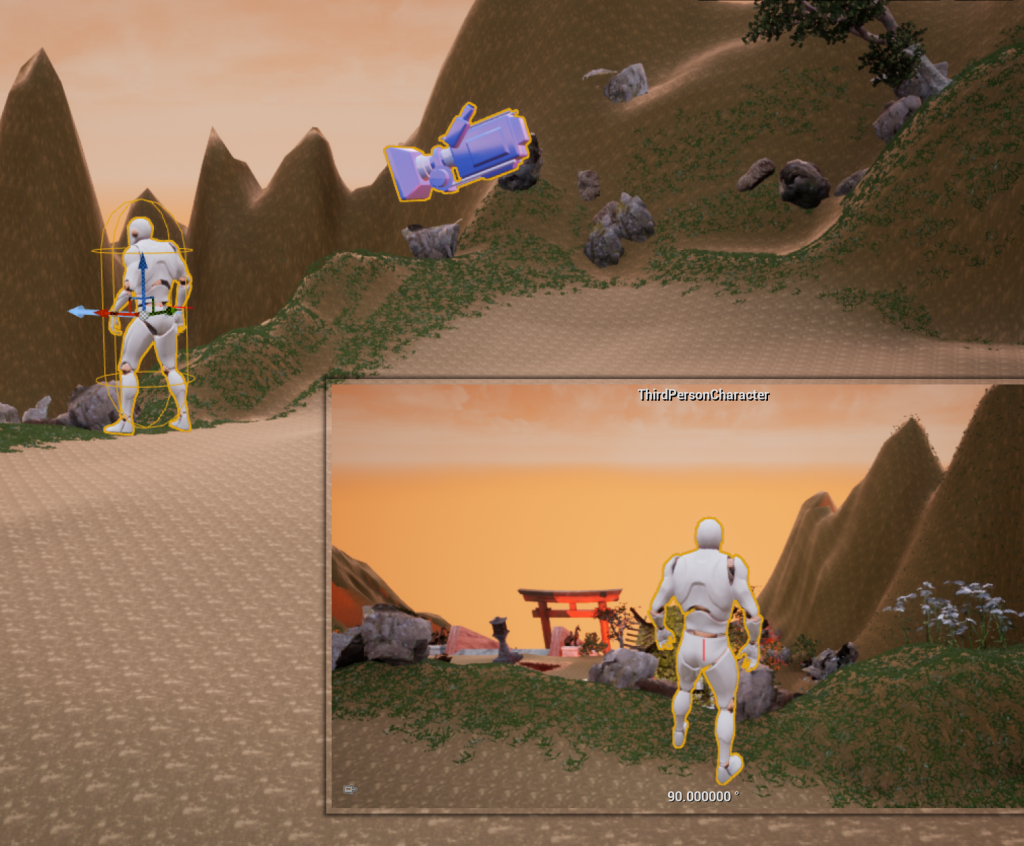
Originally the plan was to have a character exploring the world as the main outlet for the video. However, there were some technical difficulties setting it up, its main issue being scaling. So instead I provided a 2 minute video with the camera and immersive view showcasing the entire world and the different areas. This includes a better look of the empty space for the blacksmith’s building.
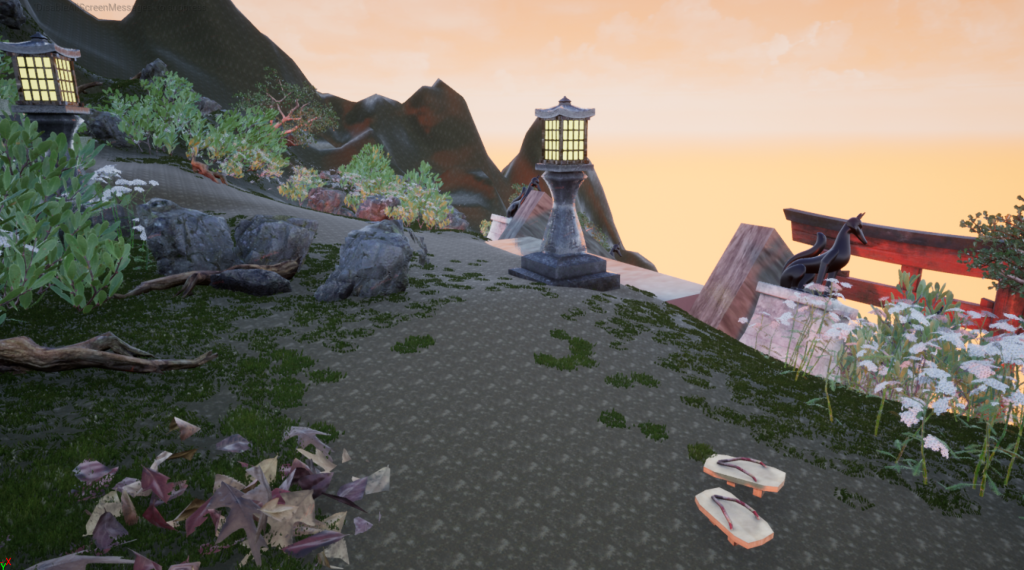
In the video, I show off the three separate areas of the landscape I’ve built. The first area introducing the world with a tori gate, inviting the viewer into a different ‘world’ spiritually. However, the debris surrounding the stairs and the gate suggests the tranquility of this place has already been broken.
The fox statues are made of metal, they stand proudly as they were made by the blacksmith, their positioning resembles a symmetrical format as they are meant to impose a dominating stance over the player. It’s perfect appearance, however, is tainted by blood, much like the white marble stairs. The dark red on the statues showing clearly on the marble replicates the main story’s theme: destruction as the colour theory behind the contrast implies a more darker force took away the peace.
It’s also clear that the blacksmith’s home was built from the ground up from rich materials as they take great pride in their work.
In the second area, the true horror starts to appear, the blood and violence become more apparent with more debris and blood splatters surrounding the areas. I had some empty spaces such as near the bell tower and some flora around to give the player some breathing space. However, the aftermath becomes more apparent with the helmets lying near the pools of blood.
In the third area, nearby the blacksmiths, the katana is chained tightly against a sakura tree. Underneath is an Oni mask and surrounding the tree are different lanterns that have fallen down into the pools of blood, emitting a red glow. The small area is meant to give the player a claustrophobic feel whilst the harsh lighting is meant to intimidate them. The placement of these assets are also meant to suggest a ritual in sealing one of the demons, therefore the seals attatched to the katana and the chains.
The final area is the empty space for the blacksmith’s building. I gave the team a large area to work and experiment, adding another a well asset as a contribution to their work.
References
docs.unrealengine.com. (n.d.). Grass Quick Start. [online] Available at: https://docs.unrealengine.com/4.27/en-US/BuildingWorlds/OpenWorldTools/Grass/QuickStart/ [Accessed 01 May 2022].